Publicidad
Idiomas disponibles
Idiomas disponibles
Enlaces rápidos
85078, 85079
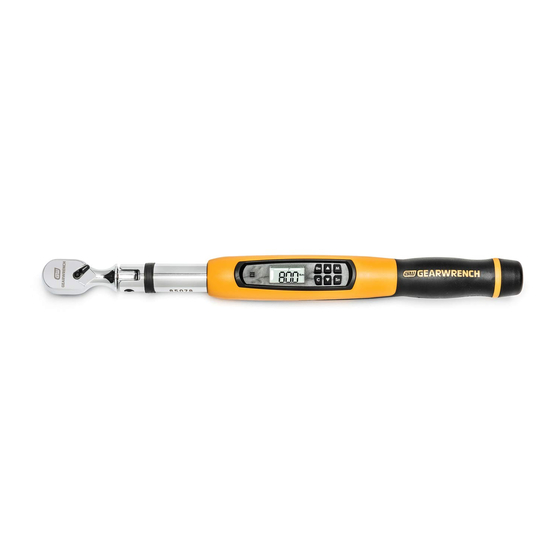
ELECTRONIC TORQUE WRENCH WITH ANGLE OPERATING INSTRUCTIONS
LCD Display and Button Functions
Audible
Select Unit of
Alert
Measurement
• Color LCD
• On/Off
Screen
• Clear
• Exit Current
Setting
1. Power On
1. Verify torque is not being applied to the wrench. Press
Wrench will beep once.
2. The wrench will default to Peak Torque Mode. The last unit of measurement
and last torque setting will display.
3. The wrench is ready to use.
2. Power Off
1. If no torque is applied, wrench will shut off automatically after 90 seconds.
2. To shut off manually, verify torque is not being applied then press
3 seconds.
3. How to Change Unit of Torque Measurement
1. Power on the wrench as described in Section 1.
2. Press
repeatedly to select one of the five torque measurement options:
M
U
NI
· Kg-m
C
S
ET
· Nm
· Ft-lb
· In-lb
· Kg-cm
3. The wrench is ready to use.
4. How to Set Mode
1. There are four mode options:
• P = Peak Torque (default)
• A = Angle
• PA = Peak Angle
• PCt = Target Torque Alert Setting
2. Power on the wrench as described in Section 1.
3. Press
M
repeatedly to scroll through the different modes. "SEL" will
U
NI
show at the top of the screen to indicate the mode being selected. The
C
S
ET
currently selected mode will NOT show as an option when scrolling through
M
U
NI
modes.
C
4. Press
S
to select the new mode. The screen will show the last setting
ET
for the mode selected.
Note: To exit out of setting mode without changing the mode, press
current mode and setting will remain unchanged.
5. How to Set Target Torque in "Peak Torque" Mode
1. Power on the wrench as
M
U
NI
described in Section 1.
C
2. Press
. The current torque
S
ET
setting will flash on the screen.
3. The unit of torque measurement can also be adjusted at this time. Press
M
U
NI
to change it if required.
4. Press
or
C
M
to select torque value, then press
S
U
NI
ET
5. The wrench is ready to use.
C
S
ET
6. Apply torque and rotate the wrench at a constant moderate speed until
alerted to stop by the handle vibration, beeps and LCD display. The LCD screen
alternates red/green when the "target torque alert" warning starts. When the
target torque is reached the LCD Screen shows solid red.
Note: After reaching the target torque the display will flash for 10 seconds,
then default to the last setting. The next measurement can be taken while the
screen is flashing by applying force again, or by pressing
last setting.
6. How to Set Angle
1. Power on the wrench as
described in Section 1.
2. Place the torque wrench on a
U
stable flat surface to calibrate.
3. Press
until the "A" mode is reached, then press
C
M
U
NI
4. The screen will show "OOOO" as the torque wrench calibrates, then will
C
S
ET
display the last angle value set.
M
U
NI
5. If desired angle is displayed, the wrench is ready to use.
M
U
NI
6. If you want a different angle, press
again to change the angle
C
S
ET
degree. Press
or
to get to the required angle, then press
C
M
U
S
ET
NI
7. The wrench is ready to use.
C
S
ET
8. Apply torque and rotate the wrench at a constant moderate speed until
U
NI
alerted to stop by the handle vibration, beeps and LCD display.
9. To take the next measurement press
C
or wait until the display stops
flashing.
Note: After reaching the target angle the display will flash for 10 seconds, then
default to the last setting.
For better accuracy the torque wrench should be rotated between
10 degree/sec – 180 degrees/sec.
7. How to Change "Target Torque
Alert" and "Target Angle Alert"
Percentages
1. Power on the wrench as
described in Section 1.
2. Press
U
NI
3. The current value will flash on the screen.
C
Value (+) Change Mode
S
4. Press
U
NI
target torque alert can start at a maximum of 50% to the target torque value
C
or a minimum of 1% to the target torque value. For example, if your target
torque is 100 ft-lbs and your target torque alert is set at 50%, the alert will
M
U
start when you reach 50 ft-lbs. Press
NI
U
NI
5. The screen will show "dEG" so the target angle alert can be adjusted.
C
S
ET
6. Press
C
to select when the target angle alert will start. The target angle alert can
start at a maximum of 50 degrees before the target angle or a minimum of 5
degrees before the target angle. Press
Value (-) • Change Torque
7. The wrench is ready to use.
or Angle Value
Setting
8. How to Use Pre-Set Torque Values
• Select Option
Displayed
1. Power on the wrench as
• Select Torque
M
U
NI
or Angle Value
described in Section 1.
2. Press
C
S
M
screen will show the setting number
U
NI
at the top of the screen and the torque value will be flashing.
for 2 seconds.
C
S
ET
3. Press
U
NI
4. The wrench is ready to use.
C
9. How to Change Pre-Set Torque Values
Pre-Set Torque Values can only be
selected in Peak or Peak Angle modes.
1. Power on the wrench as
M
U
NI
U
NI
described in Section 1.
for
C
S
ET
2. Press
C
S
of the screen and the torque value will be flashing.
3. Press
U
NI
for 3 seconds, after which the wrench will beep.
C
4. Now the pre-set number at the top of the screen will flash. Press
to select the desired torque setting, then press
M
U
NI
saved into the Pre-Set options.
5. Press
C
S
10. How to Set Torque with Angle
1. Power on the wrench as
described in Section 1.
2. Place the torque wrench on a
M
U
NI
stable flat surface to calibrate.
C
S
ET
3. Press
U
NI
4. The screen will show "OOOO" as
C
S
the wrench calibrates, then will
show last angle and torque value set.
5. If the desired angle and torque
values are displayed, the wrench is ready to use.
6. If you want a different torque
value or angle , press
7. To change the torque value
M
U
NI
press
U
NI
C
. The
S
required value, then press
ET
C
The screen will show "ANG". If the
target angle value previously displayed
is correct, press
The wrench is ready to use.
M
U
NI
8. After setting the torque value, the screen will show "ANG". Press
C
S
ET
U
NI
or change the angle value. Press
value, then press
C
M
U
NI
M
U
NI
9. The wrench is ready to use.
C
S
10. Apply torque and rotate the wrench at a constant moderate speed until
ET
C
.
S
ET
alerted to stop by the handle vibration, beeps and LCD display.
Note: After reaching the target torque the wrench will start recording the
angle measurement. After reaching the target torque and target angle the
display will flash for 10 seconds, then default to the last setting. To take the
next measurement press
11. Low Battery
M
U
NI
1. When the remaining battery capacity is at 30%, the battery icon on the dis-
to return to the
C
S
ET
play will flash. The Electronic Torque Wrench will still function, but the battery
will need replaced soon.
2. When the remaining battery
capacity is at 10%, the battery icon
M
U
NI
will show continuously. The Electronic
C
S
ET
Torque Wrench will not function correctly. Immediately replace the battery.
M
NI
12. Changing Batteries
.
1. Use AA (Alkaline) Batteries only.
S
ET
2. Remove Batteries if the torque wrench is not used for an extended period
of time.
3. Unscrew end cap
M
U
NI
C
S
ET
M
S
ET
U
NI
M
until the "PCt" mode is reached, then press
C
M
U
NI
ET
or
C
M
to select when the target torque alert will start. The
S
ET
S
ET
M
U
NI
C
to save.
S
ET
M
to change the target angle alert setting. Press
S
ET
M
U
NI
to save.
C
S
ET
then
M
. The
U
ET
NI
C
S
M
U
ET
NI
C
or
to select the desired pre-set torque value, then press
M
S
ET
S
ET
M
then
. The screen will show the pre-set number at the top
M
U
ET
NI
M
U
NI
C
S
ET
or
to select the desired pre-set torque value, then press
C
M
S
ET
M
S
U
ET
NI
. The new Pre-Set Value is
C
S
ET
again to set the target torque as to the new Pre-set value.
ET
U
NI
M
until the "PA" mode is reached, then press
C
S
ET
M
U
NI
again.
C
S
ET
M
U
NI
M
U
NI
or
to get to the
C
M
S
ET
C
.
S
ET
S
ET
M
U
NI
to exit.
C
S
ET
U
NI
M
U
NI
C
M
or
to get to the required angle
C
M
U
S
NI
ET
again.
S
ET
C
S
ET
M
U
NI
or wait until the display stops flashing.
C
S
ET
4. Insert 2 AA (Alkaline) Batteries
13. Maximum Capacity Exceeded
1. When the applied torque exceeds
U
M
NI
the wrench full-scale capacity the
C
S
ET
LCD screen will show red. The
M
display will show "ovEr".
2. Verify the calibration of the wrench if you know its capacity has been
. .
S
ET
exceeded.
How to Apply Torque
1. This Electronic Torque Wrench is designed so that when force is properly
applied to the handgrip, a continuous audible signal, the LCD screen display
and vibration in the handle will indicate that the Target Torque or Angle has
M
U
been attained. DO NOT pull beyond this point.
NI
C
or
M
S
U
NI
ET
Caution: The audible signal, LCD screen display and vibration in the the handle
C
S
are indicators that the proper torque or angle have been attained. Over torqu-
ET
ing beyond these signals could cause fastener failure.
2. To properly apply torque, attach socket securely on torque wrench square
drive and position socket on fastener so that tilting will not occur. Grasp the
center of hand grip and apply a slow steady increasing force perpendicular
(90 degrees) to the torque wrench body and perpendicular (90 degrees) to the
M
U
NI
lb.ft
C
center line of the square drive, socket and fastener.
S
ET
3. Turn the fastener down with a smooth and even force applied to the handle
M
U
NI
of the torque wrench. As turning resistance increases, pull more slowly. To
C
.
assure accuracy, the fastener must be in motion when the torque measure-
S
ET
ment is made.
WARNING: Any change from the above procedure will result in a change of
torque being applied. This includes standard torque wrenches, flex-head
M
torque wrenches, universal joints, and universal sockets. DO NOT USE universal
U
NI
lb.ft
C
S
joints or universal sockets due to the complexity of determining the associated
ET
error. If you need angular access, use a flex-head torque wrench.
M
U
NI
Extensions
C
S
ET
M
When it is necessary to use an extension that changes the effective lever
U
NI
length of the torque wrench, torque being applied will change.
C
or
M
U
S
NI
ET
Compute adjustments as follows:
C
TW - Torque set on Wrench
S
ET
TE - Torque applied by the extension to the fastener
TW = (TE x L) / (L + E)
TE = (TW x (L + E)) / L
M
U
NI
C
S
ET
M
.
ET
Notice: Socket extension bars that are axially in line with the square drive do
not cause error and need no adjustment.
M
U
NI
Apply torque and rotate the wrench at a constant moderate speed until alerted
lb.in
C
S
ET
to stop by the continuous audible signal, the LCD Screen display and handle
vibration.
Certification
M
U
NI
This torque wrench was calibrated prior to shipment from the factory within
C
S
ET
tolerance limits of:
• Torque (unflexed): +/- 2% CW, +/- 3% CCW from 20% to 100% of capacity
• Angle: (+/- 1% of reading) + (+/- 1 degree @ angular velocity >10 degree/
M
U
sec <180 degree/sec) + (+/- 1 degree of test fixture)
NI
C
S
ET
M
Limited Warranty
to review
S
Until one year from the date of purchase, we will repair any defect in material
ET
or workmanship free of charge. Improper use of these products, including but
not limited to the application of excessive force, will affect performance and
may result in injury. The warranty does not apply to wrenches which do not
function properly or within specified accuracy because of wear, improper or
unreasonable use, damage not resulting from defect or malfunction, or which
have been altered. Calibration is warranted for 90 days. This warranty gives you
specific legal rights, and you may also have other rights which vary from state
to state. For repair or calibration send wrench, postage prepaid, to:
Angle Repair
175 Angle Dr
Beckley, WV 25801
M
U
NI
Questions, comments or for more warranty information call toll free:
C
S
ET
1-304-253-5729
• Never use the torque wrench with the power off. Always turn on the
torque wrench so the applied torque is measured.
5. Replace End Cap
• Do not press any key while torque is being applied.
• Do not use electronic torque wrench to loosen fasteners.
• Verify the calibration of the wrench if you know or suspect its
capacity has been exceeded.
• Periodic recalibration is required to maintain accuracy.
• Never apply more torque than the maximum wrench capacity or the
maximum fastener specifications.
• Do not immerse in fluids.
• Do not use on live electrical circuits.
• Electrical shock can cause injury. Rubber handle is NOT insulated.
M
U
NI
C
S
ET
WARNING
ATG-4761
Publicidad

Manuales relacionados para Gearwrench 85078

Resumen de contenidos para Gearwrench 85078
- Página 1 1. When the applied torque exceeds Alert” and “Target Angle Alert” the wrench full-scale capacity the Percentages 85078, 85079 LCD screen will show red. The 1. Power on the wrench as ELECTRONIC TORQUE WRENCH WITH ANGLE OPERATING INSTRUCTIONS display will show “ovEr”.
- Página 2 1. Lorsque le couple de serrage d’alerte de couple cible et d’alerte appliqué dépasse la capacité d’angle cible 85078, 85079 maximale de la clé, l’écran ACL 1. Mettre la clé en fonction tel que Mode d’emploi de la clé dynamométrique électronique à lecture d’angle apparaît en rouge.
- Página 3 7. Cómo cambiar los porcentajes de “Alerta de par de torsión objetivo” y 12. Cambio de batería “Alerta de ángulo objetivo” 1. Encienda la llave tal como se 85078, 85079 describe en la Section 1. Instrucciones de uso de la llave dinamométrica electrónica con ángulo 2. Presione hasta alcanzar el modo “PCt”, luego presione...