Publicidad
Enlaces rápidos
17
F
E
1
União Superior / Inferior
2
Union Upper / Bottom
Unión Superior / Inferior
19
6
7
L
7
20
G
1
N
G
2
M
Colocar item (G) nas Laterais (1) e (2).
Place item (G) in the Sides (1) and (2).
Fije el ítem (G) en las Laterales (1) y (2).
Pág.4
Fixação na Parede
18
Fastening to the wall
Fijación a la pared
4x
10
Nivelar todos os móveis
antes de fixar.
Level all furniture before setting.
Nivelar todos los muebles
antes de instalar.
IMPORTANTE:
Para sua segurança, fixe o móvel na parede com o
acessório fornecido pela Bertolini. OBS.: A Bertolini não
se responsabilizará por acidentes decorrentes da não
observância desta norma e pela fragilidade da parede.
IMPORTANT:
C
For your safety ,fasten the cabinet to the wall with the accessory
I
furnished by Bertolini. NOTE.: Bertolini will not be responsible for
accidents resulting from non observing this norm or by the weakness
of the wall.
IMPORTANTE:
Para su seguridad, fije el mueble en la pared con el accesorio
suministrado por Bertolini. OBS.: Bertolini no se responsabilizará por
accidentes ocasionados por la inobservancia de esta norma y por la
fragilidad de la pared.
I
J
K
D
Ajuste das portas
Door adjustment
Ajuste de las puertas
H
Ajuste Interno
Ajuste de profundidade
Internal adjustment
O
Ajuste interno
-Ler e observar atentamente toda a instrução antes de iniciar a montagem.
-Monte o móvel sobre uma forração, de preferência em cima de uma mesa.
-Somente aperte os Parafusos após a montagem do móvel.
-Observe que nas Laterais existe uma etiqueta de Indicação.
-
Read the instructions carefully before starting the assembly
-Assemble the cabinet on a carpet on top of a table if possible.
-Fasten the screws only after the cabinet complete assembling.
B
-Observe that there is an indication label on the side units.
-
Lea y fíjese atentamente en la esquematica de la ensamblaje, antes de armar el mueble
-Arme el mueble sobre una superficie protegida, de preferencia arriba de una mesa.
-Solamente apriete los Tornillos después del ensamblaje del mueble.
A
- Fíjese que en la lateral existe una etiqueta que indica la dirección
1
Lateral Maior
2
Lateral Menor
3
Base
4
Fundo
5
Fundo Inferior
6
Porta
7
Porta Maior
8
Travessa
9
Suporte
10
Pés /
1
2
3
4
5
6
7
8
9
Acessórios
Hardware
Accesorios
A
B
C
D
E
F
P o r
t a
D o o
G
r
P u e
r t a
H
Depth adjustment
I
Ajuste de profundidad
J
K
BERTOLINI S.A. Rua Francisco Luiz Bertolini, 235 - Cx. P. 604 Fone (55 54)2102-8500 - Fax (55 54) 2102-8585 - CEP 95701-118
ATENÇÃO:
ATTENTION:
ATENCIÓN:
Quantidade
Quantity
Cantidad
02
/Side Panel/Lateral
02
/Side Panel/Lateral
07
/Upper panel/Base
01
/Bottom/Fondo
01
/Botton Inferior /Fondor Inferior
02
/Door/Puerta
01
/ Door Large/Puerta Mayor
01
/
Crosspiace/Travesano
04
/S
upport/Soporte
04
Legs/Patas
Ref:
6030 - 6031 - 6032 - 6033
7030 - 7031 - 7032 - 7033
Quantidade
Acessórios
Quantity
Hardware
Cantidad
Accesorios
Parafuso AA 4,8x45
L
06
Screw AA 4,8x45
Tornillo AA 4,8x45
Bucha S8
M
02
Bushing S8
Taco S8
Parafuso AA 4,2x9,5
N
12
Screw AA 4,2x9,5
Tornillo AA 4,2x9,5
Parafuso MP 3,5x10
O
40
Screw MP 3,5x10
Tornillo MP 3,5x10
Parafuso 3/16x5/16
P
Screw 3/16x5/16
24
Tornillo 3/16x5/16
Porca 3/16
Nut 3/16
24
Tuerca 3/16
Tapa furo Ø 6,5mm
08
Hole cap Ø 6,5mm
Tapa agujeroØ 6,5mm
Importante!
Tapa furo Ø 10mm
abertura da porta. O modelo a ser exemplificado nessa montagem é referente ao
Hole cap Ø 10mm
06
Cód.(6030,6031, 7030 e 7032) abertura das portas para a DIREITA. Para portas
Tapa agujero Ø 10mm
ESQUERDAS Cód.(6032, 6033, 7031 e 7033),teve-se inverter os acessórios.
Dobradiça
Important!
06
Hinge
the opening of the door. The model to be exemplified in this assembly is Referent
Bisagra
end the Code(6030,6031, 7030 end 7032) door opening to the RIGHT. For LEFT
doors code(6032, 6033, 7031 and 7033) reverse the accessories.
Calço
04
Importante!
Wedge
Calce
Ppara determinar la apertura de la puerta. El modelo que se
Calço
ejemplificará en este ensamblaje es referencial el Cod.(6030, 6031,
01
Wedge
7030 y 7032) que se abre hacia la DERECHA. Para puertas
Calce
IZQUIERDA Cod.(6032, 6033, 7031 y 7033) invierta los accesorios.
Bento Gonçalves - RS-Brasil e-mail: bertolini@bertolini.com.br / export@bertolini.com.br - Page: www.bertolini.com.br
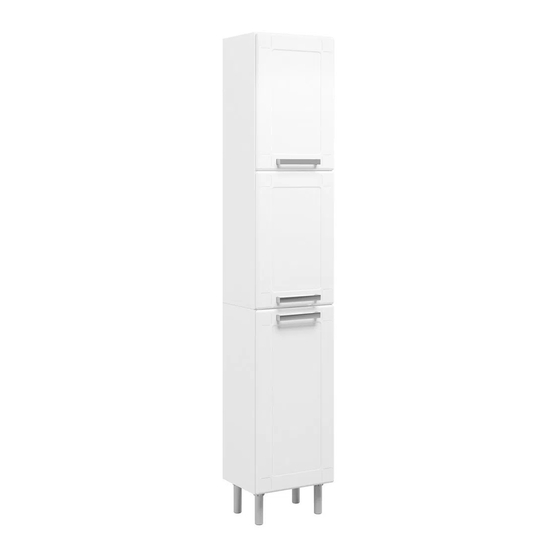
Paneleiro 350/400
Tall Cab.350/400
Gabinete 350/400
Ø 8
1
4
3
3
6
1
3
3
6
3
5
2
8
3
2
7
3
9
10
Quantidade
Quantity
Cantidad
Amortecedor
06
Shok-absorber
Amortiguador
Parafuso RI 3,5x25
06
Screw RI 3,5x25
Tornillo RI 3,5x25
Bucha
06
Bushing
Taco
Puxador
03
Handle
Tirador
Calço
04
Wedge
Calce
Atentar para o sentido dos acessórios J, K e P para determinar a
Pay attention to the direction of accessoriesJ, K and P to determine
Atención a la posición de los accesorios J, K y
179971
Rev.03-22/04/2020
Publicidad

Manuales relacionados para Bertolini 350


Resumen de contenidos para Bertolini 350
- Página 1 Place item (G) in the Sides (1) and (2). Fije el ítem (G) en las Laterales (1) y (2). BERTOLINI S.A. Rua Francisco Luiz Bertolini, 235 - Cx. P. 604 Fone (55 54)2102-8500 - Fax (55 54) 2102-8585 - CEP 95701-118 179971 Bento Gonçalves - RS-Brasil e-mail: bertolini@bertolini.com.br / export@bertolini.com.br - Page: www.bertolini.com.br...
- Página 2 Siga os passos de montagem 1º Follow the assembly steps Siga las etapas de ensamblaje 1º 3º 2º 4º 2º 3º 4º Superior Inferior Upper Bottom Superior Inferior 1º 2º Pág.2 Pág.3...