Tabla de contenido
Publicidad
Idiomas disponibles
Idiomas disponibles
Enlaces rápidos
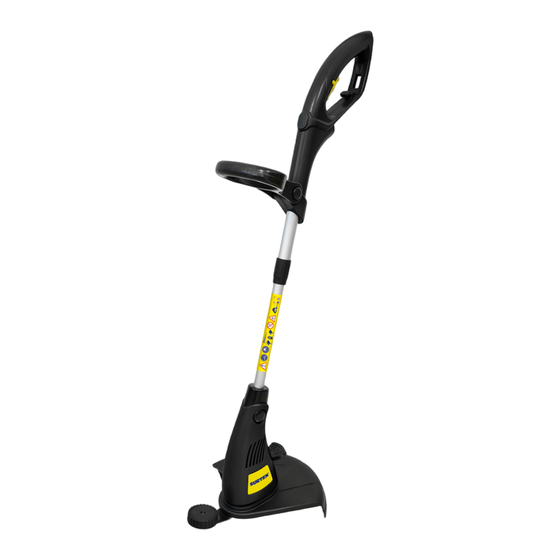
Desbrozadora Eléctrica
Electric Trimmer
DE513A
Manual de Usuario y Garantía.
User's Manual and Warranty.
ATENCIÓN: Lea, entienda y siga las instrucciones de seguridad contenidas en este
manual, antes de operar esta herramienta.
WARNING: Read, understand and follow the safety rules in this manual, before operating this tool.
Publicidad
Tabla de contenido

Resumen de contenidos para Surtek DE513A
- Página 1 Desbrozadora Eléctrica Electric Trimmer DE513A Manual de Usuario y Garantía. User’s Manual and Warranty. ATENCIÓN: Lea, entienda y siga las instrucciones de seguridad contenidas en este manual, antes de operar esta herramienta. WARNING: Read, understand and follow the safety rules in this manual, before operating this tool.
-
Página 2: Tabla De Contenido
E S P A Ñ O L E N G L I S H CONTENIDO CONTENT Normas generales de seguridad General safety rules Seguridad eléctrica Electric safety Seguridad personal Personal safety Utilización y cuidados de las herramientas eléctricas Tool use and care Advertencias de seguridad para Specific safety rules for electric desbrozadoras eléctricas... -
Página 3: Normas Generales De Seguridad
E S P A Ñ O L • M a nu a l de U su a ri o Cuando maneje una herramienta eléctrica en NORMAS GENERALES DE SEGURIDAD el exterior, use una prolongación de cable ade- Esta DESBROZADORA tiene características que cuada para uso en el exterior. -
Página 4: Utilización Y Cuidados De Las Herramientas Eléctricas
resbaladizos, gorro duro, o protección para los quier herramienta eléctrica que no pueda con- oídos reducirá los daños personales. trolarse con el interruptor es peligrosa y debe Evite un arranque accidental. Asegúrese de repararse. que el interruptor está en posición apagado Desenchufe la clavija de la fuente de alimen- antes de conectar a la red y/o a la batería, co- tación y/o de la batería antes de efectuar... -
Página 5: Características
E S P A Ñ O L • M a nu a l de U su a ri o 2. No coloque el cabezal de corte por encima 7. No utilice la herramienta en alguna otra del nivel de los pies, apuntando hacia el fren- aplicación distinta a la que fue destinada. -
Página 6: Instrucciones De Operación
Fig. 5 INSTRUCCIONES DE OPERACIÓN INSTRUCCIONES DE ENSAMBLE AJUSTE DE LA GUARDA Y GUÍA DE CORTE 1. Alinee la guía de la Fig. 1 guarda con el cabezal de la desbrozadora y deslícela en posición (Fig.1a). 2. Coloque el tornillo junto con la arandela en posición (Fig.1b) y apriétela firmemente. -
Página 7: Mantenimiento
E S P A Ñ O L • M a nu a l de U su a ri o CORTANDO BORDES MANTENIMIENTO Siga las instrucciones que siguen para cambiar IMPORTANTE: Evite arranques accidenta- el modo de corte. les. Desconecte al desbrozadora de la fuente IMPORTANTE: Siempre desconecte la des- de poder, mantenga sus pies u otros objetos brozadora antes de llevar a cabo cualquier tipo... -
Página 8: General Safety Rules
shock. If an extension cord is necessary, a cord GENERAL SAFETY RULES with adequate size conductors should be used Your ELECTRIC TRIMMER has many features to prevent excessive voltage drop, loss of pow- that will make your job faster and easier. Safe- er or overheating. -
Página 9: Important
E N G L I S H • U se r ' s m an ua l SERVICE IMPORTANT: This appliance is not intended Tool service must be performed only by quali- for use by persons (including children) with re- fied repair personnel. -
Página 10: Features
FEATURES KNOW YOUR TOOL 7. GUARD 1. SWITCH 8. HEAD CUT 2. CORD HOLDER HOOK 9. HEAD CUT ADJUSTMENT BUTTON 3. BUTTON LOCKING HANDLE (180˚) 10. GUARD SCREW AND WASHER 4. HANDLE 11. REEL 5. HEIGHT ADJUSTMENT BUTTON 12. REEL HOLDER 6. - Página 11 E N G L I S H • U se r ' s m an ua l ADJUSTING HANDLE To adjust, press both buttons that hold the handle and put it to a desired location (See Fig. 3 Fig. 3). OPERATION OF THE TRIMMER Use the edge of the guard as a guide when cut- NOTE: Remove the blade guard before starting...
-
Página 12: Maintenance
3. Attach the nylon on the reel (arrow in Fig.10) TECHNICAL DATA and wrap it carefully. VOLTAGE-FREQUENCY 120 V ~ 60 Hz 4. Follow the same procedure in step 3 to place SPEED 10 000 r/min the nylon on the opposite side. CUTTING CAPACITY 12"... -
Página 13: Notas
M a n u a l d e u s u a r i o / U s e r ’s m a n u a l Notas / Notes... - Página 14 Notas / Notes...
- Página 15 M a n u a l d e u s u a r i o / U s e r ’s m a n u a l Notas / Notes...
-
Página 16: Warranty Policy
Urrea Herramientas Profesionales S.A. de C.V. km 11,5 Carretera A El Castillo, El Salto, Ja- km 11,5 Carretera A El Castillo, El Salto, Jalis- DE513A lisco, México. C. P. 45680, Tel. (33) 3208 7900, co, México. C. P. 45680, Tel. (33) 3208 7900,...
