Sony XAV-A1 Manual De Instrucciones
Ocultar thumbs
Ver también para XAV-A1:
- Manual de instrucciones (44 páginas) ,
- Manual de instrucciones (183 páginas) ,
- Manual de instrucciones (171 páginas)
Tabla de contenido
Publicidad
Idiomas disponibles
Idiomas disponibles
Enlaces rápidos
Sony Corporation
Printed in Japan
2RR6P10A50001A
AV Center
Centro AV
Operating Instructions
Manual de instrucciones
操作說明
POR FAVOR LEA DETALLADAMENTE ESTE MANUAL
DE INSTRUCCIONES ANTES DE CONECTAR Y
OPERAR ESTE EQUIPO.
RECUERDE QUE UN MAL USO DE SU APARATO
PODRÍA ANULAR LA GARANTÍA.
For installation and connections, see the supplied Installation/Connections
manual.
Para obtener información sobre la instalación y las conexiones, consulte el manual
de Instalación/Conexiones suministrado.
有關安裝和連接,請參見附帶的安裝/連接手冊。
XAV-A1
© 2005 Sony Corporation
2-597-469-23(1)
GB
ES
CT
Publicidad
Capítulos
Tabla de contenido

Manuales relacionados para Sony XAV-A1


Resumen de contenidos para Sony XAV-A1
- Página 1 PODRÍA ANULAR LA GARANTÍA. For installation and connections, see the supplied Installation/Connections manual. Para obtener información sobre la instalación y las conexiones, consulte el manual de Instalación/Conexiones suministrado. 有關安裝和連接,請參見附帶的安裝/連接手冊。 XAV-A1 2RR6P10A50001A Sony Corporation Printed in Japan © 2005 Sony Corporation...
- Página 2 This label is located on the bottom of the chassis.
-
Página 3: Tabla De Contenido
Table of Contents Features ............... 4 Settings and Adjustments Precautions ............5 Using the System Menu ........34 Monitor settings — MONITOR ........34 Display settings — DSPL ..........34 Getting Started Sound settings — SOUND ..........35 Preparations ............9 Other settings —... -
Página 4: Features
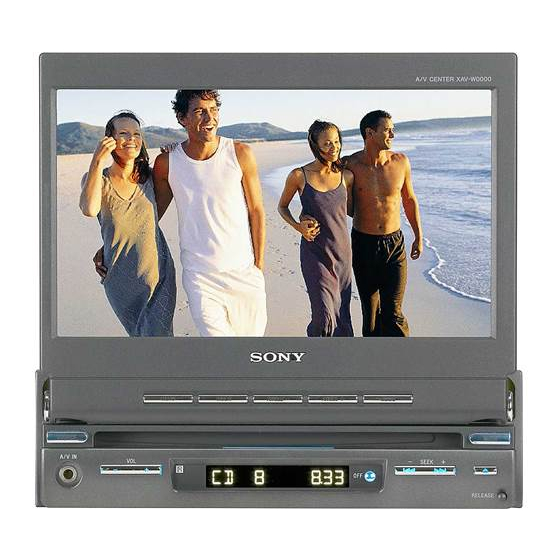
Features Welcome! Thank you for purchasing this Sony AV Center. Before operating the unit, please read this manual thoroughly and retain it for future reference. 7-inch in-dash motorized TFT monitor Innovative in-dash monitor design allows the unit to be mounted in a single DIN slot. At the touch of a button, a 7-inch wide-aspect-ratio screen slides out, for comfortable TV or DVD viewing. -
Página 5: Precautions
Precautions To avoid the risk of injury or accident, read • When backing up you car, be sure to look the following precautions before installing back for your safety. and operating the unit. On installation On safety • We recommend this unit should be Comply with your local traffic rules and installed by a qualified technician or service regulations. - Página 6 If you have any questions or problems occur, the unit will not operate properly. In concerning your unit, please consult your such a case, remove the disc and wait for nearest Sony dealer. about an hour until the moisture has evaporated. About this manual •...
- Página 7 Playable discs Video CD (VCD) A Video CD can contain both audio and Format of discs visual data on a disc with the same size as a regular Audio CD. The playing time is 74 DVD VIDEO minutes for a standard 12-cm CD. Audio CD DVD-R* An Audio CD containing audio data.
-
Página 8: Region Code
Precautions Note on DualDiscs DVDs labeled can be also played on this unit. A DualDisc is a two sided disc product which If you try to play any other DVD, the mates DVD recorded material on one side message “Can not play” will appear on the with digital audio material on the other side. -
Página 9: Getting Started
Getting Started Preparations Detaching the front panel Resetting the unit You can detach the front panel of this unit to Before operating the unit for the first time, or prevent theft. after replacing the car battery or changing the connections, you must reset the unit. Caution alarm Detach the front panel by pressing RELEASE and pull it off towards you. -
Página 10: Adjusting The Monitor Angle
Preparations The monitor slides out of the main unit. Adjusting the monitor position You can adjust the monitor position by sliding it forward or backward while pressing SLIDE. When the monitor cannot slide any more, the monitor begins to slide in the opposite direction. -
Página 11: Shutting Down
Closing the monitor Note Do not place any articles, such as cans or bottles, on the Press OPEN/CLOSE. monitor. It may cause a malfunction. The monitor retracts into the unit, and you can use only the audio functions of the unit. OPEN/CLOSE Shutting down •... -
Página 12: Setting The Clock
Preparations Setting the clock Attaching the front panel The clock uses a 12-hour digital indication. Engage part A of the front panel with part B of the unit, as illustrated, and push the right On the monitor side into position until it clicks. Touch SOURCE LIST. -
Página 13: Location Of Controls
Location of Controls Main unit Monitor Open Refer to the pages listed for details. 1 ZxZ button 46 9 ANGLE – button 10 2 SOURCE button 11, 17 0 ANGLE + button 10 3 SOURCE button 11, 17 qa SLIDE button 10 4 A/V IN jack qs MODE button 5 VOL –/+ button... -
Página 14: Card Remote Commander Rm-X706
Location of Controls Card remote commander RM-X706 The unit can be operated with the card remote commander. For safety, stop the car before using the card remote commander, or have a passenger operate it. qs ATT button To attenuate the sound. To cancel, press again. Turning off the sound temporarily. -
Página 15: Basic Operation
Basic Operation Playing a Disc When the disc is inserted Playing DVD/Video CD/Audio Press DVDu on the remote to start CD/MP3/JPEG playback. Note When PBC is On, DVD u on the remote may not Depending on the disc, some operations may be different function to playback VCD. - Página 16 Playing a Disc To select the track directly To playback a JPEG disc You can select the track directly from the album/track list on the display. Insert a JPEG disc. Touch LIST. Touch LIST. The album/track list appears. Example for MP3 Touch the desired file name.
-
Página 17: Watching Tv/Listening To The Radio
Watching TV or listening to Touch the Mode menu box. radio Preparation: To view TV programmes on this unit, an optional Sony TV tuner unit XT-V70 must be connected. Open up the monitor (page 9). Press (SOURCE) or touch the Touch the desired mode. -
Página 18: Player
Player About the Source Menu Display menu (page 21) Use the source menus of this unit to adjust the various functions and settings for playback. The displayed menu differs depending on the status of the unit. To adjust each setting, see page 20. -
Página 19: Using The Source Menu
Using the Source Menu To scroll the text information Touch the desired information (B, C or D). When “A. Scroll” is set to “On”, the text information scrolls automatically (page 22). Note ∗ “ ” appears in place of the letters other than the alphabet and numbers. -
Página 20: Setting The Screen - Wallpaper/Screen Effect
Using the Source Menu Use the source menus of this unit to adjust To close the Screen Effect menu the various functions and settings for Touch playback. ♦ The displayed menu differs depending on the Wallpaper status of the unit. You can select the background picture from “Wallpaper 1”, “Wallpaper 2”, “Wallpaper 3”... -
Página 21: Setting For The Display - Display
Basic operation VCD (with PBC Off)/Audio CD: On the monitor Repeat repeats the current track. Shuffle to play tracks in random order. Touch the Play mode menu box. normal play. The default settings are underlined. Setting for the Display — Display SOURCE LIST The following setting options are available. - Página 22 Using the Source Menu To return to the previous screen Touch Dimmer. Touch Back on the monitor. To close the Display mode menu Adjust the level while touching the Touch DSPL. – or +. ♦ A. Scroll You can scroll long displayed items automatically when the track is changed.
-
Página 23: Setting The Sound Quality - Equalizer
♦ Picture Mode Setting the sound quality You can adjust the picture characteristics — Equalizer according to the programme type, picture tone or personal preference. You can select the sound quality for each source. Also you can adjust the sound Standard standard picture and function setting. - Página 24 Using the Source Menu On the monitor During playback, touch the Equalizer menu box. The Equalizer menu appears. Touch the desired setting. Adjust the level touching the SOURCE LIST Press (ENTER). To reset the setting, touch Reset.
-
Página 25: Resuming Playback - Resume Play
Resuming Playback — Resume Play The unit stores the point where you stopped playback for up to 10 discs, and starts Resume playback even after the unit is turned off, or the disc being played is ejected. To play from the point you previously stopped On the monitor Touch x during playback. -
Página 26: Searching A Specific Point On A Disc - Scan
Searching a Specific Point on a Disc — Scan ./> > TOP MENU MENU MODE ENTER SHUF SEARCH AUDIO SUBTITLE ANGLE CLEAR You can quickly locate a specific point on a disc with monitoring the picture. During playback, touch and hold ./> on the monitor (or press and hold ./>... -
Página 27: Using The Menus On Dvds
Using the Menus on DVDs On the remote During DVD playback, press > TOP MENU (TOP MENU) or (MENU). MENU TOP MENU MENU MODE B/V/v/b ENTER Press M/m/</,, or the number SHUF buttons to select the desired item, SEARCH AUDIO SUBTITLE ANGLE then press (ENTER). -
Página 28: Using Pbc Functions - Pbc (Playback Control)
Using PBC Functions — PBC (Playback control) Notes • The items on the menu, and the operation procedures differ depending on the disc. DVDBX • During PBC playback, the track number, playback > TOP MENU MENU time, etc., are not displayed. MODE •... -
Página 29: Starting Playback From A Selected Point - Search Play
Starting Playback from a Selected Point — Search Play During playback, press (SEARCH) repeatedly on the remote. > TOP MENU MENU MODE : Chapter search 3/12 ENTER ENTER : Title search SHUF SEARCH AUDIO SUBTITLE ANGLE SEARCH Press < or ,, or the number buttons to select the desired Number buttons... -
Página 30: Various Dvd Operations Changing The Audio Channels
Various DVD Operations Changing the Audio Channels The audio language switches among the available languages. When 4 digits appear, input the language > code corresponding to the desired language TOP MENU MENU MODE (page 57). ENTER When the same language is displayed two or more times, the DVD is recorded in multiple SHUF audio formats. -
Página 31: Adjusting The Audio Output Level - Dvd Level Adjustment
Adjusting the Audio Output Level — DVD Level Adjustment The audio output level for DVD video differs depending on the recorded audio format (PCM, Dolby Digital, or DTS). You can adjust the output level of PCM, Dolby Digital or DTS separately to reduce the volume level differences between disc and source. -
Página 32: Changing The Angles
Changing the Angles > TOP MENU MENU MODE ENTER SHUF SEARCH AUDIO SUBTITLE ANGLE ANGLE CLEAR You can change the viewing angle if various angles (multi-angles) for a scene are recorded on a DVD. On the monitor Touch ANGLE on the monitor. On the remote Press (ANGLE) repeatedly to select the desired angle number. -
Página 33: Displaying The Subtitles
Displaying the Subtitles > TOP MENU MENU MODE ENTER SHUF SEARCH AUDIO SUBTITLE ANGLE SUBTITLE CLEAR You can turn the subtitles on or off, or change the subtitle language if more are recorded on the DVD. During playback, touch SUBTITLE (or press (SUBTITLE) on the remote). -
Página 34: Settings And Adjustments
Settings and Adjustments Using the System Menu By using the System menu, you can make Auto Close On Closes the monitor automatically various adjustments to items, such as picture when: and sound. • you turn off the unit by pressing OFF of the unit for 2 seconds. -
Página 35: Sound Settings - Sound
♦ Rear Att Sound settings — SOUND Reducing the audio output level of the REAR “SOUND” setting allows you to adjust the MONITOR OUT if the playback sound is sound according to the playback conditions distorted. and connected equipment. This setting affects the output of the REAR MONITOR OUT. -
Página 36: Other Settings - Other
Using the System Menu ♦ Demo Other settings — OTHER Switching on and off the Demo mode. The ♦ AUX 3 Demo screen is displayed only when the power is off. You can set the function of the AUX3 jack. When you connect the back camera to AUX3 Demo On Turns on the Demo mode. -
Página 37: Using The Dvd Setup Menu
Using the DVD Setup Menu To close the DVD Setup menu Touch DVD Setup. By using the DVD Setup menu, you can make various adjustments to items, such as picture and sound. Language settings for DVD You can also set a language for the subtitle playback —... -
Página 38: Settings For Digital Audio Output - Audio
Using the DVD Setup Menu Settings for digital audio Settings for the parental output control — Audio — Lock You can lock a disc, or set playback ♦ DRC (Dynamic Range Control) restrictions according to a predetermined level such as viewer age. For details on the Makes the sound clear when the volume is setup procedures, see “Locking discs”... -
Página 39: Locking Discs - Lock
Changing the password Locking discs — Lock You can lock a disc, or set playback Touch DVD Setup while playback is restrictions according to a predetermined stopped. level such as viewer age. Restricted playback scenes are blocked or replaced with different The DVD Setup menu appears. -
Página 40: Changing The Area And Its Movie Rating Level
Using the DVD Setup Menu Setting the parental control on Changing the area and its movie rating level Touch DVD Setup while playback is You can set the restriction levels depending on the area and its movie ratings. stopped. The DVD Setup menu appears. Touch DVD Setup while playback is stopped. - Página 41 Area code list Standard Code number Argentina 2044 Australia 2047 Austria 2046 Belgium 2057 Brazil 2070 Canada 2079 Chile 2090 China 2092 Denmark 2115 Finland 2165 France 2174 Germany 2109 India 2248 Indonesia 2238 Italy 2254 Japan 2276 Korea 2304 Malaysia 2363 Mexico...
-
Página 42: Tv/Radio/Other Components
While receiving the station that you want You can select “TV” only when you connect the optional to store, touch and hold a number on the Sony TV tuner unit XT-V70. top of the display. On the monitor On the remote, press and hold a number button (1 to 6). -
Página 43: Using The Local Seek Mode In Tuner Function
Using the Local seek mode in Switching FM reception to tuner function monaural If you set “Local” function to “On”, you can If the FM broadcast is noisy, switch to FM receive to only tune into stations with reception to monaural. stronger signals. -
Página 44: Auxiliary Audio/Video Equipment
Auxiliary Audio/Video Equipment You can connect optional devices to the AUX Setting for the auxiliary IN terminal on the unit. equipment Selecting auxiliary equipment You can change the setting of the auxiliary equipment. Touch SOURCE LIST. Basic operation On the monitor Touch AUX. -
Página 45: Displaying The Image Of The Back Camera
Displaying the image of the back camera You can display the image of a back camera (when you connect an optional back camera). Make sure that you have connected the camera cable to the unit’s AUX 3 jack correctly. During the connection of the back camera, set the AUX3 to “Normal”... -
Página 46: Switching The Front/Rear Output - Zone
Switching the Front/Rear Output — Zone x Zone Press (ZxZ) on the main unit. To operate the source of the front, use the > buttons of the main unit*. TOP MENU MENU MODE ENTER To operate the source of the rear, use the card remote commander. -
Página 47: Other Features
Other Features Additional Information panel are flawless. However, there is a Card remote commander possibility that less than 0.01% of the precautions segments are defective and may not light up properly. However, these segments will not • Do not leave the card remote commander interfere with your viewing. -
Página 48: Fuse Replacement
2 Engage the release keys together with the may be an internal malfunction. In such a protection collar. case, consult your nearest Sony dealer. Fuse (10 A) 3 Pull out the release keys to remove the protection collar. - Página 49 Notes on discs About MP3 files • To keep a disc clean, do not touch its MP3, which stands for MPEG-1 Audio Layer- surface. Handle the disc by its edge. 3, is a music file compression format • Keep your discs in their cases or disc standard.
-
Página 50: Troubleshooting
Troubleshooting The following checklist will help you remedy Picture problems you may encounter with your unit. Before going through the checklist below, There is no picture/picture noise check the connection and operating appears. procedures. • A connection has not been made correctly. •... -
Página 51: Sound
Sound Operation There is no sound/sound skips/ The remote does not function. sound cracks. • There are obstacles between the remote and the unit, or the remote receptor. • A connection has not been made correctly. • The distance between the card remote •... - Página 52 Troubleshooting The unit does not start playing. You cannot perform certain • The disc is inserted upside down. functions. , Insert the disc with the playback surface Depending on the disc, you may not be able to down. perform operations such as Stop, Search, Slow- •...
-
Página 53: Radio Reception
Radio reception Messages The stations cannot be received. Error displays/Messages The sound is hampered by noises. The following indications appear when a malfunction occurs on the unit. • Connect a power aerial control lead (blue) or accessory power supply lead (red) to the On the monitor power supply lead of a car’s aerial booster (only when your car has built-in FM/AM... -
Página 54: Specifications
Specifications System Amplifier section Laser Semiconductor laser Outputs Speaker outputs Signal format system (sure seal connectors) NTSC Speaker impedance 4 - 8 ohms Maximum power output Monitor section 50 W × 4 (into 4 ohms, at 1 kHz) Display type Wide LCD color monitor General Size... -
Página 55: Glossary
Glossary Chapter DVD VIDEO Sections of a picture or a music feature that A disc that contains up to 8 hours of moving are smaller than titles. A title is composed of pictures even though its diameter is the same several chapters. - Página 56 Glossary DVD+RW A DVD+RW is a recordable and rewritable disc. DVD+RWs use a recording format that is comparable to the DVD VIDEO (digital video disc, video) format. Film based software, Video based software DVDs can be classified as Film based or Video based software.
-
Página 57: Language Code List
Language Code List The language spellings conform to the ISO 639: 1988 (E/F) standard. Code Language Code Language Code Language Code Language 1027 Afar 1174 French 1332 Lithuanian 1507 Samoan 1028 Abkhazian 1181 Frisian 1334 Latvian; Lettish 1508 Shona 1032 Afrikaans 1183 Irish 1345 Malagasy 1509 Somali... - Página 58 Esta etiqueta está ubicada en la parte inferior del chasis.
- Página 59 Índice Características ............. 4 Selecciones y ajustes Precauciones ............5 Utilización del menú del sistema ..... 34 Selecciones de monitor — MONITOR ......34 Para empezar Selecciones de indicación — DSPL ......34 Preparativos ............9 Selecciones de sonido — SOUND ........ 35 Desmontaje del panel frontal ..........
-
Página 60: Características
Características ¡Bienvenidos! Muchas gracias por su compra de este Centro AV de Sony. Antes de hacer funcionar la unidad, lea completamente este manual y guárdelo para su referencia en el futuro. Monitor TFT motorizado de 7 pulg. en el cubretablero Innovador diseño de monitor en el cubretablero permite montar la unidad en una sola... -
Página 61: Precauciones
Precauciones Para evitar el riesgo de heridas o accidentes, • Cuando conecte la cámara trasera: lea las siguientes precauciones antes de – Durante la conducción, vigile instalar y hacer funcionar la unidad. cuidadosamente el entorno para su seguridad. No dependa sólo de la cámara Acerca de la seguridad trasera. - Página 62 Si tiene dudas o problemas con respecto a • La antena eléctrica se alarga su unidad, consulte con su tienda de Sony automáticamente cuando haga funcionar la más cercana. unidad. Acerca de este manual Condensación de humedad...
- Página 63 Discos que puede reproducir CD de audio Un CD de audio contiene datos de audio. El Formato de discos tiempo de reproducción es de 74 minutos para un CD normal de 12 cm. DVD VIDEO CD grabable (CD-R) Con un CD-R puede editar datos de audio, DVD-R* Puede escribir información en el CD-R una sola vez.
-
Página 64: Código De Región
Precauciones Nota sobre DualDiscs Los DVD con etiquetas también pueden reproducirse en esta unidad. Un DualDisc es un disco de dos caras que Si trata de reproducir otros DVD, aparecerá el acopla el material grabado en el DVD en un mensaje “Can not play”... -
Página 65: Para Empezar
Para empezar Preparativos Desmontaje del panel frontal Reinicio de la unidad Puede desmontar el panel frontal de esta Antes de hacer funcionar la unidad por unidad para evitar robos. primera vez o después de cambiar la batería del coche o de cambiar las conexiones, deberá Alarma de precaución reiniciar la unidad. -
Página 66: Ajuste De La Posición Del Monitor
Preparativos El monitor sale de la unidad principal. Ajuste de la posición del monitor Puede ajustar la posición del monitor deslizando hacia adelante o atrás mientras presiona SLIDE. Cuando no pueda seguir deslizando el monitor, empezará a deslizarse en el otro sentido. -
Página 67: Cierre Del Monitor
Cierre del monitor * Advertencia cuando instale en un coche que no tenga la posición ACC (accesorios) en la llave de Presione OPEN/CLOSE. encendido El monitor vuelve a entrar en la unidad y Después de girar el encendido a OFF, asegúrese de puede utilizar sólo las funciones de audio de presionar OFF en la unidad durante 2 segundos para la unidad. -
Página 68: Ajuste Del Reloj
Preparativos Ajuste del reloj Instalación del panel frontal El reloj utiliza una indicación digital de 12 Enganche la parte A del panel frontal con la horas. parte B de la unidad, tal como en la figura y presione el lado derecho en su posición hasta En el monitor que se escuche un chasquido. -
Página 69: Ubicación De Los Controles
Ubicación de los controles Unidad principal Monitor abierto Consulte las páginas en la lista para más detalles. 1 Botón ZxZ 46 9 Botón ANGLE – 10 2 Botón SOURCE 11, 17 0 Botón ANGLE + 10 3 Botón SOURCE 11, 17 qa Botón SLIDE 10 4 Toma A/V IN qs Botón MODE... -
Página 70: Control Remoto De Tarjeta Rm-X706
Ubicación de los controles Control remoto de tarjeta RM-X706 La unidad puede funcionar con el control remoto de tarjeta. Para su seguridad, estacione el coche antes de utilizar el control remoto de tarjeta o solicite a un pasajero que lo haga funcionar. -
Página 71: Funcionamiento Básico
Funcionamiento básico Reproducción de un disco Cuando se coloca el disco Reproducción de DVD/CD de Presione DVD u en el remoto para empezar video/CD de audio/MP3/JPEG la reproducción. Sugerencia Nota Cuando el PBC está en On, el DVD u en el control Según el disco, algunas operaciones pueden ser remoto puede no funcionar para reproducir VCD. -
Página 72: Para Seleccionar Directamente La Pista
Reproducción de un disco Para seleccionar directamente la Para reproducir un disco JPEG pista Puede seleccionar directamente la pista en el Coloque un disco JPEG. álbum/lista de pistas en la pantalla. Toque LIST. Toque LIST. Aparece el álbum/lista de pistas. Toque el nombre de archivo Ejemplo para MP3 deseado. -
Página 73: Mirando El Tv/Escuchando La Radio
Mirando el TV o escuchando Toque el recuadro del menú de modo. la radio Preparativos: Para ver programas de TV en esta unidad, debe conectar una unidad de sintonizador de TV Sony opcional XT-V70. Abra el monitor (página 9). Presione (SOURCE) o toque la Toque el modo deseado. -
Página 74: Reproductor
Reproductor Acerca del menú de fuente Menú de pantalla (página 21) Utilice los menús de fuente de esta unidad para ajustar las diversas funciones y ajustes para la reproducción. El menú mostrado es diferente según el estado de la unidad. Para ajustar cada seleccíon, vea la página 20. -
Página 75: Utilización Del Menú De Fuente
Utilización del menú de fuente Para avanzar la información de texto Toque la información deseada (B, C o D). Cuando se ajusta “A. Scroll” a “On”, la información de texto avanza automáticamente (página 22). Nota ∗ Aparece “ ” en el lugar de las letras que no sean del alfabeto y números. -
Página 76: Selección De La Pantalla - Wallpaper/Effect Type
Utilización del menú de fuente Utilice los menús de fuente de esta unidad Para cerrar el menú de efecto de para ajustar las distintas funciones y ajustes pantalla para la reproducción. Toque El menú mostrado es diferente según el ♦ estado de la unidad. -
Página 77: Funcionamiento Básico
Funcionamiento básico VCD (con PBC desactivado)/CD de audio: En el monitor Repeat repite la pista actual. Shuffle para reproducir pistas en orden Toque el recuadro del menú de aleatorio. modo de reproducción. reproducción normal. Sugerencia Las selecciones por omisión están subrayadas. Selección de indicaciones —... - Página 78 Utilización del menú de fuente Para volver a la pantalla anterior Toque Dimmer. Toque Back (Atrás) en el monitor. Para cerrar el menú de modo de Ajuste el nivel mientras toca – o +. indicaciones Toque DSPL (indicaciones). ♦ A. Scroll Puede avanzar automáticamente los ítems mostrados largos cuando cambia la pista.
-
Página 79: Selección De La Calidad Del Sonido - Equalizer
♦ Picture Mode (Modo de imagen) Selección de la calidad del Puede ajustar las características de la imagen sonido — Equalizer de acuerdo con el tipo de programa, tono de imagen o preferencias personales. Puede seleccionar la calidad del sonido. También puede ajustar las características del Standard imagen normal y selección de... - Página 80 Utilización del menú de fuente En el monitor Durante la reproducción, toque el recuadro del menú del ecualizador. Aparece el menú del ecualizador. Toque la selección deseada. Ajuste el nivel mientras toca el SOURCE LIST Presione (ENTER). Para reiniciar la selección, toque Reset (reinicio).
-
Página 81: Continuación De La Reproducción - Continúa La Reproducción
Continuación de la reproducción — Continúa la reproducción Notas • La continuación de la reproducción existe sólo para los La unidad memoriza el punto donde paró la DVD. reproducción de hasta 10 discos y continúa la • Cuando memoriza un punto de continuación del disco reproducción incluso después de apagar la 11º... -
Página 82: Búsqueda De Un Punto Específico En Un Disco - Búsqueda
Búsqueda de un punto específico en un disco — Búsqueda ./> > TOP MENU MENU MODE ENTER SHUF SEARCH AUDIO SUBTITLE ANGLE CLEAR Puede buscar rápidamente un punto específico en el disco monitoreando la imagen. Durante la reproducción, mantenga tocado ./>... -
Página 83: Utilización De Los Menús En Los Dvd
Utilización de los menús en los DVD Toque v/V/b/B para seleccionar el ítem deseado y toque Enter. > TOP MENU MENU TOP MENU MENU Para mover la posición del recuadro de MODE cursor, toque la posición a donde desea B/V/v/b ENTER mover el cursor. -
Página 84: Utilización De Las Funciones De Pbc - Pbc (Control De Reproducción)
Utilización de las funciones de PBC — PBC (Control de reproducción) Notas • Los ítems en el menú y los procedimientos de operación son diferentes dependiendo del disco. DVDBX • Durante la reproducción con PBC, no aparecen el > TOP MENU MENU número de pista, tiempo de reproducción, etc. -
Página 85: Inicio De La Reproducción De Un Punto Seleccionado
Inicio de la reproducción de un punto seleccionado — Reproducción con búsqueda Durante la reproducción, presione repetidamente (SEARCH) en el > emoto. TOP MENU MENU MODE ENTER : Búsqueda de capítulo ENTER 3/12 SHUF : Búsqueda de título SEARCH AUDIO SUBTITLE ANGLE SEARCH... -
Página 86: Distintas Operaciones Del Dvd
Distintas operaciones del DVD Cambio de canales de audio El idioma del audio cambia entre los idiomas disponibles. Cuando aparecen 4 cifras, ingrese el código > de idioma correspondiente al idioma deseado TOP MENU MENU MODE (página 57). ENTER Cuando el mismo idioma aparece dos o más veces, el DVD se grabó... -
Página 87: Ajuste Del Nivel De Salida Del Audio - Ajuste De Nivel De Dvd
Ajuste del nivel de salida del audio — Ajuste de nivel de DVD El nivel de salida de audio para el DVD de video es diferente según el formato de audio grabado (PCM, Dolby Digital o DTS). Puede ajustar el nivel de salida de PCM, Dolby Digital o DTS por separado para reducir las diferencias de nivel de volumen entre el disco y la fuente. -
Página 88: Cambio De Ángulos
Cambio de ángulos > TOP MENU MENU MODE ENTER SHUF SEARCH AUDIO SUBTITLE ANGLE ANGLE CLEAR Puede cambiar el ángulo de visión si hay distintos ángulos (múltiples ángulos) para una escena grabados en un DVD. En el monitor Toque ANGLE en el monitor. En el remoto Presione repetidamente (ANGLE) para seleccionar el número de ángulo deseado. -
Página 89: Indicación De Subtítulos
Indicación de subtítulos > TOP MENU MENU MODE ENTER SHUF SEARCH AUDIO SUBTITLE ANGLE SUBTITLE CLEAR Puede activar o desactivar los subtítulos o cambiar el idioma de subtítulos si hay varios grabados en el DVD. Durante la reproducción, toque SUBTITLE (o presione (SUBTITLE) en el remoto). -
Página 90: Selecciones Y Ajustes
Selecciones y ajustes Utilización del menú del sistema Mediante el uso del menú de sistema puede Auto Close On Cierra automáticamente el monitor hacer distintos ajustes en ítems tales como la cuando: imagen y el sonido. • apague la unidad presionando OFF Cuando cambie la selección de esta unidad de la unidad durante 2 segundos. -
Página 91: Selecciones De Sonido - Sound
♦ Rear Att (Att trasero) Selecciones de sonido Reduce el nivel de salida de audio del REAR — SOUND MONITOR OUT si el sonido de la reproducción está distorsionado. SOUND La selección “ ” permite ajustar el Esta selección tiene efecto en la salida del sonido de acuerdo con las condiciones de REAR MONITOR OUT. -
Página 92: Otras Selecciones - Other
Utilización del menú del sistema ♦ Demo Otras selecciones — OTHER Se activa o desactiva la función de ♦ AUX 3 demostración. Aparece la pantalla de demostración sólo cuando la electricidad está Puede seleccionar la función de la toma AUX3. apagada. -
Página 93: Utilización Del Menú De Instalación De Dvd
Utilización del menú de instalación de DVD Para cerrar el menú de instalación de DVD Toque DVD Setup (instalación). Mediante el uso del menú de instalación de DVD puede hacer distintos ajustes de ítems tales como la imagen y el sonido. Selecciones de idioma para la También puede seleccionar un idioma para reproducción de DVD... -
Página 94: Selecciones Para La Salida De Audio Digital - Audio
Utilización del menú de instalación de DVD Selecciones para la salida de Selecciones para el control de audio digital padres — Audio — Lock Puede bloquear un disco o seleccionar ♦ DRC (Control de Rango Dinámico) limitaciones de reproducción de acuerdo con un nivel predeterminado como la edad del El sonido se escucha más nítido cuando se espectador. -
Página 95: Bloqueo De Discos - Lock
Cambio de la contraseña Bloqueo de discos — Lock Puede bloquear un disco o seleccionar Toque DVD Setup (instalación) con limitaciones de reproducción de acuerdo con la reproducción parada. un nivel predeterminado como la edad del espectador. Las escenas de reproducción Aparece el menú... -
Página 96: Cambio Del Área Y Su Nivel De Clasificación De Películas
Utilización del menú de instalación de DVD Selección del control de padres activado Cambio del área y su nivel de clasificación de películas Toque DVD Setup (instalación) con Puede seleccionar el nivel de limitación según el área y su clasificación de películas. la reproducción parada. - Página 97 Lista de códigos de área Normal Número de código Argentina 2044 Australia 2047 Austria 2046 Bélgica 2057 Brasil 2070 Canadá 2079 Chile 2090 China 2092 Dinamarca 2115 Finlandia 2165 Francia 2174 Alemania 2109 India 2248 Indonesia 2238 Italia 2254 Japón 2276 Corea 2304...
-
Página 98: Tv/Otros Componentes
Nota Puede seleccionar “TV” sólo cuando conecta el sintonizador de TV opcional de Sony TV XT–V70. Para cancelar el procedimiento de memorización En el monitor Toque BTM ON durante el procedimiento de memorización. -
Página 99: Utilización Del Modo De Búsqueda Local En La Función De Sintonizador
Utilización del modo de Cambio de la recepción de FM búsqueda local en la función a monoaural de sintonizador Si hay ruidos en la transmisión de FM, cambia la recepción de FM a monoaural. Si selecciona “On” en la función “Local” puede recibir y sintonizar sólo las emisoras Durante el modo de recepción FM, con señales más fuertes. -
Página 100: Equipo De Audio/Video Auxiliar
Equipo de audio/video auxiliar Puede conectar equipos opcionales en el Selección para el equipo terminal AUX IN en la unidad. auxiliar Selección de equipo auxiliar Puede cambiar la selección del equipo auxiliar. Toque SOURCE LIST. Funcionamiento básico En el monitor Toque AUX. -
Página 101: Indicación De La Imagen De La Cámara Trasera
Equipo de audio/video auxiliar Indicación de la imagen de la cámara trasera Puede mostrar la imagen de la cámara trasera (cuando conecte una cámara trasera opcional). Asegúrese de que ha conectado correctamente el cable de la cámara en la toma AUX 3 de la unidad. Durante la conexión de la cámara trasera, seleccione AUX3 a “Normal”... -
Página 102: Cambio De La Salida Frontal/Trasera - Zone X Zone
Cambio de la salida frontal/trasera — Zone x Zone Presione (ZxZ) en la unidad principal. > TOP MENU MENU Para hacer funcionar la fuente del frente, MODE utilice los botones de la unidad principal*. ENTER Para hacer funcionar la fuente de atrás, utilice Z×Z SHUF el control remoto de tarjeta. -
Página 103: Otras Funciones
Otras funciones Información adicional El panel de LCD es de gran sofisticación y Precauciones del control más del 99,99% de los segmentos utilizados remoto de tarjeta en el panel son perfectos. Sin embargo, hay una posibilidad de que menos del 0,01% de •... -
Página 104: Desmontaje De La Unidad
2 Enganche las llaves de liberación entre sí fundirse el fusible después de cambiar, puede con el collar de protección. haber un mal funcionamiento interno. En ese caso, consulte con su tienda de Sony más cercana. Fusible (10A) 3 Saque las llaves de liberación para desmontar el collar de protección. - Página 105 Notas acerca de los discos Para CD • Para mantener un disco limpio, no toque su – Formato ISO 9660 nivel 1/nivel 2, Joliet/ superficie. Manipule el disco por su borde. Romeo en el formato de expansión • Mantenga sus discos en sus cajas o –...
-
Página 106: Localización De Averías
Localización de averías La siguiente lista de verificación le ayudará a Imagen solucionar problemas que pueda encontrar con su unidad. Antes de pasar por la No hay imagen/aparece ruido en la siguiente lista de verificación, verifique las imagen. conexiones y procedimientos de •... -
Página 107: Sonido
Sonido Funcionamiento No hay sonido/salta el sonido/el El remoto no funciona. sonido tiene cortes. • Hay obstáculos entre el remoto y la unidad o el receptor remoto. • Una conexión no se hizo correctamente. • La distancia entre el control remoto de tarjeta •... - Página 108 Localización de averías La unidad no empieza a reproducir. El disco no empieza a reproducir • El disco se colocó al revés. desde el principio. , Coloque el disco con la superficie de La continuación de la reproducción está reproducción hacia abajo. activada (página 25).
-
Página 109: Recepción De La Radio
Recepción de la radio Mensajes Las emisoras no pueden recibirse. Indicaciones/mensajes de error El sonido tiene interferencias de Las siguientes indicaciones aparecen cuando se produce un mal funcionamiento en la unidad. ruidos. • Conecte un cable de control de antena En el monitor eléctrica (azul) o cable de alimentación DISC Error... -
Página 110: Especificaciones
Especificaciones Sistema Sección del amplificador Láser Láser semiconductor Salidas Salidas de altavoz Sistema de formato de señal (conectores de sello seguro) NTSC Impedancia de altavoz 4 – 8 ohmios Máxima salida eléctrica Sección del monitor 50 W x 4 (en 4 ohmios, a 1 kHz) Tipo de indicación General Monitor color LCD ancho... -
Página 111: Glosario
Glosario Capítulo DVD VIDEO Secciones de una imagen o música que son Un disco que contiene hasta 8 horas de menores que los títulos. Un título se compone imágenes móviles incluso aunque su de varios capítulos. Según el disco, puede no diámetro sea el mismo que un CD. - Página 112 Glosario DVD+RW Un DVD+RW es un disco que puede grabar y regrabar. Los DVD+RWs utilizan un formato de grabación que es comparable con el formato DVD VIDEO (videodisco digital, video). Software con base en película, software con base en video Los DVDs pueden clasificarse en software con base en película o con base en video.
-
Página 113: Lista De Códigos De Idioma
Lista de códigos de idioma La ortografía de idiomas cumplen con la norma ISO 639: 1988 (E/F). Código Idioma Código Idioma Código Idioma Código Idioma 1027 Afar 1174 French 1332 Lithuanian 1507 Samoan 1028 Abkhazian 1181 Frisian 1334 Latvian; Lettish 1508 Shona 1032 Afrikaans 1183 Irish... - Página 114 此標籤位於底盤的底部。 僅適用於台灣 廢電池請回收...
- Página 115 目錄 特性 ........4 設定及調整 操作前注意事項 ......5 使用系統選單 ......34 監視設定 — MONITOR ......34 顯示設定 — DSPL ......34 開始 聲音設定 — SOUND ......35 準備 ........9 其他設定 — OTHER ......36 拆下前面板 ........9 電視彩色制式設定 — 電視機制式 ....36 重設本機...
- Página 116 特性 歡迎! 在此感謝您購買 Sony AV Center。在使用本機之前,請詳閱本使用說明書以及保管好本使 用說明書,以備後用。 7 英寸儀表板內置自動 TFT 監視器 創新的儀表板內置監視器設計使本機可以固定在一個 DIN 槽中。輕觸一個按鈕,7 英寸寬 縱橫比螢幕滑出,可舒適地觀看電視或 DVD。(Sony 電視調諧器是選購件。) • 高亮度和寬視角監視器。 • 觸碰面板和圖解用戶介面。 DVD(數碼影像光碟)、CD(光碟)及 VCD(視像光碟)播放兼容 • 兼容各種光碟格式,例如 DVD-R/-RW、DVD+R/DVD+RW 等 DVD-RW:兼容視像模式及視像錄製(VR)模式(允許多種編輯) DVD+RW:兼容視像模式及 + 視像錄製(+VR)模式(允許多種編輯) • 可播放在 DVD-R/-RW 或 DVD+R/DVD+RW 以 MP3 檔案格式錄製的曲目*達 1000 首...
-
Página 117: 操作前注意事項
操作前注意事項 為了避免受傷或事故,在安裝和操作本機前先 安裝方面 閱讀下列注意事項。 • 我們建議請有資格的技術人員或維修人員安 裝本機 安全方面 – 如果您嘗試自己安裝本機,請仔細閱讀附 請遵守您所在國家的交通法規。 帶的“安裝/連接”手冊。務必正確地安裝 • 駕駛時 本機。 – 請勿觀看或操作監視器。將可能導致精神 – 不正確的安裝可能引起電池漏電或短路。 不集中並引發事故。 • 如果本機工作不正常,請首先檢查連接(參 先把車停在安全的地方再觀看監視器和操 見附帶的“安裝/連接”手冊)。如果沒有 作本機。 問題,再檢查保險絲。 • 操作時 • 更換保險絲 – 當監視器運轉時,不要把手、手指或外部 – 更換保險絲時,務必使用相同規格的保險 物體插入本機。將可能導致受傷或損壞本 絲(電流規格)。 機。 保險絲(10 A) – 把細小的零件放在兒童拿不到的地方。 •... - Página 118 • 駕車時不要用預置功能,或使用任何會轉移 – 當監視器在開啟或關閉位置會阻擋駕駛員 注意馬路的功能。 的視線。 • 本機在操作時電源將自動持續延長。 – 會妨礙汽車或安全氣囊的操作。 – 它將妨礙車輛操作,特別是方向盤、變速 潮濕 杆或剎車踏板的操作。 在下雨天或潮濕地方,本機內的晶片或顯示器 可能產生潮濕,本機將不能正常操作。在此情 如果對本機有任何疑問或問題,請向附近的 況下,移開光碟並等 1 個小時左右,讓濕氣 Sony 經銷商咨詢。 蒸發。 保持高品質音效 有關本手冊 請小心不要濺到果汁或其他飲料於本機或光碟 • 在此手冊內的指示說明了卡式遙控器(card 上。 remote commander)的控制。您也可以使用 本機上與卡式遙控器上相同或近似名稱的控 制。 • 在此手冊,“DVD”是 DVD-R/-RW 及 DVD+R/+RW 的一般措辭。 • 本手冊內使用的圖標意義說明如下:...
- Página 119 可播放光碟 視訊光碟(VCD) VCD 是在一張與普通音訊光碟相同大小光碟內 光碟格式 含有音訊及影像資料的光碟。標準 12 厘米的 光碟播放時間為 74 分鐘。 DVD VIDEO 音訊光碟(Audio CD) 音訊 CD 含有音訊資料。標準 12 厘米的光碟 DVD-R* 播放時間為 74 分鐘。 可錄製光碟(CD-R) DVD-RW* 在 CD-R 光碟,您可以編輯音訊資料。您只可 寫入資料至 CD-R 光碟一次。 DVD+R* 可重寫光碟(CD-RW) 在 CD-RW 光碟,您可以編輯音訊資料。您可 重複寫入資料至 CD-RW 光碟。 DVD+RW* 光碟-增附(CD-Extra)...
- Página 120 操作前注意事項 DualDisc 註釋 有 標籤的 DVD 亦可於本機播放。 DualDisc 是一種一面用 DVD 記錄材料製成, 如果您嘗試播放其他 DVD,“Can not play” 另一面用數碼音訊材料製成的雙面光碟產品。 資訊將出現在監視器螢幕上。該 DVD 或許並 但是,由於音訊材料面不符合光碟(CD)標 無標明地區編碼,即使標明卻是地區限制播放 準,因此不確保能在本產品上播放。 的 DVD。 透明光碟註釋 DVD 及 VCD 播放操作註釋 12 厘米光碟只有內部 8 厘米部份容納資料 有些 DVD 及 VCD 播放操作或經由軟體制作人 (其餘部份是透明的)不能在本機播放。 蓄意設定。 由於本機是根據軟體制作人設計的光碟內容播...
-
Página 121: 拆下前面板
開始 準備 拆下前面板 重設本機 您可拆下前面板防盜。 首次使用本機前或更換汽車電池後或改變連接 後,您必須先重設本機。 警告器 按 RELEASE 並朝您身體方向拉動前面板將其 拆下。 沒有拆下前面板,如果把汽車點火鑰匙轉到 使用自動鉛筆之類尖頭物體按重設按鈕。為避 OFF 時,警告器將響幾秒鐘。 免損壞本機,不要使用針或過度用力。 警告器只會響,如果使用內置的揚聲器。 按重設按鈕。 按 (OFF)。 本機關閉。 TILT OPEN/CLOSE 按 (RELEASE),並往前拉。 重設按鈕 注意 • 當按重設按鈕時,時間和所有儲存的設定丟失,必須重 新編製。 • 按重設按鈕後,重設過程約需 10 秒鐘。 (RELEASE) • 當重設過程完成時,請按 OPEN/CLOSE 按鈕,並確認監 視器正確開啟。... - Página 122 準備 監視器滑出主機。 調整監視器位置 當按 SLIDE 時,您可滑動監視器來調整位置 向前或向後。 當監視器無法再滑動時,監視器開始向相反方 向滑動。當監視器在中途時,按下並按住 SLIDE 2 秒鍾,監視器將向相反方向滑動。 調整被記憶,開啟監視器時,監視器將自動的 向同一方向移動。 注意 • 卡式遙控器不能用來開啟或關閉監視器。 • 在開啟或關閉監視器時,如果監視器的移動受到變速杆 或另一個障礙物的阻礙,請再次按 OPEN/CLOSE。 調整監視器角度 您可以調整監視器角度到最佳位置。 反復按 ANGLE -/+。 按鈕以跳躍的方式調整監視器位置。 SLIDE 使監視器向前傾斜 為了方便操作儀表板的按鈕,請將監視器往前 傾斜。 按 TILT(傾斜)。 TILT ANGLE –/+ + 按鈕︰ 監視器向後面傾斜。 - 按鈕︰ 監視器向前面傾斜。 調整被記憶,且在監視器關閉後,再次開啟後...
- Página 123 關閉監視器 注意 請勿放置罐或瓶類的物體於監視器上,將導致故障發生。 按 OPEN/CLOSE。 監視器縮回本機,您只能使用本機的音訊功 能。 OPEN/CLOSE 關機 • 當監視器開啟時,如果按卡式遙控器上的 OFF,聲音關閉,本機切換到待機狀態,只有 時鐘顯示顯示。 • 如果把汽車點火鑰匙轉到 OFF,將自動關閉 本機電源。* 要點 當監視器開啟時,如果按 OFF,您可觸碰監視器或按 SOURCE 重現影像。 * 當在點火鑰匙沒有 ACC(輔助)位置的車上安裝時的警 告 點火開關關閉後,務必在本機上按 OFF 2 秒鐘以關閉時 鐘顯示。 否則,時鐘顯示不會關閉並會引起電池漏電。 當本機關閉時,要開啟本機,請按本機上的 SOURCE。 (您不能用卡式遙控器開啟本機。) SOURCE...
-
Página 124: 設定時鐘
準備 設定時鐘 裝上前面板 本機使用 12 小時時間顯示。 如下圖所示,將前板 A 部分與本機 B 部分 連接,以及推動左邊至連接位置直到發出喀噠 在監視器上 聲為止。 觸碰 SOURCE LIST(設備源清單)。 觸碰 MENU(選單)。 觸碰 CLOCK(時鐘)。 出現調整時鐘顯示。 注意 請勿放任何物品在前面板內側。 Enter SOURCE LIST 觸碰 V/v 設定小時和分鐘。 觸碰 Enter。 時鐘從 00 秒開始計時。... - Página 125 控制按鈕位置 主機 監視器關閉 有關詳情,請參見列出的頁碼。 1 ZxZ(區域 x 區域)按鈕 46 9 ANGLE(角度調整)- 按鈕 10 2 SOURCE(設備源)按鈕 11, 17 0 ANGLE(角度調整)+ 按鈕 10 3 SOURCE(設備源)按鈕 11, 17 qa SLIDE(滑動)按鈕 10 4 A/V IN 插孔 qs MODE(模式)按鈕 5 VOL(音量調整)-/+ 按鈕 qd RELEASE(鬆開)按鈕 9 6 顯示視窗...
-
Página 126: 控制按鈕位置
控制按鈕位置 卡式遙控器 RM-X706 本機可以用卡式遙控器操作。為了安全,在使用卡式遙控器前先停車或由乘客操作。 qs ATT 按鈕 用於關閉聲音。要取消,請再按一次。 暫時關閉聲音。 當您按按鈕時,將關閉聲音及“ATT”出現在顯示屏。 再次按按鈕(或 VOL +/-)即可回復聲音。 qd DVD u 按鈕 15, 25 > 用於開始/暫停播放。 TOP MENU MENU qf ./> 按鈕 15, 26 MODE qg ENTER 按鈕 27, 28, 29 用於完成設定。 ENTER qh MENU (選單) 按鈕 27 用於顯示... -
Página 127: 播放光碟
基本操作 播放光碟 裝進光碟時 播放 DVD/VCD/音訊 CD/MP3/ 按遙控器的 DVD u 開始播放。 JPEG 要點 當 PBC 打開時,遙控器上的 DVD u 可能不能進行 VCD 注意 的播放功能。在這種情況下,按 [ENTER]。 依光碟種類,有些操作不同或受到限制。 參看您的光碟所附的操作說明書。 停止播放 觸碰監視器的 x(或按遙控器的 x)。 開啟監視器(第 9 頁)。 關閉本機 按主機或遙控器的 OFF。 裝進光碟。 要點 將自動開始播放(依光碟,按 DVD u 開始 當本機關閉時,您無法裝進光碟(如果您將點火開關轉至... - Página 128 播放光碟 直接選取曲目 要播放 JPEG 光碟 您可直接在顯示屏的專輯歌集/曲目清單中選 取曲目。 裝進 JPEG 光碟。 觸碰 LIST。 觸碰 LIST。 出現專輯/曲目清單。 例如,MP3 時 觸碰所需的檔案名稱。 Album Root SOURCE LIST 觸碰所需曲名(或號碼)。 至 在監視器 在遙控器 操作 操作 其他操作 將影像向左轉動 觸碰 。 按 <。 至 在監視器操作 90 度 至下一頁 觸碰 。...
-
Página 129: 觀看電視/聽收音機
觀看電視/聽收音機 選取所需模式 看電視或聽收音機 觸碰模式選單方塊。 準備:要在本機上觀看電視節目,必須連接一個選購的 Sony 電視調諧器 XT-V70。 開啟監視器(第 9 頁)。 按 {SOURCE} 或觸碰螢幕。 觸碰所需模式。 選取電視或收音機功能。 選取電視功能: 觀看/收聽其他的視訊/音訊 1 觸碰“SOURCE LIST”。 準備:將其他部件連接於本機。 開啟監視器(第 9 頁)。 按 {SOURCE} 或觸碰螢幕。 選取“AUX”。 2 觸碰“TV”。 1 觸碰“SOURCE LIST”。 2 在監視器觸碰“AUX”。 選取收音機功能: 在遙控器重複按 (SRC)。 1 觸碰“SOURCE LIST”。... -
Página 130: 有關設備源選單
播放機 有關設備源選單 顯示選單(第 21 頁) 使用本機的設備源選單調整功能方式和設定播 放。 依本機的屬性所顯示的選單將不同。調整各項 設定請參看第 20 頁。 螢幕效果選單(第 20 頁) SOURCE LIST 注意 依光碟設備源的項目和操作手續將不同。 播放 CD/MP3 的顯示項目 SOURCE LIST 播放模式選單(DVD/CD/MP3)(第 20 頁) SOURCE LIST SOURCE LIST 音訊等化器選單(第 23 頁) A 播放過時間 B 專輯名稱 /光碟名稱 C 曲目名稱 D ID3 標籤信息... -
Página 131: 使用設備源選單
使用設備源選單 捲動文本信息 觸碰所需信息(B、C 或 D)。 當 “A.Scroll” 設定為“On”時,文本信息 將自動捲起(第 22 頁)。 注意 ∗ “ ”顯示代替英文字母和數字之外的字母。 依照 MP3 檔案播放 根目綠 注意 • 依據所記錄的軟體播放將有異。 • 本機可播放至 1000 曲目和 256 個專輯。超過 1000 曲 和 256 個專輯將無法讀取。 要點 • 假如您在曲目之前加上號碼(01、02、03 等),在各專 輯中的曲目將依照號碼播放。 • 從有很多的根目錄的光碟開始播放需要時間時,建議您 建立不超過兩個根目錄層級的專輯。... -
Página 132: 設定播放模式 - Play Mode
使用設備源選單 使用調整稼機設備源選單各功能和設定播放。 取消螢幕效果選單 根據本機情況的不同顯示將有異。 觸碰 。 ♦ 螢幕示例 Wallpaper (壁紙) DVD: 您可從“Wallpaper 1”、“Wallpaper 2”、 “Wallpaper 3”或“Off”選擇背景圖片。當 您選擇“Off”時,壁紙尚未設定。 • 您可從各功能選擇不同的壁紙。 ♦ Effect Type (效果類型) 您可從“Type 1”、“Type 2”、“Type 3” 或“Off”選擇螢幕效果。當您選擇“Off” Repeat Off 時,螢幕效果尚未設定。 SOURCE LIST • 您可從各功能選擇不同的螢幕效果。 設定螢幕設定 設定播放模式 — Play Mode —... -
Página 133: 設定顯示 - Display
基本操作 VCD(PBC 關閉)/音樂 CD: 在監視器上 Repeat 重複當前曲目。 Shuffle 隨機播放曲目。 觸碰播放模式選單方塊。 正常播放。 要點 帶有下劃線的為初始設定。 設定顯示 — Display 依序設定下列選項即可。 SOURCE LIST A.(Auto) Scroll(自動捲起):當曲目改變 播放模式選單方塊 時自動捲起較長的顯示項目。 Dimmer(調光器):調整顯示亮度。 出現播放模式選單。 Wide Mode(寬螢幕模式):除了正常模式 (4:3),此螢幕也可設定成全、寬螢幕、變焦 及劇院模式。 觸碰所需選項。 Picture Mode(圖片模式):依據程式類型調 整圖片,圖片亮度或個人喜好。 取消播放模式選單 基本運作 觸碰播放模式選單方塊。 在監視器上 在遙控器上 在播放期間,觸碰 DSPL。 重複按... - Página 134 使用設備源選單 回到上一螢幕 觸碰 Dimmer。 觸碰監視器 Back。 取消顯示模式選單 由觸碰 - 或 + 調整調光器層級。 觸碰 DSPL。 ♦ A. Scroll(自動捲起) 當曲目听變時自動捲起較長的顯示項目。 A. Scroll On 當曲目變更時可自動捲起較長的顯示 選項。 A. Scroll Off 觸碰專輯/曲目之前,永不捲起較長的 DISC Repeat 顯示選項。 SOURCE LIST 最多顯示 31 個字符。 ♦ Dimmer(調光器) 您可調整顯示亮度。 ♦ Wide Mode (寬螢幕模式)(視訊設備源 時可用)...
-
Página 135: 設定聲音品質 - Equalizer
♦ Picture Mode (圖片模式) 設定聲音品質 — Equalizer 您可以依據程式類型調整圖片特性、圖片亮度 您可以選擇各設備源的音質。您也可調整聲音 或個人喜好。 特性且儲存其設定。 Standard 標準圖片和功能設定。 選擇聲音品質 Cinema 提供清楚的黑白清晰度圖片。 在監視器上 Dynamic 提供一美麗及亮麗顏色清楚的影像。 User 您可調整圖片特性且儲存此設定。 在播放期間,觸碰等化器選單方塊。 要點 帶有下劃線的為初始設定。 調整慣用設定 您可以對不同亮度的圖片儲存自己的使用者調 整式設定。 在監視器上 SOURCE LIST 等化器選單方塊 在播放期間,觸碰 DSPL。 出現顯示模式選單。 出現等化器選單。 觸碰 Pucture Mode。 觸碰所需設定。 觸碰 User。 取消等化器選單... - Página 136 使用設備源選單 在監視器 在播放期間,觸碰等化器選單方塊。 出現等化器選單。 觸碰所需設定。 觸碰 或 調整層級。 SOURCE LIST 按 (ENTER)。 要重新設定時觸碰 Reset。...
-
Página 137: 繼續播放 - Resume Play
繼續播放 — Resume Play 本機儲存您所停止播放點最多至 10 張光碟為 止,即使在每關閉本機或所播放的光碟彈出之 後,將開始繼續播放。 從上一次的停止點開始播放 在監視器上 在播放期間,觸碰 x。 出現 X x,且停止播放。 觸碰 N 繼續播放。 從停止點開始播放。 在遙控器上 在播放期間,按 x。 出現 X x,且停止播放。 按 DVD u 繼續播放。 從頭開始播放 在步驟 1 中再次觸碰 x(或按遙控器上的 x),出現 x 且繼續播放被取消。下次開始 播放時,將從 DVD 的開頭開始播放。 或者,視光碟類型而定,在... -
Página 138: 在光碟搜索一特定點 - Scan(掃描
在光碟搜索一特定點 — Scan(掃描) ./> > TOP MENU MENU MODE ENTER SHUF SEARCH AUDIO SUBTITLE ANGLE CLEAR 您可邊觀看圖片邊迅速確定光碟的特定點。 在播放期間,觸碰並按住監視器的 ./> (或按下並按住遙控器的 ./>),以及 在所需點放鬆。 注意 在搜索時,將不輸出音訊和不顯示字幕。... -
Página 139: 使用 Dvd 的選單
使用 DVD 的選單 在遙控器上 在 DVD 播放期間,按 (TOP MENU) > TOP MENU 或 (MENU)。 MENU TOP MENU MENU MODE B/V/v/b ENTER 按 M/m/</, 或數字鍵選擇所需 SHUF 項目,之後按 (ENTER)。 SEARCH AUDIO SUBTITLE ANGLE ENTER 數字鍵 注意 選單的項目和操作過程依 DVD 而有異。 CLEAR 有些 DVD 您可使用其所附帶的選單,就如主 選單或... -
Página 140: 使用 Pbc 功能 - Pbc(播放控制
使用 PBC 功能 — PBC(播放控制) 注意 • 選單的項目和操作過程依光碟而有異。 • 在 PBC 播放期間,曲目編號、播放時間等不顯示。 DVDBX • 重復播放和隨機播放在 PBC 回放中不可用。 > TOP MENU MENU MODE 要點 ENTER 繼續 PBC 播放時,按 (OFF) 停止播放,之後按 DVD u,開始 PBC 播放。 SHUF SEARCH AUDIO SUBTITLE ANGLE 數字鍵 CLEAR 在播放... -
Página 141: Search Play(搜索播放
從所選擇點開始播放 — Search play(搜索播放) 在播放期間,重複按遙控器的 (SEARCH)。 > TOP MENU MENU MODE : 章節搜索 3/12 ENTER ENTER : 標題搜索 SHUF SEARCH AUDIO SUBTITLE ANGLE SEARCH 按 < 或 ,,或者數字鍵選擇所需 數字鍵 的章節或標題。 CLEAR 按 (ENTER)。 從所選擇的點開始播放。 關閉播放模式選單 (PBC 關閉) 按 (SEARCH)。 以明確規定標題、章節或曲目等,您可迅速確 定所需點。... -
Página 142: Dvd 的各種操作
DVD 的各種操作 改變音訊頻道 將可切換所附帶的語言音訊。 當出現 4 位數字時,請輸入您所需的語言代 碼(第 57 頁)。 > 在播放同樣語言兩次或以上時,DVD 將以多層 TOP MENU MENU MODE 音訊格式記錄。 ENTER VCD: SHUF SEARCH AUDIO SUBTITLE ANGLE AUDIO 在播放期間,觸碰音訊頻道方塊。 出現音訊頻道選單。 CLEAR Stereo/MONO MONO/L MONO/R Stereo SOURCE LIST 在播放用多層音訊格式(PCM、Dolby Digital 或 DTS)所錄製的 DVD 時,您可改變音訊格 觸碰所需項目。... - Página 143 調整音訊輸出層級 — 調整 DVD 層級 依所錄製的音訊格式(PCM、Dolby Digital 或 DTS)DVD 影像光碟的音訊輸出層級不同。 您可分別調整 PCM、Dolby Digital 或 DTS 的輸出層級來降低光碟與設備源間的音量層級 之差。 在監視器上 觸碰 SOURCE LIST。 觸碰 MENU。 出現系統選單。 觸碰 SOUND。 觸碰 DVD Level Adjust。 觸碰 On。 自動調整輸出層級。 要更好調整輸出層級,觸碰 - 或 +。 Sound DVD Level Adj Bass Treble Balance...
-
Página 144: 改變角度
改變角度 > TOP MENU MENU MODE ENTER SHUF SEARCH AUDIO SUBTITLE ANGLE ANGLE CLEAR 如果 DVD 錄製有各種角度(多角度)的景觀 時,您可改變觀景角度。 在監視器上 觸碰監視器的 ANGLE。 在遙控器上 重複按 (ANGLE) 選取所需角度數字。 改變角度。 注意 因 DVD 規格不同,即使多層角度錄製而您或許無法改變 角度。... -
Página 145: 顯示字幕
顯示字幕 > TOP MENU MENU MODE ENTER SHUF SEARCH AUDIO SUBTITLE ANGLE SUBTITLE CLEAR 如果 DVD 錄製有更多的語言,您可開啟或關 閉字幕以及改變字幕語言。 在播放期間,觸碰 SUBTITLE(或按遙 控器的 (SUBTITLE))。 1.ENG 出現字幕語言。 重複觸碰 SUBTITLE。 在遙控器重複按 (SUBTITLE) 選擇所需語言。 依光碟規格不同,呈現不同語言。 當出現 4 位數字時,請輸入您所需的語言代 碼(第 57 頁)。 關閉字幕 觸碰監視器的 SUBTITLE(或重複按 (SUBTITLE) 選擇“OFF”)。 注意... -
Página 146: 使用系統選單
設定及調整 使用系統選單 使用系統選單可以調整多種項目,如圖片或是 Auto Close On 自動關閉監視器當您: 聲音。 •您通過按住本機的 OFF 按鈕 2 秒鐘 當您改變此裝置的設定時,(例如顯示螢幕的 關閉本機時。 字幕語言),您必須在設定選單內設定。詳情 •點火開關切到“OFF”位置。 請參閱第 37 頁。 •您移除前面板。 Auto Close Off 當您關閉本機時,將不會自動關閉監 基本操作 視器。 在監視器上 上述帶有下劃線的為初始設定。 觸碰 SOURCE LIST。 ♦ Rear Monitor (後視監視器) 選擇後視監視器的 DVD/VCD 信號格式。 連接選購的後視監視器時此設定會受到影響。 觸碰... -
Página 147: 聲音設定 - Sound
♦ Rear Att(後端 Att) 聲音設定 — SOUND 如果播放的聲音失真,請減少 REAR MONITOR “SOUND”設定允許您可根據播放情況及連結 OUT 的音訊輸出層級。 其他設備調整聲音。 此項設定影響 REAR MONITOR OUT 的輸出。 Rear Att On 減少音訊的輸出層級。若從揚聲器 在監視器上 (後監視器)傳出的播放聲音源失 真,請選擇此項。 觸碰 SOURCE LIST。 Rear Att Off 若正常,請選擇此項。 此項設定僅可用於 DVD 或 VCD。 觸碰 MENU。 ♦ DVD Level Adjust (DVD 層級調整) 出現系統選單。... -
Página 148: 其他設定 - Other
使用系統選單 ♦ Demo (示範) 其他設定 — OTHER 開啟關閉示範功能模式。示範螢幕僅在電源關 ♦ AUX 3 閉時顯示。 你可以設定 AUX 3 插孔的作用。當你連接後 Demo On 開啟示範功能。 視攝影機到 AUX 3 插孔,設定“Back Camera”。要在觀看攝影機的影像時調整後視 Demo Off 關閉示範功能。 攝影機的位置,請設定為“Normal”。 要點 Normal • 當您連接其他比連接後視攝影機至 帶有下劃線的為初始設定。 AUX 3 插孔高階元件時,請選擇此 項。 ♦ Touch Panel Adjust (觸碰面板調整) •... -
Página 149: 使用 Dvd 設定選單
使用 DVD 設定選單 播放 DVD 的語言設定 使用 DVD 設定選單,您將有多種選項設定, — Language 如圖片或聲音。 在其他主題您也可以設定顯示螢幕的字幕語 ♦ 言。其他設定選項細節,請參閱第 37 至 41 DVD Menu (DVD 選單) 頁。 您可以選擇光碟選單內所需的語言。 注意 注意 • 儲存於光碟的播放設定將會優先取代設定選單的設定, 不論您設定為何,您的語言設定將會依據 DVD 自動顯 且並非所有功能都會起作用。 示。 • 只有遙控器上的分級控制的操作有效。 ♦ Audio (音訊) 基本操作 切換聲軌的語言。當您選擇“Original”時, 將優先選取光碟內預設語言。... -
Página 150: 數碼音訊輸出設定 - Audio
使用 DVD 設定選單 數碼音訊輸出設定 設定分級控制 — Audio — Lock 您可以鎖定一光碟或依據限制層級設定限制播 ♦ DRC(動態範圍控制 Dynamic Range 放,例如觀看年齡。詳細設定過程請參照第 39 頁“鎖定光碟”。 Control) 在 DVD 播放後按“DRC”確認,將音量選項開 啟後可使聲音清楚。 混音信號設定 — Downmix 此設定影響 AUDIO OUT 的輸出。 提供現場演唱效果。 ♦ Downmix (混音) 通常,請選擇此選項。 您可以為帶有內置 DTS 或 Dolby Digital 解 碼器的選購音訊部件選擇混音信號。此項設定... -
Página 151: 鎖定光碟 - Lock
改變密碼 鎖定光碟 — Lock 您可以鎖定一光碟或依據限制層級設定限制播 停止播放時,觸碰 DVD Setup。 放,例如觀看年齡。在播放分級控制兼容的 出現 DVD 設定選單。 DVD 時,限制播放場面將中斷或由不同的場面 代替。 觸碰 Lock。 輸入密碼 停止播放時,觸碰 DVD Setup。 觸碰 Password。 出現 DVD 設定選單。 觸碰數字輸入您的舊密碼,之後觸碰 Enter。 觸碰 Lock。 觸碰數字輸入您的新密碼,之後觸碰 觸碰 Password。 Enter。 購買時被設定為“1111”。 假如輸入錯誤數字,請觸碰 Clear。 DVD Setup Lock Password 觸碰... - Página 152 使用 DVD 設定選單 設定分級控制 改變地域和其電影分級的層級 您可依照地域和其電影分級的層級設定限制層 級。 停止播放時,觸碰 DVD Setup。 出現 DVD 設定選單。 停止播放時,觸碰 DVD Setup。 出現 DVD 設定選單。 觸碰 Lock。 觸碰 Lock。 觸碰 Rating。 觸碰 Area Code(地域代碼)。 觸碰數字選取比率層級,之後觸碰 出現設定密碼顯示。 Enter。 當您設定關閉分級控制時,選取“Unlock”。 觸碰數字輸入您的密碼,之後觸碰 觸碰 Back,返回前一個選單。 Enter。 觸碰數字輸入您的密碼,之後觸碰 觸碰數字輸入地域代碼,之後觸碰 Enter。 Enter。 假如輸入錯誤數字,請觸碰...
- Página 153 地域代碼清單 標準 代碼 阿根廷 2044 澳大利亞 2047 奧地利 2046 比利時 2057 巴西 2070 加拿大 2079 智利 2090 中國 2092 丹麥 2115 芬蘭 2165 法國 2174 德國 2109 印度 2248 印尼 2238 義大利 2254 日本 2276 韓國 2304 馬來西亞 2363 墨西哥 2362 荷蘭...
-
Página 154: 電視/收音機/其他部件
— BTM • 如果您在儲存程式期間取消 BTM,則預設僅處理到一 半。 您可以儲存 18 個 VHF/UHF 電臺或是 18 個 FM 電臺、12 個 AM 電臺。本機自動選擇信號 最強的電臺且將其儲存。 手動儲存 儲存您在收聽的電臺時,觸碰並按住螢幕頂部 注意 的數字。 只有你連接 Sony 電視調諧器 XT-V70,您才可以選擇 “TV”。 在遙控器上,按下並按住一數字鍵(1 到 6)。 於監視器上 按下的數字會顯示在螢幕上。 觸碰 SOURCE LIST。 注意 如果您想用同一數字儲存其他電臺,原來的電臺將會被取 代。 觸碰 TV 或 TUNER。... -
Página 155: 利用調諧器功能的地區尋找模式
利用調諧器功能的地區尋找模式 將 FM 接收切換到單聲道 假如您設定“Local”功能至“On”,您只可 如果 FM 廣播有噪音,請將 FM 接收切換到單 收聽到強信號的電臺。 聲道。 在監視器上 在 FM 接收模式中,觸碰 Stereo/ MONO 選單方塊。 觸碰 SOURCE LIST。 Stereo/MONO 觸碰 TUNER。 Stereo MONO 觸碰選擇“FM”、“AM”頻段。 SOURCE LIST 觸碰地區選單方塊。 立體聲/單聲道 Local/DX 觸碰 MONO。 Local 要恢複立體聲接收,請觸碰 Stereo。 SOURCE LIST 地區選單方塊... -
Página 156: 附加音訊/視訊設備
附加音訊/視訊設備 您可將選購的裝置連接至本機的 AUX IN 端 設定附加設備 子。 您可改變附加設備的設定。 選擇附加設備 基本操作 在監視器上 觸碰 SOURCE LIST。 觸碰 SOURCE LIST。 觸碰 AUX。 觸碰 AUX。 觸碰設定選單方塊。 出現選單顯示。 觸碰所需設定。 觸碰模式選單方塊。 關閉設定選單 觸碰所需模式。 觸碰 Setup。 根據要連接的裝置選擇所需模式。 ♦ AUX 1 ♦ AUX 2 在遙控器上 選擇連接裝置至 AUX 1 和 AUX 2 插孔的類 型。... -
Página 157: 顯示後視攝影機的影像
附加音訊/視訊設備 顯示後視攝影機的影像 您可顯示後視攝影機的影像(當您連接了選購 的後攝影機)。請確認您已經正確的將攝影機 電纜連接至本機的 AUX 3 插孔。在連接後視 攝影機期間,請將 AUX 3 設定到“Normal” 以檢查後視攝影機的位置。 假如您切換至“Back Camera”,當倒車燈亮 時(或變速杆設定為“R(倒車)位置)將顯 示後視攝影機的影像。 在 AUX3 模式中,您還可以切換後視攝影機的 NTSC/PAL 制式。有關 AUX3 插孔的功能以及 NTSC/PAL 制式的詳情,請參見第 36 頁。 有關連接攝影機電纜之詳情,請參看附帶的 “安裝/連接”手冊。 注意 • 駕駛時,為了您的安全請仔細觀看四周。不要完全依賴 後視攝影機。 • 如果連接了後視監視器,當變速杆設定到 R 位置時, 顯示變暗。當變速杆設定到其他位置時,顯示恢複。... -
Página 158: Zone X Zone
切換前/後輸出 — Zone x Zone 在主機按 (ZxZ)。 要運行前面的設備源,請用主機的按鈕*。 > TOP MENU MENU MODE 要運行後面的設備源,請用卡式遙控器。 ENTER * 要使用主機上的 PBC 功能(VCD),請用卡 式遙控器關閉 Zone x Zone 並設定 PBC 功 Z×Z SHUF SEARCH AUDIO SUBTITLE ANGLE 能。 注意 • 在遙控器上,按 (ZxZ) 激活 Zone x Zone,然後再按 CLEAR (ZxZ) 停止... -
Página 159: 附加資訊
其它特性 附加資訊 卡式遙控器使用前注意事項 更換鋰電池 • 不要把卡式遙控器放在儀表板、方向盤或其 在正常條件下,電池將工作約 1 年。(電池 他受陽光直射的地方。特別在夏天,這些地 使用時間可能縮短,這取決於使用條件。)當 方的溫度很高,會使遙控器變形。 電池電力減弱時,卡式遙控器的工作範圍將減 • 當車停在太陽下時,從安裝位置取下卡式遙 小。請更換新的 CR2025 鋰電池。使用其他任 控器把它放在工具箱或其他受保護的地方。 何電池可能引起火災或爆炸。 • 在陽光直射時,來自卡式遙控器的信號有時 可能不能被本機正確接收。 此時,將遙控器靠近主機前面板的感應器。 關於液晶顯示屏(LCD) • 不要按壓監視器的液晶顯示屏,否則會使圖 片失真或引起故障。圖片可能變得模糊,或 + 面向上 損壞液晶顯示屏。 • 除了您的手指之外,請勿用其他東西觸碰液 晶顯示屏。將損壞液晶顯示屏或引起故障。 • 清潔注意事項 – 用稍沾上水的軟布清潔液晶顯示屏。 – 不要使用溶劑,如汽油、稀釋劑、市售清 潔劑或抗靜電噴霧劑。... -
Página 160: 拆下本機
附加資訊 更換保險絲 拆下本機 更換保險絲時,務必使用相同規格的保險絲 (電流規格)。當保險絲熔化時,在更換保險 絲之前請先檢查線路並確定問題原因。假如更 拆下保護箍。 換保險絲後保險絲再熔化時,可能是內部發生 1 拆下前面板(第 9 頁)。 故障。請與您附近的 Sony 經銷商商量。 2 將鬆脫鎖與保護箍嚙合。 保險絲(10 A) 3 拉出鬆脫鎖取下保護箍。 清潔連接器 機體和前面板之間的連接器污垢時,本機可能 無法正確起作用。因此為了預防發生故障,拆 下前面板(第 9 頁)並用棉花浸些酒精擦拭 乾淨。請勿用力太大,否則會損壞連接器。 注意 • 安全起見,清潔連接器之前,關閉點火開關,並從點火 拆取下本機。 開關把鑰匙取下。 • 請勿用手指或任何金屬物品直接觸摸連接器。 1 同時插進兩把鬆脫鎖直到發出卡嗒聲。 2 拉出鬆脫鎖使本機鬆脫。 3 漸漸取出本機。... - Página 161 使用光碟注意事項 有關 MP3 檔案 • 保持光碟清潔,勿觸碰讀取面。由其外緣拿 MP3,於 MPEG-1 Audio Layer 3,為一種壓縮 取使用。 規格標準的音樂檔案,壓縮原來音樂 CD 資料 • 若不使用光碟時請置於其光碟盒或是光碟收 至幾乎 1/10 大小的容量。 納本內。 • 本機適用下列規格。 • 勿靠近熱源/高溫。 避免放置在停駐的車內或儀表板/後車廂 對于 CD 內。 – ISO 9660 level l/level 2 格式、 • 勿在光碟上黏貼標籤或使用白板筆(油性 Joliet/Romeo 用於擴充格式 筆)/殘留物。此類光碟可能導致讀取時停...
-
Página 162: 故障排除
故障排除 在您遇到有關本機的問題時,下列檢測各項將 影像 幫助您解除困難。 參考下列檢測之前,請先檢查一下連接和操作 沒有影像或影像的聲音出現。 的手續。 • 沒有正確的連接。 • 檢查所連接設備的連接,設定設備輸出選擇器 至與本機相符的來源。 一般故障 • 光碟污垢、有瑕疵或變質。 • 本機的安裝角度超過 30°。 沒有電源。 • 本機沒有牢固的安裝在汽車上。 • 電源線沒有正確連接。 • 停車線(淺綠色)尚未連接至停車制動開關導 , 請檢查連接。如果一切正常,請檢查保險 線或停車制動失靈。 絲。 • 汽車沒有 ACC 位置。 影像與螢幕不適合。 , 在主機重複按 (SOURCE) 按鈕。 在 DVD 有螢幕縱橫比率。 •... - Página 163 聲音 操作 無聲/跳音/裂音。 遙控器未起作用。 • 沒有正確的連接。 • 遙控器與本機或遙控接收器間有障礙物。 • 檢查所連接設備的連接,設定設備輸出選擇器 • 卡式遙控器與本機的距離太遠。 至與本機相符的來源。 • 卡式遙控器並未正確指向遙控感應器,或主機 • 光碟污垢、有瑕疵或變質。 上的接收器。 • 本機的安裝角度超過 30°。 • 卡式遙控器的電池微弱。 • 本機沒有牢固的安裝在汽車上。 操作按鈕未起作用。 • 本機處於暫停播放模式或慢播放模式。 • 輸出設定不正確。 按重設按鈕(第 9 頁)。 • 調整 DVD 輸出層級(第 35 頁)。 • 聲音太小。 無法選擇選單項目。...
- Página 164 故障排除 本機不能開始播放。 您不能執行若干功能。 • 光碟相反方面插入。 基於光碟,您可能無法執行操作,如停止、搜 , 以播放面向上插入光碟。 尋、慢速播放或重複播放。詳情參閱光碟提供 • 光碟未正確插入。 的操作手冊。 • 插入光碟因地區編碼不適用。 • 本機內潮濕。 聲音曲目語言無法變更。 • 插入的 DVD-R、DVD-RW、 DVD+R、 DVD+RW、 • 使用 DVD 選單取代直接選擇(第 27 頁)。 CD-R 或 CD-RW 未定義。 • 多種語言曲目無錄製於播放的 DVD。 • DVD 禁止變更聲音曲目語言。 您未能選擇設備源。 Zone × Zone 操作中。 字幕語言無法變更或關閉。...
-
Página 165: 收音機接收
收音機接收 資訊 無法接收電臺。 錯誤顯示/資訊 聲音受雜音干擾。 當本機發生故障時下列指示出現。 • 連接電源空中控制線(藍色)或配件電源供應 在監視器上 線(紅色)至汽車天線增強器(只有當您汽車 後面/旁邊玻璃窗有內置 FM/AM 天線)。 DISC Error(光碟錯誤) • 檢查汽車天線的連接。 • 光碟污垢或上下相反插入。 • 自動天線不上升。 清潔或正確插入光碟。 檢查電源天線控制線的連接。 • 光碟因某些問題不能播放。 • 檢查頻率。 插入另一張光碟。 無法預設調頻。 Can not play (無法播放) • 儲存正確的頻率於記憶體。 • 因不同地區編碼 DVD 禁止播放。 • 廣播信號太微弱。 •... - Página 166 規格 系統 放大器部分 鐳射 半導體 輸出 揚聲器輸出 信號格式系統 (真正的絕緣連接器) 4 - 8 Ω NTSC 揚聲器阻抗 最大功率輸出 50 W × 4(1 kHz, 4 Ω) 監視器部分 一般 顯示類型 寬液晶彩色監視器 尺寸 7 英寸 電源要求 12 V DC,來自汽車電池(負極接 系統 TFT 有源矩陣 地) 像素數 336960 個像素 額定消耗...
- Página 167 術語 標題 JPEG 圖片壓縮格式(Joint 是 DVD、電影等的較長部分的圖片或音樂的專 Photographic Expert Group) 題,製作在視訊軟體或音訊軟體的全專輯。 由國際標準化組織 International Organization for Standardization(ISO) 杜比數碼(Dolby Digital) 資助,JPEG 被定義為在電腦有關系統使用的 數碼音訊壓縮技術由杜比實驗室(Dolby 劇照影像數碼壓縮和解縮之全球性標準格式。 Laboratories)開發。此技術等同於 5.1-聲 通常,壓縮率在轉化成視覺前是易變的。劇照 道環繞聲。在此格式內,後面的聲道是立體聲 影像以 1/10 至 1/100 由原來大小壓縮而 及分隔的副低音揚聲器聲道。 成。 杜比數碼提供相同於杜比數碼影院系統展現 5.1 分隔聲道的高品質數碼音訊。分隔聲道良 數碼影院系統(DTS) 好的呈現是因為所有聲道資料是分隔錄製及呈 數碼音訊壓縮技術由數碼影院系統公司 現微小的變質是因為所有聲道資料經由數碼處 (Digital Theater Systems, Inc.)開發。 理。...
- Página 168 術語 影片基礎軟體和視像基礎軟體 DVD 可以分類成影片基礎及視像基礎軟件。影 片基礎的 DVD 容納與在影院相同的影像(一 秒 24 個畫面)。視像基礎 DVD,有如電視劇 或連續單元喜劇,顯示的影像是一秒 30 個畫 面(或 60 場景)。 章節(Chapter) 影像片斷或音樂主題小於標題。一標題是由幾 個章節組成。視乎光碟,或許無錄製任何章 節。...
-
Página 169: 語言代碼清單
語言代碼清單 語言拼寫符合 ISO 639:1988(E/F)的標準。 代碼 語言 代碼 語言 代碼 語言 代碼 語言 1027 Afar 1174 French 1332 Lithuanian 1507 Samoan 1028 Abkhazian 1181 Frisian 1334 Latvian; Lettish 1508 Shona 1032 Afrikaans 1183 Irish 1345 Malagasy 1509 Somali 1039 Amharic 1186 Scots Gaelic 1347 Maori 1511 Albanian 1044 Arabic...