Tabla de contenido
Publicidad
Idiomas disponibles
Idiomas disponibles
Enlaces rápidos
Publicidad
Tabla de contenido

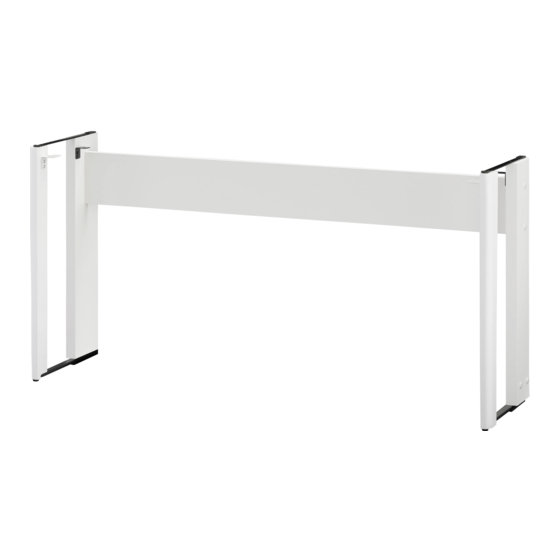
Resumen de contenidos para Kawai HM-5
- Página 1 English Deutsch Français HM-5 Assembly Instructions HM-5 Aufbauanleitung Español Instructions d’assemblage du HM-5 Instrucciones de montaje del HM-5 Istruzioni di assemblaggio HM-5 Italiano Инструкция по сборке стойки HM-5 HM-5 スタンド組立説明書 РУССКИЙ Я3ЫК 日本語...
-
Página 2: Included Parts
Please read these assembly instructions thoroughly before attempting to assemble the HM-5 digital piano stand. • Do not use this HM-5 stand for any purpose other than its intended use as a piano stand. • At the final stage of assembly, ensure that all screws are firmly tightened. - Página 3 1. Assembling the side boards and back board Attach the Back Board to the left and right Side Boards using two screws either side. Place Caps over the for screws. * Ensure that all four screws are firmly tightened. 2. Mounting the digital piano onto the stand 3.
- Página 4 HM-5 Aufbauanleitung Vielen Dank für den Kauf dieses Kawai Zubehör Produktes. Bitte lesen Sie diese Aufbauanleitung aufmerksam durch, bevor Sie mit dem Aufbau des Ständers HM-5 beginnen. • Benutzen Sie den Ständer HM-5 ausschließlich als Ständer für das Digitalpiano Modell.
- Página 5 1. Zusammenbau der Seitenteile mit der Rückwand Verschrauben Sie die Rückwand mit den beiden Seitenteilen mit je 2 Schrauben auf beiden Seiten. Setzen Sie die Kappen auf die Schraubenköpfe. * Prüfen Sie den festen Sitz der 4 Schrauben. 2. Positionierung des Digitalpianos auf dem 3.
- Página 6 • Si des vis se desserrent, resserrez-les immédiatement. Pièces Avant de commencer le montage du le HM-5 stand de piano numérique, assurez-vous que toutes les pièces ci-dessous sont présentes. Prévoyez également un tournevis cruciforme (non inclus) pour le montage de le stand.
- Página 7 1. Assemblage des panneaux latéraux et du panneau arrière Fixez le panneau arrière aux panneaux latéraux de gauche et de droite à l’aide de deux longues vis placées des deux côtés. Placez les capuchons sur les quatre vis. * Veillez à ce que toutes les vis soient fermement serrées.
-
Página 8: Piezas Incluidas
• Si algún tornillo se afloja, apriételo inmediatamente. Piezas incluidas Antes de montar el soporte de piano digital HM-5, asegúrese de que todas las piezas mostradas más abajo vienen incluidas. Un destornillador Phillips (no incluido) también será necesario para montar el soporte. -
Página 9: Montar Las Tablas Laterales Y La Tabla Trasera
1. Montar las tablas laterales y la tabla trasera Fije la tabla trasera a las tablas laterales izquierda y derecha usando dos tornillos en cada lado. Coloque los embellecedores sobre los cuatro tornillos. * Asegúrese que los cuatro tornillos estén bien apretados. - Página 10 Vi ringraziamo per aver acquistato questo accessorio destinato al pianoforte digitale Kawai. Vi preghiamo voler leggere attentamente le istruzioni che seguono prima di procedere all’assemblaggio del supporto HM-5. • Non utilizzare il supporto HM-5 per usi diversi da quello di supporto per pianoforte digitale.
- Página 11 1. Assemblare i pannelli laterali e il pannello posteriore Unire il pannello posteriore ai pannelli laterali sinistro e destro utilizzando due viti su ogni lato. Mettere i copri viti sulle quattro viti. * Assicurarsi che tutte le quattro viti siano fissate saldamente.
-
Página 12: Комплект Поставки
Инструкция по сборке стойки HM-5 Благодарим за покупку стойки для цифрового пианино Kawai. Прежде чем приступать к сборке стойки HM-5, пожалуйста, полностью прочитайте данную инструкцию. • Используйте стойку HM-5 только по назначению, для цифрового пианино. • По окончании сборки проверьте все винты, они должны быть затянуты. - Página 13 1.Сборка боковых панелей и задней панели Прикрепите заднюю панель к левой и правой боковым панелям с помощью двух болтов на каждой стороне. Закройте головки винтов заглушками * Убедитесь, что все четыре винта надежно затянуты. 2. Установка цифрового пианино на 3. Закрепление корпуса пианино на стойку...
- Página 14 HM-5スタンド組立説明書 ・ ピア ノスタンド以外の目的に使用しないでく ださい。 ・ 組立時、 ネジをしっかり締めてく ださい。 ・ 運搬時に引きずったり、 落と したり しないでく ださい。 ・ スタンドの上に乗ったり、 無理な力をかけたり しないでく ださい。 ・ 使用していてネジが緩んだ場合、 もう一度しっかり と締めてく ださい。 ・ ピア ノに寄りかからないでく ださい。 同梱されている部品 組み立てる前に、 以下のすべての部品が入っていることを確認してください。 スタンドを組み立てる際には、 プラスドライバーをご用意ください。 側板1 側板2 背板 ネジ x 4 キャップ...
- Página 15 ・ に を固定する ・ と をぴったり と押しあてて ネジ4本できつく締め固定します。 キャップを ネジの頭にかぶせます。 2. デジタルピア ノを載せる 3. デジタルピア ノを固定する デジタルピアノ底面のネジ穴とスタンドの金具の穴の位 ノブ (4個) できつく締めて固定します。 置が合うように載せます。 デジタルピア ノ デジタルピア ノ...
- Página 16 HM-5 Assembly Instructions 3000003390 SP00000376 R102 OW1136-S2008 Copyright © 2020 Kawai Musical Instruments Mfg. Co.,Ltd. All Rights Reserved. Printed in Indonesia...
