Tabla de contenido
Publicidad
Idiomas disponibles
Idiomas disponibles
Enlaces rápidos
Publicidad
Capítulos
Tabla de contenido

Resumen de contenidos para AKASO A31
- Página 1 USER MANUAL AKASO A31 Drone...
- Página 2 01 - 14 15 - 28 V1.1...
-
Página 3: Tabla De Contenido
English CONTENTS What's in the box The drone Transmitter intructions Caution Forbidden Important notes Install battery Replace the wifi camera module Replace the drive motor Install undercarriage&protectors Connect transmitter to drone Flight action Control by app Charging the battery Drone battery charging Trouble shooting guide Contact us... -
Página 4: What's In The Box
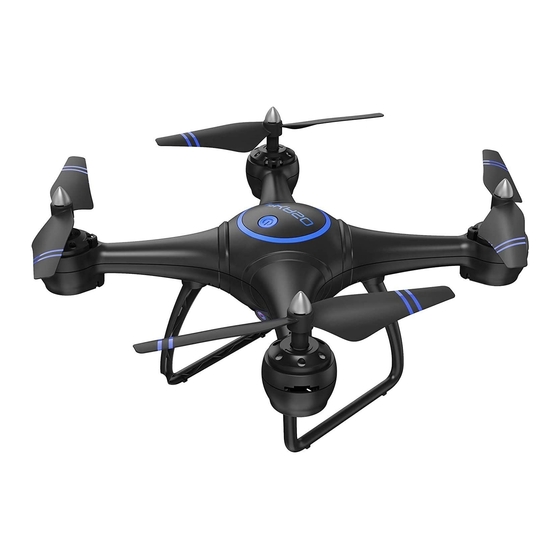
WHAT'S IN THE BOX TRANSMITTER INTRUCTIONS Short Press: Headless Mode Phone Clamps Long Press: One Key Return 1 x Remote Control Speed Switch Key 1 x A31 Drone 1 x Screwdriver (battery not included) Flip One Key Start/landing Short Press: Photo Left Rocker Long Press: Video 1 x 3.7v 500mAh... -
Página 5: Important Notes
Keep away from the humid environment. INSTALL BATTERY R/C aircraft are composed of many precision electrical components, it is critical to keep it For both the transmitter and drone, and turn on. away from moisture, do not operate or expose it in rainy day. Please do not remove or reform the parts of drone, please use the original parts for repairing, to ensure safe flight. -
Página 6: Replace The Wifi Camera Module
REPLACE THE WIFI CAMERA MODULE 3. Install the replacement motor into the motor slot and connect the motor in port with the correct polarity. (Pic.3) 4. Fasten the motor cover by screwdriver. INSTALL UNDERCARRIAGE&PROTECTORS (Pic .1) (Pic .2) (Pic .3) 1. - Página 7 1. Calibrate Drone 3. Fine Tuning Balance ① Before take off the drone, please place the drone on a flat surface then calibrate it as Press the below button to adjust if the drone can not keep balance in the sky at the follows.
-
Página 8: Flight Action
CONTROL BY APP iOS system: Please download the ”AKASO-UFO” app from APP Store. Headless Mode: Short Press Android system: Please download the ”AKASO-UFO” app from Google Play Store. One Key Return: Long Press G ET IT ON Download on the... -
Página 9: Charging The Battery
DRONE BATTERY CHARGING Take out the USB charger cable, and insert the battery power port to it, make sure the ports connect tight and correct. Insert USB port to get it charged Note: It takes 2 hours to charge, red light indicate is charging, when the light turns off indicate is full charged, and do not charge it once completed. -
Página 10: Contact Us
Can not fly after fall. 2. Gear loosen. 2. Fasten the gear. CONTACT US For any problem with AKASO products, please feel free to contact us, we will respond within 24 hours. E-mail address: cs3@akasotech.com Tel: (888) 466-9222 (US) Mon-Fri (except holiday) 9am-5pm (EST) - Página 11 Español CONTENIDO Qué hay en la caja El drone Instrucciones del transmisor Precaución Prohibido Notas importantes Instalar la batería Reemplace el módulo de wifi cámara Reemplace el conducir motor Instalar tren de aterrizaje & protectores Conecte el transmisor al dron Acción de vuelo Control por app Cargando la batería...
-
Página 12: Qué Hay En La Caja
QUÉ HAY EN LA CAJA Pulsación corta: modo sin cabeza Abrazaderas del teléfono Pulsación larga: una tecla de retorno Tecla de cambio de velocidad 1 x Control Remoto 1 x A31 Drone 1 x Destornillador (batería no incluida) Flip One Key comienzo/ aterrizaje Rocker izquierdo Pulsación corta: foto... -
Página 13: Notas Importantes
Mantener alejado del ambiente húmedo. INSTALAR LA BATERÍA Las aeronaves R/C están compuestas de muchos componentes eléctricos de precisión, es Tanto para el transmisor como para el dron, y enciéndelo. fundamental mantenerlo alejos de la humedad, no operarlo ni exponerlo en días lluviosos. Por favor no quite ni reforma las partes del dron, por favor use las partes originales para reparar, para garantizar un vuelo seguro. -
Página 14: Reemplace El Módulo De Wifi Cámara
REEMPLACE EL MÓDULO DE Wi-Fi CÁMARA 3. Instale el motor de reemplazo en la ranura del motor y conecte el motor en el puerto con la polaridad correcta.(Imagen 3) 4. Fije la cubierta del motor con un destornillador. INSTALAR TREN DE ATERRIZAJE & PROTECTORES (Imagen 1) (Imagen 2) (Imagen 3) - Página 15 1. Calibrar Drone 3. Balance de ajuste fino ① Antes de despegar el dron, colóquelo en una superficie plana y luego calibre de la Presiona el botón de abajo para ajustar si el dron no puede mantener el equilibrio en el siguiente manera.
-
Página 16: Acción De Vuelo
CONTROL POR APP Modo sin cabeza: Sistema iOS: descargue la APP "AKASO-UFO" desde APP Store. pulsación corta Sistema Android: descargue la APP "AKASO-UFO" desde Google Play Store. One Key de retorno: pulsación larga G ET IT ON Download on the... -
Página 17: Cargando La Batería
DRONE BATERÍA CARGANDO Saque el cable del cargador USB e inserte el puerto de alimentación de la batería, asegúrese de que los puertos conectar apretado y correcto. Inserte el puerto USB para cargarlo Nota: Tarda 2 horas en cargarse, la luz roja indica que se está cargando, cuando la luz se apaga indica que está... -
Página 18: Contáctenos
1. Instale el motor nuevamente. 2. Engranaje aflojar. después del otoño 2. Sujetar el engranaje. CONTÁCTENOS Para cualquier problema con los productos AKASO, sin duda en contactarnos, le responderemos dentro de las 24 horas. Dirección de correo electrónico: cs3@akasotech.com Sitio web oficial: www.akasotech.com...
