Tabla de contenido
Publicidad
Idiomas disponibles
Idiomas disponibles
Enlaces rápidos
Publicidad
Capítulos
Tabla de contenido

Manuales relacionados para Panacom LYN-T7

Resumen de contenidos para Panacom LYN-T7
- Página 1 LYN-T7 / LYN-X7 User Manual LYN-T7 / LYN-X7 Manual del Usuario...
-
Página 2: Tabla De Contenido
Û Table of Contents THANK YOU ........... 3 CONNECTING TO THE INTERNET ..... 19 Package Contents ............3 Requirements ..............19 Features................4 Connect to a Wi-Fi Network ........20 GETTING TO KNOW THE INTERNET TABLET BROWSING THE WEB ......... 22 OPTIONAL CONNECTIONS ......26 About the Touchscreen ..........8 Connecting to a Computer ........26 Protective Film ............8... -
Página 3: Thank You
 Thank You Congratulations on your purchase of the Internet Tablet. This guide is provided to help you get started quickly with your tablet; please read it carefully and save it for future reference. To view PDF documents, download and install the free Adobe Acrobat reader from the Adobe website at www.adobe.com. -
Página 4: Features
features Automatic orientation detection Read any way you want; the display adjusts Browse the Web. automatically! Visit your favourite websites Check your e-mail Keep in touch with friends and family Watch YouTube™ videos Browse the world’s most popular video-sharing community ... -
Página 5: Getting To Know The Internet Tablet
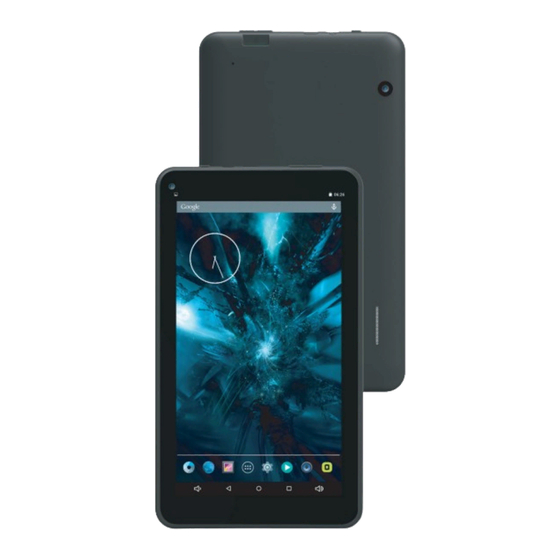
 Getting to know the Internet Tablet unit at a Glance name description Camera Front-facing camera Page 5 Getting To Know The Internet Tablet... - Página 6 name description 2 3 4 Power Key Press to turn the unit on, or to turn the screen on and off. Headphone Audio output connection for jack head-phones. USB Host Connect a storage device to the tablet. Volume + Press to increase the volume level.
- Página 7 name description camera Rear-facing camera Speaker Speaker output is automati- cally muted when using head- phone jack. Reset Press to reset the tablet if it freezes or otherwise behaves abnormally. (Use a paperclip or other small object to gently press this key.) Page 7 Getting To Know The Internet Tablet...
-
Página 8: About The Touchscreen
about the Touchscreen touchscreen, use your fingertip to manipulate icons, buttons, menu items, the on-screen keyboard and other Your tablet comes equipped with an easy-to-use touch- items displayed on the screen. screen. You can perform the following actions on the touchscreen Our capacitive multi-touchscreen requires gentle fingertip using your fingertip. -
Página 9: About The Orientation Sensor
about the orientation Sensor Swipe: To swipe, touch the screen and then quickly move your fingertip across the The tablet contains a sensor that will automatically screen without lifting your fingertip. change the orientation of most screens as you rotate the Do not pause on the screen with your tablet. -
Página 10: Charging The Tablet
Charging the Tablet Inserting a memory Card The current battery status will be always displayed in the The tablet accepts microSD memory cards. Insert a top right of the screen in the system information bar.The memory card into the microSD card slot to: battery icon will change in accordance with the battery status. -
Página 11: Resetting The Tablet
To release and remove a memory card: 2. Push the card further into the slot until you hear a click. The card will spring out of the slot. 1. unmounT the memory card. 3. Grasp the card by its edge to remove it. a. -
Página 12: Getting Started
 Getting Started Turning the Tablet on and off 2. Touch ok to turn off the tablet. To turn the tablet on: Press and hold the power key until the LCD screen turns on. Wait until the Home screen appears; the tablet is now ready for use. -
Página 13: Turning The Screen On And Off (Standby)
Turning the Screen On and Off (Standby) Unlocking the Screen When the tablet is on, you can turn off the screen to When the screen turns off, you will have to unlock the conserve battery power. Simply press the power key screen when you turn it back on. -
Página 14: Home Screen At A Glance
home Screen at a Glance If a password has been set, enter the password to finish unlocking the screen. The Screen Unlock password can be set in the Security settings menu. The home screen is the starting point for all of the features of your tablet. -
Página 15: About Applications
about applications name description Touch to go back to the previous Back To open an application, touch the application icon on the screen. home screen or in the Launcher. icon Home icon Touch to go back to the central Launcher screen: Home screen. - Página 16 Browse the web. View and manage files stored on the tablet. Display the calendar or record events View photos and videos, plus edit and appointments to manage your photos. schedule. Perform simple mathematical Play music. operations. Take pictures or videos with the front- Access the Settings menu to adjust facing camera.
-
Página 17: Installing Applications
Installing Applications Removing Widgets You can also download and install additional applications Touch and hold the Widget until the Remove icon ap- from the device’s applications marketplace, the web pears on the left of the screen, then drag the Widget to browser, or other sources. -
Página 18: About Notifications
About Notifications Touch a notification in the list; the Notifications panel will close and the application associated with the notification The icons that appear in the Notification bar at the top will launch. left corner of the screen alert you when new messages arrive or alarms or other application events occur. -
Página 19: Connecting To The Internet
 Connecting to the Internet This tablet can utilize Wi-Fi data networks to connect to the Internet. — Wireless Wi-Fi technology can provide Internet access at distances of over 300 feet; however, this distance can be affected by your surrounding environment and Wi-Fi router. requirements Please refer to your wireless router’s documentation for help, or ask your network administrator for details. -
Página 20: Connect To A Wi-Fi Network
Connect to a wi-fi network The Notification bar displays icons that indicate your tablet’s Wi-Fi status. Connected to a Wi-Fi network (waves indicate connection strength). There are no Wi-Fi networks in range, or [no icon] the Wi-Fi radio is off. 1. - Página 21 If the network is open, the tablet will prompt you to When you have successfully connected to a Wi-Fi net- confirm connection to the network. Touch Connect to work, the Notifications bar at the top right of the screen confirm. will show a Wi-Fi signal indicator.
-
Página 22: Browsing The Web
 browsing the web The Browser application lets you visit webpages and find information on the web, keep up with the news, your friends, or enjoy video from YouTube™, the world’s most popular video-sharing community. To use Browser, the tablet must be connected to the name description Internet. - Página 23 To bookmark a webpage. Some common Browser actions are described below. Bookmark your favourite webpages in order to visit To go to a webpage. them quickly without entering a URL. 1. Go to the web- 1. Touch the address bar at the top of the page that you Browser screen.
-
Página 24: Browser Menu
To go to a bookmarked webpage. 3. Touch “Delete bookmark“. 1. Touch the Goto bookmark icon. 4. Touch “OK” to confirm. 2. Touch a bookmark browser menu tile to open it. While viewing a webpage, touch the icon(as shown on the right) to open the Browser Menu, the icon is located on the top right corner of the screen, the options are: ... - Página 25 Print: Save as PDF file. Find in page: Search for content on the current page. Request desktop site: Switch between the computer and android version of the desktop. Settings: Customize the Browser. Help & feedback: Press to enter the help and feed- back page.
-
Página 26: Optional Connections
 optional Connections Connecting to a Computer The Tablet’s “mass storage mode” is compatible with many operating systems including: Connect the tablet to a computer to transfer files. Microsoft Windows XP, Vista, 7 or higher and ® ® 1. Connect your tablet to the computer. Mac OS or Linux. -
Página 27: Connecting Headphones
Connecting headphones 2. mount the storage drive. Touch Connected as a media device to mount Connect a pair of headphones (or earphones) to the the tablet’s built-in storage, then touch media tablet to enjoy media in private. device(mTp), now you can copy files to/from your Lower the volume level of the tablet before connecting computer. -
Página 28: Using The Usb Full-Size Adapter
using the uSb full-Size adapter The USB full-size adapter can be used to connect and You may also use this connection to add a use USB devices with the tablet. The adapter converts mouse to the tablet. the Micro USB port on the tablet into a USB On-the-Go The adapter supports one connection at a time. -
Página 29: Setting The System Options
 Setting the System options Open the system settings menu to adjust how the tablet looks and functions. Many applications will have their own settings; refer to the documentation provided by the application developer to learn more. To open the Settings menu: 1. -
Página 30: Specifications
Û Processor A33 Quad-core brightness set to default. Actual playback results may vary. Storage microSD card slot (max. 32GB supported) Display 7.0”TN LCD (1024*600), capacitive touchscreen Networking Wi-Fi IEEE 802.11 b/g/n Bluetooth Wireless BT Connection Audio Output 3.5 mm headphone PC Interface USB 2.0 Hi-speed Additional Fea-... -
Página 31: Safety Notices
Û Safety Notices WARNING: or moisture. Dangerous high voltage is present inside the enclosure. Do not open the cabinet. equilateral triangle is intended to alert the user to the presence Protect your hearing: Hearing experts advise against the constant use of uninsulated “dangerous voltage”... - Página 32 Û Tabla de Contenidos CONECTANDO A INTERNET ......... 47 GRACIAS................... 33 Requisitos ................47 Contenidos del paquete............33 Conectarse a una red Wi-Fi ..........48 Características................. 34 NAVEGAR POR LA WEB ..........50 ACERCA DE LA TABLET............36 Acerca de la Pantalla táctil..........36 CONEXIÓNES OPCIONALES..........
-
Página 33: Descripción
Û Conociendo la Tablet Nombre Descripción Cámara Cámara frontal Página 33 Acerca de la Tablet... -
Página 34: Entrada De Conexión De Salida De Audio Auricular Para Auriculares
Nombre Descripción 2 3 4 Botón de Pulse la tecla para encender la unidad, Encendido o para encender y apagar la pantalla. Entrada de Conexión de salida de audio Auricular para auriculares Entrada USB Conecta un dispositivo de almacenamiento a la tableta. Tecla + de Pulse para aumentar el volumen Volumen... -
Página 35: Technical Services
Nombre Descripción Cámara cámara trasera Altavoz El altavoz se silencia automáticamente cuando se usa el auricular. Restablecer Si se tilda o funciona anormalmente (Utilice un clip u otro objeto pequeño con cuidado al pulsar esta tecla.) Página 35 Acerca de la tablet... -
Página 36: Acerca De La Pantalla Táctil
Acerca de la pantalla táctil el bisel. Para controlar la tableta desde la pantalla táctil, utilice el dedo para manipular iconos, botones, elementos de menú, el Su tablet viene equipada con una pantalla táctil teclado en pantalla u elementos que se muestren en la pantalla. fácil de usar. -
Página 37: Doble Pulsación
Sobre el sensor de orientación Arrastrar: Para mover un elemento, toque la pantalla y luego muévalo rápidamente a través de la pantalla sin levantar el dedo. No haga una La tableta contiene un sensor que automáticamente cambiar la pausa en la pantalla con su la yema del orientación de la mayoría de las pantallas a medida que se gira. -
Página 38: Carga De La Tableta
Carga de la tablet Insertar una tarjeta de memoria La tableta acepta tarjetas de memoria microSD. El estado actual de la batería se muestra siempre en la parte Inserte una tarjeta de memoria en la ranura: superior derecha de la pantalla. El icono de la batería cam- biará... -
Página 39: Reiniciando La Tablet
Para liberar y extraer una tarjeta de memoria: 2. Empuje la tarjeta en la ranura hasta que oiga un clic. La tarjeta saldrá hacia afuera de la ranura. 1. RETIRANDO la tarjeta de memoria. 3. Sujete la tarjeta por los bordes para extraerla. a. -
Página 40: Iniciando
Û Iniciando Encendiendo y apagando la tablet 2. Toque OK para apagar la tablet. Para activar la tableta: Mantenga oprimida la tecla Tecla de encendido hasta que la pantalla LCD se encienda. Espere hasta que aparezca la pantalla de inicio; la tablet está... -
Página 41: Girar La Pantalla Encendido Y Apagado (En Espera)
Girar la pantalla encendido Desbloqueo de la pantalla y apagado (En espera) Cuando la pantalla se apaga, tendrá que desblo- quearla para que se encienda de nuevo. Cuando la tableta está activada, puede desactivar la pantalla para conservar la energía de la batería. Para desbloquear la pantalla, toque y arrastre el icono Sólo tiene que pulsar el botón de encendido de candado hacia el borde del círculo que lo contiene. -
Página 42: Pantalla Principal De Un Vistazo
Pantalla principal Si una contraseña se ha establecido, introduzca la contraseña para desbloquear la pantalla. La contraseña de desbloqueo puede establecerse en el menú Opciones de Seguridad. La pantalla de inicio es el punto de partida para toda la características de la tableta. ADVERTENCIA: Por favor guarde su contraseña Patrón de bloqueo / PIN / contraseña. -
Página 43: Acerca De Las Aplicaciones
Acerca de las Aplicaciones Nombre Descripción Volver a Toque para volver a la Para abrir una aplicación, toca el icono de la aplicación en la anterior pantalla. icono la pantalla inicial: Icono Pantalla Toque el icono Inicio para volver Aplicaciones preinstaladas Inicial a la pantalla de inicio Toque para mostrar la lista miniatura... - Página 44 Navegar por la web. Ver y administrar archivos almacenados en la tableta. Mostrar los eventos de calendario Ver fotos y videos, además de o citas para administrar su editar las fotos. agenda. Realizar operaciones matemáticas Reproducir música. sencillas. Tome fotos o videos con la cámara Acceder al menú...
-
Página 45: Instalación De Aplicaciones
Instalación de aplicaciones Eliminación de widgets También puede descargar e instalar aplicaciones Tocar y soltar el widget hasta que aparezca el icono de adicionales eliminación a la izquierda de la pantalla, a continuación, del mercado de aplicaciones del dispositivo, del arrastre el widget hasta el icono Eliminar. -
Página 46: Acerca De Las Notificaciones
Acerca de las Notificaciones Para responder una Notificación Los iconos que aparecen en la barra de notificaciones en la Toca una notificación en la lista; el panel de notificaciones se esquina superior izquierda de la pantalla le avisan cuando cerrará y la aplicación asociada a la notificación se pondrá en haya nuevos mensajes o se produzcan alarmas u otros even- marcha. -
Página 47: Conexión A Internet
Û Conexión a Internet Usted necesitará saber el nombre de la red Esta tableta puede utilizar redes de datos Wi-Fi para (SSID), así como la contraseña u otras creden- conectarse a Internet. ciales si su red está protegida. Estos ajustes se pueden encontrar en la página web de adminis- La tecnología inalámbrica Wi-Fi puede proporcionar tración de su router inalámbrico. -
Página 48: Conectarse A Una Red Wi-Fi
Conectarse a una red Wi-Fi La barra de notificaciones: muestra iconos que indican el estado de Wi-Fi de la tablet. Conectados a una red Wi-Fi (las ondas indicar la fuerza de la conexión). [Sin icono] No hay redes Wi-Fi dentro del alcance, o el Wi-Fi está... - Página 49 Cuando se ha conectado correctamente a una red Wi-Fi, la Si la red está abierta, la tablet le pedirá confirmar la conexión a la red. Toque Conectar. barra de notificaciones en la parte superior derecha de la panta- lla mostrará un indicador de señal Wi-Fi. Si la red está...
-
Página 50: Navegar Por La Web
Û Navegar por la Web La aplicación del navegador le permite visitar páginas web y encontrar información en la web, mantenerse al día con las noticias, sus amigos, o disfrutar de vídeo de YouTube ™, la más popular comunidad de intercambio de videos del mundo. Para utilizar el navegador, la tablet debe estar conectada Nombre Descripción... - Página 51 Marcar una página web. Algunas de las acciones comunes del navegador se Marque sus páginas web favoritas para visitar de describen a continuación. forma rápida sin necesidad de introducir una URL. Ir a una página web. 1. Ir a la página web que Toque la Dirección en la desea marcar...
-
Página 52: Menú Del Navegador
Para ir a una página web marcada. Toque borrar página marcada Toque el icono para ir a la página marcada Toque “OK” para confirmar Toque un marcador Menú del navegador mosaico para abrirlo. Mientras visualiza una página Web, toque el icono (como muestra a la derecha) para abrir el menú... - Página 53 Imprimir: Guardar como archivo PDF. Buscar en la página: Búsqueda de contenido en la página actual. Solicitud sitio de escritorio: cambiar entre el ordenador y la versión Android del escritorio. Ajustes: Personalizar el navegador. Ayuda y Feedback: Pulse para entrar en la ayuda y comentarios. Página 53 Navegando la Web...
-
Página 54: Conexiónes Opcionales
Û Conexiones opcionales Conexión a un ordenador "Modo de almacenamiento masivo" de la tableta es compatible con muchos sistemas operativos Conectar la tableta a un ordenador para transferir archivos. incluyendo: Microsoft® Windows® XP, Vista, 1. Conecte la tablet al ordenador. 7 o superior y Mac OS o Linux. -
Página 55: Conexión De Los Auriculares
Conexión de los auriculares 2. Monte la unidad de almacenamiento. Conectar auriculares a la tablet para disfrutar Toque Conectado como un dispositivo de medios de los medios de comunicación en privado. para montar la tablet de almacenamiento incorpora- do, a continuación, toque Medios dispositivo (MTP), ahora se puede copiar archivos a / desde su computa- Bajar el nivel de volumen antes de conectar auricula- dora. -
Página 56: Uso Del Adaptador Usb De Tamaño Completo
Uso del adaptador USB de tamaño completo También puede usar esta conexión para El adaptador USB de tamaño completo se puede conectar un mouse a la tableta. utilizar para conectar y utilizar dispositivos USB con la tableta. Los conversos adaptador el puerto micro USB en la tableta en un USB On-the-Go (OTG). -
Página 57: Configuración De Las Opciones Del Sistema
Û Configuración de las opciones del sistema Abra el menú de configuración del sistema para ajustar la apariencia y funciones de la tablet. Muchas aplicaciones tienen sus propios ajustes; consulte la documentación proporcionada por el desarrollador de aplicaciones para saber más. Para abrir el menú... -
Página 58: Características
Û Características * La música se puso a prueba con un archivo MP3 a 128 kbps; vídeo Procesador A33 de cuatro núcleos fue probado con una 1920 x 1080 archivo MPEG-4 / AVC; naveg- ación fue probado con la pantalla brillo ajustado al valor predetermi- nado. -
Página 59: Avisos De Seguridad
Û Aviso de seguridad ADVERTENCIA: Para evitar el riesgo de incendio o descarga eléctrica, no exponga este aparato a la lluvia o la humedad. Alto voltaje peligroso dentro de la caja. No abrir La cabina. Proteger su audición: Los expertos en audición desaconsejan el uso constante de estéreos personales a un volumen alto. -
Página 60: Servicio Técnico
TECHNICAL SERVICES / SERVICIO TÉCNICO RAZÓN SOCIAL LOCALIDAD DOMICILIO TELÉFONO RAZÓN SOCIAL LOCALIDAD DOMICILIO TELÉFONO COMPANY LOCALITY ADDRESS PHONE COMPANY LOCALITY ADDRESS PHONE PROVINCIA DE MENDOZA CIUDAD DE BUENOS AIRES SERVICE HOME C.A.B.A Carlos Calvo 3621 011-4957-3030 PLAY SERVICE Mendoza San Juan 1630 0261-489-9691 OMEGA.COM... - Página 61 Página 61...
-
Página 62: International Warranty
INTERNATIONAL WARRANTY Terms and Conditions 1. PANACOM warrants the operation of this product to be free from any manufacturing and/or material defect for a period of 6 months from the date of purchase by the user. 2. This warranty is limited to the repair and/or replacement of this product, according to our own criterion, free of charge within the stipulated term and it does not extend to consequential or incidental damages to other products that may be used with this unit.