Tabla de contenido
Publicidad
Idiomas disponibles
Idiomas disponibles
Enlaces rápidos
Publicidad
Tabla de contenido

Manuales relacionados para Denon Professional DN-300DH

Resumen de contenidos para Denon Professional DN-300DH
- Página 1 User Guide English ( 3 – 12 ) Guía del usuario Español ( 13 – 22 ) Guide d’utilisation Français ( 23 – 32 ) Guida per l’uso Italiano ( 33 – 42 ) Benutzerhandbuch Deutsch ( 43 – 52 ) Appendix English ( 53 –...
- Página 3 User Guide (English) Introduction Thank you for purchasing the DN-300DH. At Denon Professional, performance and reliability mean as much to us as they do to you. That’s why we design our equipment with only one thing in mind—to make your performance the best it can be.
-
Página 4: Front Panel
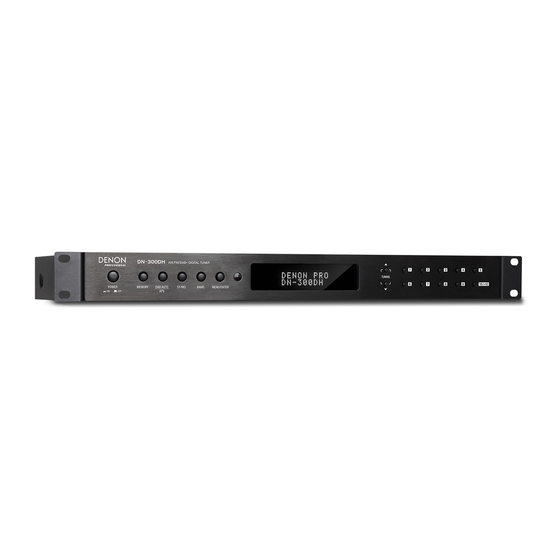
Features Front Panel 5 6 7 8 9 Power Button: Press this button to turn the unit on or off. Display: This screen indicates the unit’s current operation. Tuning Buttons: Press one of these buttons to increase or decrease the frequency one step at a time. -
Página 5: Connection Diagram
Connection Diagram Items not listed under Introduction > Box Contents are sold separately. USB Drive FM Antenna DAB+ Antenna AM Antenna Loop Powered Monitors Power... - Página 6 Setup Important: Connect all cables securely and properly (with stereo cables: left with left, right with right), and do not bundle them with the power cable. Use a stereo RCA cable or XLR cable to connect the Outputs to the analog inputs of your external receiver, amp, powered monitors, etc.
-
Página 7: Remote Control
Operation Remote Control Mute Button: Press this button to silence the audio output. Press this button again to turn the sound on. See Operation > Using the Radio for more information. ST/MO: In FM mode only, press this button to alternate between Stereo mode and Mono mode. - Página 8 Display Button: When in FM or DAB+ mode, press this button to show different operation information on the screen when RDS data has been received. Press the Display button once for PS (program name), again for PTY (program type), then CT (current time), the signal strength meter, and lastly RT (information).
-
Página 9: Battery Usage
Battery Usage Important: Before using the remote control for the first time, pull the insulation sheet out from the battery compartment. To replace the battery: On the back of the remote control, put a pin into the door release hole and then slide the door release open. -
Página 10: Using The Radio
Using the Radio To use the radio: If the unit is off, press the Power button to power it on. Press the Band button to select AM or FM. The audio from the broadcast will start automatically. Important: Make sure you have properly connected the FM and AM antennae and set the Region to the correct setting. -
Página 11: Using Dab/Dab
3. Use the Number buttons (1–10/10+) on the unit or the remote control to enter the desired preset number. 4. Press the Memory button to save the station to the preset. DN-300DH can store up to 40 DAB stations in memory. - Página 12 If you are not able to get a signal from a DAB/DAB+ station: After you have powered on DN-300DH for the first time, press the DAB Auto button so it can search for stations available in your area. Once auto-tuned, you do not need to do it again unless you take it to another part of the country with different coverage or if you want to scan for new stations.
-
Página 13: Introducción
Guía del usuario (Español) Introducción Gracias por comprar el DN-300DH. En Denon Professional, el rendimiento y la confiabilidad significan tanto para nosotros como para usted. Por eso es que diseñamos nuestros equipos con una sola cosa en mente—hacer que pueda tocar su mejor interpretación. -
Página 14: Panel Trasero
Características Panel frontal 5 6 7 8 9 Botón de encendido: Pulse este botón para encender o apagar la unidad. Pantalla: Esta pantalla indica el funcionamiento actual de la unidad. Botones de sintonización: Pulse alguno de estos botones para aumentar o reducir la frecuencia de a un paso a la vez. -
Página 15: Diagrama De Conexión
Diagrama de conexión Los elementos que no se enumeran en Introducción > Contenido de la caja se venden por separado. Unidad USB Antena de FM Antena de DAB+ Antena de cuadro de AM Suministro Monitores alimentados eléctrico... -
Página 16: Instalación
Instalación Importante: Conecte todos los cables firme y correctamente (los cables estéreo: izquierdo con izquierdo, derecho con derecho) y no los agrupe junto con el cable de corriente. Utilice un cable RCA o XLR para conectar las salidas a las entradas analógicas de su receptor externo, amplificador, monitores alimentados, etc. -
Página 17: Funcionamiento
Funcionamiento Control remoto Botón de silenciamiento: Pulse este botón para silenciar la salida de audio. Pulse este botón nuevamente para encender el sonido. Consulte Funcionamiento > Uso de la radio para más información. ST/MO: Solo en modo FM, pulse este botón para alternar entre el modo estéreo y el modo monoaural. - Página 18 Botón de visualización: Estando en modo de FM o DAB+, pulse este botón para mostrar información de funcionamiento diferente en la pantalla cuando se hayan recibido los datos del RDS. Pulse el botón Display (pantalla) una vez para PS (nombre del programa), de nuevo para PTY (tipo de programa), luego CT (hora actual), Medidor de fuerza de la señal y finalmente RT (información).
-
Página 19: Uso De La Pila
Uso de la pila Importante: Antes de utilizar el control remoto por primera vez, tire de la tira aislante hacia afuera del compartimiento de la pila. Reemplazo de la pila En la parte posterior del control remoto, coloque un alfiler en el orificio de apertura de la puerta y luego deslícela para abrirla. - Página 20 Cómo usar la radio Cómo utilizar la radio: Si la unidad está apagada, pulse el botón Power para encenderla. Pulse el botón Band para elegir entre AM/FM. El audio de la radio comenzará automáticamente. Importante: Asegúrese de tener las antenas de FM y AM conectadas correctamente y de ajustar la Región con el ajuste correcto.
-
Página 21: Uso De Dab/Dab
Asegúrese de que la antena esté extendida lo más verticalmente posible para lograr la mejor recepción. Coloque el DN-300DH lo más cerca posible de una ventana para garantizar que el ambiente circundante no obstaculice la señal de DAB/DAB+. Intente ubicar la unidad en una posición elevada dentro de la casa para captar las señales de... -
Página 22: Solución De Problemas
Si no es posible captar la señal de una estación de DAB/DAB+: Tras haber encendido el DN-300DH por primera vez, pulse el botón DAB Auto para que pueda buscar las estaciones disponibles en su zona. Una vez finalizada la sintonización automática, no es necesario realizarla nuevamente salvo que la lleve a otra parte del país con diferente cobertura o si... -
Página 23: Contenu De La Boîte
Guide d’utilisation (Français) Présentation Merci d’avoir fait l’acquisition du DN-300DH. Chez Denon Professional, la performance et la fiabilité sont aussi importantes pour nous qu’ils le sont pour vous. C’est pourquoi nous concevons nos produits avec une seule chose en tête — faire de votre performance la meilleure qui soit. -
Página 24: Panneau Arrière
Caractéristiques Panneau avant 5 6 7 8 9 Touche d’alimentation : Cette touche permet de mettre l’appareil sous et hors tension. Écran d’affichage : Cet écran indique le fonctionnement actuel de l’appareil. Touches de syntonisation : Ces touches permettent d’augmenter ou de diminuer la fréquence un pas à... -
Página 25: Schéma De Connexion
Schéma de connexion Les articles qui ne figurent pas dans la section Présentation > Contenu de la boîte sont vendus séparément. Clé USB Antenne FM Antenne DAB+ Antenne cadre AM Enceintes amplifiées Alimentation... - Página 26 Installation Important : Raccordez tous les câbles correctement (câbles stéréo : le canal gauche sur le connecteur gauche et le canal droit sur le connecteur droit), et ne les groupez pas avec le câble d’alimentation. Utilisez un câble RCA stéréo ou XLR pour relier les sorties aux entrées analogiques de votre récepteur, amplificateur, enceintes amplifiées, etc.
- Página 27 Fonctionnement Télécommande Touche de mise en sourdine : Cette touche permet la mise en sourdine de la sortie audio. Appuyez à nouveau afin de désactiver la mise en sourdine. Veuillez consulter la section Fonctionnement > Utilisation de la radio pour plus d’information. Sélecteur stéréo/mono (ST/MO) : En mode FM uniquement, cette touche permet de commuter entre les modes stéréo et mono.
- Página 28 Touche d’affichage : En mode FM ou DAB+, cette touche permet d’afficher différentes informations de fonctionnement lorsque des données RDS sont transmises. Appuyez sur la touche d’affichage pour afficher le nom du programme (PS), une deuxième fois pour le type de programme (PTY), puis pour l’heure, indicateur de puissance du signal, et enfin pour l’information (RT).
-
Página 29: Portée De La Télécommande
Pile Important : Avant d’utiliser la télécommande pour la première fois, retirez la languette du compartiment à pile. Remplacement de la pile : À l’arrière de la télécommande, insérez une aiguille dans le trou du couvercle et faites-le ensuite glisser pour l’ouvrir. Retirez la pile au lithium usée et insérez-en une nouvelle. -
Página 30: Utilisation De La Radio
Utilisation de la radio Pour utiliser la radio : Si l’appareil est hors tension, appuyez sur la touche d’alimentation afin de le mettre sous tension. Appuyez sur le sélecteur de bande de fréquence afin de sélectionner la radio FM, ou AM. -
Página 31: Utilisation De La Radiodiffusion Sonore Numérique (Dab/Dab+)
Les signaux DAB et DAB+ contiennent des informations supplémentaires qui s’affichent sur l’écran du DN-300DH. Durant l’écoute de la radio, les stations radio peuvent faire défiler le nom de l'artiste, le titre de la chanson, le genre musical, les chansons à venir, les manchettes, les résultats sportifs, les adresses Internet et les numéros de téléphone pour les demandes... - Página 32 Si vous ne parvenez pas à capter le signal d’une station DAB/DAB+ : La première fois que vous mettez le DN-300DH sous tension, appuyez sur la touche DAB Auto afin de lancer le balayage automatique des stations radio DAB/DAB+ offertes dans votre région. Une fois synchronisé, vous n'avez pas à...
-
Página 33: Contenuti Della Confezione
Guida per l’uso (Italiano) Introduzione Grazie per aver acquistato il DN-300DH. Per noi di Denon Professional, prestazioni e affidabilità contano moltissimo, proprio come per te. Ecco perché progettiamo i nostri dispositivi con un unico obiettivo in mente: rendere le tue prestazioni le migliori possibili. -
Página 34: Caratteristiche
Caratteristiche Pannello anteriore 5 6 7 8 9 Tasto di alimentazione: premere questo tasto per accendere e spegnere l’apparecchio. Display: questo schermo mostra l’operazione corrente dell’apparecchio. Pulsanti di sintonia: premere uno di questi pulsanti per aumentare o diminuire la frequenza di un passo alla volta. -
Página 35: Schema Dei Collegamenti
Schema dei collegamenti Elementi non elencati sotto Introduzione > Contenuti della confezione sono venduti separatamente. Drive USB Antenna FM Antenna DAB+ Antenna AM fascetta Monitor Alimentazione... - Página 36 Configurazione Importante: collegare tutti i cavi in maniera sicura e adeguata (con cavi stereo: sinistro con sinistro, destro con destro) e non unirli in fascio con il cavo di alimentazione. Servirsi di un cavo stereo RCA o XLR per collegare le uscite agli ingressi analogici di ricevitore esterno, amplificatore, monitor, ecc.
- Página 37 Operazione Telecomando Tasto muto: premere questo tasto per silenziare l’uscita audio. Premere nuovamente questo tasto per accendere l’audio. Per maggiori informazioni, si veda Operazione > Uso della radio. ST/MO: Solo in modalità FM, premere questo tasto per alternare tra modalità stereo e modalità...
- Página 38 Tasto display: quando in modalità FM o DAB+, premere questo tasto per mostrare varie informazioni operative sullo schermo quando vengono ricevuto dati RDS. Premere una volta il tasto Display per PS (nome programma), premerlo ancora per PTY (tipo di programma), quindi CT (tempo corrente) Misuratore della forza di segnale, e infine RT (informazioni).
-
Página 39: Utilizzo Della Batteria
Utilizzo della batteria Importante: prima di utilizzare il telecomando per la prima volta, estrarre la linguetta isolante dallo scomparto batterie. Per sostituire la batteria Inserire un ago a livello della parte posteriore del telecomando nel foro di sbloccaggio dello sportello e aprire quest’ultimo. Estrarre la vecchia batteria al litio dallo scomparto batterie e inserirne una nuova. -
Página 40: Utilizzo Della Radio
Utilizzo della radio Per utilizzare la radio: Se l’apparecchio è spento, premere il tasto Power per accenderlo. Premere il tasto Band per scegliere FM o AM. L’audio della trasmissione si avvierà immediatamente. Importante: assicurarsi di aver collegato debitamente le antenne FM e AM e aver impostato la Regione sulla configurazione corretta. -
Página 41: Utilizzo Di Dab/Dab
3. Servirsi dei tasti numerici (1–10/10+) sull'apparecchio o sul telecomando per inserire il numero predefinito desiderato. 4. Premere il tasto Memory per salvare la stazione sul preset. Il DN-300DH può memorizzare fino a 40 stazioni DAB. Per richiamare il numero di preset di una stazione DAB/DAB+ salvata, servirsi dei tasti numerici (1–10/10+) sull'apparecchio o sul telecomando per inserire il numero predefinito... -
Página 42: Risoluzione Di Problemi
Risoluzione di problemi Se non si riceve alcun segnale da una stazione DAB/DAB+: dopo aver acceso il DN-300DH per la prima volta, premere il tasto DAB Auto in modo che cerchi le stazioni disponibili nella propria zona. Una volta effettuata la sintonia automatica non è necessario ripeterla, a meno che non si porti l’apparecchio in una zona diversa del Paese con una copertura diversa o che... -
Página 43: Lieferumfang
Benutzerhandbuch (Deutsch) Einführung Vielen Dank für den Kauf des DN-300DH. Bei Denon Professional schätzen wir Leistung und Zuverlässigkeit - genau wie Sie. Darum entwerfen wir unsere Geräte stets nur mit einem einzigen Ziel vor Augen: Ihre Anwendung so gut wie möglich zu unterstützen. - Página 44 Funktionen Vorderseite 5 6 7 8 9 Netzschalter: Drücken Sie diese Taste, um das Gerät ein-/auszuschalten. Display: Dieses Display zeigt die aktuelle Funktion des Gerätes. Tuning-Tasten: Drücken Sie eine dieser Tasten, um die Frequenz um jeweils einen Schritt zu erhöhen oder zu verringern.
- Página 45 Anschlussdiagramm Teile, die nicht unter Einführung > Lieferumfang angegeben sind, sind separat erhältlich. USB-Stick FM-Antenne DAB+ -Antenne AM-Antenne Rahmen Aktivmonitore Stromversorgung...
- Página 46 Setup Wichtig: Schließen Sie alle Kabel sicher und ordnungsgemäß an (Stereo-Kabel: links mit links, rechts mit rechts) und bündeln Sie sie nicht mit dem Netzkabel. Verwenden Sie ein Stereo-Cinch-Kabel oder XLR-Kabel, um die Ausgänge an die analogen Eingänge Ihres externen Receivers, Verstärkers, Aktivmonitore etc. anzuschließen. Stellen Sie sicher, dass die Tuner-Region auf Ihren Standort (Amerika/Europa/Japan) eingestellt ist.
- Página 47 Betrieb Fernbedienung Taste Stummschalten: Drücken Sie diese Taste, um die Audioausgabe stumm zu schalten. Drücken Sie diese Taste erneut, um den Ton einzuschalten. Siehe Betrieb > Verwendung Radios für weitere Informationen. ST/MO: Nur im FM-Modus, drücken Sie diese Taste, um zwischen Stereo- und Mono-Modus zu wechseln.
- Página 48 Display-Taste: Wenn Sie sich im FM-Modus befinden oder DAB+, drücken Sie diese Taste, um verschiedene Betriebsinformationen auf dem Bildschirm anzuzeigen, wenn die RDS- Daten empfangen wurde. Drücken Sie die Display-Taste einmal für PS (Programmname), ein weiteres Mal für PTY (Programmtyp), dann CT (aktuelle Zeit) Signalstärke-Messgerät, und schließlich RT (Information).
- Página 49 Batterieverbrauch Wichtig: Bevor Sie die Fernbedienung zum ersten Mal verwenden, ziehen Sie die Isolierfolie aus dem Batteriefach. So tauschen Sie die Batterien aus: Bringen Sie einen Stift in das Loch auf der Rückseite der Fernbedienung und schieben dann die Klappe zur Seite. Entfernen Sie die alte Lithium-Batterie aus dem Batteriefach und legen Sie eine neue ein.
-
Página 50: Verwendung Des Radios
Wenn Sie ein klares Rundfunksignal empfangen können, fixieren Sie die Antenne mit Klebeband in einer Position, wo der Geräuschpegel minimal ist. Allgemeinhinweis zur Konformitätserklärung: Hiermit erklären wir, daß sich das Gerät DN-300DH in Übereinstimmung mit den grundlegenden Anforderungen der europäischen Richtlinie 1999/5/EG befindet. -
Página 51: Verwendung Von Dab/Dab
Um den bestmöglichen Empfang zu haben, sollten Sie die Antenne so vertikal wie möglich ausrichten. Positionieren Sie das DN-300DH so nah wie möglich an einem Fenster, damit die DAB-/DAB+- Sendestärke durch nichts in Ihrem Umfeld beeinträchtigt wird. Versuchen Sie auch, das Gerät an einer höheren Stelle im Haus zu positionieren, um einen... - Página 52 Fehlerbehebung Sie können kein Signal einer DAB/DAB+-Station empfangen: Nachdem Sie DN-300DH zum ersten Mal eingeschaltet haben, drücken Sie die DAB Auto–Taste, damit das Gerät nach in Ihrem Gebiet verfügbaren Radiosendern sucht. Wenn Sie die automatische Suche einmal durchgeführt haben, brauchen Sie dies nur dann wieder zu tun, wenn Sie das Gerät in einen anderen Teil des Landes mit einer anderen Abdeckung bringen oder wenn Sie nach neuen Sendern suchen wollen.
-
Página 53: Technical Specifications
Appendix (English) Technical Specifications Radio Specifications America: FM: 87.5 – 108 kHz FM Step Frequency: 50 kHz FM Signal-to-Noise: 30 dB, < 3 dBu AM: 520 – 1710 kHz AM Step Frequency: 10 kHz DAB/DAB+: 174.928 MHz – 239.200 MHz (Band III) Europe: FM: 87.5 –... - Página 54 (1) XLR output pair Connectors (1) RCA stereo output pair (1) USB port (for firmware updates) (1) IEC power input Power Connection: IEC Input Voltage: 115 V / 230 V, 50/60 Hz Operating Temperature: 41° – 95° 5° – 35° Operating Humidity: 25 –...
- Página 56 denonpro.com Manual Version 1.2...