Tabla de contenido
Publicidad
Idiomas disponibles
Idiomas disponibles
Enlaces rápidos
DTW38FL, DTW12FL
DTW39FL, DTW12FL
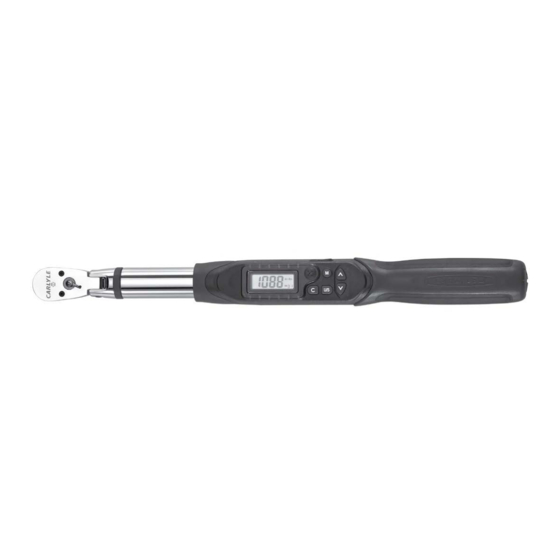
3/8" and 1/2" Digital Torque Wrenches with Angle Indicator
3/8" Torque Range . . . . . . . . . . . . . . . . . . . . . . . . . . . . . . . . . . . . . 5.0-99.5 ft.-lbs.
1/2" Torque Range . . . . . . . . . . . . . . . . . . . . . . . . . . . . . . . . . . . 12.5-250.0 ft.-lbs.
Torque Accuracy (*1) . . . . . . . . . . . . . . . . . . . . . . . . . . . . (CW ±2%) (CCW ±3%)
Angle Accuracy (*2) . . . . . . . . . . . . . . . +/- 2° ( rotating 90° at speed of 30°/sec)
Angle Range . . . . . . . . . . . . . . . . . . . . . . . . . . . . . . . . . . . . . . . . . . . . . . . . . 1˚-360˚
Data Memory Values . . . . . . . . . . . . . . . . . . . . . . . . . . . . . . . . . . . . . . . . . . . .
Number of Presets . . . . . . . . . . . . . . . . . . . . . . . . . . . . . . . . . . . . . . . . . . . . . . . . 9
Operation Modes . . . . . . . . . . . . . . . . . . . . . . . . . . . . . . . . . . . . . Peak Hold/Track
Unit Selection . . . . . . . . . . . . . . . . . . . . . . . . . . N-m, in-lb, ft-lb, kg-cm & Degrees
Head Type . . . . . . . . . . . . . . . . . . . . . . . . . . . . . . . . . . . . . . . . . . . . . Flex Ratchet
Gear teeth . . . . . . . . . . . . . . . . . . . . . . . . . . . . . . . . . . . . . . . . . . . . . . . . . . . . . 36
Audible Alarm . . . . . . . . . . . . . . . . . . . . . . . . . . . . . . . . . . . . . . . . . . . . . . . . . . .Yes
Buttons . . . . . . . . . . . . . . . . . . . . . . . . . . . . . . . . . . . . . . . . . . . . . . . . . . . . . . . . . 5
LED Indicator . . . . . . . . . . . . . . . . . . . . . . . . . . . . . . . . . . . . . . . . . . . . . . 12 LED's
Batteries . . . . . . . . . . . . . . . . . . . . . . . . . . . . . . . . . . . . . . . . . . . . . . . . . . . . . .2 AA
Battery Life-Continuous Operation (*3) . . . . . . . . . . . . . . . . . . . . . . . . . . . . 60 Hrs
Battery Life-Standby (*3) . . . . . . . . . . . . . . . . . . . . . . . . . . . . . . . . . . . . . . . 1 Year
Operating Temperature . . . . . . . . . . . . . . . . . . . . . . . . . . . . . . . . . . . 14ºF ~ 140ºF
Storage Temperature . . . . . . . . . . . . . . . . . . . . . . . . . . . . . . . . . . . . . -4ºF ~ 158ºF
Humidity . . . . . . . . . . . . . . . . . . . . . . . . . . . . . . . . . . . Up to 90% non-condensing
DTW38FL, DTW12FL
SPECIFICATIONS
50
1
WARNING
ALWAYS READ
INSTRUCTIONS
BEFORE USING
TOOLS
ALWAYS WEAR
SAFETY
GOGGLES
NOT
WATERPROOF
Rev. 01/23/13
Publicidad
Tabla de contenido

Manuales relacionados para Napa Carlyle DTW39FL

Resumen de contenidos para Napa Carlyle DTW39FL
- Página 1 DTW39FL, DTW12FL DTW38FL, DTW12FL 3/8" and 1/2" Digital Torque Wrenches with Angle Indicator SPECIFICATIONS WARNING 3/8" Torque Range ........5.0-99.5 ft.-lbs. 1/2"...
- Página 2 SPECIFICATIONS Notes from Page 1: The accuracy of the readout is guaranteed from 20% to 100% The angle accuracy is guaranteed at ±2% clockwise, ±3% of maximum range + /- 1 increment. The torque accuracy is a counterclockwise when rotating wrench to 90º at the speed of typical value. Calibration point is at the middle line of the five 30º/s.
-
Página 3: Features And Functions
FEATURES AND FUNCTIONS Head Repair Kit 16 18 20 1. Reversible Ratchet Head 6. Buttons 12. Torque/Angle Value 17. Pre-setting number Selection 2. Direction Lever 7. Battery Compartment 13. Pre-setting number Button 3. LCD Readout 8. Battery Cover 14. Units 18. Unit/Setting Button 4. - Página 4 REPLACING THE HEAD KIT (CONT.) Step 2: Insert the pawl spring into the handle spring hole. See Fig. 2 Fig. 2 Step 3: Place the steel ball on top of the pawl spring. See Fig. 3 Fig. 3 Step 4: Insert the pawl with the square hole facing inward and the circle hole facing you. See Fig. 4 Fig. 4 DTW38FL, DTW12FL Rev. 01/23/13...
- Página 5 REPLACING THE HEAD KIT (CONT.) Step 5: Insert the switch into the square hole on the pawl making sure the the tail of the switch and the bottom of the pawl (See Fig. 5) are both pointing in the same direction. Then fasten with the switch screw. Fig. 5 Step 6: Insert the driver into the ratchet head aligning the teeth on the driver with the teeth on the pawl. See Fig. 6 Fig. 6 Step 7: Place the lid on the driver with the chamfer side of the lid facing out. See Fig. 7 Fig. 7 DTW38FL, DTW12FL Rev.
-
Página 6: Battery Installation
REPLACING THE HEAD KIT (CONT.) Step 8: Fasten the lid to the ratchet head with lid screws. See Fig. 8 Test the functionality by making sure the driver turns and the switch can pivot in both directions. Fig. 8 BEFORE USING THE WRENCH BATTERY INSTALLATION • Remove the battery cap. • Insert two AA batteries (provided) matching the -/+ polarities of the battery to the battery compartment. -
Página 7: Sleep Mode
IMPORTANT! Angle Mode Warning NOTE: ANGLE" When using the wrench in " mode the wrench must be placed flat (horizontally) on table or workbench before any attempt is made to change values or to power up the unit. If the user attempts these functions without following the instructions above the unit's display will begin to flash a series of four zeros in the top half of the screen. In order to reset the unit, remove the battery cover; then replace. SLEEP MODE • The wrench will automatically go into "Sleep" mode after being idle for approximately 2 minutes to save power. Press to wake from "Sleep" mode. LOW BATTERY VOLTAGE PROTECTION • If the battery voltage is below 2.3 volts, the wrench ft.-lb. - Página 8 SETTING TORQUE VALUES Increases Decreases Torque Value Torque Value Torque Value Use the Up arrow to increase torque value. Use the Down arrow to decrease torque value. RESETTING PRESET TORQUE VALUES Torque Wrench comes with 9 Preset values pre-installed at the factory. To change a preset value stored in memory: Pre-Set Memory Indicator: M1 1. Press the memory button repeatedly to Press for immediate use.
-
Página 9: Track Mode
If this warning appears, the wrench has applied more than 110% of the torque set in memory. SELECTING TRACK AND PEAK MODES At start up either (P) or (T) will show in the lower right hand corner of the display depending on the last time the wrench was used. Note: Track (T) mode is the factory default. 1. In order to change the mode, press and hold the button for 2 seconds. - Página 10 PEAK HOLD MODE Peak Hold Mode: This mode allows the operator to view and store individual torque values. Up to 50 values can be stored. NOTE: The peak hold mode can only be used with a torque value previously stored in one of the 9 Pre-Set memory locations. Storing Peak Hold Values: 1. Using the button, navigate to the desired preset value. (e.g. M3, M4, M5 . . . etc.) Be sure the wrench is in Peak Hold Mode (P). 2. Apply load to the handle until the red light illuminates and the alarm tone sounds, then release the load.
- Página 11 PEAK HOLD MODE Deleting a Peak Hold Value: 1. Repeat steps 1 through 3 from "Viewing Peak Hold Values". Then, using the buttons, navigate to the location you wish to delete. 2. Press the button. "No?" appears in the display. 3. Press the button again. "dEL" appears in the display, and this action deletes the current entry.
- Página 12 USING ANGLE FUNCTION Setting Angle Values Angle Value Pressing the button allows you to cycle sequentially though each of the units of measure Increases Decreases until you reach the angle display. Angle Value Angle Value 2. Use the Up arrow to increase angle value. Use the Down arrow to decrease angle value. Resetting Preset Angle Values Torque Wrench comes with 9 Preset values pre-installed at the factory.
- Página 13 Using Angle Mode (Cont.) To change to the desired unit of measure: 1. Press the button for 2-3 seconds; "node E" appears in the display. 2. Press the button again "AU-1" appears in the display. 3. Use the buttons to cycle through the different units of measure until you reach the 0º...
-
Página 14: Troubleshooting
TROUBLESHOOTING Error Codes for Angle Feature Torque Wrenches Error Code Cause Corrective Action Comments Applied torque exceeded 110% of Return torque wrench to repair center the maximum rated capacity of the for calibration. torque wrench. 1. Press the button to restart The torque wrench shut down If the torque wrench is the torque wrench - If this does not during angle mode. When in angle mode, it must work, then restarted, the torque wrench was... - Página 15 Viewing and Deleting Angle Values To view and delete angle values, follow the same procedures outlined in the " Viewing Peak Hold Values" and "Deleting Peak Hold Values" on pages 10 and 11 NOTES Memory Prest Newton meters inch/pounds foot/pounds kilogram/centimeters angle Location # (N-m) (in - lb) (ft - lb) (kg -cm) (degree º) DTW38FL, DTW12FL Rev. 01/23/13...
-
Página 16: Torquímetros Digitales 3/8" Y 1/2" Con Indicador De Ángulo
DTW39FL, DTW12FL DTW38FL, DTW12FL Torquímetros digitales 3/8" y 1/2" con indicador de ángulo ESPECIFICACIONES ADVERTENCIA Rango de torsión 3/8" ....... 5.0-99.5 libras-pie. Rango de torsión 1/2"... -
Página 17: Especificaciones
ESPECIFICACIONES Notas de las página 1: La precisión se basa en el grado cero de desplazamiento del eje perpendicular. La precisión de la lectura de salida está garantizada del 20% al 100% del máximo rango de incremento + /- 1. La precisión La precisión del ángulo está... -
Página 18: Reposición Del Equipo De Cabeza
FEATURES AND FUNCTIONS Equipo de reparación de cabeza 1. Cabeza de trinquete reversible 6. Botones 12. Torsión/Valor de ángulo 17. Botón de selección de número 2. Manivela de sentido 7. Compartimiento de batería 13. Número de pre-ajuste preajustado 3. Lectura de salida DCL 8. - Página 19 REPOSICIÓN DEL EQUIPO DE CABEZA Paso 2: Inserte el resorte del trinquete en el agujero del resorte del mango. Ver la fig. 2 Fig. 2 Paso 3: Coloque la bola de acero en la parte superior del resorte del trinquete. Ver la fig. 3 Fig. 3 Paso 4: Inserte el trinquete con el agujero cuadrado orientado hacia adentro y el agujero circular orientado hacia usted.
- Página 20 REPOSICIÓN DEL EQUIPO DE CABEZA Paso 5: Inserte el interruptor en el agujero cuadrado en el trinquete, asegurándose que la cola del interruptor y la parte inferior del trinquete (ver la fig.5) los dos estén apuntándose en la misma dirección. Luego sujete con el tornillo del interruptor. Fig. 5 Paso 6: Inserte el conductor en la cabeza del trinquete, alineando los dientes en el conductor con los dientes del trinquete.
-
Página 21: Instalación De La Batería
REPOSICIÓN DEL EQUIPO DE CABEZA Paso 8: Sujete la tapa a la cabeza de la carraca con los tornillos de la tapa. Ver la fig. 8 Compruebe la funcionalidad al asegurar que el conductor gire y que el interruptor pivote en ambos sentidos. Fig. 8 ANTES DE USAR LA LLAVE INSTALACIÓN DE LA BATERÍA • Extraiga la tapa de la batería. -
Página 22: Estado Suspendido
¡IMPORTANTE! ADVERTENCIA ADVERTENCIA Advertencia del modo del ángulo NOTA: Al usar la llave en "ANGLE" el modo la llave se debe poner completamente (horizontalmente) en la tabla o el banco de trabajo antes de que se haga cualquier tentativa cambiar valores o de accionar para arriba la unidad. Si el usuario intenta estas funciones sin el siguiente de las instrucciones sobre el unit' la exhibición de s comenzará a destellar una serie de cuatro ceros adentro la mitad superior de la pantalla. Para reajustar la unidad; quite la cubierta de batería, después substitúyala. -
Página 23: Ajustando Los Valores De Torsión
AJUSTANDO LOS VALORES DE TORSIÓN Aumenta el valor Disminuye el valor Valores de torsión de torsión de torsión Use la flecha de Arriba para aumentar el valor de torsión. Use la flecha de Abajo para disminuir el valor de torsión. REAJUSTE DE VALORES DE PRECOLOCACIÓN El torquímetro viene con 9 valores pre-ajustados desde la fábrica. To change a preset value stored in memory: Indicador de memoria pre-ajustado: M1 Oprima para uso inmediato. -
Página 24: Selección De Modos De La Pista Y Del Pico
ADVERTENCIA Si aparece esta advertencia, la llave ha aplicado más del 110% de la torsión ajustada en la memoria. SELECCIÓN DE MODOS DE LA PISTA Y DEL PICO Con el encendido aparecerá o una (P) o una (T) en la esquina inferior derecha del despliegue, dependiendo del último uso del torquímetro. Nota: El modo de rastreo (T) es la configuración predeterminada de la fábrica. -
Página 25: Modo De Retención De Picos
MODO DE RETENCIÓN DE PICOS Modo de retención de picos: Este modo le permite al operador revisar y almacenar los valores individuales de torsión. Se pueden almacenar de hasta 50 valores. NOTA: El modo de retención de picos sólo puede usarse con un valor de torsión almacenado previamente en una de las 9 ubicaciones de memoria pre-ajustadas. - Página 26 MODO DE RETENCIÓN DE PICOS Borrando un valor de retención de picos: 1. Repita los pasos 1 al 3 de "Revisando los valores de sujeción pico: Luego, usando los botones, navegue hasta la ubicacíón destinada la que se desea borrar. 2. Oprima el botón. "No?" aparece en el despliegue. 3.
-
Página 27: Usando La Función De Ángulo
USANDO LA FUNCIÓN DE ÁNGULO Ajustando valores de ángulo Valor ángulo 1. Al presionar el botón se permite ciclar secuencialmente por cada una de las unidades de medición Aumenta el valor Disminuye el valor hasta que usted alcance el despliegue de ángulo. del ángulo de ángulo Use la flecha de... - Página 28 Usando el modo de ángulo (Cont.) Para cambiar a la unidad de medición deseada: 1. Presione el botón por 2 a 3 segundos "nodo E" aparece en el despliegue. 2. Presione el botón de nuevo, "AU-1" aparece en el despliegue. 3.
-
Página 29: Diagnóstico De Averías
DIAGNÓSTICO DE AVERÍAS Códigos de error para torquímetros con característica de ángulo Código de error Causa Acción correctiva Comentarios La torsión aplicada excede el Devuelva el torquímetro a un centro de 110% de la máxima capacidad reparaciones para el calibrado. nominal del torquímetro. - Página 30 Revisando y borrando los valores de ángulo Para ver y borrar los valores de ángulo, siga los mismos procedimientos que se dieron a conocer en "Revisando los valores de sujeción de picos" y "Borrando los valores de sujeción de picos" en las páginas 25 y 26. NOTAS Preajuste de memoria Metros Newton Pulgadas/pie Libras/pie Kilogramo/centímetros ángulo Localización # (N-m) (in - lb) (ft - lb)