Tabla de contenido
Publicidad
Enlaces rápidos
I
PR6/PR7
[a]
[a]
[b]
[b]
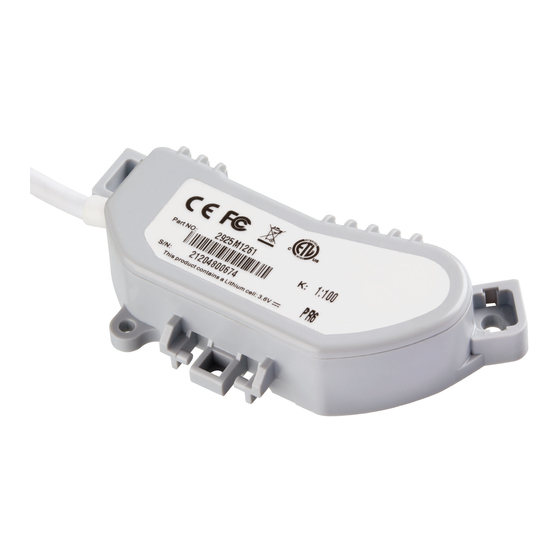
PR6 UNIT
[c]
PR7 UNIT
PR6
PR7
(Fig. 1)
(Fig. 2)
Package Parts
PR6 (Fig. 1)
The PR6 is packaged with an O-ring (pre-fitted), (a) 2 security labels, and (b) 4 plastic locking pins. If the PR6 has been ordered for
use with a commercial meter, use the 2 M3 screws included with the meter.
PR7 (Fig. 2)
The PR7 is packaged with an O-ring (pre-fitted), (a) 2 security labels, (b) 2 thumb screws, and (c) 1 installation aid.
Verpackungsinhalt
PR6 (Fig. 1)
Das Impulsmodul PR6 wird mit einem O-Ring (vormontiert), zwei Sicherungsetiketten (a) und vier Plastik-Clips (b) ausgeliefert.
PR7 (Fig. 2)
Das Impulsmodul PR7 wird mit einem O-Ring (vormontiert), zwei Sicherungsetiketten (a), zwei Rändelschrauben (b) und einer
Installations-Hilfe (c) geliefert.
Pièces De Paquet
PR6 (Fig. 1)
Le PR6 est fournit avec un joint torique (pre monte), (a) 2 poingons anti-fraudes (b) 4 fermoirs plastiques.
PR7 (Fig. 2)
Le PR7 est fournit avec un joint torique (pre monte) (a) 2 poingons anti-fraudes, (b) 2 vis de surete
(c) une aide a l'installation.
Piezas incluídas
PR6 (Fig. 1)
El PR6 está embalado con una junta tórica (pre-instalada), (a) 2 etiquetas de seguridad y (b) 4 pivotes plásticos de cierre
PR7 (Fig. 2)
El PR7 está embalado con una junta tórica (pre-instalada), (a) 2 etiquetas de seguridad, (b) 2 tornillos de fijación y (c) un instalador
Page 1
Publicidad
Tabla de contenido

Resumen de contenidos para Elster PR6 Serie
- Página 1 PR6/PR7 PR6 UNIT PR7 UNIT (Fig. 1) (Fig. 2) Package Parts PR6 (Fig. 1) The PR6 is packaged with an O-ring (pre-fitted), (a) 2 security labels, and (b) 4 plastic locking pins. If the PR6 has been ordered for use with a commercial meter, use the 2 M3 screws included with the meter. PR7 (Fig.
-
Página 2: Cleaning And Maintenance
Il est recommandé de nettoyer l'émetteur d'impulsions avec un tissu humide doux. Utiliser pour cela uniquement de l'eau ou une solution 6 base de savon doux. Attention : Ne pas essayer de désassembler l'émetteur ou de nettoyer les parties internes cela endommagerait le produit. Consulter Elster Comptage si l'émetteur est endommagé ou en panne. Limpieza y mantenimiento Se recomienda que el emisor se revise y se limpie de forma regular utilizando un paño suave húmedo. - Página 3 PR6 – V200 The PR6 is designed for Elster’s V200 range of domestic water meters and for some commercial meters which feature a plastic register. Suitable meters are marked with PR6 on the dial face or around the rim of the shroud.
- Página 4 UK - To secure, push in 2 of the plastic locking pins (the other 2 are spares). Ensure they are fully engaged and the PR6 is fully located flush to the LOCKING PINS counter dial face. DE - Zwei der beigefügten Plastik-Stifte in die vorgesehene Bohrung eindrücken (siehe Bild rechts).
- Página 5 PR6 – H4000P The PR6 is designed for Elster’s H4000P range of commercial meters which feature a plastic register. Suitable meters are marked with PR6 on the dial face or around the rim of the shroud. Die Baureihe H400P wird in Deutschland nicht eingesetzt.
- Página 6 UK - The security labels provide evidence of any attempt to tamper with the pulse unit attached to the meter. Fit them across the joint as shown. FR - Avec l'émetteur fixe sur le compteur, les poinçons mettent en évidence toute tentative de fraude.
- Página 7 The PR7 is designed for the Elster range of commercial water meters. Suitable meters are marked with PR7 on the dial face or around the rim of the shroud. Das Impulsmodul PR7 ist einsetzbar auf ELSTER Großwasserzählern der Baureihen H4000, H4200, S2000, C4000 und C3100.
-
Página 8: Technical Informations
UK - The security labels provide evidence of any attempt to tamper with the pulse unit or meter. Fit these across the joint as shown. DE - Die Sicherungsetiketten zum Schutz gegen unerlaubtes Entfernen des PR7 sind wie rechts gezeigt anzubringen. FR - Une fois l'émetteur fixé... - Página 9 k-Faktor der Impulsmodule Die meisten PR6 und PR7 haben zwei K-Faktoren, da sie zwei Ausgänge besitzen. Dies ist an der Beschriftung der Geräte abzulesen. Die erste Ziffer beschreibt den K-Faktor für den ersten Ausgang, und die zweite Ziffer steht für den K-Faktor des zweiten Ausgangs.
- Página 10 VI Cable Connections Anschluss-Belegung Le Branchment des Cables Conexionado de los Cables PR6/PR7 CH1P = Both forward and reverse direction pulses are output here. CH1D = D.Flag = Direction flag (High = Forward flow). CH2P = Forward flow minus reverse flow. This pulse stream compensates for any backflow. CH2C = Reverse flow Compensation flag.
- Página 11 CH1P = Volumenimpulse (unabhängig von der Fließrichtung), aktiv „Low“ CH1D = Richtungs-Flag, „High“ = Vorwärtsfluss = externe Spannungsversorgung 3-3,6 VDC = nicht belegt TAMP = Alarm-Flag, signalisiert die Demontage de s Impulsmoduls vom Zählwe rk oder niedrigen Batterieladezustand, aktiv ”High” = Masse Alle Ausgänge sind “Open Collector”.
-
Página 12: Part Numbers
The company’s policy is one of the continuous Elster Metering Limited E-mail: water.metering@gb.elster.com improvement and reserves the right to modify Elster Messtechnik GmbH E-Mail: elstermesstechnik.de the specifications without notice. Elster Elster metering S.A E-Mail: Elster Iberconta S.A E-mail: elster.iberconta@es.elster.com...

