Tabla de contenido
Publicidad
Idiomas disponibles
Idiomas disponibles
Enlaces rápidos
GEAppliances.com
Safety Instructions
. . . . . . . . . . . . . 2, 3
Operating Instructions
Controls . . . . . . . . . . . . . . . . . . . . . . . . . . . 4-6
Air Filter . . . . . . . . . . . . . . . . . . . . . . . . . . . . . . 6
Outdoor Coils . . . . . . . . . . . . . . . . . . . . . . . . . 6
Normal Operating Sounds . . . . . . . . . . . .13
Consumer Support
Consumer Support . . . . . . . . . . Back Cover
Warranty for Customers
in the U.S.A. . . . . . . . . . . . . . . . . . . . . . . . . . .15
E
S
labeled product
®
NERGY
TAR
As an E
S
partner, GE has
®
NERGY
TAR
determined that this product meets
the E
S
guidelines for
®
NERGY
TAR
energy efficiency.
Write the model and serial numbers here:
Model # _________________________
Serial # __________________________
Find these numbers on a label on the side of
the air conditioner.
. . . . . . 7-12
. . . . . . . . . . . .13
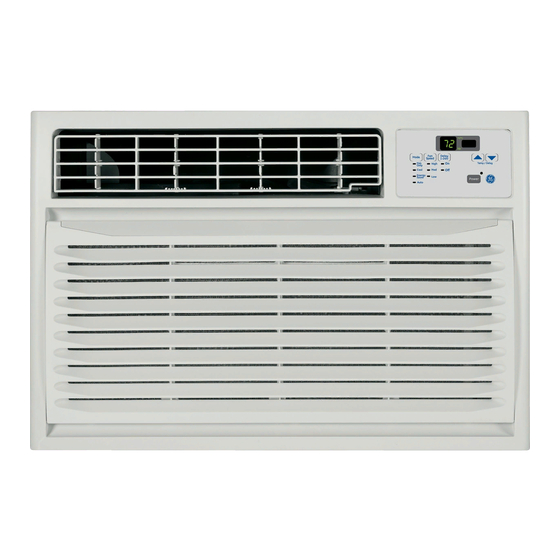
Owner's Manual and
Installation Instructions
AHH24
AHL24
49-7724 10-13 GE
Publicidad
Tabla de contenido

Manuales relacionados para GE Applianes AHH24


Resumen de contenidos para GE Applianes AHH24
-
Página 1: Tabla De Contenido
U.S.A......15 labeled product ® NERGY As an E partner, GE has ® NERGY determined that this product meets the E guidelines for ®... -
Página 2: Safety Precautions
DO NOT use equipment certified for Turn the unit OFF and unplug your air R22 refrigerant only. conditioner before cleaning. GE does not support any servicing of the air conditioner. We strongly recommend that you do not attempt to service the air conditioner yourself. -
Página 3: Use Of Extension Cords
GEAppliances.com WARNING! USE OF EXTENSION CORDS RISK OF FIRE. Could cause serious injury or death. DO NOT use an extension cord with this Window Air Conditioner. DO NOT use surge protectors or multi-outlet adaptors with this Window Air Conditioner. READ AND FOLLOW THIS SAFETY INFORMATION CAREFULLY. SAVE THESE INSTRUCTIONS... -
Página 4: About The Controls On The Air Conditioner
About the controls on the air conditioner Features and appearance will vary. Lights next to the touch pads on the air conditioner control panel indicate the selected settings. Unit power on/off Mode select Fan speed Delay 1–24hr Auto Cool Temperature set/Delay Fan Only High... -
Página 5: Cool Mode
GEAppliances.com Do Not Operate in Freezing Outdoor Conditions This cool-only air conditioner was not designed for freezing outdoor conditions. It must not be used in freezing outdoor conditions. Remote Control To ensure proper operation, aim the remote Make sure nothing is between the air conditioner control at the signal receiver on the air and the remote control that could block the conditioner. -
Página 6: Air Direction
About the controls on the air conditioner Additional important information. Air Direction Use the lever to adjust the air direction left, right, up and down. Care and cleaning of the air conditioner. Grille and Case Turn the air conditioner off and remove the plug from To clean, use water and a mild detergent. -
Página 7: Installation Instructions
Installation Air Conditioner Instructions Questions? Call 800.GE.CARES (800.432.2737) or Visit our Website at: GEAppliances.com CAUTION: BEFORE YOU BEGIN Do not, under any circumstances, cut or remove the third (ground) prong from the power cord. Read these instructions completely Do not change the plug on the power cord and carefully. -
Página 8: Parts Included
Installation Instructions PARTS INCLUDED (Appearance may vary) Top mounting Top mounting rail rail gasket Foam top window gasket Bottom seal gasket Left and Right Side Curtains Installation Bracket (2) Window Lock Bracket Remote Control Bracket Wood 2-1/2” Flat Head Bolt Self-Tapping Screws (6) Screws (8) -
Página 9: Window Requirements
Installation Instructions PREPARE THE AIR CONDITIONER WINDOW REQUIREMENTS Remove three screws from each side of the These instructions are for a standard case. The front two screws will be reinstalled later. them for other types of windows. The air conditioner can be installed without the Insert a flat head screw driver between the side curtain panels if needed to fit in a narrow front grille and the metal case along the sides. -
Página 10: Prepare Window For Installation
Installation Instructions INSTALL OUTER CASE IN WINDOW PREPARE THE CASE Place outer case in window. Lower sash until it NOTE: Attach curtains to the air conditioner rests behind front flange of top mounting rail. before placing the air conditioner in window. Bottom mounting rail must rest behind window Install the top mounting rail with four type A sill. -
Página 11: Complete Installation
Installation Instructions INSTALL OUTER CASE IN WINDOW COMPLETE INSTALLATION Thread nut onto bolt, then thread the bolt into Insert the foam seal behind the top of the lower the triangle bracket as shown in the figure window sash and against the glass of the upper below. - Página 12 Installation Instructions RETURN CHASSIS TO THE OUTER CASE RETURN CHASSIS TO THE OUTER CASE Once the case is securely attached to the window, reinstall the air conditioner. Have two people lift the air conditioner and slide it into the case. Snap the front grill back onto the air conditioner.
-
Página 13: Troubleshooting Tips
Troubleshooting Tips. Problem Possible Causes What To Do Air conditioner The air conditioner does not start is unplugged. completely into the outlet. The fuse is blown/circuit breaker is tripped. the fuse or reset the breaker. Power failure. used after the power is restored. 3 minutes) to prevent tripping of the compressor overload. - Página 14 Note...
- Página 15 This warranty is extended to the original purchaser and any succeeding owner for products purchased for home use within the USA. If the product is located in an area where service by a GE Authorized Servicer is not available, you may be responsible for a trip charge or you may be required to bring the product to an Authorized GE Service location for service.
-
Página 16: Consumer Support
1.800.561.3344. Contact Us In the U.S.A.: GEAppliances.com If you are not satisfied with the service you receive from GE, contact us on our Website with all the details including your phone number, or write to: General Manager, Customer Relations GE Appliances, Appliance Park In Canada: www.GEAppliances.ca, or write to: Director, Consumer Relations, Mabe Canada Inc. -
Página 17: Cuidado Y Limpieza
Soporte al Cliente ....14 Producto etiquetado *E ® NERGY Como socio de E ® NERGY GE ha confirmado que este producto cumple las directrices de E relativas al ® NERGY rendimiento energético. -
Página 18: Precauciones De Seguridad
Apague la unidad y desenchufe su acondicionador de aire antes de limpiar. estándares de seguridad aprobados para su uso con este refrigerante. NO use GE no está no apoya que se le proporcione equipamiento certificado sólo para ningún servicio al acondicionador de aire. refrigerante R22. - Página 19 GEAppliances.com ¡ADVERTENCIA! USO DE PROLONGADORES RIESGO DE INCENDIO. Podría ocasionar lesiones graves o la muerte. NO use un prolongador con este Acondicionador de Aire de Ventana. NO use protectores contra picos de corriente ni adaptadores para múltiples tomacorrientes con este Acondicionador de Aire de Ventana. LEA Y SIGA ESTA INFORMACIÓN DE SEGURIDAD CUIDADOSAMENTE.
-
Página 20: Acerca De Los Controles En El Acondicionador De Aire
Acerca de los controles en el acondicionador de aire Las funciones y la apariencia podrán variar. Las luces junto a las teclas táctiles del panel de control del acondicionador de aire indican las configuraciones seleccionadas. NOTA: La pantalla siempre muestra la Encendido/ temperatura del ambiente, excepto al apagado de la... -
Página 21: No Use En Las Condiciones Externas Debajo El Punto De Congelación
GEAppliances.com No use en las condiciones externas debajo Este acondicionador de aire no es diseñado para usar en temperaturas externas debajo el punto de el punto de congelación congelación. No use en las condiciones externas debajo el punto de congelación. Control remoto Para garantizar una operación apropiada, oriente Cerciórese de que no haya nada entre el... -
Página 22: Dirección Del Aire
Acerca de los controles en el acondicionador de aire. Información adicional importante. Dirección del Aire Use la palanca para ajustar la dirección del aire hacia la izquierda, derecha, arriba y abajo. Cuidado y limpieza del acondicionador de aire. Rejilla y caja Apague el acondicionador de aire y retire el enchufe Para limpiar, use agua y un detergente suave. -
Página 23: Acondicionador De Aire
Instrucciones Acondicionador de instalación de aire ¿Preguntas? Llame 800.GE.CARES (800.432.2737) o visite nuestra página en la red en: GEAppliances.com REQUISITOS ELÉCTRICOS ANTES DE INICIAR Algunos modelos requieren tomacorrientes de Lea estas instrucciones completa y 115/120 voltios de corriente alterna y 60 Hz cuidadosamente. -
Página 24: Herramientas Que Necesitará
Instrucciones de instalación HERRAMIENTAS QUE NECESITARÁ Lápiz Llave francesa Un destornillador de estrella Taladro y broca de 1/8” Nivel Una regla o cinta métrica Tijeras o cuchilla PARTES INCLUIDAS Junta de gomaespuma de la parte superior de la ventana (Apariencia puede variar) Riel de montaje superior Junta del riel de Junta de sellado... -
Página 25: Requisitos Para La Ventana
Instrucciones de instalación PREPARE EL ACONDICIONADOR DE REQUISITOS PARA LA VENTANA Estas instrucciones son para una AIRE ventana estándar de dos pliegues. Retire los tres tornillos a cada lado de la caja. Usted necesitará modificar el proceso para otros tipos de ventanas. Los dos tornillos frontales serán reinstalados Todas las partes de apoyo deben quedar totalmente luego. - Página 26 Instrucciones de instalación PREPARE LA CAJA INSTALE LA CAJA EXTERIOR EN LA VENTANA NOTA: Coloque las cortinas en el acondicionador de aire antes de colocar el acondicionador de aire Coloque la caja exterior en la ventana. Baje en la ventana. el marco hasta que se apoye detrás de la pestaña frontal del riel de montaje superior.
-
Página 27: Instalación Completa
Instrucciones de instalación INSTALE LA CAJA EXTERNA PARA INSTALACIÓN COMPLETA VENTANA Inserte el sello de gomaespuma detrás de la Enrosque la tuerca en el tornillo; luego enrosque parte superior del marco de la ventana y contra el tornillo en el soporte triangular, como se el vidrio de la ventana superior. - Página 28 Instrucciones de instalación REGRESE EL CHASIS A LA CAJA EXTERNA REGRESE EL CHASIS A LA CAJA EXTERNA Una vez que la caja se haya asegurado a la ADVERTENCIA ventana, vuelva a instalar el acondicionador de aire. Asegúrese de que dos personas levanten el acondicionador de aire y que lo deslicen en la caja.
-
Página 29: Sonidos De Operación Normales
Solucionar problemas. Problema Causas posibles Qué hacer no enciende está desconectado. enchufado totalmente en el tomacorriente. el cortacircuitos se disparó. y reemplace cualquier fusible o reajuste el interruptor. suministro eléctrico. utilizada por última vez luego de reestablecer la electricidad. 3 minutos) para evitar la desconexión por sobrecarga del compresor. Por esta razón, es posible que la unidad no comience a enfriar de forma normal hasta transcurridos 3 minutos desde que volvió... -
Página 30: Garantía De Su Acondicionador De Aire
Estados Unidos. Si el producto está situado en un área que no dispone de servicio por parte de un proveedor de servicio autorizado de GE, podría tener que hacerse cargo de los costes de envío o bien podría solicitársele que lleve el producto a una centro de servicio de GE autorizado para realizar la reparación. -
Página 31: Página Web De Ge Appliances
Póngase en contacto con nosotros GEAppliances.com Si no está satisfecho con el servicio que recibe de GE, póngase en contacto con nosotros en nuestra página Web indicando todos los detalles así como su número de teléfono o escríbanos a: General Manager, Customer Relations... - Página 32 1.800.561.3344. Contact Us In the U.S.A.: GEAppliances.com If you are not satisfied with the service you receive from GE, contact us on our Website with all the details including your phone number, or write to: General Manager, Customer Relations...