Tabla de contenido
Publicidad
Idiomas disponibles
Idiomas disponibles
Enlaces rápidos
GB
General Safety Instructions
if necessary pass the instruction manual on to a third party.
WARNING: When using electrical appliance, basic safety precautions should always be followed to
reduce the risk of fire, electrical shock and personal injury.
SAFETY PRECAUTIONS
1) General
1.
Check if the electrical specifications of this appliance are compatible with your installation.
2.
Unauthorized use and technical modifications to the appliance can lead to danger to life and health.
3.
This appliance can be used by children aged from 8 years and above and persons with reduced physical,
sensory or mental capabilities or lack of experience and knowledge if they have been given supervision or
instruction concerning use of the appliance in a safe way and understand the hazards involved.
4.
Children shall not play with the appliance.
5.
Cleaning and user maintenance shall not be made by children without supervision.
6.
This appliance is for indoor use only.
7.
Means for disconnection must be incorporated in the fixed wiring in accordance with the wiring rules.
8.
Never install the appliance in a moist or wet room.
9.
Be careful when working near the rotating blades.
. 0 1
e N
e v
a r
a t t
h c
h t
11. Switch off the power before connecting or repairing the fan.
12. The electrical wiring must be in accordance with the local regulations.
13. The fan must be properly grounded to avoid the risk of electric shocks.
2) Electrical safety
14. The appliance should be installed by authorized
electrician only acc. to national wiring rules.
Specific Safety Rules
15. The fan is to be installed so that the blades
are more than 2,3 m above the floor and
distance to wall Min 0.5m.
16. The minimum carrying capacity of the outlet box from which the fan is hung must be 40Kg.
17. Install the luminaire into the fan, to make a complete product.
18. The mains supply to this appliance must be via all pole disconnection switch (Live and Neutral wires),
the switch must have a contact separation of at least 3 mm.
19. To reduce the risk of fire or injury, do not use this product in conjunction with any variable (Rheostat)
wall control or dimmer.
20. The power supply must be disconnected before installation of the fan, or during the maintenance and cleaning,
in case of doubt, contact a qualified electrician.
21. When changing the bulb, switch off and disconnected from the power supply and allow the old bulb to cool down
before handling.
22. Regarding the instructions for the fan that intended to be fixed by screws on the method of fixing and how to install
the appliance, thanks to refer to the section "INSTALLATION".
23. Regarding the method of the cable connection, thanks to refer to the section "INSTALLATION".
24. Regarding the instructions for the blub replacement and the type reference of the luminaire, thanks to refer to the
section "INSTALLATION".
NO:709C
INSTALLATION INSTRUCTION FOR CEILING FAN
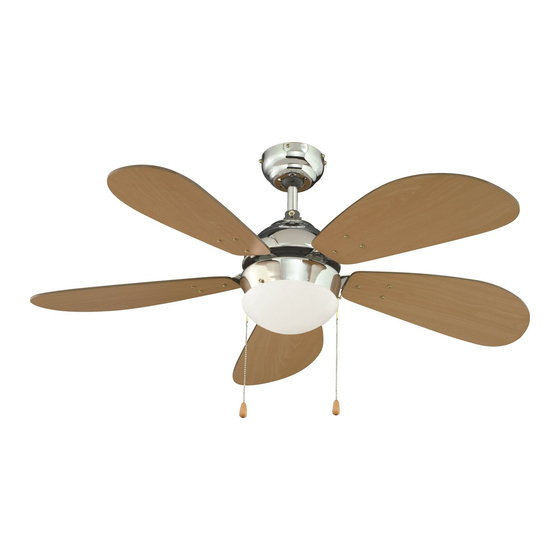
MODEL:MB42-5-1L
PRODUCT:MILLY
f e
n a
o t
a
p
w o
r e
o p
t n i
b ,
t u
o t
h t
c e
l i e
g n i
s t i
. f l e
康福浪漫MB42-5-1L说明书
尺寸:210×290mm
纸张:双胶纸:100g
警告语和安装步骤的大写字母字体
高度要有3mm或以上
500 mm
Wall
2.3 metre
Floor
Page1
Publicidad
Tabla de contenido

Resumen de contenidos para CONFORAMA MILLY
- Página 1 INSTALLATION INSTRUCTION FOR CEILING FAN MODEL:MB42-5-1L PRODUCT:MILLY General Safety Instructions if necessary pass the instruction manual on to a third party. WARNING: When using electrical appliance, basic safety precautions should always be followed to reduce the risk of fire, electrical shock and personal injury.
- Página 2 Product exploded diagram 1. Mounting plate 2. Ball Joint 3. Down Rod 4. Canopy Securing Screw 5. Canopy Securing Spring Washer 6. Canopy Securing Fixing Star Washer 7. Canopy 8. Cross Pin 9. Upper Housing 10. Three Pin Wire Connector 11.
-
Página 3: Cable Connection
1. Mounting plate (Using explosion screws(not provided) for concrete). Cable connection 7. Canopy 16.Terminal Block Hang the fan onto the bracket hook by using one of the holes at the top of the upper canopy. Page3... -
Página 4: Bulb Replacement
25. Blade Fixing Spring Washer 24. Blade Fixing Nut 26. Blade Fixing Flat Washer 27. Blade Holder 28. Blade 29. Blade Fixing Screws Install the fan blade sets onto the motor Assemble blade holder onto the blades by tightening the screws and spring by tightening the screws, flat washer, washers. -
Página 5: Informazioni Generali Di Sicurezza
ISTRUZIONI DI INSTALLAZIONE PER VENTILATORE DA SOFFITTO MODELLO:MB42-5-1L PRODOTTO:MILLY Informazioni Generali di Sicurezza Leggete questo manuale di istruzioni prima di utilizzare l'apparecchio e conservatelo per riferimento futuro e se necessario, passare il manuale di istruzioni a un terzo. ATTENZIONE: Quando si utilizzano apparecchi elettrici, le precauzioni di sicurezza di base devono sempre essere seguite per ridurre il rischio di incendi, scosse elettriche e lesioni personali. -
Página 6: Esploso Del Prodotto
Esploso del prodotto 1. Piastra di montaggio 2. Giunto sferico 3. Asta inferiore 4. Vite di fissaggio copertura 5. Rondella di fissaggio copertura 6. Rondella a stella di fissaggio copertura 7. Copertura 8. Perno trasversale 9. Involucro superiore 10. Blocco di fissaggio 11. - Página 7 Illustrazioni di montaggio 1. Piastra di montaggio Posizionare e contrassegnare il centro della staf Passare i cavi attraverso il foro ed assicurare la sta Aprire la confezione ed estrarre il ventilatore. al soffitto con appositi tasselli in base alla tipologia di fitto (tasselli ad espansione non forniti).
- Página 8 25. Rondella a molla 24. Dado di di fissaggio pala fissaggio pala 26. Rondella piatta di fissaggio pala 27. Braccio 28. Pala porta pala Fissare i gruppi pale al motore serrando 29. Vite di fissaggio pala Assemblare le pale ai supporti serrando le le rondelle, le rondelle a molla e le viti di rondelle, le rondelle a molla e le viti di fissaggio apposite.
-
Página 9: Instrucciones Generales De Seguridad
TECHO MODELO MB42-5-1L PRODUCTO: MILLY Instrucciones generales de seguridad Lea atentamente este manual de instrucciones antes de utilizar el aparato y guárdelo para referencia en el futuro. En caso de transferencia del aparato, entregue asimismo este manual de instrucciones a la persona correspondiente. -
Página 10: Diagrama De Desglose Del Producto
Diagrama de desglose del producto 1. Placa de montaje 2. Rótula 3. Vástago de extensión 4. Tornillo de fijación del dosel 5. Arandela de resorte de fijación del dosel 6. Arandela de estrella de fijación del dosel 7. Dosel 8. Pasador de cruz 9. -
Página 11: Placa De Montaje
ILUSTRACIÓN DE INSTALACIÓN DEL VENTILADOR 1. Placa de montaje Localice y marque el centro de la vigueta, pase los cables de alimentación a través del orificio de la placa de montaje, fije la placa de montaje a la vigueta del techo utilizando las arandelas planas, las arandelas de resorte y los tornillos para madera (empleando tornillos Abra la caja de cartón y extraiga el ventilador. -
Página 12: Instalación De La Bombilla
25. Arandela de resorte de fijación de las aspas 24. Tuerca de fijación de las aspas 26. Arandela plana de fijación de las aspas 27. Soporte de las aspas 28. Aspas 29. Tornillos de fijación de las aspas Monte el soporte de las aspas sobre las aspas Instale los conjuntos de las aspas del ventilador apretando los tornillos, la arandela plana, las sobre el motor apretando los tornillos y las... -
Página 13: Instruções Gerais De Segurança
INSTRUÇÕES DE INSTALAÇÃO PARA VENTOINHA DE TECTO MODELO: MB42-5-1L PRODUTO: MILLY Instruções gerais de segurança Leia por completo este manual de instruções antes de usar o aparelho, e guarde-o para futuras referências e, se necessário, entregue o manual de instruções a terceiros. - Página 15 IMAGEM DA INSTALAÇÃO DA VENTOINHA 1. Placa de montagem Encontre e assinale o centro da viga, passe os fios da alimentação através do orifício na placa de montagem, fixe a placa de montagem na viga do tecto usando as anilhas planas, anilhas de mola e parafusos de madeira (Usar parafusos de explosão (não Abra a cai x a e reti r e a ventoi n ha.
- Página 16 25. Anilha de mola de fixação da lâmina 24. TPorca de fixação da lâmina 26. Anilha plana de fixação da lâmina 27. Suporte da lâmina 28. Lâmina 29. Parafusos de fixação da lâmina Monte o suporte da lâmina nas lâminas Instale as lâminas da ventoinha no motor, apertando os parafusos, anilha plana, anilhas apertando os parafusos e anilhas de mola.
-
Página 17: Consignes De Sécurité Générales
INSTRUCTIONS D’INSTALLATION DU VENTILATEUR DE PLAFOND MODÈLE : MB42-5-1L PRODUIT : MILLY Consignes de sécurité générales Lisez la notice d’utilisation attentivement et intégralement avant d’utiliser l’appareil et conservez-la pour consultation ultérieure. Si nécessaire, transmettez la notice d’utilisation à un tiers. - Página 18 Product exploded diagram Plaque de montage Coupelle Tige Vis de fixation de la base Rondelle élastique de fixation de la base Rondelle éventail de fixation de la base Base Broche 9. Partie supérieure du boîtier Connecteurs mâle/femelle Plafonnier Interrupteur de la lampe Vis moletée Douille Abat-jour en verre...
-
Página 19: Installation Du Ventilateur
INSTALLATION DU VENTILATEUR 1. Plaque de montage Identifiez et marquez le centre d’une solive. Faites passer les fils d’alimentation électrique dans le trou de la plaque de montage, fixez la plaque de montage sur la solive de plafond avec les rondelles plates, les rondelles élastiques et les vis à... -
Página 20: Remplacement De I'ampoule
25. Rondelle élastique 24. Écrou de fixation de fixation de pale de pale 26. Rondelle plate de fixation de pale 27. Support de pale 28. Pale 29. Vis de fixation de pale Assemblez les pales sur le boîtier du Assemblez les pales sur leurs supports moteur avec les vis et les rondelles avec les vis, les rondelles plates, les élastiques.