Tabla de contenido
Publicidad
Idiomas disponibles
Idiomas disponibles
Enlaces rápidos
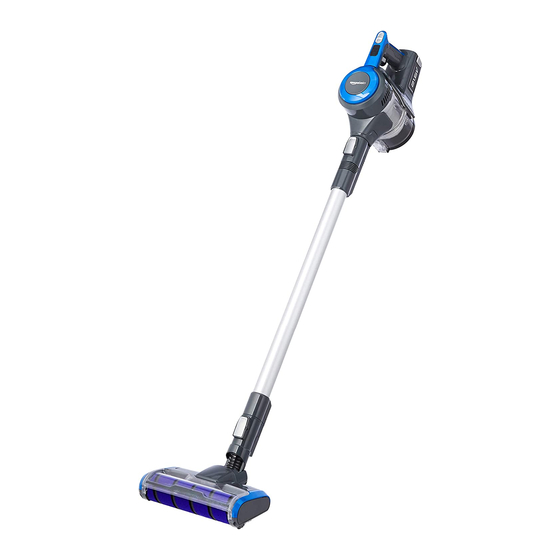
2in1 Cordless Rechargeable Vacuum Cleaner P5, Handheld
Aspirateur Manuel Sans Fil Rechargeable 2 en 1 P5
2-in-1-Akku-Staubsauger P5, Handgerät
Aspirapolvere Ricaricabile Senza Fili 2 in 1 P5, Portatile
Aspirador de Mano P5 Recargable Inalámbrico 2 en 1
2-In-1 Oplaadbare Accustofzuiger P5, Handbediend
B07SG47LWK, B07SG48G4S,
B07SG47LWR, B07SG48DKX
Publicidad
Tabla de contenido
Solución de problemas

Resumen de contenidos para Amazon Basics P5
- Página 1 2in1 Cordless Rechargeable Vacuum Cleaner P5, Handheld Aspirateur Manuel Sans Fil Rechargeable 2 en 1 P5 2-in-1-Akku-Staubsauger P5, Handgerät Aspirapolvere Ricaricabile Senza Fili 2 in 1 P5, Portatile Aspirador de Mano P5 Recargable Inalámbrico 2 en 1 2-In-1 Oplaadbare Accustofzuiger P5, Handbediend...
- Página 2 English ............ 3 Français ..........21 Deutsch ..........39 Italiano ..........57 Español ..........75 Nederlands ..........93...
- Página 3 Welcome Guide • English Contents: Before getting started, ensure the package contains the following components: For B07SG47LWK and B07SG48G4S only...
-
Página 4: Product Overview
Product overview featur Air outlet cover Battery (H) Air outlet filter Battery status indicator Base nozzle Hard floor mode indicator Power supply contacts MAX power indicator Dust cup lever Carpet mode indicator Dust cup Carpet/hard floor mode button Bottom lid MAX button Power trigger Fabric filter Charging port... - Página 5 Main unit Unlock button Extension pipe Working light [only floor nozzle (C)] Motorized floor nozzle Brush roll 2-in-1 upholstery tool Crevice tool Motorized plush nozzle...
-
Página 6: Important Safeguards
Main unit 2-in-1 upholstery tool Crevice tool Wall mount Charger IMPORTANT SAFEGUARDS Read these instructions carefully and retain them for future use. If this product is passed to a third party, then these instructions must be included. When using electrical appliances, basic safety precautions should always be followed to reduce the risk of fire, electric shock, and/or injury to persons including the following: •... - Página 7 • The appliance is only to be used with the power supply unit provided with the appliance. • The battery must be removed from the product before cleaning or maintaining the appliance. • The appliance must be disconnected from the supply mains when removing the battery.
-
Página 8: Charger Warnings
Charger Warnings WARNING Risk of explosion! Do not recharge non-rechargeable batteries. • Use provided charger (model MC2508A-B or MC2508A-V) only with this product. Battery Warnings • Keep batteries out of the reach of children. • Do not dispose of batteries in fire. •... -
Página 9: Before First Use
• This product is intended for household use only. It is not intended for commercial use. • This product is intended to be used in dry indoor areas only. • No liability will be accepted for damages resulting from improper use or non- compliance with these instructions. - Página 10 Step 2: Step 3:...
-
Página 11: Battery And Charging
Battery and charging Charging • Slide the battery (H) into the battery slot until it locks. • Connect the charger (I) to the charging port (9). • Connect the charger (I) to the socket outlet. • The battery status indicator (12) shows the charging status: Battery status indicator Status Charging level... - Página 12 Accessories For quick and easy cleaning, NOTICE the product can also be used without any accessories. Accessory Function Extension pipe (B) • floor cleaning • hard-to-reach areas Assemble the extension pipe between base nozzle (3) and the desired nozzle (C), (D), (E) or (G).
- Página 13 Accessory Function 2-in-1 upholstery tool (D) Brush out • blinds • vents • delicate surfaces Press the button in the middle in the nozzle and extend the brush. 2-in-1 upholstery tool (D) Brush in • blinds • vents • upholstered surfaces Press the button in the middle in the nozzle and hide the brush.
- Página 14 Attaching accessories NOTICE All accessories can be connected directly to the base nozzle (3) of the main unit (A) or to the extension pipe (B) Detaching accessories Press the unlock button (21) and remove the accessory. Operation Switching on/off Press the power trigger (8) to switch on. Press again to switch off. Checking battery level When the product is on, the battery status indicator (12) shows the battery level: Battery status indicator...
-
Página 15: Cleaning And Maintenance
Emptying the dust cup There are two ways to empty the dust cup (6). • Hold the product over a bin. • Press the dust cup lever (5) to release the bottom lid (7) and empty the debris. • Hold the dust cup (6) and twist until the arrow lines up with the ‘unlock’... - Página 16 Dust cup filter maintenance • Twist the dust cup (6) and remove. • Twist the filter cover (20) and remove. • Remove the fabric filter (18). • Separate foam filter (19) from fabric filter (18) by pulling them apart. • Rinse and dry thoroughly. • Once completely dry: Reassemble in reverse order.
- Página 17 Motorized floor nozzle maintenance 1. Place the motorized floor nozzle (C) upside down. Use scissors or knife to cut strings and threads. Retainer clip 2. If debris cannot be removed easily, remove retainer clip to remove the brush roll (23). 3. Remove the brush roll (23) and clean debris. 4.
-
Página 18: Troubleshooting
3. If necessary, rinse the brush roll (23) under the tap. Roll it in a towel to absorb water. Dry thoroughly before reassembling. 4. To reassemble: – Align one end of the brush roll (23) with the floor nozzle gear. – Press the other end into the slot. -
Página 19: Battery Disposal
Disposal The Waste Electrical and Electronic Equipment (WEEE) Directive aims to minimise the impact of electrical and electronic goods on the environment, by increasing re-use and recycling and by reducing the amount of WEEE going to landfill. The symbol on this product or its packaging signifies that this product must be disposed separately from ordinary household wastes at its end of life. - Página 20 Battery (model BP21625A) Battery type: 21.6 V, Li-Ion, 2500 mAh Operation time (approx): Normal power: 30 minutes Max. power: 16 minutes Charging time: 3.5 - 4.5 hours Battery (model BP21620D) Battery type: 21.6 V, Li-Ion, 2000 mAh Operation time (approx): Normal power: 25 minutes Max.
- Página 21 Guide de Démarrage • Français Contenu : Avant de commencer, veuillez vous assurer que l’emballage contient les composants suivants : Pour B07SG47LWK et B07SG48G4S uniquement...
-
Página 22: Vue D'ensemble Du Produit
Vue d’ensemble du produit featur Capot d’air sortant Batterie (H) Filtre d’air sortant Voyant d’état de la batterie Buse principale Voyant mode sol dur Bornes d’alimentation Voyant puissance MAX Levier du bac à poussière Voyant mode moquette Bac à poussière Bouton mode moquette/sol dur Capot inférieur Bouton MAX Gâchette de mise sous tension... - Página 23 Unité principale Bouton de déverrouillage Éclairage de zone de travail [suceur Tube de rallonge pour sol (C) uniquement] Suceur motorisé pour sol Rouleau à brosse Accessoire 2 en 1 pour revêtement textile Suceur plat Suceur motorisé pour peluches...
-
Página 24: Mesures De Sécurité Importantes
Unité principale Accessoire 2 en 1 pour revêtement textile Suceur plat Support mural Chargeur MESURES DE SÉCURITÉ IMPORTANTES Veuillez lire attentivement les présentes instructions et les conserver afin de pouvoir vous y référer ultérieurement. En cas de cession de ce produit à un tiers, le présent manuel d’utilisation doit également lui être remis. - Página 25 • L’appareil ne doit être utilisé qu'avec le module d’alimentation électrique fourni avec l’appareil. • La batterie doit être retirée du produit avant de nettoyer l’appareil ou d’effectuer une opération de maintenance sur ce dernier. • L'appareil doit être débranché du réseau secteur lors du retrait de la batterie.
-
Página 26: Avertissements Relatifs Au Chargeur
Avertissements Relatifs au Chargeur AVERTISSEMENT Risque d’explosion ! Ne rechargez pas de piles non rechargeables. • N'utilisez le chargeur fourni (modèle MC2508A-B ou MC2508A-V) qu'avec ce produit. Avertissements Relatifs aux Batteries • Maintenez les batteries hors de la portée des enfants. •... -
Página 27: Avant La Première Utilisation
• Ce produit est exclusivement destiné à un usage domestique. Il n’est pas conçu pour un usage commercial. • Ce produit est destiné à être utilisé exclusivement dans des environnements secs à l’intérieur. • Toute responsabilité sera déclinée en cas de dommages résultant d’une utilisation incorrecte de l’appareil ou du non-respect de ces instructions. - Página 28 Étape 2 : Étape 3 :...
-
Página 29: Batterie Et Chargement
Batterie et chargement En cours de chargement • Glissez la batterie (H) dans son logement jusqu'à ce qu'elle s'enclenche. • Connectez le chargeur (I) au port de chargement (9). • Branchez le chargeur (I) à la prise secteur. • Le voyant d'état de la batterie (12) indique l'avancement de la charge : Voyant d’état de la Avancement de la État... - Página 30 Accessoires Pour un nettoyage rapide REMARQUE et facile, le produit peut également être utilisé sans aucun accessoire. Accessoire Fonction Pour Tube de rallonge (B) • nettoyage du sol • espaces difficiles à atteindre Montez le tube de rallonge entre la buse principale (3) et le suceur désiré (C), (D), (E) ou (G).
- Página 31 Accessoire Fonction Accessoire 2 en 1 pour Pour revêtement textile (D) • persiennes Brosse sortie • ouïes de ventilation • surfaces fragiles Appuyez sur le bouton situé au milieu du suceur et déployez la brosse. Accessoire 2 en 1 pour Pour revêtement textile (D) • persiennes Brosse rentrée •...
- Página 32 Fixation des accessoires REMARQUE Tous les accessoires peuvent être raccordés directement à la buse principale (3) de l'unité principale (A) ou au tube de rallonge (B). Détacher les accessoires Appuyez sur le bouton de déverrouillage (21) puis retirez l'accessoire. Utilisation Mise sous/hors tension Appuyez sur la gâchette de mise sous tension (8) pour allumer l'appareil. Appuyez à nouveau pour éteindre.
-
Página 33: Nettoyage Et Entretien
Vider le bac à poussière Il existe deux façons de vider le bac à poussière (6). A : • Tenez le produit au-dessus d'une poubelle. • Appuyez sur le levier du bac à poussière (5) pour libérer le capot inférieur (7) et vider les déchets. B : •... - Página 34 Entretien du filtre du bac à poussière • Tournez le bac à poussière (6) et retirez-le. • Tournez le couvre-filtre (20) et retirez-le. • Retirez le filtre en tissu (18). • Désolidarisez le filtre en mousse (19) et le filtre en tissu (18) en les séparant. •...
- Página 35 Entretien du Suceur motorisé pour sol 1. Retournez le suceur motorisé pour sol (C). Utilisez des ciseaux ou un couteau pour couper les ficelles et les fils. Pince de maintien 2. Si les saletés ne peuvent pas être enlevées facilement, enlevez la pince de maintien pour retirer le rouleau à...
-
Página 36: Dépannage
3. Si nécessaire, passez le rouleau à brosse (23) sous le robinet. Enroulez-le dans une serviette pour absorber l'eau. Séchez soigneusement avant le remontage. 4. Remontage : – Alignez une extrémité du rouleau à brosse (23) avec le pignon du suceur pour sol. –... -
Página 37: Mise Au Rebut Des Batteries
Démontage Pour Entretien 1. La brosse, le tuyau, le tube extensible, le bac à poussière, la grille d’aspiration, le filtre et tous les accessoires peuvent être démontés ou extraits sans aucun outil. 2. Le capot frontal, l’enrouleur de câble, le sélecteur, la commande de puissance d’aspiration et l’interrupteur marche/arrêt peuvent être démontés à... - Página 38 Chargeur (modèle MC2508A-V pour l’Europe ou MC2508A-B pour le Royaume-Uni) À l’entrée du chargeur : de 100 à 240 V~, 50/60 Hz En sortie du chargeur : de 25 à 29 V , 800 mA Classe de protection : Classe II/ Longueur du câble : env. 1,8 mètre Batterie (modèle BP21625A) Type de batterie : 21,6 V, Li-ion, 2 500 mAh Durée de fonctionnement Puissance standard :...
- Página 39 Bedienungsanleitung • Deutsch Inhalt: Bevor Sie beginnen, prüfen Sie, ob die Verpackung die folgenden Teile enthält: Nur für Modell B07SG47LWK und B07SG48G4S...
- Página 40 Produktübersicht featur Luftauslass-Abdeckung Akku (H) Luftauslass-Filter Akku-Statusanzeige Hauptdüse Anzeige: Hartboden-Modus Stromversorgungs-Kontakte Anzeige: MAX Leistung Staubbehälter-Hebel Anzeige: Teppich-Modus Staubbehälter Taste für Teppich-/Hartboden-Modus Unterer Deckel MAX-Taste Betriebs-Auslöser Gewebefilter Ladeanschluss Schaumstofffilter Akku-Entriegelungstaste Filter-Abdeckung...
- Página 41 Hauptgerät Entriegelungstaste Verlängerungsrohr Arbeitslicht [nur für Bodendüse (C)] Motorisierte Bodendüse Bürstenwalze 2-in-1-Polsterwerkzeug Fugendüse Motorisierte Polsterdüse...
-
Página 42: Wichtige Sicherheitshinweise
Hauptgerät 2-in-1-Polsterwerkzeug Fugendüse Wandhalterung Ladegerät WICHTIGE SICHERHEITSHINWEISE Lesen Sie diese Anweisungen sorgfältig durch und bewahren Sie sie zur künftigen Verwendung auf. Wenn dieses Produkt an Dritte weitergegeben wird, muss diese Gebrauchsanweisung beigefügt werden. Bei der Verwendung von Elektrogeräten sollten immer grundlegende Sicherheitsmaßnahmen befolgt werden, um die Gefahr von Feuer, Stromschlag und/oder Verletzungen zu reduzieren, einschließlich der folgenden:... - Página 43 • Das Gerät darf nur mit der im Lieferumfang enthaltenen Netzgerät betrieben werden. • Der Akku muss vor der Reinigung oder Wartung des Gerätes aus dem Produkt entfernt werden. • Das Gerät muss vor dem Entfernen des Akkus vom Netzanschluss getrennt werden. •...
- Página 44 Ladegerät-Warnhinweise WARNUNG Explosionsgefahr! Nicht-wiederaufladbare Akkus dürfen nicht aufgeladen werden. • Verwenden Sie das im Lieferumfang enthaltene Ladegerät (Modell MC2508A-B oder MC2508A-V) nur für dieses Produkt. Akkuhinweise • Bewahren Sie Akkus außerhalb der Reichweite von Kindern auf. • Werfen Sie Akkus nicht ins Feuer. •...
-
Página 45: Vor Der Ersten Verwendung
• Dieses Produkt ist nur für den Hausgebrauch vorgesehen. Es ist nicht zur gewerblichen Nutzung vorgesehen. • Das Produkt ist ausschließlich zur Verwendung in trockenen Innenbereichen vorgesehen. • Es wird keine Haftung für Schäden aufgrund unsachgemäßer Verwendung oder Missachtung dieser Bedienungsanleitung übernommen. Vor der ersten Verwendung •... - Página 46 Schritt 2: Schritt 3:...
- Página 47 Akku und Aufladen Aufladen • Schieben Sie den Akku (H) in das Akkufach, bis er einrastet. • Schließen Sie das Ladegerät (I) an den Ladeanschluss (9) an. • Schließen Sie das Ladegerät (I) an die Steckdose an. • Die Akku-Statusanzeige (12) zeigt den Ladestatus an: Akku-Statusanzeige Status Ladestufe...
- Página 48 Zubehör Für eine schnelle und HINWEIS einfache Reinigung kann das Produkt auch ohne Zubehör verwendet werden. Zubehörteil Funktion Für Verlängerungsrohr (B) • Fußbodenreinigung • schwer erreichbare Stellen Setzen Sie das Verlängerungsrohr zwischen der Hauptdüse (3) und der gewünschten Düse (C), (D), (E) oder (G) ein. Motorisierte Bodendüse (C) Für •...
- Página 49 Zubehörteil Funktion 2-in-1-Polsterwerkzeug (D) Für Bürste ausgezogen • Jalousien • Lüftungsschlitze • empfindliche Oberflächen Drücken Sie die Taste in der Mitte der Düse, um die Bürste herauszuziehen. 2-in-1-Polsterwerkzeug (D) Für Bürste eingezogen • Jalousien • Lüftungsschlitze • gepolsterte Oberflächen Drücken Sie die Taste in der Mitte der Düse, um die Bürste zu verbergen.
- Página 50 Zubehör aufsetzen HINWEIS Alle Zubehörteile können direkt an die Hauptdüse (3) am Hauptgerät (A) oder an das Verlängerungsrohr (B) angeschlossen werden Zubehör abnehmen Drücken Sie die Entriegelungstaste (21) und entfernen Sie das Zubehör. Verwendung Ein-/Ausschalten Drücken Sie den Betriebs-Auslöser (8), um das Gerät einzuschalten. Drücken Sie ihn erneut, um das Gerät auszuschalten.
-
Página 51: Reinigung Und Pflege
Staubbehälter entleeren Es gibt zwei Möglichkeiten, den Staubbehälter (6) zu leeren. • Halten Sie das Produkt über einen Behälter. • Drücken Sie den Staubbehälter-Hebel (5), um den unteren Deckel (7) zu lösen und die Rückstände zu entfernen. • Halten Sie den Staubbehälter (6) fest und drehen Sie ihn, bis der Pfeil mit der Markierung „Entriegeln“... - Página 52 Wartung des Staubbehälters • Drehen Sie den Staubbehälter (6) und entfernen Sie ihn. • Drehen Sie die Filter-Abdeckung (20) und entfernen Sie sie. • Entfernen Sie den Gewebefilter (18). • Trennen Sie den Schaumstofffilter (19) vom Gewebefilter (18), indem Sie diese auseinanderziehen. • Gründlich abspülen und trocknen. •...
- Página 53 Wartung der motorisierten Bodendüse 1. Drehen Sie die motorisierte Bodendüse (C) um. Verwenden Sie eine Schere oder ein Messer, um Schnüre und Fäden zu durchtrennen. Halteklammer 2. Wenn sich die Rückstände nicht einfach entfernen lassen, nehmen Sie die Halteklammer ab, um die Bürstenwalze (23) zu entfernen. 3.
- Página 54 3. Spülen Sie die Bürstenwalze (23) bei Bedarf unter fließendem Wasser ab. Rollen Sie die Walze in ein Handtuch, um Wasser aufzunehmen. Vor dem Zusammenbau gründlich trocknen lassen. 4. Zusammenbauen: – Richten Sie ein Ende der Bürstenwalze (23) am Bodendüsen-Rad aus. – Drücken Sie das andere Ende in den Schlitz.
-
Página 55: Entsorgung Des Akkus
Demontage zur Wartung 1. Schlauch, Verlängerungsrohr, Staubbeutel, Abluftgitter, Filter und sämtliches Zubehör können ohne Werkzeuge zerlegt oder abgenommen werden. 2. Die vordere Abdeckung, der Schalter für Kabelaufwicklung, die Saugleistungssteuerung und der Ein-/Ausschalter können mit einem Schraubendreher zerlegt werden. 3. Auf die Platine, die Anschlussleitung und den Motorraum können Sie zugreifen, indem Sie 6 Schrauben am Hauptgerät entfernen (2 Schrauben an der Unterseite, 2 Schrauben unter der vorderen Abdeckung und 2 Schrauben an der Rückseite). - Página 56 Ladegerät(Modell MC2508A-V für Europa oder MC2508A-B für Großbritannien) Ladegerät-Eingang: 100-240 V~, 50/60 Hz Ladegerät-Ausgang: 25-29 V , 800 mA Schutzklasse: Klasse II / Kabellänge: ca 1,8 Meter Akku (Modell BP21625A) Akkutyp: 21,6 V, Li-Ion, 2500 mAh Betriebszeit (ca): Normalleistung: 30 Minuten Maximale Leistung: 16 Minuten Ladezeit: 3,5 – 4,5 Stunden Akku (Modell BP21620D) Akkutyp: 21,6 V, Li-Ion, 2000 mAh Betriebszeit (ca):...
- Página 57 Guida di Benvenuto • Italiano Contenuto: Prima di iniziare, assicurarsi che la confezione contenga i seguenti componenti: Solo per B07SG47LWK e B07SG48G4S...
-
Página 58: Panoramica Del Prodotto
Panoramica Del Prodotto featur Coperchio dell'uscita aria Batteria (H) Filtro dell'uscita aria Indicatore stato batteria Ugello base Indicatore modalità pavimento duro Contatti di alimentazione Indicatore di potenza MAX Leva del contenitore della polvere Indicatore modalità tappeto Pulsante modalità tappeto/ Contenitore della polvere pavimento duro Coperchio inferiore Pulsante MAX... - Página 59 Unità principale Pulsante di sbocco Luce da lavoro [solo ugello per Tubo di prolunga pavimenti (C)] Ugello motorizzato per pavimenti Rullo spazzola Attrezzo per tappezzeria 2 in 1 Attrezzo per fessure Ugello felpato motorizzato...
- Página 60 Unità principale Attrezzo per tappezzeria 2 in 1 Attrezzo per fessure Supporto a parete Caricabatterie AVVISI DI SICUREZZA IMPORTANTI Leggere attentamente le istruzioni e conservarle per utilizzo futuro. In caso di cessione del prodotto a terzi, accludere parimenti questo manuale utente. Quando si utilizzano apparecchi elettrici, è...
- Página 61 • L'apparecchio deve essere utilizzato solo con l'unità di alimentazione in dotazione. • Prima della pulizia o della manutenzione dell'apparecchio, la batteria deve essere rimossa dal prodotto. • Quando si rimuove la batteria, l'apparecchio deve essere scollegato dalla rete di alimentazione. •...
-
Página 62: Avvertenze Sulla Batteria
Avvertenze sul caricabatterie AVVERTENZA Rischio di esplosione! Non ricaricare batterie non ricaricabili. • Utilizzare il caricabatterie in dotazione (modello MC2508A-B o MC2508A-V) solo con questo prodotto. Avvertenze sulla batteria • Tenere le batterie fuori dalla portata dei bambini. • Non smaltire le batterie nel fuoco. •... -
Página 63: Prima Del Primo Utilizzo
• Questo prodotto è destinato unicamente all'uso domestico. Non è destinato all’uso commerciale. • Questo prodotto è destinato esclusivamente all'uso in ambienti interni asciutti. • La Società non si assume alcuna responsabilità per danni causati da un uso improprio del prodotto o dal mancato rispetto delle presenti istruzioni. Prima del primo utilizzo •... - Página 64 Passo 2: Passo 3:...
-
Página 65: Batteria E Ricarica
Batteria e ricarica Ricarica • Far scorrere la batteria (H) nella fessura della batteria finché non si blocca. • Collegare il caricabatterie (I) alla porta di ricarica (9). • Collegare il caricabatterie (I) alla presa di corrente. • L'indicatore di stato della batteria (12) indica lo stato di carica: Indicatore stato batteria Stato Livello di carica... - Página 66 Accessori Per una pulizia facile e AVVISO veloce, il prodotto può essere utilizzato anche senza accessori. Accessorio Funzione Tubo di prolunga (B) • pulizia del pavimento • zone difficili da raggiungere Montare il tubo di prolunga tra l'ugello base (3) e l'ugello desiderato (C), (D), (E) o (G). Ugello motorizzato per pavimenti (C) Per •...
- Página 67 Accessorio Funzione Attrezzo per tappezzeria 2 in 1 (D) Spazzola fuori • tapparelle • prese d'aria • superfici delicate Premere il pulsante al centro dell'ugello ed estendere la spazzola. Attrezzo per tappezzeria 2 in 1 (D) Spazzola dentro • tapparelle • prese d'aria •...
- Página 68 Attacco accessori AVVISO Tutti gli accessori possono essere attaccati direttamente all'ugello base (3) dell'unità principale (A) o al tubo di prolunga (B) Distacco accessori Premere il pulsante di sblocco (21) e rimuovere l'accessorio. Funzionamento Accensione/Spegnimento Premere il grilletto di accensione (8) per accendere. Premere nuovamente per spegnere. Controllo del livello di batteria Quando il prodotto è...
-
Página 69: Pulizia E Manutenzione
Svuotamento del contenitore della polvere Ci sono due modi per svuotare il contenitore della polvere (6). • Tenere il prodotto sopra un cestino. • Premere la leva del contenitore della polvere (5) per sbloccare il coperchio inferiore (7) e svuotare i detriti. •... - Página 70 Manutenzione del filtro del contenitore della polvere • Ruotare il contenitore della polvere (6) e rimuoverlo. • Ruotare il coperchio del filtro (20) e rimuoverlo. • Togliere il filtro in tessuto (18). • Separare il filtro in schiuma (19) dal filtro in tessuto (18) tirandoli. •...
- Página 71 Manutenzione dell'ugello motorizzato per pavimenti 1. Posizionare l'ugello motorizzato per pavimenti (C) a testa in giù. Usare delle forbici o un coltello per tagliare corde e fili. Fermo 2. Se i detriti non possono essere rimossi facilmente, rimuovere il fermo per togliere il rullo spazzola (23).
-
Página 72: Risoluzione Dei Problemi
3. Se necessario, sciacquare il rullo spazzola (23) sotto il rubinetto. Avvolgerlo in un asciugamano per assorbire l'acqua. Asciugare completamente prima del rimontaggio. 4. Per rimontare: – Allineare un'estremità del rullo spazzola (23) all'ingranaggio dell'ugello per pavimenti. – Premere l'altra estremità nella fessura. –... -
Página 73: Smaltimento Della Batteria
Smontaggio Per la Manutenzione 1. È possibile smontare o staccare il tubo, la prolunga del tubo, il sacchetto per la polvere, la griglia di scarico, il filtro e tutti gli accessori senza utilizzare alcuno strumento. 2. È possibile smontare la protezione frontale, l’avvolgicavo, l’interruttore, il pulsante di comando della potenza di aspirazione e il pulsante on/off utilizzando un cacciavite. - Página 74 Caricabatterie (modello MC2508A-V per l'Europa o MC2508A-B per il Regno Unito) Ingresso caricabatterie: 100-240 V~, 50/60 Hz Uscita caricabatterie: 25-29 V , 800 mA Classe di protezione: Classe II / Lunghezza cavo: circa 1,8 metri Batteria (modello BP21625A) Tipo batteria: 21,6 V, ioni di litio, 2500 mAh Tempo di funzionamento (circa): Potenza normale: 30 minuti Potenza massima:...
- Página 75 Guía de Bienvenida • Español Contenido: Antes de comenzar, compruebe que el embalaje incluye los siguientes componentes: Solo para B07SG47LWK y B07SG48G4S...
-
Página 76: Resumen Del Producto
Resumen Del Producto featur Tapa de la salida de aire Batería (H) Filtro de la salida de aire Indicador del estado de la batería Boquilla base Indicador de modo de suelo duro Contactos de suministro eléctrico Indicador de potencia MAX Palanca del depósito del polvo Indicador del modo alfombra Botón del modo alfombra/suelo Depósito del polvo... - Página 77 Unidad principal Botón de desbloqueo Luz de trabajo [solo boquilla para el Tubo de extensión suelo (C)] Boquilla motorizada para el suelo Cepillo cilíndrico Accesorio para tapicería 2 en 1 Boquilla para rincones Boquilla motorizada para felpa...
-
Página 78: Consejos De Seguridad Importantes
Unidad principal Accesorio para tapicería 2 en 1 Boquilla para rincones Soporte mural Cargador CONSEJOS DE SEGURIDAD IMPORTANTES Lea estas instrucciones atentamente y guárdelas para futuras consultas. Si transfiere el producto a una tercera persona, debe incluir también este manual de instrucciones. Al usar aparatos eléctricos, siempre deben tomarse unas precauciones de seguridad básicas para reducir el riesgo de incendio, de descarga eléctrica y/o de daños personales... - Página 79 • El aparato solo debe usarse con el unidad de suministro de alimentación incluida. • Antes de limpiar o revisar el aparato, extraiga la batería. • El aparato debe desconectarse del suministro eléctrico al extraer la batería. • El soporte mural debe instalarse en una pared de madera o cemento con los anclajes incluidos (tornillería).
-
Página 80: Advertencias Del Cargador
Advertencias del cargador ADVERTENCIA ¡Riesgo de explosión! No recargue baterías no recargables. • Utilice el cargador incluido (modelo MC2508A-B o MC2508A-V) solo con este producto. Advertencias de la batería • Mantenga las baterías alejadas de los niños. • No deseche las baterías en el fuego. •... -
Página 81: Antes Del Primer Uso
• Este producto solo se ha diseñado para uso doméstico. No es apto para uso comercial. • Este producto solo es apto para usar en interiores secos. • No se aceptará ninguna responsabilidad por los daños provocados por el uso inadecuado o por el incumplimiento de estas instrucciones. - Página 82 Paso 2: Paso 3:...
-
Página 83: Batería Y Carga
Batería y carga Carga • Deslice la batería (H) a la ranura de la batería hasta que encaje. • Conecte el cargador (I) al puerto de carga (9). • Conecte el cargador (I) a la toma de corriente. • El indicador del estado de la batería (12) muestra el estado de la carga: Indicador del estado de la Estado Nivel de carga... - Página 84 Accesorios Para una limpieza fácil y NOTA rápida, el producto se puede utilizar sin accesorios. Accesorio Función Para Tubo de extensión (B) • limpieza del suelo • zonas de difícil acceso Monte el tubo de extensión entre la boquilla base (3) y la boquilla deseada (C), (D), (E) o (G).
- Página 85 Accesorio Función Accesorio para tapicería 2 en 1 (D) Para Cepillo fuera • cortinas • respiraderos • superficies delicadas Presione el botón en la parte media de la boquilla y extienda el cepillo. Accesorio para tapicería 2 en 1 (D) Para • cortinas Cepillo dentro •...
-
Página 86: Funcionamiento
Acoplar los accesorios NOTA Todos los accesorios se pueden conectar directamente a la boquilla base (3) de la unidad principal (A) o al tubo de extensión (B) Extraer los accesorios Presione el botón de desbloqueo (21) y extraiga el accesorio. Funcionamiento Encendido y apagado Presione el activador (8) para encender. -
Página 87: Limpieza Y Mantenimiento
Vaciar el depósito del polvo Existen dos maneras de vaciar el depósito del polvo (6). • Sujete el producto en una papelera. • Presione la palanca del depósito del polvo (5) para soltar la tapa inferior (7) y vacíe la suciedad. • Sujete el depósito del polvo (6) y gírelo hasta que la flecha se alinee con la marca de desbloqueo •... - Página 88 Mantenimiento del filtro del depósito del polvo • Gire el depósito del polvo (6) y extráigalo. • Gire la tapa del filtro (20) y extráigala. • Extraiga el filtro de tela (18). • Separe el filtro de espuma (19) del filtro de tela (18) tirando de ellos. •...
- Página 89 Mantenimiento de la boquilla motorizada para el suelo 1. Coloque la boquilla motorizada para el suelo (C) boca abajo. Utilice unas tijeras o cuchillo para cortar las cuerdas e hilos. Clip de retención 2. Si no puede eliminar la suciedad fácilmente, extraiga el clip de retención para separar el cepillo cilíndrico (23).
-
Página 90: Solución De Problemas
3. Si fuera necesario, enjuague el cepillo cilíndrico (23) bajo el grifo. Envuélvalo en una toalla para que absorba el agua. Seque completamente antes de volver a montar. 4. Para volver a montar: – Alinee un extremo del cepillo cilíndrico (23) con el engranaje de la boquilla para el suelo. -
Página 91: Desmontaje Por Mantenimiento
Desmontaje por Mantenimiento 1. La manguera, el tubo telescópico, la bolsa para el polvo, la rejilla de escape, el filtro y todos los accesorios se pueden desmontar o separar sin ninguna herramienta. 2. La cubierta frontal, enrollador del cable, el botón, el control de succión de potencia y el interruptor de encendido / apagado se deben desmontar con la ayuda de un tornillo. -
Página 92: Comentarios Y Ayuda
Cargador (modelo MC2508A-V para Europa o MC2508A-B para Reino Unido) Entrada del cargador: 100-240 V~, 50/60 Hz Salida del cargador: 25-29 V , 800 mA Clase de protección: Clase II / Longitud del cable: aprox. 1,8 metros Batería (modelo BP21625A) Tipo de batería: 21,6 V, Li-Ion, 2500 mAh Tiempo de funcionamiento Potencia normal: 30 minutos... - Página 93 Welkomstgids • Nederlands Inhoud: Controleer, voordat u aan de slag gaat, of het pakket de volgende zaken bevat: Alleen voor B07SG47LWK en B07SG48G4S...
-
Página 94: Productoverzicht
Productoverzicht featur Luchtuitlaatkap Accu (H) Luchtuitlaatfilter Status van accu-controlelampjes Basismondstuk Harde vloermodus-controlelampje Voedingscontacten MAX voeding-controlelampje Hendel voor stofbak Tapijtmodus-controlelampje Stofbak Tapijt/harde vloer-modusknop Onderste deksel MAX knop Aan/uit-schakelaar Stoffen filter Laadaansluiting Schuimfilter Accuvrijgaveknop Filterkap... - Página 95 Hoofdeenheid Ontgrendelingsknop Werkingslampje [alleen Verlengbuis vloermondstuk (C)] Gemotoriseerd vloermondstuk Borstelrol 2-in-1 stofferingsmondstuk Spleetmondstuk Gemotoriseerd pluismondstuk...
-
Página 96: Belangrijke Voorzorgsmaatregelen
Hoofdeenheid 2-in-1 stofferingsmondstuk Spleetmondstuk Muurhouder Lader BELANGRIJKE VOORZORGSMAATREGELEN Lees deze gebruiksaanwijzing aandachtig door en bewaar ze voor later gebruik. Doe bij overdracht van dit product aan derden deze gebruiksaanwijzing erbij. Volg altijd de basisvoorschriften inzake veiligheid op wanneer u elektrische apparaten gebruikt om het risico op brand, elektrische schokken en persoonlijk letsel te beperken, zoals: •... - Página 97 • Gebruik alleen het snoer dat met het apparaat is meegeleverd. • Haal de accu uit het apparaat alvorens het apparaat te reinigen of te onderhouden. • Ontkoppel het apparaat van de netvoeding voordat u de accu verwijdert. • De muurhouder moet aan een muur van hout, baksteen of beton worden vastgemaakt met de meegeleverde bevestigingen.
-
Página 98: Waarschuwingen Over De Lader
Waarschuwingen over de lader WAARSCHUWING Explosiegevaar! Wegwerpbatterijen mogen niet worden opgeladen. • Gebruik de meegeleverde lader (model MC2508A-B of MC2508A-V) alleen met dit product. Waarschuwingen over de accu • Houd accu’s buiten het bereik van kinderen. • Gooi de accu niet weg in het vuur. •... -
Página 99: Vóór Het Eerste Gebruik
• Dit product is alleen bestemd voor huishoudelijk gebruik. Het is niet bestemd voor commercieel gebruik. • Dit product is alleen bestemd voor gebruik in droge binnenruimten. • Wij aanvaarden geen enkele aansprakelijkheid voor schade die als gevolg van verkeerd gebruik of het negeren van deze instructies is ontstaan. Vóór het eerste gebruik •... - Página 100 Stap 2: Stap 3:...
-
Página 101: Accu En Opladen
Accu en opladen Bezig met opladen • Schuif de accu (H) in de accusleuf totdat het vast komt te zitten. • Sluit de lader (I) aan op de laadaansluiting (9). • Steek de stekker van de lader (I) in een stopcontact. •... - Página 102 Accessoires OPMERKING Voor een snelle en eenvoudige reiniging kan het product tevens zonder accessoires worden gebruikt. Accessoire Functie Voor Verlengbuis (B) • het reinigen van vloeren • moeilijk te bereiken plaatsen Maak de verlengbuis vast tussen het basismondstuk (3) en het gewenste mondstuk (C), (D), (E) of (G).
- Página 103 Accessoire Functie 2-in-1 stofferingsmondstuk (D) Voor Borstel uit • jaloezieën • ventilatiegaten • delicate oppervlakken Druk op de knop in het midden van het mondstuk en trek de borstel uit. 2-in-1 stofferingsmondstuk (D) Voor Borstel in • jaloezieën • ventilatiegaten • gestoffeerde oppervlakken Druk op de knop in het midden van het mondstuk en verberg de borstel.
- Página 104 Accessoires bevestigen OPMERKING Alle accessoires kunnen direct op het basismondstuk (3) van de hoofdeenheid (A) of de verlengbuis (B) worden bevestigd Accessoires losmaken Druk op de ontgrendelingsknop (21) om de accessoires te verwijderen. Gebruik In-/uitschakelen Druk op de aan/uit-schakelaar (8) om het apparaat in te schakelen. Druk opnieuw om uit te schakelen.
-
Página 105: Reiniging En Onderhoud
De stofbak legen De stofbak (6) kan op twee verschillende manieren worden geleegd. • Houd het product boven een vuilnisbak. • Druk op de hendel voor stofbak (5) om het onderste deksel (7) los te maken en het vuil te verwijderen. •... - Página 106 De stofbekerfilter onderhouden • Draai de stofbeker (6) en verwijder het. • Draai de filterkap (20) en verwijder het. • Verwijder de stoffen filter (18). • Trek de schuimfilter (19) en de stoffen filter (18) uit elkaar. • Spoel en veeg ze grondig droog. •...
- Página 107 Het gemotoriseerd vloermondstuk onderhouden 1. Draai het gemotoriseerd vloermondstuk (C) ondersteboven. Knip vastzittende koorden en draden door met een schaar of mes. Vastzetklem 2. Als het vuil niet eenvoudig verwijderd kan worden, verwijder de vastzetklem om de borstelrol (23) te verwijderen. 3.
-
Página 108: Probleemoplossing
3. Indien nodig, spoel de borstelrol (23) onder de kraan. Rol het in een handdoek om het water te absorberen. Laat het volledig drogen voordat u het opnieuw aanbrengt. 4. Opnieuw in elkaar zetten: – Breng een uiteinde van de borstelrol (23) op één lijn met het tandwiel van het vloermondstuk. -
Página 109: Specificaties
Uit Elkaar Halen Voor Onderhoud 1. De slang, verlengbuis, stofzak, uitlaatrooster, filter en alle toebehoren kunnen zonder gebruik van gereedschap uit elkaar worden gehaald of worden losgemaakt. 2. Het voorste deksel, snoeropwinder, schakelaar, zuigkrachtregelaar en de aan/uit- knop kunnen met behulp van een schroevendraaier uit elkaar worden gehaald. 3. -
Página 110: Feedback En Hulp
Lader (model MC2508A-V voor Europa of MC2508A-B voor VK) Invoer lader: 100–240 V~, 50/60 Hz Uitvoer lader: 25-29 V , 800 mA Beschermingsklasse: Klasse II / Lengte kabel: ca. 1,8 meter Accu (model BP21625A) Type accu: 21,6 V, Li-Ion, 2500 mAh Werkingstijd (ca.): Normaal vermogen: 30 minuten Max. vermogen: 16 minuten Oplaadtijd: 3,5 - 4,5 uur... - Página 111 amazon.com/AmazonBasics MADE IN CHINA FABRIQUÉ EN CHINE HERGESTELLT IN CHINA PRODOTTO IN CINA HECHO EN CHINA GEMAAKT IN CHINA V7-11/19...