Tabla de contenido
Publicidad
Enlaces rápidos
SISTEMA MODULARE PROFESSIONALE PMS2000
PMS2000 PROFESSIONAL MODULAR SYSTEM
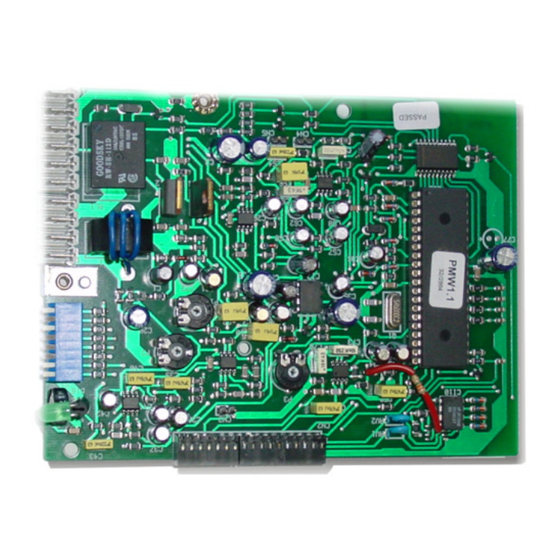
Scheda di controllo amplificatore
Amplifier control card
Carte de contrôle amplificateur
Verstärkerkontrolleinheit
Besturingskaart versterker
Tarjeta de control amplificador
VES
Istruzioni per l'uso
Instructions for use
Manuel d'utilisation
INTRODUZIONE
Nel ringraziarVi per aver scelto un prodotto
PASO, vogliamo ricordarVi che la nostra
azienda opera con sistema di qualità certificato.
Tutti i nostri prodotti vengono pertanto
controllati in ogni fase della produzione per
garantirVi la piena soddisfazione del Vostro
acquisto. Per ogni evenienza la garanzia
coprirà, nel periodo di validità, eventuali difetti
di fabbricazione. Vi raccomandiamo di leggere
attentamente le seguenti istruzioni d'uso per
sfruttare appieno le prestazioni offerte da
questo prodotto e per evitare eventuali
problemi.
Nel continuo intento di migliorare i propri prodotti,
la PASO S.p.A. si riserva il diritto di apportare
modifiche ai disegni e alle caratteristiche tecniche
in qualsiasi momento e senza alcun preavviso.
NOTA
- PMS2000 System -
INTRODUCTION
While thanking you for having chosen a PASO
product, we would like to remind you that our
company works according to a certified Quality
System. This means that all our products are
checked during every phase of manufacturing
in order to ensure that you will be fully satisfied
with your purchase. In any case, the guarantee
will cover any manufacturing flaws during the
guarantee period. We recommend that you
read the following instructions for use and
follow them carefully in order to exploit in full
the performance of this product and use it
correctly.
PASO S.p.A. strive to improve their products
continuously, and therefore reserve the right to
make changes to the drawings and technical
specifications at any time and without notice.
PM2092-V
Gebrauchsanleitung
Gebruiksaanwijzing
Instrucciones de empleo
NOTE
1
Publicidad
Tabla de contenido

Manuales relacionados para Paso PM2092-V


Resumen de contenidos para Paso PM2092-V
- Página 1 NOTE Nel continuo intento di migliorare i propri prodotti, PASO S.p.A. strive to improve their products la PASO S.p.A. si riserva il diritto di apportare continuously, and therefore reserve the right to modifiche ai disegni e alle caratteristiche tecniche make changes to the drawings and technical in qualsiasi momento e senza alcun preavviso.
-
Página 2: Descrizione Generale
Ref. 11/596 PM2092-V DESCRIZIONE GENERALE GENERAL DESCRIPTION La scheda di controllo PM2092-V è stata creata The PM2092-V control card was created to per consentire l'esecuzione semplice e veloce di provide a simple and rapid way of testing the test sugli amplificatori modulari PMWxx... - Página 3 Ref. 11/596 PM2092-V 3. togliere la piastrina (particolare [A], fig. 2.1) 3. Remove the small plate (detail [A], Figure 2.1) dal pannello posteriore dell'amplificatore from the rear panel of the amplifier by svitando la vite [B]; unscrewing the screw [B];...
- Página 4 PM2092-V card. della scheda PM2092-V. Il pannello superiore A key summarising the connections has been dell’amplificatore è...
- Página 5 Ref. 11/596 PM2092-V • Collegamento ingressi (opzionale) • Connecting the inputs (optional) Qualora si volesse collegare un secondo ingresso, If you wish to connect a second input, use utilizzare i terminali 8, 9 e 10 della morsettiera terminals 8, 9 and 10 of the ‘CONTROL I/O’...
- Página 6 Once this connection has been connessione, sarà possibile made, it will then be possible to controllare tramite software control the PM2092-V card by dedicato la scheda PM2092-V. means of dedicated software. Nella tabella sottostante è The following table shows the riportata la piedinatura del pinout of the connector.
-
Página 7: Modalità Di Funzionamento
PM2092-V MODALITÀ DI FUNZIONAMENTO OPERATING MODES Le modalità di funzionamento consentite dalla There are two possible operating modes enabled scheda PM2092-V sono due: by the PM2092-V card: • Modalità ‘STAND-ALONE’; • ‘STAND-ALONE’ mode; • Modalità ‘REMOTE CONTROL’ • ‘REMOTE CONTROL’ mode... - Página 8 Ref. 11/596 PM2092-V Il led verde ‘OK’ lampeggierà due volte e dopo The green ‘OK’ LED will then flash twice, and after alcuni secondi rimarrà acceso in modo fisso ad a few seconds it will remain on steadily to indicate indicare la corretta acquisizione della linea.
- Página 9 Ref. 11/596 PM2092-V Per gli altri valori, consultare la ‘Tavola di For the other values, consult the ‘Configuration configurazione’ a pag. 38. Table’ on page 38. Una vol ta scelto l'intervallo desiderato, Once the required interval has been chosen, the l'amplificatore ripeterà...
- Página 10 Ref. 11/596 PM2092-V • Controllo di volume • Volume control Alla prima accensione, la regolazione del volume When the equipment is switched on for the first di uscita viene affidata al trimmer posto a lato del time, adjustment of the output volume is made led ‘OK’.
- Página 11 Ref. 11/596 PM2092-V 2. togliere il jumper dal connettore CN7 (MIX) 2. remove the jumper from connector CN7 (MIX) ed inserirlo nel connettore CN6 (NO MIX). and insert it into connector CN6 (NO MIX). 3. riposizionare la copertura. 3. put the cover back into place.
-
Página 12: Energy-Saving Mode
Ref. 11/596 PM2092-V L’utente dovrà anche in questo caso utilizzare Again in this case the user will have to use the dip i dip-switches per attivare la funzione. switches to activate the function. Filtro • OFF • Filter Filtro • ON • Filter Fig. -
Página 13: Caratteristiche Tecniche
Ref. 11/596 PM2092-V 6. Riportare in posizione OFF tutte le altre leve. 6. Return all the other levers to the OFF position. Impostazione indirizzo • Address setting Calibrazione • Calibration Fig. 4.3.1 Fig. 5.1.1 CALIBRAZIONE CALIBRATION Poichè l'accoppiamento scheda-amplificatore può... -
Página 14: Description Générale
Ref. 11/596 PM2092-V DESCRIPTION GÉNÉRALE ALLGEMEINE BESCHREIBUNG La carte de contrôle PM2092-V a été créée afin Die Kontrollkarte PM2092-V wurde entwickelt, de pouvoir réaliser de façon simple et rapide des um eine einfache und zügige Durchführung der tests sur les amplificateurs modulaires PMWxx Tests der modularen Verstärker PMWxx... - Página 15 Ref. 11/596 PM2092-V 3. Retirer la plaquette (détail [A], fig. 2.1) du 3. Entfernen Sie die Platine (Detail [A], Abb. 2.1) panneau postérieur de l'amplificateur en vom Rückpaneel des Verstärkers, indem Sie die dévissant à cet effet la vis [B];...
- Página 16 être Rückpaneel des Verstärkers muss verwendet utilisé pour les branchements principaux de la werden, um die Hauptanschlüsse der Einheit carte PM2092-V. PM2092-V herzustellen. Sur le panneau supérieur de l'amplificateur sont Das obere Paneel des Verstärkers besitzt eine indiquées des légendes récapitulatives des...
- Página 17 Ref. 11/596 PM2092-V • Branchement des entrées (option) • Anschluss der Eingänge (optional) Pour le branchement d'une seconde entrée, Falls Sie einen zweiten Eingang anschließen utiliser les terminaisons 8, 9 et 10 du bornier möchten, verwenden Sie die Endstücke 8, 9 und ‘CONTROL I/O’...
- Página 18 Verstärkers mit einem Personal Computer verwendet. fois cette connexion Nach Herstellung der Verbindung effectuée, il est possible de kann die Einheit PM2092-V mit contrôler la carte PM2092-V par Hilfe einer dedizierten Software l'intermédiaire d'un logiciel dédié. gesteuert werden. Le tableau ci-dessous indique les nachstehenden Tabelle sind die bornes du connecteur.
-
Página 19: Modalités De Fonctionnement
Ref. 11/596 PM2092-V MODALITÉS DE FONCTIONNEMENT BETRIEBSMODALITÄTEN Deux modalités de fonctionnement de la carte Die Einheit PM2092-V lässt 2 Betriebsmodalitäten PM2092-V sont disponibles: • Modalité ‘STAND-ALONE’; • Modalität ‘STAND-ALONE’; • Modalité ‘REMOTE CONTROL’ ( Contrôle à distance) • Modalität ‘REMOTE CONTROL’ (Fernkontrolle) Les chapitres ci-dessous décrivent les configu-... - Página 20 Ref. 11/596 PM2092-V Le voyant vert ‘OK’ devra clignoter deux fois et Das grüne Led ‘OK’ blinkt zweimal auf und leuchtet rester allumé sans clignoter au bout de quelques nach einigen Sekunden stetig, um die korrekte secondes, indiquant ainsi que l'acquisition de la ligne Erfassung der Leitung anzuzeigen.
- Página 21 Ref. 11/596 PM2092-V Pour les autres valeurs, se reporter à la ‘Planche Für andere Werte konsultieren Sie die de configuration’ page 38. Une fois l'intervalle ‘Konfigurationsübersicht’ auf Seite 38. programmé, l'amplificateur effectuera les tests à Nach Auswahl der gewünschten Intervalls, intervalles réguliers.
- Página 22 Ref. 11/596 PM2092-V • Contrôle du volume • Lautstärkekontrolle Lors du premier allumage, le réglage du volume Beim erstmaligen Einschalten, ist die Lautstärke- de sortie s'effectue par l'intermédiaire du trimmer kontrolle dem Trimmer überlassen, der sich seitlich présent à côté du voyant ‘OK’. Il est également des Leds ‘OK’...
- Página 23 Ref. 11/596 PM2092-V 2. enlever le jumper présent sur le connecteur 2. Den Jumper vom Anschlussstück CN7 (MIX) CN7 (MIX) et l'installer sur le connecteur CN6 entfernen und in das Anschlussstück CN6 (NO (NO MIX). MIX) einsetzen. 3. remettre le carter de protection en place.
- Página 24 Ref. 11/596 PM2092-V Pour cela l'utilisateur doit également utiliser les Der Anwender muss auch hier die Dip-Switch dip-switches afin d'activer la fonction. betätigen, um diese Funktion zu aktivieren. Filtre • OFF • Filter Filtre • ON • Filter Fig./Abb. 4.1.6 •...
- Página 25 Ref. 11/596 PM2092-V 6. Ramener tous les autres leviers sur OFF. 6. Bringen Sie alle Hebel in die Position OFF. Allocation d’adresse • Adressenzuweisung Calibrage • Kalibrieren Fig./Abb. 4.3.1 Fig./Abb. 5.1.1 CALIBRAGE KALIBRIEREN L'accouplement carte-amplificateur pouvant Da die Verbindung von Einheit und Verstärker Gewinnänderungen von ca.
-
Página 26: Algemene Beschrijving
De besturingskaart PM2092-V is speciaal La tarjeta de control PM2092-V ha sido creada o n t w o r p e n o m d e m o d u l a i re ve r s t e r k e r s para consentir la ejecución, simple y rápida, de... - Página 27 (afb. 2.2). 2.2); 8. draai de schroef met metrische spoed [G] 8. enroscar el tornillo con paso métrico [G] (eveneens bij de besturingskaart geleverd) (también él incluido en el suministro de la in de boring die is aangegeven op afbeelding tarjeta de control) en el agujero indicado en al 2.2;...
-
Página 28: Conexiones
PM2092-V principales de la tarjeta PM2092-V. kaart. Het bovenpaneel van de versterker is... - Página 29 Ref. 11/596 PM2092-V • Aansluiting ingangen (optional) • Conexión entradas (opción) Indien men een tweede ingang wenst aan te sluiten, Si se desea conectar una segunda entrada, utilizar dienen de klemmen 8, 9 en 10 van de los terminales 8, 9 y 10 de la bornera de conexión klemmenstrook ‘CONTROL I/O’...
- Página 30 Zodra deze aansluiting is Una vez efectuada esta conexión será posible controlar la tarjeta uitgevoerd, kan met behulp van PM2092-V mediante software speciale software de PM2092-V dedicado. kaart bestuurd worden. En la tabla siguiente se indican In de onderstaande tabel is de los polos del conectador.
-
Página 31: Modalidades De Funcionamiento
Ref. 11/596 PM2092-V WERKWIJZE MODALIDADES DE FUNCIONAMIENTO Met de kaart zijn de volgende werkwijzen Las modalidades de funcionamiento consentidas mogelijk: por la tarjeta son dos: • ‘STAND-ALONE’ werking; • Modalidad ‘STAND-ALONE’; • ‘REMOTE CONTROL’ werking (afstandsbediening). • Modalidad ‘REMOTE CONTROL’ (Control remoto) . - Página 32 Ref. 11/596 PM2092-V De groene led ‘OK’ gaat tweemaal knipperen en na El LED verde ‘OK’ destellará dos veces y al cabo de enige seconden blijft deze branden, waarmee de unos segundos quedará encendido fijo para indicar juiste afstemming van de lijn wordt bevestigd.
- Página 33 Ref. 11/596 PM2092-V Raadpleeg voor de overige waarden de Para los otros valores consultar la ‘Tabla de ‘Configuratietafel’ op pag. 38. configuración’ en la pág. 38. Wanneer het gewenste interval is gekozen, Una vez seleccionado el intervalo deseado, el herhaalt de versterker regelmatig de test.
- Página 34 Ref. 11/596 PM2092-V • Instelling geluidsvolume • Control de volumen Wanneer het apparaat voor het eerst wordt Al primer encendido, la regulación del volumen aangezet, wordt de uitgangsvolumeregeling de salida es confiada al condensador de ajuste overgelaten aan de trimmer naast de led ‘OK’.
- Página 35 Ref. 11/596 PM2092-V 2. verwijder de jumper uit de connector CN7 (MIX) 2. quitar el puente del conector CN7 (MIX) y en steek deze in connector CN6 (NO MIX). ponerlo en el conector CN6 (NO MIX). 3. plaats het deksel terug.
-
Página 36: Asignación Dirección
Ref. 11/596 PM2092-V De gebruiker dient ook in dat geval de dip-switches El usuario debe en tal caso utilizar los dip-switches te gebruiken voor het activeren van de functie. para activar la función. Filter • OFF • Filtro Filter • ON • Filtro Afb./Fig. -
Página 37: Technische Kenmerken
Ref. 11/596 PM2092-V 6. Breng alle andere hefbomen op de OFF stand. 6. Poner de nuevo en la posición OFF todas las otras palancas. Adrestoekenning • Asignación dirección Afstellen • Calibrado Afb./Fig. 4.3.1 Afb./Fig. 5.1.1 AFSTELLEN CALIBRADO Daar de combinatie kaart-versterker variaties kan Dado que la conexión tarjeta-amplificador puede... - Página 38 Ref. 11/596 PM2092-V TAVOLA DI CONFIGURAZIONE • CONFIGURATION TABLE INDIRIZZO ADDRESS - PMS2000 System -...
- Página 39 Ref. 11/596 PM2092-V TAVOLA DI CONFIGURAZIONE • CONFIGURATION TABLE INDIRIZZO ADDRESS - PMS2000 System -...
- Página 40 If the product dovrà essere inviato alla Paso franco di spese di is found to be faulty, it must be sent to Paso free of spedizione e ritorno. Questa garanzia non ne charges for shipment and return. This warranty...
-
Página 41: Eliminación Del Producto Segun
El producto, que haya resultado defectuoso, deberá défectueux devra être envoyé à Paso franco de ser enviado a la Paso con portes pagados de envío frais d'expédition et de réexpédition. La présente y de vuelta. Esta garantía no incluye otras, explícitas garantie n'en inclut aucune autre, explicite ou o implícitas, y no incluye daños o accidentes... - Página 42 Producten waarbij Versandkosten für den Hin- und Rücktransport zu een defect is geconstateerd dienen franco verzend- und von Paso gesendet werden. Diese Garantie schließt en retourkosten aan Paso opgestuurd te worden. keine weiteren, expliziten oder impliziten Leistungen Deze garantie omvat geen enkele andere expliciete und Folgeschäden an Personen, Gegenständen oder...
- Página 43 Ref. 11/596 PM2092-V - PMS2000 System -...
- Página 44 Ref. 11/596 PM2092-V S.p.A Via Mecenate, 90 - 20138 MILANO - ITALIA TEL. +39-02-580 77 1 (15 linee r.a.) FAX +39-02-580 77 277 http://www.paso.it Printed in Italy - 10/06 - 0.5K - 11/596 - PMS2000 System -...