Tabla de contenido
Publicidad
Idiomas disponibles
Idiomas disponibles
Enlaces rápidos
Item #1003008633
Model #HB-7738-03
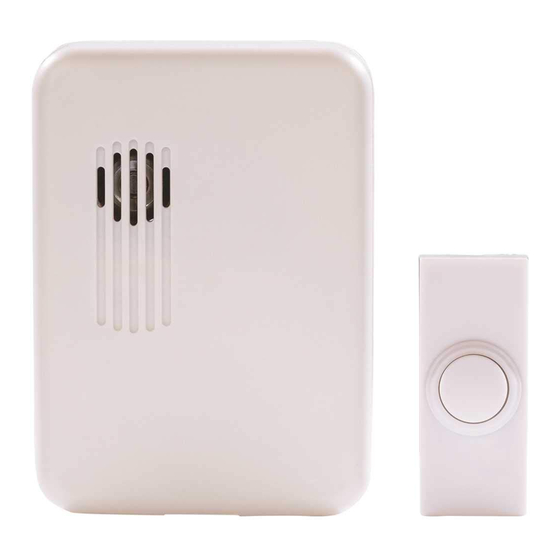
USE AND CARE GUIDE
WIRELESS DOORBELL KIT
Questions, problems, missing parts?
Before returning to the store, call Hampton Bay Customer Service
8 a.m. - 5 p.m., CST, Monday - Friday
1-844-760-3644
HAMPTONBAY.COM
Illustrations may vary from actual unit.
THANK YOU
We appreciate the trust and confidence you have placed in Hampton Bay through the purchase of this wireless doorbell
kit. We strive to continually create quality products designed to enhance your home. Visit us online to see our full line of
products available for your home improvement needs. Thank you for choosing Hampton Bay!
Publicidad
Capítulos
Tabla de contenido

Manuales relacionados para HAMPTON BAY HB-7738-03


Resumen de contenidos para HAMPTON BAY HB-7738-03
- Página 1 THANK YOU We appreciate the trust and confidence you have placed in Hampton Bay through the purchase of this wireless doorbell kit. We strive to continually create quality products designed to enhance your home. Visit us online to see our full line of...
-
Página 2: Tabla De Contenido
Table of Contents Tools Required ........3 Table of Contents ........2 Hardware Included .........3 Safety Information ........2 Package Contents ........4 Warranty ...........2 Installation ..........4 3-Year Limited Warranty ......2 Operation...........6 Pre-Installation .........3 Care and Cleaning ........6 Planning Installation ......3 Troubleshooting ........7 Specifications ........3 Safety Information PRECAUTIONS NOTE: The push button and doorbell come synced from... -
Página 3: Pre-Installation
Pre-Installation PLANNING INSTALLATION Before installing the wireless doorbell kit, ensure that all parts are present. Compare parts with the Hardware Included and Package Contents sections. If any part is missing or damaged, do not attempt to assemble, install, or operate this wireless doorbell kit. Estimated installation time: 30 minutes SPECIFICATIONS Doorbell... -
Página 4: Package Contents
Pre-Installation (continued) PACKAGE CONTENTS Part Description Quantity Doorbell Push button Installation Installing the batteries NOTE: Sync/Reset button (2). See Troubleshooting for additional information. NOTE: In typical use, alkaline batteries will last up to one year. Press the catch on the doorbell (A) to remove the doorbell (A) from the doorbell back plate (1). - Página 5 Installation (continued) Testing the doorbell and push NOTE: The push button and doorbell come synced from button placement the factory. The range of the wireless doorbell can vary with location, temperature, and battery condition. Temporarily position the push button (B) and doorbell (A) where they will be mounted.
-
Página 6: Operation
Installation (continued) Attaching the doorbell to the back plate Align the top edge of the doorbell (A) with the top of the back plate (1). Rotate the bottom of the doorbell (A) toward the back plate (1) and snap into position. Operation Selecting a tune NOTE: All doorbells are designed to play only two... -
Página 7: Troubleshooting
Troubleshooting Problem Possible Cause Solution Doorbell does not The batteries are not Make sure the batteries are installed according to the sound. installed correctly. diagram inside the push button and doorbell. The batteries are dead. Check the charge of the push button and doorbell bat- teries and replace if necessary. - Página 8 Questions, problems, missing parts? Before returning to the store, call Hampton Bay Customer Service 8 a.m. - 5 p.m., CST, Monday - Friday 1-844-760-3644 HAMPTONBAY.COM Retain this manual for future use. 209432-01A...
-
Página 9: Guía Para El Uso Y Cuidado
Las ilustraciones pueden ser diferentes de la unidad comprada. GRACIAS Agradecemos la confianza que ha depositado en Hampton Bay al comprar este juego de timbre inalámbrico. Procuramos crear continuamente productos de calidad diseñados para mejorar su hogar. Visítenos en internet para ver nuestra línea completa de productos disponibles que necesita para el mejoramiento de su hogar. -
Página 10: Contenido
Contenido Contenido ..........10 Herramientas Requeridas ....11 Información de seguridad ......10 Ferretería Incluida ........11 Garantía ...........10 Contenido del Paquete ......12 3 años de garantía limitada ....10 Instalación ..........12 Antes de la instalación ......11 Operación ..........14 Planificación de la Instalación .....11 Cuidado y limpieza ........14 Especificaciones ........11 Análisis de averías ........15 Información de seguridad... -
Página 11: Antes De La Instalación
Antes de la instalación PLANIFICACIÓN DE LA INSTALACIÓN Antes de instalar el juego de timbre inalámbrico, asegúrese de que tiene todas las piezas. Compare las piezas con las indicadas en las secciones Ferretería incluida y Contenidos del paquete. Si alguna pieza falta o está dañada, no trate de ensamblar, instalar u operar este juego para el timbre inalámbrico con luz nocturna. -
Página 12: Contenido Del Paquete
Antes de la instalación (continuación) CONTENIDO DEL PAQUETE Pieza Descripción Cantidad Timbre Pulsador Instalación Instalación de las pilas NOTA: Botón sincronizador/de reinico. Consulte Análisis de averías para obtener información adicional. NOTA: Con uso normal, las pilas alcalinas durarán hasta un año. Presione la traba en el timbre (A) para quitar el timbre (A) de la placa posterior del timbre (1). -
Página 13: Montaje Del Pulsador
Instalación (continuación) Prueba de la colocación del NOTA: El pulsador y el timbre vienen sincronizados de timbre y del pulsador fábrica. El alcance del timbre inalámbrico puede variar con el lugar, la temperatura y la condición de la pila. Coloque temporalmente el pulsador (B) y el timbre (A) donde serán montados. -
Página 14: Operación
Instalación (continuación) Colocación del timbre en la placa posterior Alinee el borde superior del timbre (A) con la parte superior de la placa posterior (1). Gire la parte inferior del timbre (A) hacia la placa posterior (1) y cierre a presión en su posición. -
Página 15: Análisis De Averías
Análisis de averías Problema Causa Probable Solución El timbre no Las baterías no están Asegúrese que las pilas estén instaladas según el suena. bien instaladas. diagrama al interior del pulsador y del timbre. Las baterías no están Revise la carga de las pilas del pulsador y del timbre y bien instaladas. - Página 16 ¿Tiene preguntas, problemas o piezas faltantes? Antes de la devolución al almacén llame al Servicio al Cliente de Hampton Bay de 8 a.m.-5 p.m., Hora del Central, de lunes a viernes. 1-844-760-3644 HAMPTONBAY.COM Guarde este manual para uso futuro. 209432-01A...