Tabla de contenido
Publicidad
Idiomas disponibles
Idiomas disponibles
Enlaces rápidos
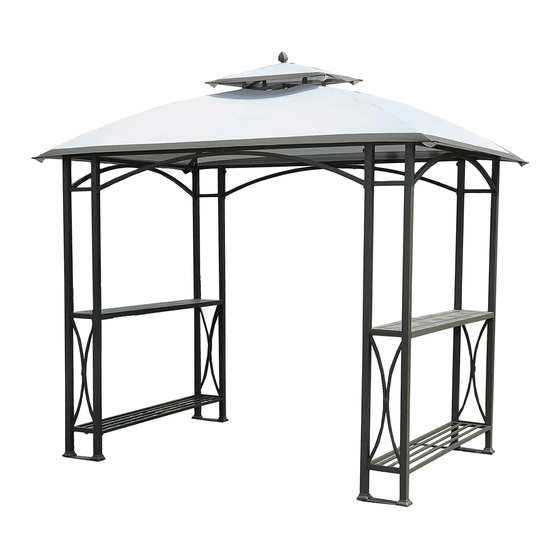
Congratulations on your purchase of our SUNJOY Sheridan Grill Gazebo. Our clear, easy to
follow, step-by-step instructions will guide you through the assembly process from start to
finish.
WARNING:
z This unit is heavy. Do not assemble this item alone. 4 people are recommended for safe assembly.
z Keep all children and pets away from assembly area. Children and pets should be supervised when
they are in the area of the Gazebo construction.
z Keep assembly area at least 6ft/1.8m from any obstruction such as a fence, garage, house,
overhanging branches, laundry line or electrical wires.
z Some parts may contain sharp edges. When assembling and using this product, basic safety
precautions should always be followed to reduce the risk of personal injury and damage to the product.
Please read all instructions before assembly and use.
z Assemble on level ground.
z Check all bolts for tightness before use, and periodically check and tighten bolts as necessary.
z For outdoor use only
Please take time to read these instructions thoroughly and follow each step carefully for safe and
easy operation. Keep this manual for future reference.
For technical assistance on assembly or replacement parts, call Sunjoy Industries at
1-866-578-6569 from 8:30AM to 5:30PM EST, or email us at customer@sunjoygroup.com, or visit
www.sunjoydirect.com
Sheridan Grill Gazebo
Item# L-GG040PST
IMPORTANT
for assistance.
1
Publicidad
Tabla de contenido

Manuales relacionados para Sunjoy L-GG040PST

Resumen de contenidos para Sunjoy L-GG040PST
- Página 1 Sheridan Grill Gazebo Item# L-GG040PST Congratulations on your purchase of our SUNJOY Sheridan Grill Gazebo. Our clear, easy to follow, step-by-step instructions will guide you through the assembly process from start to finish. WARNING: z This unit is heavy. Do not assemble this item alone. 4 people are recommended for safe assembly.
-
Página 2: Parts List
Parts List Description Pic. Post Screen 1 Post Screen 2 Long Side Screen Short Side Screen Slate Table Top Shelf Oblique Beam Big Top Connector Small Top Oblique Beam Small Top Connector Finial Hook Small Canopy Big Canopy Screw... - Página 4 Fig.3: Insert Long Side Screen (C) Fig.2: Insert Slate Table Top Fig.1: Insert Shelf (F) into the into the buckle of Post Screen 1&2 (E) into the buckle of Post buckle of Post Screen 1&2 (A&B), and fix them by Screw (O). Screen 1&2 (A&B), and fix (A&B), and fix them by Screw (Do the same steps for Short Side...
- Página 5 Fig.5: Insert the bottom of Oblique Beam Fig.4: Insert Oblique Beam (G) into Big Top (G) into Post Screen 1&2 (A&B), then put Connector (H), then attach Hook (L) to Big Big Canopy (N) on the big top. Do not top Connector (H).
-
Página 6: Hardware Pack
Hardware Pack Stake 8x180mm 8 PCS Fig.9: Cover Oblique Beam (G) by Fig.8: Put Small Canopy (M) onto the Small Big Canopy (N). Top and extend it to Small Top Oblique Beam (I), attach Finial (K) to Small Top Connector (J). Fig.10: Fix the assembled gazebo to floor by Stake (HH). - Página 7 Limited Warranty: Sunjoy Industries warrants to the original purchaser that this item is free from defects in workmanship and materials for a period of 1 year from the date of purchase, provided the item was factory-sealed at the time of purchase and is maintained with care and used only for personal, residential purposes.
- Página 8 Léase, por favor, estas instrucciones detenidamente y completamente y sigua cada etapa con cuidado para una operación fácil y segura. Guarde esta manual para futura consulta. Para asistencia técnica sobre el montaje o piezas de recambio, llame a Sunjoy Industries al 1-866-578-6569...
-
Página 9: Tabla De Contenido
Lista de Piezas Descripción Cantidad Diagrama Fachada del Poste 1 Fachada del Poste 2 Fachada del Lado Largo Fachada del Lado Corto Mesa de Pizarra Estante Viga Arqueada Conexión del Techo Grande Conexión de la Viga Inclinada del Techo Pequeño Conexión del Techo Pequeño Florón... -
Página 11: A Fachada Del Poste
Fig.3: Introduzca la Fachada del Fig.2: Introduzca la lámina de Fig.1: Introduzca la lámina del Lado Largo (C) en el casco de la la Mesa de Pizarra (E) en el Estante (F) en el casco de la Fachada del Poste 1 y 2 (A y B), y casco de la Fachada del Poste Fachada del Poste 1 y 2 (A y fíjelas con los Tornillos (O). -
Página 12: Grande
Fig.5: Introduzca la extremidad inferior Fig.4: Introduzca la Viga Inclinada (G) en de la Viga Inclinada (G) en la Fachada la Conexión del Techo Grande (H), Luego, del Poste 1 y 2 (A y B), y Coloque el Toldo fije el gancho (L) a la Conexión del Techo Grande (N) sobre el techo grande. -
Página 13: Bolsa De Ferretería
Bolsa de Ferretería Estaca 8x180mm 8 Piezas Fig.8: Coloque el Toldo Pequeño (M) sobre el Fig.9: Cubra la Viga Inclinada (G) Techo Pequeño y extiéndalo sobre la Viga con el Toldo Grande (N). Inclinada del Techo Pequeño (I), Fije el Florón (K) en la Conexión del Techo Pequeño (J). - Página 14 Garantía Limitada: Sunjoy Industries garantiza al comprador original, que este articulo está libre de defectos en mano de obra y materiales por un periodo de 1 ano a partir de la fecha de compra, siempre y cuando el articulo este sellado por la fábrica al momento de su compra y que se haya mantenido con cuidado y empleado solo para uso...