Tabla de contenido
Publicidad
Idiomas disponibles
Idiomas disponibles
Enlaces rápidos
DO YOU HAVE?
Supply Line
Adjustable
Wrench
Putty Knife
Flathead
Screwdriver
Carpenter's
Level
Hacksaw
Safety
Goggles
NOTE: Items not included.
ATTACH YOUR RECEIPT HERE
Questions, problems, missing parts? Before returning to your retailer, call our customer service
department at 1-866-417-7564, 8 a.m. - 8 p.m., EST, Monday - Friday.
AB16338
AquaSource
is a registered trademark of LF, LLC.
®
All Rights Reserved.
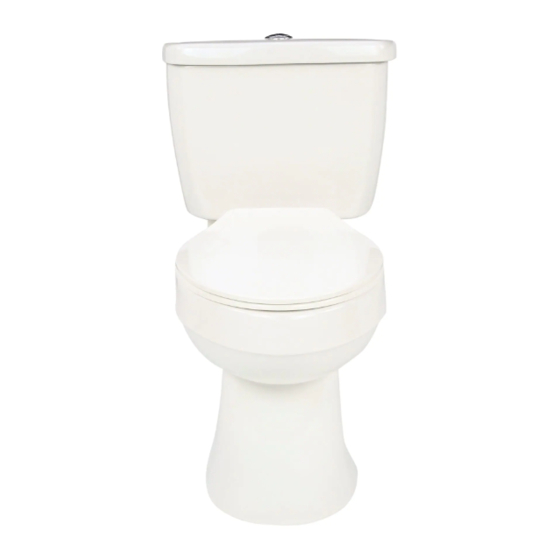
HIGH-EFFICIENCY DUAL-FLUSH TOILET
ITEM #0274044
MODEL #T801
Estimated Installation: 50 Minutes
ARE YOU READY?
Please read and understand this entire manual before attempting to
assemble, operate or install the product.
If replacing an existing toilet, follow these general guidelines. (Not all
toilets and connections are the same. Therefore, these guidelines may
or may not apply.)
Remove Old Toilet
1. Turn off water supply and flush tank completely. Use a towel to
dry remaining water from tank and bowl.
2. Disconnect and remove old water supply line.
3. Remove tank from bowl by removing old tank-to-bowl hardware.
4. Remove bowl from floor by removing bolt caps and floor bolt nuts.
5. Remove floor bolts from toilet flange and clean old wax, putty and
sealant from base area. (Temporarily plug floor flange with a towel
or cover to block sewer gases from escaping.)
WARNING: Do not use in-tank cleaners in your toilet.
Products containing chlorine (calcium hypochlorite) can
seriously damage fittings in the tank. This damage can cause
leakage and property damage.
CAUTION: Do not lift or rock the bowl after placement. If
you break watertight seal, you must install a new wax seal.
Be sure the water supply valve is shut off before installation.
NOTE: Mounting surface must be clean and level before
new toilet is installed.
1
Français p. 7
Español p. 13
Publicidad
Tabla de contenido

Manuales relacionados para LF AquaSource T801

Resumen de contenidos para LF AquaSource T801
- Página 1 Français p. 7 Español p. 13 AquaSource is a registered trademark of LF, LLC. ® All Rights Reserved. HIGH-EFFICIENCY DUAL-FLUSH TOILET ITEM #0274044 MODEL #T801 Estimated Installation: 50 Minutes DO YOU HAVE? ARE YOU READY? Please read and understand this entire manual before attempting to assemble, operate or install the product.
-
Página 2: Package Contents
PACKAGE CONTENTS Part Description Quantity Bowl Tank Toilet Seat Tank Lid Flush Button NOTE: Before beginning, make sure all parts are present. Compare parts with package contents diagram here. If any part is missing or damaged, do not attempt to assemble, install or operate the product. -
Página 3: Installation Instructions
INSTALLATION INSTRUCTIONS 1. Install Floor Bolts NOTE: Inspect existing floor flange for damage. If it is damaged, replace the flange before proceeding. Replace old T-bolts with new T-bolts (AA), then hand-tighten the bowl nuts (DD) onto the T-bolts. 2. Install Wax Ring Turn the bowl (A) upside down and rest it gently on the floor on something soft (i.e. - Página 4 INSTALLATION INSTRUCTIONS 4. Secure Bowl to Floor Insert the bevel discs (HH) and bowl wing nuts (EE) onto the T-bolts (AA). Tighten the bowl wing nuts (EE) to secure the position of the bevel discs (HH). Place the bolt caps (GG) over the T-bolts (AA) and snap into place.
-
Página 5: Care And Maintenance
INSTALLATION INSTRUCTIONS 8. Install Seat Turn the seat (C) upside down and place the hinge gaskets (KK) into place as shown. Then, turn the seat (C) over. Place seat (C) on bowl (A), aligning the holes of the toilet seat (C) with the holes in the back of the bowl (A). -
Página 6: Replacement Parts List
TROUBLESHOOTING Problem Possible Cause Corrective Action Poor flush 1. Shut-off valve is not fully open. 1. Open the valve. 2. Water pressure is low. 2. Increase the pressure. 3. Push rod is too short. 3. Adjust push rod to desired length. 4. - Página 7 AquaSource® est une marque de commerce déposée de LF, LLC. Tous droits réservés. TOILETTE À DOUBLE CHASSE À RENDEMENT ÉLEVÉ ARTICLE #0274044 MODÈLE #T801 Temps d’installation approximatif : 50 minutes. AVEZ-VOUS LES ÊTES-VOUS PRÊT? OUTILS SUIVANTS? Assurez-vous de lire et de comprendre l’intégralité du présent manuel avant de tenter d’assembler, d’utiliser ou d’installer l’article.
-
Página 8: Contenu De L'emballage
CONTENU DE L’EMBALLAGE Pièce Description Quantité Cuvette Réservoir Siège Couvercle de réservoir Bouton de chasse d’eau REMARQUE : Avant de commencer l’assemblage de l’article, assurez-vous d’avoir toutes les pièces. Comparez les pièces dans l’emballage avec l’illustration ci-contre. S’il y a des pièces manquantes ou endommagées, ne tentez pas d’assembler, d’installer, ni d’utiliser l’article. -
Página 9: Installation De La Cuvette Sur La Bride De Sol
INSTRUCTIONS POUR L’INSTALLATION 1. Installation des boulons pour bride Bride de sol REMARQUE : Inspectez la bride de sol. Si elle est endommagée, remplacez-la avant de procéder à l’installation. Remplacez les anciens boulons en T (AA) par les nouveaux, puis vissez les écrous pour cuvette (DD) sur les boulons en T en les serrant à... -
Página 10: Fixation De La Cuvette Au Plancher
INSTRUCTIONS POUR L’INSTALLATION 4. Fixation de la cuvette au plancher Placez les rondelles biseautées (HH) et les écrous à oreilles pour cuvette (EE) sur les boulons en T (AA). Fixez les rondelles biseautées (HH) en place en serrant les écrous à oreilles pour cuvette (EE). -
Página 11: Installation Du Siège
INSTRUCTIONS POUR L’INSTALLATION 9. Installation du siège Placez le siège (C) à l’envers et installez les joints de charnière (KK), tel qu’il est illustré. Retournez le siège (C). Placez le siège (C) sur la cuvette (A) en alignant les trous du siège (C) sur ceux situés à... -
Página 12: Liste Des Pièces De Rechange
DÉPANNAGE Problème Cause possible Mesure corrective L’évacuation d’eau 1. La vanne d’arrêt n’est pas complètement 1. Ouvrez la vanne. ouverte. est insatisfaisante. 2. Augmentez la pression. 2. La pression de l’eau est faible. 3. Réglez la tige-poussoir à la longueur désirée. 3. -
Página 13: Inodoro De Descarga Doble De Alta Eficiencia
AquaSource® es una marca registrada de LF, LLC. Todos los derechos reservados. INODORO DE DESCARGA DOBLE DE ALTA EFICIENCIA ARTÍCULO #0274044 MODELO #T801 Tiempo de instalación estimado: 50 minutos ¿TIENE...? ¿ESTÁ LISTO? Lea y comprenda completamente este manual antes de intentar ensamblar, usar o instalar el producto. -
Página 14: Contenido Del Paquete
CONTENIDO DEL PAQUETE Pieza Descripción Cantidad Taza Tanque Asiento para inodoro Tapa del tanque Botón de descarga NOTA: antes de comenzar, asegúrese de tener todas las piezas. Compare las piezas con el diagrama del contenido del paquete que aparece aquí. No intente ensamblar, instalar ni utilizar el producto si alguna pieza falta o está... -
Página 15: Instale Los Pernos Para Montaje En El Piso
INSTRUCCIONES DE INSTALACIÓN 1. Instale los pernos para montaje en el piso NOTA: asegúrese de que no haya daños en la brida del piso existente. Si está dañada, reemplácela antes de proceder. Reemplace los pernos en T previos por los pernos en T (AA) nuevos y apriete a mano las tuercas de la taza (DD) sobre ellos. -
Página 16: Instale El Sello Del Tanque A La Taza
INSTRUCCIONES DE INSTALACIÓN 4. Fije la taza al piso Inserte los discos biselados (HH) y las tuercas mariposa de la taza (EE) en los pernos en T (AA). Apriete las tuercas mariposa de la taza (EE) para asegurar la posición de los discos biselados (HH). Coloque las tapas de los pernos (GG) sobre los pernos en T (AA) e insértelas a presión en su lugar. -
Página 17: Instale El Botón De Descarga
INSTRUCCIONES DE INSTALACIÓN 7. Instale el asiento Coloque el asiento (C) boca abajo y la empaquetadura de bisagra (KK) en su lugar, como se muestra. Luego, dé vuelta el asiento (C). Coloque el asiento (C) sobre la taza (A), alineando los orificios del asiento para inodoro (C) con los orificios de la parte posterior de la taza (A). -
Página 18: Solución De Problemas
SOLUCIÓN DE PROBLEMAS Problema Causa posible Acción correctiva Hay poca 1. La válvula de cierre no está completamente 1. Abra la válvula. descarga abierta. 2. Aumente la presión. 2. La presión de agua es baja. 3. Ajuste el largo de la varilla hasta lograr el 3.