
Resumen de contenidos para Summit JupiterBike
- Página 1 Folding Electric Bike | Vélo Pliant Electric | Bici Eléctrica Plegable USERS MANUAL...
-
Página 2: Tabla De Contenido
TABLE OF CONTENTS Structural Diagram ............2 Specifications ..............3 Installing the Front Wheel ........4 Installing the Handlebars ........5 Seat Post Installation ..........6 Pedals Installation ............6 Removing the Battery ..........7 Fender Installation ............7 Turning On Your Bike ..........8 The LCD Display ............ -
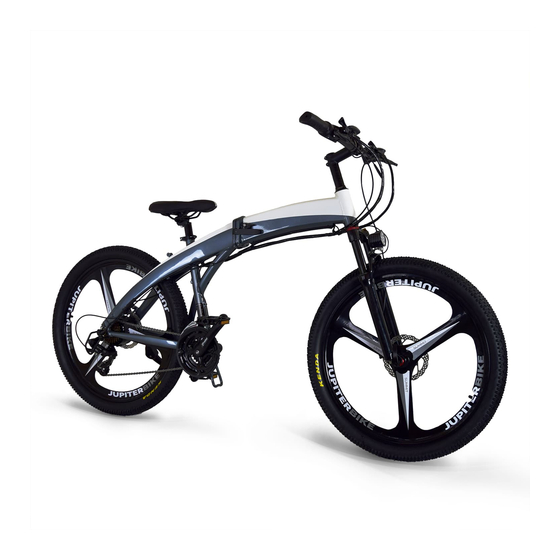
Página 3: Structural Diagram
STRUCTURAL DIAGRAM BIKE FRAME BRAKE DISPLAY LATCH HANDLE SADDLE STEM BIKE FRAME SEAT POST SHOCK SEAT POST ABSORBER CLAMP DISC BRAKE FRONT FORK PEDAL CHAINWHEEL DERAILLEUR MOTOR *Mileage is subjected to weight, road conditions, temperature, wind speed, riding habits, etc. The bike was tested on speed 1 in conditions, which consisted of: 143 lb Load, 77°F temperature, riding on flat road, wind less than .5 mph and with full charge. -
Página 4: Specifications
SPECIFICATIONS MOTOR & BATTERY PACKING CONTENTS: Motor Wattage: 48V / 500w Summit Electric Bike Charging Time: About 5 hours Saddle & Seat Tube Waterproof Rating: IP54 User Manual Battery Capacity: 48V / 7Ah Charger Battery Type: Lithium Ion In Frame Battery... -
Página 5: Installing The Front Wheel
INSTALLING THE FRONT WHEEL Remove parts from box and locate Unscrew the thumb screw on the the front wheel and front wheel axle, place the axle in the front axle. wheel, then loosely re-screw it. Place the front fork on to the axle. Hand tighten the thumb screw, Make sure the Axle Latch is open. -
Página 6: Installing The Handlebars
INSTALLING THE HANDLEBARS Loosen screws 1 and 2, then turn the handlebar stem to the front. Remove the 4 screws on the top cover, then remove the cover. Attach the handlebars onto the handlebar stem and tighten screws. -
Página 7: Seat Post Installation
SEAT POST INSTALLATION Unlatch and loosen seat clamp. Put seat post in frame and adjust to desired height. Retighten and re- latch clamp. PEDALS INSTALLATION Install the pedal with the L on it on the left side of the bike. It should hand twist easily on the pedal arm. -
Página 8: Removing The Battery
REMOVING THE BATTERY Unlatch the Bike Frame Latch and fold the bike in half. The frame has a metal stand under the Chainring that the bike will balance on when folded. Use the included keys to unlock the battery, then gently pull the battery out of the frame. -
Página 9: Turning On Your Bike
& battery frame access panel. Congratulations! safety measures when panel and switch the You bike is ready. riding your bike. power On. THE LCD DISPLAY Download the complete display manual at jupiterbike.com/summit for detailed instructions. -
Página 10: Precautions When Riding
PRECAUTIONS WHEN RIDING • Wear the appropriate protection gear such as helmets, knee pads, and elbow pads on your rides to help prevent injury. • Inspect the bike, brakes, & battery before each ride to ensure all is in working order. •... -
Página 11: Warnings
We encourage you to use contact Jupiter Tech at 813-609-BIKE (2456) or lighting, reflectors and signal flags. e-mail sales @jupiterbike.com • Always comply with laws, regulations and ordinances, including local traffic laws. • Always give way to pedestrians, and be alert to your surroundings, both directly in front of you and in the distance. -
Página 12: Warranty
JUPITER BIKE SUMMIT – LIMITED 1 YEAR WARRANTY The Jupiter Bike Summit and accessories are manufactured to high quality standards. The Jupiter Bike Summit is warranted to the original purchaser for one full year from the original purchase date against defective materials or workmanship. This warranty applies to replacement parts only and specifically excludes the tire tread, battery, and wear parts. - Página 14 TABLE DES MATIÈRES Schéma de la structure ......... 14 Caractéristiques techniques ....... 15 Installation de la roue avant ......16 Installation des guidons ........17 Installation de la tige de selle ......18 Installation des pédales ........18 Retrait de la batterie ..........19 Installation de l’aile ...........
-
Página 15: Schéma De La Structure
SCHÉMA DE LA STRUCTURE FREIN AFFICHER LOQUET DE CADRE DE VÉLO POIGNÉE SELLE TIGE CADRE POSTE DE SIÈGE DE VÉLO PINCE DE TIGE AMORTISSEUR DE SELLE FREIN À DISQUE FOURCHE AVANT PÉDALE ROUE À CHAÎNE DÉRAILLEUR MOTEUR * Le kilométrage est soumis au poids, aux conditions routières, à la température, à... -
Página 16: Caractéristiques Techniques
CONTENU Puissance du moteur : 48V / 500w DE L’EMBALLAGE : Temps de charge : Environ 5 heures Summit Vélo Électrique Étanchéité à l’eau : IP54 Selle et tube de selle Capacité de la batterie: 48V / 7Ah Manuel de l’utilisateur... -
Página 17: Installation De La Roue Avant
INSTALLATION DE LA ROUE AVANT Retirez les pièces de la boîte et Dévissez la vis à oreilles sur l’axe, localisez la roue avant et l’axe de placez l’axe dans la roue avant, roue avant. puis revissez-le sans serrer. Placez la fourche avant sur Serrez à... -
Página 18: Installation Des Guidons
INSTALLATION DES GUIDONS Desserrez les vis 1 et 2, puis tournez la potence du guidon vers l’avant. Retirez les 4 vis du capot supérieur, puis retirez le capot. Fixez le guidon sur la potence du guidon et serrez les vis. -
Página 19: Installation De La Tige De Selle
INSTALLATION DE LA TIGE DE SELLE Déverrouillez et desserrez le collier de selle. Placez la tige de selle dans le cadre et ajustez à la hauteur désirée. Resserrez et réenclenchez la pince. PEDALS INSTALLATION Installez la pédale avec le L dessus sur le côté... -
Página 20: Retrait De La Batterie
RETRAIT DE LA BATTERIE Déverrouillez le loquet du cadre du vélo et pliez le vélo en deux. Le cadre a un support en métal sous le plateau sur lequel le vélo s’équilibre une fois plié. Utilisez les clés fournies pour déverrouiller la batterie, puis retirez doucement la batterie du cadre. -
Página 21: Allumer Votre Vélo
Toutes nos lorsque faire du vélo. l’appareil sous tension. félicitations! Votre vélo est prêt. L’ÉCRAN LCD Téléchargez le manuel complet de l’affichage sur jupiterbike.com/summit pour obtenir des instructions détaillées. -
Página 22: Précautions À Prendre Lors De La Conduite
PRÉCAUTIONS À PRENDRE LORS DE LA CONDUITE • Portez l’équipement de protection approprié, comme un casque, des genouillères et des protège- coudes, afin de prévenir les blessures. • Inspectez le vélo, les freins et la batterie avant chaque sortie pour vous assurer que tout est en bon état de marche. -
Página 23: Avertissements
éclairage, des réflecteurs et des drapeaux de signalisation. DÉPANNAGE • Respectez toujours les lois, règlements et Pour tout problème de dépannage ou ordonnances, y compris les lois de circulation d’exploitation, veuillez communiquer avec locales. Jupiter Tech au 813-609-BIKE (2456) ou par courriel sales@jupiterbike.com... -
Página 24: Garantie
Si vous pensez que votre Jupiter Bike Summit ne fonctionne pas correctement et a besoin d’une pièce de rechange, contactez Jupiter Tech au 813-609-BIKE (2453) ou par e-mail à... - Página 26 ÍNDICE Diagrama Estructural ..........26 Especificaciones ............27 Instalación de la rueda delantera ....28 Instalación de los manillares ......29 Instalación de la tija del sillín ......30 Instalación de pedales .......... 30 Extracción de la batería ......... 31 Instalación de guardabarros .......
-
Página 27: Diagrama Estructural
DIAGRAMA ESTRUCTURAL FRENO MONITOR PESTILLO DE MARCO DE BICICLETA ENCARGARSE DE SILLÍN VÀSTAGO EL MARCO POSTE DEL ASIENTO DE LA BICICLETA ABRAZADERA PARA AMORTIGUADOR POSTE DE ASIENTO FRENOS DE DISCO TENEDOR FRONTAL PEDAL RUEDA DE CADENA DESVIADOR MOTOR * El kilometraje está sujeto al peso, las condiciones del camino, la tempera- tura, la velocidad del viento, los hábitos de conducción, etc. -
Página 28: Especificaciones
CONTENIDO MOTOR y BATERÍA DEL PAQUETE: Potencia del motor: 48V / 500w Tiempo de Carga: Alrededor de 5 horas Summit Bicicleta Electrónica Impermeabilidad: IP54 Sillín y asiento Capacidad de Batería: 48V / 7Ah Manual de usuario del tubo Tipo de Batería: Ion Litio Cargador Corriente de Carga 2A máximo... -
Página 29: Instalación De La Rueda Delantera
INSTALACIÓN DE LA RUEDA DELANTERA Retire las piezas de la caja y Desatornille el tornillo de mariposa ubique la rueda delantera y el eje del eje, coloque el eje en la rueda de la rueda delantera. delantera y vuelva a atornillarlo sin apretarlo. -
Página 30: Instalación De Los Manillares
INSTALACIÓN DE MANILLARES Afloje los tornillos 1 y 2, luego gire la potencia del manillar hacia el frente. Quite los 4 tornillos de la cubierta superior y luego retire la cubierta. Coloque los manillares en la potencia del manillar y apriete los tornillos. -
Página 31: Instalación De La Tija Del Sillín
INSTALACIÓN DEL SILLÍN Destrabe y afloje la abrazadera del asiento. Coloque la tija del sillín en el marco y ajústela a la altura deseada. Vuelva a apretar y vuelva a enganchar la abrazadera. INSTALACION DE PEDALES Instale el pedal con la L en el lado izquierdo de la bicicleta. -
Página 32: Extracción De La Batería
EXTRACCIÓN DE LA BATERÍA Destrabe el pestillo del cuadro de la bicicleta y doble la bicicleta por la mitad. El cuadro tiene un soporte de metal debajo del plato en el que la bicicleta se equilibrará cuando esté plegada. Use las llaves incluidas para desbloquear la batería, luego extraiga suavemente la batería del marco. -
Página 33: Encendido De Su Bicicleta
¡Feli- cuando batería y encienda la cidades! Tu bicicleta andar en bicicleta. alimentación. está lista. LA PANTALLA LCD Descargue el manual completo de la pantalla en jupiterbike.com/summit para obtener instruc- ciones detalladas. -
Página 34: Precauciones Al Manejar
PRECAUCIONES AL MANEJAR • Use el equipo de protección adecuado, como cascos, rodilleras y coderas en sus paseos para ayudar a prevenir lesiones. • Inspeccione la bicicleta, los frenos y la batería antes de cada viaje para asegurarse de que todo funcione correctamente. -
Página 35: Precauciones De Seguridad
Jupiter Tech banderas de señalización. al 813-609-BIKE (2456) o envíe un correo • Siempre cumpla con las leyes, reglamentos electrónico a ventas sales@jupiterbike.com y ordenanzas, incluidas las leyes de tránsito locales. • Siempre dé paso a los peatones y esté alerta a su entorno, tanto directamente frente a usted como a distancia. -
Página 36: Garantía
Esta garantía se anula si el comprador original transfiere el producto a otra persona. Si Jupiter Bike Summit sufre daños debido a modificaciones del cliente y/o se utiliza para cualquier aplicación que no sea para la que fue designada, esta garantía es nula.