Tabla de contenido
Publicidad
Idiomas disponibles
Idiomas disponibles
Enlaces rápidos
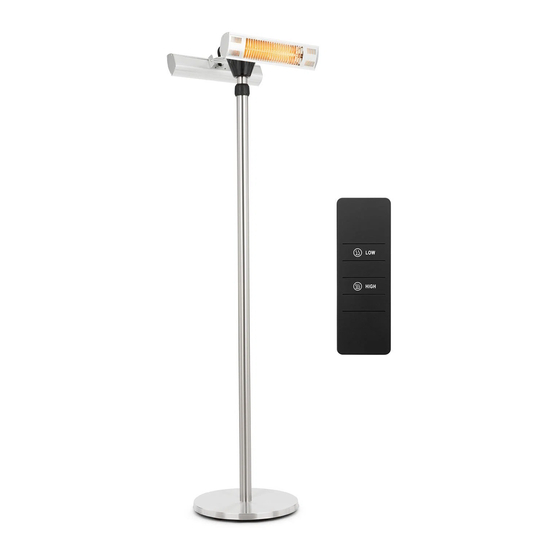
Heat Guard Pro
Heizstrahler
Patio Heater
Radiador
Radiateur
Radiatore
10031446
Hinweis: Das Gerät eignet sich nur
für den Außengebrauch.
Note: The device is only suitable for
outdoor use.
Advertencia: Este aparato solo es
apto para su uso en exteriores.
Remarque : l'appareil convient
pour une utilisation extérieure
uniquement.
Nota: il dispositivo è idoneo solo per
un uso esterno.
Publicidad
Tabla de contenido

Resumen de contenidos para Chal-tec Blumfeldt Heat Guard Pro
- Página 1 Heat Guard Pro Hinweis: Das Gerät eignet sich nur Heizstrahler für den Außengebrauch. Note: The device is only suitable for Patio Heater outdoor use. Advertencia: Este aparato solo es Radiador apto para su uso en exteriores. Remarque : l‘appareil convient Radiateur pour une utilisation extérieure Radiatore...
-
Página 3: Tabla De Contenido
220-240 V ~ 50/60 Hz Leistung 3000 W Schutzklasse IP55 HERSTELLER & IMPORTEUR (UK) Hersteller: Chal-Tec GmbH, Wallstraße 16, 10179 Berlin, Deutschland. Importeur für Großbritannien: Chal-Tec UK limited Unit 6 Riverside Business Centre Brighton Road Shoreham-by-Sea BN43 6RE United Kingdom... -
Página 4: Sicherheitshinweise
SICHERHEITSHINWEISE • Lassen Sie das Gerät nicht unbeaufsichtigt, wenn es in Betrieb ist. • Diese Heizung wird während der Benutzung heiß. Berühren Sie nicht die heißen Oberfl ächen. VORSICHT Verbrennungsgefahr! Einige Teile dieses Produktes können sehr heiß werden und Verbrennungen verursachen. Besondere Aufmerksamkeit ist erforderlich, wenn Kinder und schutzbedürftige Personen anwesend sind. - Página 5 • Ersetzen Sie das Heizelement nicht oder versuchen Sie nicht, es zu entfernen. • Verwenden Sie den Heizstrahler nicht in der unmittelbaren Umgebung eines Bades, einer Dusche oder eines Schwimmbades. • Dieses Produkt darf nicht über einen längeren Zeitraum der Witterung ausgesetzt werden.
-
Página 6: Montage
MONTAGE Kabel Fuß Führen Sie das Kabel durch den Fuß und die Stangen. Mittlere Stange Fuß Die untere Stange mit dem Fuß verschrauben. - Página 7 Mittlere Stange Untere Stange Die mittlere Stange auf die untere Stange schrauben. Obere Stange Mittlere Stange Die obere Stange auf die mittlere Stange schrauben.
- Página 8 Drücken Sie den Kopf des Heizstrahlers auf das obere Rohr und schrauben Sie den Kopf mit 2 Schrauben (M4x8) fest. Das Netzkabel unter dem Standfuß mit 4 Schrauben (M4) befestigen.
-
Página 9: Bedienung
BEDIENUNG Das Netzkabel an die Stromversorgung (mind. 13 A) anschließen, die in einem sicheren, trockenen Bereich liegt. Betreiben Sie den Standheizer nur in der aufrechten Lage. Betätigen Sie den Ein-/Aus-Schalter am Gerät. Bedienung am Gerät Stellen Sie am Berührungsschalter eine der drei Heizstufen ein. Mit jedem Knopfdruck erhöht sich die Stufe. -
Página 10: Reinigung Und Pflege
REINIGUNG UND PFLEGE • Ziehen Sie vor der Reinigung den Stecker aus der Steckdose und lassen Sie das Gerät komplett abkühlen. • Benutzen Sie zur Reinigung keine Scheuermittel oder Lösemittel und tauchen Sie das Gerät niemals in Wasser. • Reinigen Sie die Außenseite mit einem weichen, feuchten Lappen. •... - Página 11 220-240 V ~ 50/60 Hz Power consumtion 3000 W Protection class IP55 MANUFACTURER & IMPORTER (UK) Manufacturer: Chal-Tec GmbH, Wallstrasse 16, 10179 Berlin, Germany. Importer for Great Britain: Chal-Tec UK limited Unit 6 Riverside Business Centre Brighton Road Shoreham-by-Sea BN43 6RE...
-
Página 12: Safety Instructions
SAFETY INSTRUCTIONS • Do not leave this unit unattended when in use. • This heater will get hot when in use. Do not touch hot surfaces. CAUTION Risk of burns! Some parts of this product can become very hot and cause burns. Particular attention has to be given when children and vulnerable people are present. - Página 13 • Do not replace or attempt to replace the element in this product. • Do not use this heater in the immediate surroundings of a bath, shower or swimming pool. • This product must not be left outdoors exposed to the elements for long periods of time.
- Página 14 ASSEMBLY Cable Base Feed the Power Cord through the base and tubes. Middle bar Base Connect the bottom tube with base by screwing them together.
- Página 15 Middle bar Lower bar Connect the middle tube with bottom tube by screwing them together. Upper bar Middle bar Connect the top tube with middle tube by screwing them together.
- Página 16 Push the Heater Head onto the top tube and fix in position using the 4x8 mm screws. Fix the power cord on the base by us- ing four M4 nuts.
- Página 17 OPERATION Connect the power cable to the power supply (min. 13 A) located in a safe, dry area. Operate the parking heater only in the upright position. Operate the on/off switch on the device. Touch Switch Set one of the three heating modes via the touch switch. Mode 1 (left heater) 1500 W Mode 2 (right heater)
-
Página 18: Cleaning And Care
CLEANING AND CARE • Before cleaning, remove the plug from the socket and allow the unit to cool completely. • Do not use scouring agents or solvents for cleaning and never immerse the unit in water. • Clean the outside with a soft, damp cloth. •... - Página 19 220-240 V ~ 50/60 Hz Potencia 3000 W Clase de protección IP55 FABRICANTE E IMPORTADOR (RU) IMPORTADOR: Chal-Tec GmbH, Wallstraße 16, 10179 Berlín, Alemania. Importador para el Reino Unido: Chal-Tec UK limited. Unit 6 Riverside Business Centre Brighton Road Shoreham-by-Sea BN43 6RE...
-
Página 20: Instrucciones De Seguridad
INSTRUCCIONES DE SEGURIDAD • No deje el aparato sin vigilancia cuando esté en funcionamiento. • Este calefactor se calienta durante su uso. No toque las superfi cies calientes. PRECAUCIÓN ¡Peligro de quemaduras! Algunas partes se calientan mucho y pueden producir quemaduras. Se requiere una atención especial cuando hay niños y personas vulnerables cerca. - Página 21 • No sustituya ni intente retirar la resistencia. • No utilice el calefactor en las proximidades de una bañera, ducha o piscina. • No exponga este producto a la intemperie durante largos periodos de tiempo. • No toque el enchufe con las manos húmedas o mojadas. •...
-
Página 22: Montaje
MONTAJE Cable Pase el cable por el pie y las varillas. Barra central Atornille la varilla inferior al pie. - Página 23 Barra central Barra inferior Atornille la barra central en la barra inferior. Barra superior Barra central Atornille la barra superior en la barra central.
- Página 24 Presione la cabeza del calefactor radiante sobre el tubo superior y atornille la cabeza con 2 tornillos (M4x8). Fije el cable de alimentación bajo el soporte con 4 tornillos (M4).
-
Página 25: Funcionamiento
FUNCIONAMIENTO Conecte el cable de alimentación a la fuente de alimentación (mín. 13 A) situada en una zona segura y seca. Utilice el calefactor de estacionamiento sólo en posición vertical. Accione el interruptor de encendido/ apagado de la unidad. Funcionamiento en la unidad Ajuste uno de los tres niveles de calentamiento en el interruptor táctil. -
Página 26: Limpieza Y Cuidado
LIMPIEZA Y CUIDADO • Desenchufe el aparato y deje que se enfríe totalmente antes de limpiarlo. • No utilice limpiadores abrasivos o disolventes para la limpieza y nunca sumerja el aparato en agua. • Limpie la superficie con un paño suave y húmedo. •... -
Página 27: Fiche Technique
220-240 V ~ 50/60 Hz Puissance 3000 W Norme de protection IP55 FABRICANT ET IMPORTATEUR (GB) Fabricant : Chal-Tec GmbH, Wallstraße 16, 10179 Berlin, Allemagne. Importateur pour la Grande Bretagne : Chal-Tec UK limited Unit 6 Riverside Business Centre Brighton Road Shoreham-by-Sea BN43 6RE... -
Página 28: Consignes De Sécurité
CONSIGNES DE SÉCURITÉ • Ne laissez pas l'appareil en fonctionnement sans surveillance. • Ce radiateur devient très chaud pendant le fonctionnement. Ne touchez pas les surfaces chaudes de l'appareil. ATTENTION Risque de brûlure ! Certaines parties de cet appareil peuvent être très chaudes et provoquer des brûlures. - Página 29 • Ne remplacez pas l'élément chauffant et n'essayez pas de le démonter. • N'utilisez pas le radiateur à proximité immédiate d'une baignoire, d'une douche ou d'une piscine. • Ce produit ne doit pas rester exposé longtemps aux intempéries. • Ne touchez jamais la fiche avec des mains mouillées. •...
- Página 30 MONTAGE Câble Barre Faites passer le câble à travers le pied et les barres. Barre centrale Piedbarre Vissez la tige inférieure au pied.
- Página 31 Barre centrale Barre inférieure Vissez la barre centrale sur la barre inférieure. Barre supérieure Barre centrale Vissez la barre supérieure sur la barre centrale.
- Página 32 Appuyez la tête du radiateur sur le tube supérieur et vissez la tête avec 2 vis (M4x8). Fixez le câble d'alimentation sous le pied avec 4 vis (M4).
- Página 33 UTILISATION Branchez le cordon d'alimentation sur le bloc d'alimentation (au moins 13 A) placé dans un endroit sûr et sec. Ne faites fonctionner le radiateur sur pied qu'en position verticale. Appuyez sur l'interrupteur marche / arrêt de l'appareil. Utilisation sur l'appareil Réglez l'un des trois niveaux de chauffage avec l'interrupteur tactile.
-
Página 34: Nettoyage Et Entretien
NETTOYAGE ET ENTRETIEN • Avant le nettoyage, débranchez la fiche de la prise et laissez l'appareil refroidir complètement. • N'utilisez pas de produits abrasifs ou de solvants pour le nettoyage et ne plongez jamais l'appareil dans l'eau. • Nettoyez les surfaces externes avec un chiffon doux et humide. •... - Página 35 220-240 V ~ 50/60 Hz Potenza 3000 W Grado di protezione IP55 PRODUTTORE E IMPORTATORE (UK) Produttore: Chal-Tec GmbH, Wallstraße 16, 10179 Berlino, Germania. Importatore per la Gran Bretagna: Chal-Tec UK limited Unit 6 Riverside Business Centre Brighton Road Shoreham-by-Sea BN43 6RE...
-
Página 36: Avvertenze Di Sicurezza
AVVERTENZE DI SICUREZZA • Non lasciare il dispositivo privo di supervisione mentre è in funzione. • Questo dispositivo diventa estremamente caldo durante il funzionamento. Non toccare le superfi ci bollenti del dispositivo. ATTENZIONE Pericolo di ustioni! Alcuni componenti del dispositivo possono diventare estremamente caldi e causare ustioni. - Página 37 • Non sostituire l'elemento riscaldante e non cercare di rimuoverlo. • Non utilizzare il dispositivo nelle immediate vicinanze di vasche, docce o piscine. • Questo prodotto non può essere esposto alle intemperie per tempi prolungati. • Non toccare la spina con le mani bagnate o umide. •...
- Página 38 MONTAGGIO Cavo Base Far passare il cavo tra base e aste. Asta intermedia Base Avvitare l'asta inferiore alla base.
- Página 39 Asta intermedia Asta inferiore Avvitare l'asta intermedia a quella inferiore. Asta superiore Asta intermedia Avvitare l'asta superiore a quella intermedia.
- Página 40 Spingere la testa della stufa sul tubo superiore e avvitarla saldamente con 2 viti (M4x8). Fissare il cavo di alimentazione sotto alla base con 4 viti (M4).
- Página 41 UTILIZZO Collegare il cavo di alimentazione alla presa elettrica (almeno 13 A), che si trova in una zona sicura e asciutta. Utilizzare la stufa solo in posizione verticale. Premere On/ Off sul dispositivo. Controllo dal dispositivo Impostare uno dei tre livelli riscaldanti con l'interruttore touch. A ogni pressione del tasto aumenta il livello.
-
Página 42: Pulizia E Manutenzione
PULIZIA E MANUTENZIONE • Prima della pulizia, staccare la spina e lasciar raffreddare completamente il dispositivo. • Non utilizzare prodotti abrasivi o solventi per la pulizia e non immergere assolutamente il dispositivo in acqua. • Pulire l’esterno del dispositivo con un panno morbido inumidito. •...