Publicidad
Enlaces rápidos
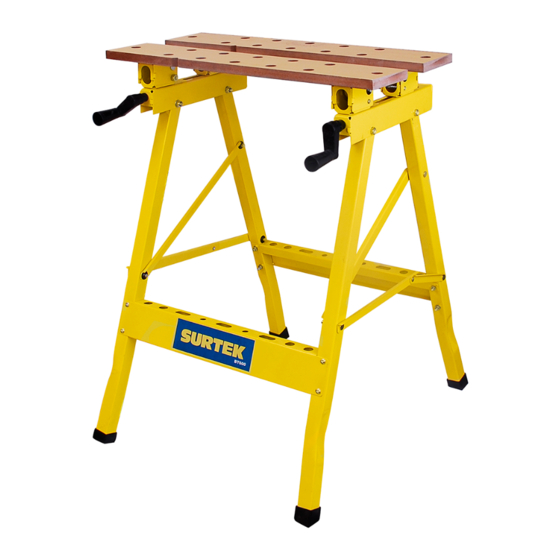
Banco de Trabajo
Workbench
Instrucciones de armado /
Herramienta requerida /
Destornillador tipo Phillips #2 (no incluida). /
screwdriver (not included).
Llave (incluida) /
Spanner (included).
1. Una las barras transversales (4) con el marco metálico
(5) usando los tornillos (7), rondanas (10) y tuercas (9)
incluidos. Asegúrese que la barra transversal con la
leyenda SURTEK quede posicionada al frente del banco
de trabajo. NOTA: El lado frontal del banco vendrá
indicado en el marco metálico con la palabra "frente / front".
Connect cross bars (4), to the leg frames (5) using bolts (7), washers (10)
and hex nuts (9) included. Make sure the cross bar with the Surtek logo is at
the front of the workbench. NOTE: The word "front" written on the inside of the
leg frame should be facing the front of the workbench.
2. Ensamble las bases deslizables (2) a los tablones de madera (1)
usando los tornillos incluidos (11).
Secure the slide base (2) to the table tops (1) with the screw (11) supplied.
3. Ensamble el marco metálico a las bases deslizantes por la parte
inferior usando los tornillos (3), rondanas (8) y tuercas con nailon
(12) incluidas para asegurar el ensamble. Los tornillos deberán
colocarse de afuera hacia adentro de la base deslizable. NOTA: Las
palancas de las bases deslizables deberán quedar al frente del
banco de trabajo, al igual que la barra transversal antes
mencionada.
Place leg frame into slide base using the hex bolts (3), washer (8) and nylon nuts (12) to secure
in place. The bolts should be inserted from the outside of the slide base. NOTE: Handles are at
front of workbench.
4. Inserte las tapas de goma (6) en las puntas de cada pata del banco. NOTA: Las aristas más altas deberán quedar por
fuera de cada una de las patas.
Attach rubber feet pads (6) to the leg frames. NOTE: The longest side of the pads faces the outsides of the workbench.
5. Inserte los topes de sujeción (13) en los orificios de los tablones donde más le convenga.
Insert support pegs (13) in appropriate holes on table top.
No.
Figuras
Descripción
Figure
Description
1
Base de madera /
2
Base deslizante /
3
Tornillo hexagonal /
4
Barra transversal /
5
Marco (patas) /
6
Tapa de goma para patas /
7
Tornillo /
8
Rondana /
9
Tuerca hexagonal /
10
Rondana /
11
Tornillo para madera /
12
Tuerca con nailon /
13
Topes de apoyo (sujeción) /
Assembly instructions
Tools required
Phillips #2
Table top
Slide base
13 x 7 x 50 mm
Hex bolt
Cross bars
Leg frame
Rubber feet pads
9,5 x 5 x 40 mm
Bolt
16 x 8 x 1,2 mm
Washer
10 x 3,5 mm
Hex nut
12 x 6 x 0,8 mm
Washer
7,5 x 4,5 x 17 mm
Wood screw
13 x 7 mm
Nylon nut
Support pegs
¿CÓMO PLEGAR EL BANCO DE
Ctd.
TRABAJO? /
Qty.
WORKBENCH?
2
A. Empuje hacia arriba las barras de soporte
lateral del marco metálico. /
2
on the legs upwards.
4
B. Continúe acercando las patas delanteras hacia
las traseras para plegar completamente el banco.
2
Recomendació
n: Consérvese
2
en un lugar
fresco y seco.
4
/Swing the
front legs
8
towards the
back legs to
4
fold the
workbench for
8
storage.
8
Recommendati
ons: Store in a
16
cool, dry place.
4
4
BT600
HOW TO FOLD THE SURTEK
Push supporting bars
A
A
B
Publicidad

Resumen de contenidos para Surtek BT600
- Página 1 Connect cross bars (4), to the leg frames (5) using bolts (7), washers (10) and hex nuts (9) included. Make sure the cross bar with the Surtek logo is at the front of the workbench. NOTE: The word “front” written on the inside of the leg frame should be facing the front of the workbench.
- Página 2 Make sure the legs remain in contact with the ground. No deberá presentar desnivel entra ellas. NUNCA USE EL BANCO DE TRABAJO COMO ESCALERA. / Never use Surtek Workbench as a ladder. No se siente sobre el banco de trabajo. / DO NOT sit or stand on the product.