Tabla de contenido
Publicidad
Idiomas disponibles
Idiomas disponibles
Enlaces rápidos
welcoming • sophisticated • inspiring
APPROVED FOR USE
IN WET LOCATIONS
allen + roth
is a registered trademark
®
ITEM #2602002
of LF, LLC. All Rights Reserved.
OUTDOOR WALL LANTERN
MODEL #WL134MBK
Français p. 10
Español p. 19
Purchase Date
ATTACH YOUR RECEIPT HERE
Questions, problems, missing parts? Before returning to your retailer, call our customer service
department at 1-866-439-9800, 8 a.m. - 8 p.m., EST, Monday - Sunday.
SM20403
1
Publicidad
Capítulos
Tabla de contenido
Solución de problemas

Manuales relacionados para Allen + Roth WL134MBK


Resumen de contenidos para Allen + Roth WL134MBK
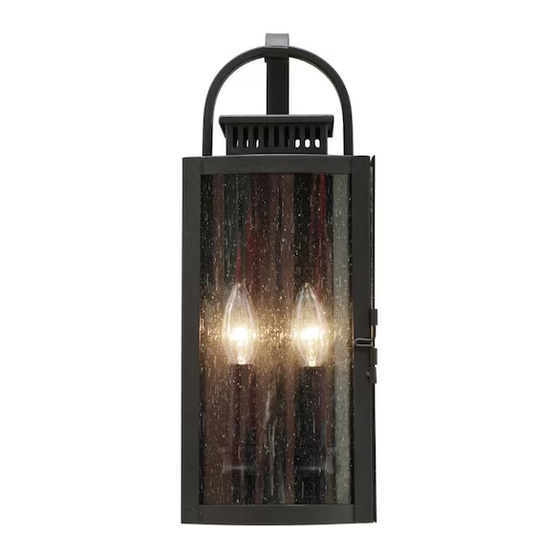
- Página 1 • sophisticated • inspiring APPROVED FOR USE IN WET LOCATIONS allen + roth is a registered trademark ® ITEM #2602002 of LF, LLC. All Rights Reserved. OUTDOOR WALL LANTERN MODEL #WL134MBK Français p. 10 Español p. 19 Purchase Date...
-
Página 2: Tabla De Contenido
TABLE OF CONTENTS Package Contents ........................2 Hardware Contents ...........................3 Safety Information ........................3 Preparation ...........................5 Assembly Instructions ......................5 Care and Maintenance ......................9 Troubleshooting ........................9 Warranty ..........................9 PACKAGE CONTENTS PART DESCRIPTION QUANTITY Fixture Mounting Strap (preassembled to fixture (A)) Decorative Nut (preassembled to mounting strap (B)) -
Página 3: Hardware Contents
HARDWARE CONTENTS (shown actual size) Machine Wire Screw Connector Qty. 2 Qty. 3 SAFETY INFORMATION READ AND SAVE THESE INSTRUCTIONS. DANGER • For your protection and safety, carefully read and understand the information provided in this manual completely before attempting to assemble, install or operate this product. Failure to do so could lead to electrical shock, fire or other injuries that could be hazardous or even fatal. -
Página 4: Preparation
SAFETY INFORMATION WARNING • To avoid personal injury, the use of gloves may be necessary while handling fixture parts with sharp edges. • DO NOT suspend any fixture by the house wires. A fixture must always be mounted directly to a mounting strap which is first attached to the outlet box. Wire connectors will not support the weight of a fixture. -
Página 5: Assembly Instructions
ASSEMBLY INSTRUCTIONS Turn off circuit breakers and wall switch to the fixture supply line leads. DANGER: Failure to disconnect power supply prior to installation may result in serious injury or death. Remove existing fixture and disconnect all electrical wiring. Open fixture door by lifting latch and pulling out. Remove and discard styrofoam inserts. - Página 6 ASSEMBLY INSTRUCTIONS Attach mounting strap (B) to outlet box (not included) using the existing washers and outlet box screws or the machine screws (BB). NOTE: If the outlet box screws required for your outlet box are of a different size than the machine screws (BB), consult with a licensed electrician Washers before proceeding.
- Página 7 ASSEMBLY INSTRUCTIONS Connect BARE/GREEN ground wire from outlet WHITE BLACK box to BARE ground wire from fixture (A) using wire connector (AA). Connect WHITE wire from fixture (A) to WHITE wire from outlet box using existing wire connector or wire connector (AA). Connect BLACK wire from fixture (A) to BLACK wire from outlet box using existing wire connector or wire connector (AA).
- Página 8 ASSEMBLY INSTRUCTIONS Push wire connectors (AA) gently back into outlet box. Carefully push excess wiring into outlet box. Secure fixture (A) to mounting strap (B) with decorative nut (C) that was previously removed (Step 3, Page 6). NOTE: Before tightening decorative nut (C) completely, use level (not included) to check fixture (A) -- adjust if necessary.
-
Página 9: Care And Maintenance
CARE AND MAINTENANCE • Shut off main power supply. Wipe with soft cloth or use window cleaner. Do not use an abrasive cleaner. TROUBLESHOOTING WARNING: Before beginning work, shut off the power supply to avoid electrical shock. PROBLEM POSSIBLE CAUSE CORRECTIVE ACTION Bulb will not light. - Página 10 • sophisticated • inspiring APPROUVÉ POUR UNE UTILISATIONDANS DES ENDROITS MOUILLÉS allen + roth est une marque de commerce ® ARTICLE #2602002 déposée de LF, LLC. Tous droits réservés. LANTERNE MURALE POUR L’EXTÉRIEUR MODÈLE #WL134MBK JOIGNEZ VOTRE REÇU ICI Date d’achat...
-
Página 11: Contenu De L'emballage
TABLE DES MATIÈRES Contenu de l’emballage ......................11 Quincaillerie incluse ......................12 Consignes de sécurité ......................12 Préparation .......................... 13 Instructions pour l’assemblage .................... 14 Entretien ..........................18 Dépannage .......................... 18 Garantie ..........................18 CONTENU DE L’EMBALLAGE PIÈCE DESCRIPTION QUANTITÉ Luminaire Traverse (préassemblée au luminaire [A]) Écrou décoratif... -
Página 12: Quincaillerie Incluse
QUINCAILLERIE INCLUSE (grandeur réelle) Capuchon de Vis à connexion métaux Qté : 3 Qté : 2 CONSIGNES DE SÉCURITÉ VEUILLEZ LIRE ET CONSERVER CES INSTRUCTIONS. DANGER • Pour votre protection et votre sécurité, veuillez lire attentivement ce guide et vous assurer de comprendre l’information qu’il contient avant de tenter d’assembler, d’installer ou d’utiliser cet article. -
Página 13: Préparation
CONSIGNES DE SÉCURITÉ AVERTISSEMENT • Portez des gants au besoin pour manipuler les pièces aux bords coupants afin de prévenir les blessures. • NE suspendez AUCUN luminaire par les fils électriques de la maison. Le luminaire doit toujours être fixé à une boîte de sortie ou à une traverse qui elle-même est reliée à la boîte de sortie. Les capuchons de connexion ne peuvent supporter le poids d’un luminaire. -
Página 14: Instructions Pour L'assemblage
INSTRUCTIONS POUR L’ASSEMBLAGE Mettez le disjoncteur et l’interrupteur mural hors tension a fin de couper l’alimentation électrique des fils du luminaire. DANGER : Ne pas couper l’alimentation électrique avant l’installation peut entraîner des blessures graves voire mortelles. Retirez le luminaire en place et débranchez tout le câblage électrique. - Página 15 INSTRUCTIONS POUR L’ASSEMBLAGE Fixez la traverse (B) à la boîte de sortie (non incluse) à l’aide des vis et des rondelles existantes ou des vis à métaux (BB). REMARQUE : Si votre boîte de sortie nécessite des vis pour boîte de sortie dont la taille est différente de celle des vis à...
- Página 16 INSTRUCTIONS POUR L’ASSEMBLAGE Raccordez le fil de mise à la terre DÉNUDÉ/VERT BLANC NOIR de la boîte de sortie au fil DÉNUDÉ du luminaire (A) au moyen du capuchon de connexion (AA). Branchez le fil BLANC du luminaire (A) au fil BLANC de la boîte de sortie au moyen du capuchon de connexion existant ou du capuchon de connexion (AA).
- Página 17 INSTRUCTIONS POUR L’ASSEMBLAGE Poussez délicatement les capuchons de connexion (AA) dans la boîte de sortie. Insérez soigneusement les fils qui dépassent dans la boîte de sortie. Fixez le luminaire (A) à la traverse (B) à l’aide de l’écrou décoratif (C) retiré précédemment (étape 3, page 14).
-
Página 18: Entretien
ENTRETIEN • Coupez l’alimentation électrique principale. Nettoyez le luminaire à l’aide d’un linge doux ou d’un nettoyant pour vitres. N’utilisez pas de détergent abrasif. DÉPANNAGE AVERTISSEMENT : Avant de manipuler l’article, coupez l’alimentation électrique pour éliminer les risques de choc électrique. PROBLÈME CAUSE POSSIBLE MESURE CORRECTIVE... -
Página 19: Farol De Pared
• sophisticated • inspiring HOMOLOGADO PARA UBICACIÓN MOJADA allen + roth es una marca registrada de ® ARTÍCULO #2602002 LF, LLC. Todos los derechos reservados. FAROL DE PARED MODELO #WL133MBK ADJUNTE SU RECIBO AQUÍ Fecha de compra ¿Preguntas, problemas, piezas faltantes? Antes de volver a la tienda, llame a nuestro Departamento de Servicio al Cliente al 1-866-439-9800, de lunes a domingo de 8 a.m. -
Página 20: Contenido Del Paquete
ÍNDICE Contenido del paquete ......................20 Aditamentos ........................21 Información de seguridad ....................21 Preparación .......................... 22 Instrucciones de ensamblaje ....................23 Cuidado y mantenimiento ....................27 Solución de problemas ......................27 Garantía ..........................27 CONTENIDO DEL PAQUETE PIEZA DESCRIPCIÓN CANTIDAD Lámpara Placa de montaje... -
Página 21: Aditamentos
ADITAMENTOS (se muestran en tamaño real) Conector de Tornillo para cables metal Cant. 3 Cant. 2 INFORMACIÓN DE SEGURIDAD LEA Y GUARDE ESTAS INSTRUCCIONES. PELIGRO • Por su propia protección y seguridad, lea atentamente y comprenda la información de este manual en su totalidad antes de intentar ensamblar, instalar o usar este producto. -
Página 22: Preparación
INFORMACIÓN DE SEGURIDAD LEA Y GUARDE ESTAS INSTRUCCIONES. ADVERTENCIA • Para evitar lesiones personales, puede ser necesario usar guantes al manipular las piezas de la lámpara con bordes filosos. • NUNCA cuelgue lámparas de los conductores de la casa. Siempre se debe montar la lámpara directamente en una caja de salida o una placa de montaje que esté... -
Página 23: Instrucciones De Ensamblaje
INSTRUCCIONES DE ENSAMBLAJE Apague los interruptores de circuito y el interruptor de pared para interrumpir el suministro de electricidad hacia la lámpara. PELIGRO: si no interrumpe el suministro de electricidad antes de la instalación, pueden producirse lesiones graves o la muerte. Retire la lámpara existente y desconecte el cableado eléctrico. -
Página 24: Aditamentos Utilizados
INSTRUCCIONES DE ENSAMBLAJE 4. Fije la placa de montaje (B) a la caja de salida (no se incluye) con las arandelas existentes y los tornillos de la caja de salida o los tornillos para metal (BB). NOTA: si el tamaño de los tornillos de la caja de salida requeridos para su caja es diferente al de Arandelas los tornillos para metal (BB), consulte a un... - Página 25 INSTRUCCIONES DE ENSAMBLAJE Conecte el conductor DESNUDO/VERDE de puesta BLANCO NEGRO a tierra de la caja de salida al conductor DESNUDO de puesta a tierra de la lámpara (A) con el conector de cables (AA). Conecte el conductor BLANCO de la lámpara (A) al conductor BLANCO de la caja de salida con el conector de cables existente o el conector de cables (AA).
- Página 26 INSTRUCCIONES DE ENSAMBLAJE Empuje los conectores de cables (AA) suavemente de vuelta en la caja de salida. Empuje cuidadosamente el exceso de cableado hacia el interior de la caja de salida. Fije la lámpara (A) a la placa de montaje (B) con la tuerca decorativa (C) que retiró...
-
Página 27: Cuidado Y Mantenimiento
CUIDADO Y MANTENIMIENTO • Corte el suministro principal de electricidad. Limpie con un paño suave o utilice un limpiador de ventanas. No use un limpiador abrasivo. SOLUCIÓN DE PROBLEMAS ADVERTENCIA: antes de comenzar cualquier trabajo, corte el suministro de electricidad para evitar descargas eléctricas.