Tabla de contenido
Publicidad
Idiomas disponibles
Idiomas disponibles
Enlaces rápidos
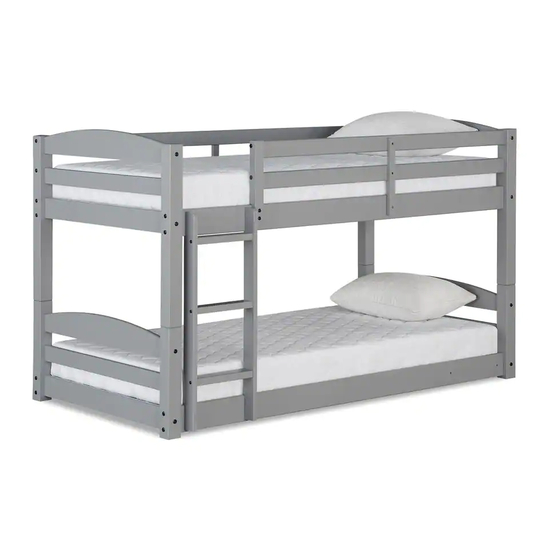
TWIN
BUNKBED
Customer satisfaction is important to us at Dorel Asia. Our agents are available Monday to
Friday 8am to 5pm (EST) to answer any question you may have. For faster service, always
have the model number ready when calling our toll free number 1-800-295-1980 or emailing
us at das@dorel.com .
For more great furniture ideas, check out our website at
You can also keep up to date on all the latest trends by liking our
Date of Purchase: _____ / _____ / _____
DO NOT RETURN PRODUCT TO THE RETAILER. If a part is missing or damaged, contact
our customer service department. We will replace the part FREE of charge.
NOTE: THIS INSTRUCTION BOOKLET CONTAINS IMPORTANT SAFETY INFORMATION.
Model Number:
DL7891-1
DL7891
DL7891W-1
DL7891W
DL7891G-1
DL7891G
DL7891B-1
DL7891B
PLEASE READ AND KEEP FOR FUTURE REFERENCE.
UPC Code:
0-65857-17796-1
0-65857-17942-2
0-65857-18284-2
0-65857-18283-5
0-65857-19465-4
0-65857-19464-7
0-65857-19900-0
0-65857-19899-7
www.dorelliving.com
Facebook
ATTENTION
USE THIS
MANUAL TO
ASSEMBLE THE
TWIN BUNK BED
Lot Number:
(taken from carton)
Color:
Mocha
Mocha
White
White
Gray
Gray
Black
Black
page.
Publicidad
Tabla de contenido

Manuales relacionados para DOREL Living DL7891-1


Resumen de contenidos para DOREL Living DL7891-1
- Página 1 Model Number: UPC Code: Color: 0-65857-17796-1 DL7891-1 Mocha 0-65857-17942-2 DL7891 Mocha 0-65857-18284-2 DL7891W-1 White 0-65857-18283-5 DL7891W White TWIN 0-65857-19465-4 DL7891G-1 Gray 0-65857-19464-7 DL7891G Gray BUNKBED 0-65857-19900-0 DL7891B-1 Black 0-65857-19899-7 DL7891B Black Customer satisfaction is important to us at Dorel Asia. Our agents are available Monday to Friday 8am to 5pm (EST) to answer any question you may have.
-
Página 2: Customer Service
CUSTOMER SERVICE If you are missing parts or have any questions about this product, contact our customer service representative first! CALL 1-800-295-1980 You can also order parts by writing to the address listed below. Please include the product model number, color and a detailed description of the part. Customer Service Department No. -
Página 3: Care And Cleaning
KEEP THESE INSTRUCTIONS FOR FUTURE USE. NOTES READ EACH STEP CAREFULLY BEFORE STARTING. IT IS VERY IMPORTANT THAT EACH STEP OF INSTRUCTION IS PERFORMED IN THE CORRECT ORDER. IF THESE STEPS ARE NOT FOLLOWED IN SEQUENCE, ASSEMBLY DIFFICULTIES WILL OCCUR AND CAN RESULT IN INJURY. CAUTION: ADULT ASSEMBLY REQUIRED MAKE SURE ALL PARTS ARE INCLUDED. -
Página 4: Hardware List
TWIN BUNK BED HARDWARE LIST Φ 1/4" x 100mm Φ 6.5mm x 48mm JOINT CONNECTOR (4mm HEX HEAD) WOOD JOINT CONNECTOR (4mm HEX HEAD) 16 PCS 10 PCS Φ 6.5mm x 100mm Φ 4mm x 35mm WOOD JOINT CONNECTOR (4mm HEX HEAD) FLAT HEAD SCREW 24 PCS 24 PCS... -
Página 5: Parts List
TWIN BUNK BED PARTS LIST TOP POST TOP POST TOP POST 1 PC 2 PCS 1 PC BOTTOM POST BOTTOM POST HEADBOARD TOP CROSS 2 PCS 2 PCS 4 PCS... - Página 6 TWIN BUNK BED PARTS LIST HEADBOARD BOTTOM CROSS TOP FRONT SIDE RAIL BOTTOM FRONT SIDE RAIL 4 PCS 1 PC 1 PC BACK SIDE RAIL BOTTOM BACK SIDE RAIL SLAT WITHOUT WOOD DOWEL 1 PC 1 PC 12 PCS LONG GUARDRAIL SHORT GUARDRAIL LEFT LADDER END 2 PCS...
- Página 7 TWIN BUNK BED STEP 1 Insert wood dowels (7) into the ends of headboard top cross (F), headboard bottom cross (G) and headboard center cross (S). Attach them to top posts (A & B) using wood joint connectors (3) as shown. Tighten the wood joint connectors (3) with the Allen key (8). NOTES: Headboard top crosses (F, G&...
- Página 8 TWIN BUNK BED STEP 2 Insert wood dowels (7) into the ends of headboard top cross (F), headboard bottom cross (G) and headboard center cross (S) and attach them to bottom posts (D) & (E) using wood joint connectors (3) as shown. Tighten the wood joint connectors (3) with the Allen key (8).
- Página 9 TWIN BUNK BED STEP 3 Attach the two headboards with bottom posts (D & E) to bottom front side rail (I) and bottom back side rail (K) using joint connectors (1) and barrel nuts (9) as shown. Tighten the joint connectors (1) with the Allen key (8). Note: This is the lower bunk.
- Página 10 TWIN BUNK BED STEP 4 Insert wood dowels (7) into each end of the long guardrails (M). Attach two long guardrails (M) and two top side rails (H & J) to top posts (A & B) and (C & B) as shown. Fasten top side rails (H &...
- Página 11 TWIN BUNK BED STEP 5 Insert wood dowels (7) into short guardrails (N). Attach short guardrails (N) to guardrail post (U) with wood joint connectors (3) as shown. Fasten the short guardrails (N) to top post (B) with wood joint connectors (3). Fasten the guardrail post (U) to top front side rail (H) with joint connectors (10) and hex cap (11) as shown.
- Página 12 TWIN BUNK BED STEP 6 Attach the guardrail leg (R) to the short guardrails (N) and top front side rail (H) with flat head screws (6). Attach the other guardrail leg (R) (on the other side of the bed) to long guardrails (M) and top back side rail (J) with flat head screws (6) as shown. Use a Phillips head screwdriver (not included) to tighten the flat head screws.
- Página 13 TWIN BUNK BED STEP 7 Insert wood dowels (7) into the end of the ladder steps (Q). Attach left ladder end (O) and right ladder end (P) to ladder steps (Q) with wood joint connectors (2). Tighten the wood joint connectors (2) with the Allen key (8).
- Página 14 TWIN BUNK BED STEP 8 insert the metal dowels (5) into the holes in the bottom posts (D and E). Stack the top bunk onto the bottom bunk with the help of another person.
- Página 15 TWIN BUNK BED back view STEP 9 Attach the ladder to the top front side rail (H) and bottom front side rail (I) with wood joint connectors (2) as shown. Use Allen key (8) to tighten the joint connectors.
- Página 16 TWIN BUNK BED STEP 10 Insert two slats with wood dowel (T) into the center slots of the top side rails (H &J) of the upper bunk as shown. Attach slats without wood dowel (L) onto top side rails (H &J) of the upper bunk with flat head screws (4) as shown.
- Página 17 TWIN BUNK BED To convert your bunk bed into two separate beds, remove the ladder and all the guardrails. With the help of another person, unstack the top bunk from the lower bunk.
- Página 18 TWIN BUNK BED CAUTION: This unit is intended for use only with the products and/or maximum weights indicated. Use with other products and/or products heavier than the maximum weights indicated may result in instability or cause possible injury. DO NOT ALLOW HORSEPLAY DO NOT ALLOW CHILDREN UNDER 6 YEARS ON OR UNDER THE BED AND OF AGE TO USE THE UPPER BUNK.
- Página 19 Modelo No: CODIGO UPC: Color: 0-65857-17796-1 DL7891-1 MOCA 0-65857-17942-2 DL7891 MOCA 0-65857-18284-2 DL7891W-1 BLANCO 0-65857-18283-5 CAMAS DL7891W BLANCO 0-65857-19465-4 DL7891G-1 GRIS 0-65857-19464-7 DL7891G GRIS CUCHETAS 0-65857-19900-0 DL7891B-1 NEGRO 0-65857-19899-7 DL7891B NEGRO SIMPLES ¡Le damos mucha importancia a la satisfacción de nuestros clientes. Nuestros representantes están disponibles de lunes a viernes de 8 h a 17 h (hora del este) para responder a todas sus...
-
Página 20: Servicio Al Cliente
SERVICIO AL CLIENTE Si faltan piezas o si tiene alguna pregunta sobre este producto, ¡comuníquese con nuestro representante de servicio! LLAME AL 1-800-295-1980 También puede pedir piezas escribiendo a la siguiente dirección. Por favor incluya el número de modelo, color y una descripción detallada de la pieza. Departamento de Servicio al Cliente No. -
Página 21: Cuidado Y Limpieza
CONSERVE ESTAS INSTRUCCIONES PARA REFERENCIA FUTURA. NOTAS LEA ATENTAMENTE CADA ETAPA ANTES DE COMENZAR. ES MUY IMPORTANTE QUE CADA ETAPA SE LLEVE A CABO EN EL ORDEN CORRECTO. SI ESTAS ETAPAS NO SE SIGUEN EN ORDEN, PUEDEN SURGIR DIFICULTADES PARA ARMAR LA CAMA Y CAUSAR LESIONES A LOS NIÑOS QUE LA USAN. DEBE SER ARMADA POR UN ADULTO. -
Página 22: Lista De Accesorios
CAMAS CUCHETAS SIMPLES LISTA DE ACCESORIOS Φ 1/4" x 100mm Φ 6.5mm x 48mm PERNO CONECTOR (4MM CABEZA HEXAGONAL) PERNO CONECTOR MADERA (4MM CABEZA 16 PCS HEXAGONAL) 10 PCS Φ 6.5mm x 100mm Φ 4mm x 35mm PERNO CONECTOR MADERA (4MM CABEZA TORNILLO CABEZA PLANA HEXAGONAL) 24 PCS 24 PCS... -
Página 23: Lista De Piezas
CAMAS CUCHETAS SIMPLES LISTA DE PIEZAS PATA SUPERIOR PATA SUPERIOR PATA SUPERIOR 1 PC 2 PCS 1 PC PATA INFERIOR PATA INFERIOR TRAVESAÑO SUPERIOR CABECERA 2 PCS 2 PCS 4 PCS... - Página 24 CAMAS CUCHETAS SIMPLES LISTA DE PIEZAS TRAVESAÑO INFERIOR CABECERA LARGUERO LATERAL SUPERIOR LARGUERO LATERAL INFERIOR 4 PCS ANTERIOR 1 PC ANTERIOR 1 PC LARGUERO LATERAL POSTERIOR LARGUERO LATERAL INFERIOR LISTÓN SIN CLAVIJA DE MADERA 1 PC POSTERIOR 1 PC 12 PCS BARANDA LARGA BARANDA CORTA LADO IZQUIERDO ESCALERA...
- Página 25 CAMAS CUCHETAS SIMPLES Etiqueta de advertencia ETAPA 1 Inserte clavijas de madera (7) en los extremos del travesaño superior de la cabecera (F), del travesaño inferior de la cabecera (G) y del travesaño central de la cabecera (S). Únalos con las patas superiores (A y B) con pernos conectores para madera (3) como ilustrado.
- Página 26 CAMAS CUCHETAS SIMPLES ETAPA 2 Inserte clavijas de madera (7) en los extremos del travesaño superior de cabecera (F), del travesaño inferior de cabecera (G) y del travesaño central de cabecera (S) y únalos con las patas inferiores (D) y (E) con pernos conectores para madera (3) como ilustrado. Ajuste los pernos conectores para madera (3) con la llave Allen (8).
- Página 27 CAMAS CUCHETAS SIMPLES ETAPA 3 Una las dos cabeceras con las patas inferiores (D y E) al larguero lateral inferior anterior (I) y al larguero lateral inferior posterior (K) con pernos conectores (1) y tuercas barrilete (9) como ilustrado. Ajuste los pernos conectores (1) con la llave Allen (8). Nota: Ésta es la cama inferior.
- Página 28 CAMAS CUCHETAS SIMPLES ETAPA 4 Inserte clavijas de madera (7) en los extremos de las barandas largas (M). Una las dos barandas largas (M) y los dos largueros laterales superiores (H y J) con las patas superiores (A y B) y (C y B) como ilustrado. Fije los largueros laterales superiores (H y J) con pernos conectores (1) y tuercas barrilete (9).
- Página 29 CAMAS CUCHETAS SIMPLES ETAPA 5 Inserte clavijas de madera (7) en las barandas cortas (N). Una las barandas cortas (N) al soporte de baranda (U) con pernos conectores para madera (3) como ilustrado. Fije las barandas cortas (N) a la pata superior (B) con pernos conectores para madera (3). Fije el soporte de baranda (U) al larguero lateral superior anterior (H) con pernos conectores (10) y pernos de brida hexagonal (11) como ilustrado.
- Página 30 CAMAS CUCHETAS SIMPLES ETAPA 6 Una un soporte de baranda (R) a las barandas cortas (N) y al larguero lateral superior anterior (H) con tornillos de cabeza plana (6). Una el otro soporte de baranda (R) (del otro lado de la cama) con las barandas largas (M) y el larguero lateral superior posterior (J) con tornillos de cabeza plana (6) como ilustrado.
- Página 31 CAMAS CUCHETAS SIMPLES ETAPA 7 Inserte clavijas de madera (7) en los extremos de los escalones (Q). Una el lado izquierdo de la escalera (O) y el lado derecho de la escalera (P) a los escalones (Q) con pernos conectores para madera (2). Ajuste los pernos conectores para madera (2) con la llave Allen (8).
- Página 32 CAMAS CUCHETAS SIMPLES Agujeros Agujeros Agujeros ETAPA 8 Inserte las clavijas de metal (5) en los agujeros de las patas inferiores (D y E). Con la ayuda de otra persona, coloque la cama superior sobre la cama inferior.
- Página 33 CAMAS CUCHETAS SIMPLES back view Vista Posterior ETAPA 9 Una la escalera al larguero lateral superior anterior (H) y al larguero lateral inferior anterior (I) con pernos conectores para madera (2) como ilustrado. Utilice la llave Allen (8) para ajustar los pernos conectores.
- Página 34 CAMAS CUCHETAS SIMPLES Listones: 8 piezas para la cama superior 8 piezas para la cama inferior ETAPA 10 Inserte dos listones con clavija de madera (T) en las ranuras ubicadas en el centro de los largueros laterales superiores (H y J) de la cama superior como ilustrado. Fije los listones sin clavija de madera (L) en los largueros laterales superiores (H y J) de la cama superior con tornillos de cabeza plana (4) como ilustrado.
- Página 35 CAMAS CUCHETAS SIMPLES La primera cama simple La segunda cama simple Para convertir las camas cuchetas en dos camas simples separadas, retire la escalera y todas las barandas. Con la ayuda de otra persona, retire la cama superior de la cama inferior.
-
Página 36: Need Help
CAMAS CUCHETAS SIMPLES PRECAUCIÓN: Esta unidad está diseñada para ser utilizada únicamente con los productos y/o pesos máximos indicados. Su uso con otros productos y/o productos más pesados que los pesos máximos indicados puede provocar inestabilidad o causar lesiones. NO PERMITA QUE NIÑOS MENORES DE 6 NO PERMITA QUE LOS NIÑOS AÑOS DUERMAN EN LA CUCHETA HAGAN PAYASADAS SOBRE O... - Página 37 Modèle No: 0-65857-17796-1 DL7891-1 MOKA 0-65857-17942-2 DL7891 MOKA 0-65857-18284-2 DL7891W-1 BLANC 0-65857-18283-5 DL7891W BLANC 0-65857-19465-4 LITS SIMPLES DL7891G-1 GRIS 0-65857-19464-7 DL7891G GRIS 0-65857-19900-0 SUPERPOSÉS DL7891B-1 NOIR 0-65857-19899-7 DL7891B NOIR La satisfaction de nos clients est important pour nous chez Dorel Asia. Nos représentants sont disponibles du lundi au vendredi de 8 h à...
- Página 38 SERVICE À LA CLIENTÈLE Si des pièces sont manquantes ou si vous avez des questions concernant ce produit, contactez un représentant de notre service à la clientèle d'abord! APPELEZ 1-800-295-1980 Vous pouvez aussi commander des pièces en écrivant à l'adresse indiquée ci-dessous. Veuillez inclure le numéro de modèle du produit, la couleur et une description détaillée de la pièce.
-
Página 39: Garantie Limitée
INTERDIRE PLUS D'UNE PERSONNE SUR LE LIT SUPÉRIEUR. CONSERVEZ CES INSTRUCTIONS POUR RÉFÉRENCE ULTÉRIEURE. NOTES LIRE ATTENTIVEMENT CHAQUE ÉTAPE AVANT DE COMMENCER. IL EST TRÈS IMPORTANT QUE CHAQUE ÉTAPE SOIT EXÉCUTÉE DANS L'ORDRE APPROPRIÉ. SI CES ÉTAPES NE SONT PAS SUIVIES DANS L'ORDRE, DES DIFFICULTÉS D'ASSEMBLAGE SE PRODUIRONT ET PEUVENT ENTRAÎNER DES BLESSURES. -
Página 40: Liste De Quincaillerie
LITS SIMPLES SUPERPOSÉS LISTE DE QUINCAILLERIE Φ 1/4" x 100mm Φ 6.5mm x 48mm BOULON DE RACCORDEMENT BOIS (4MM TÊTE BOULON DE RACCORDEMENT (4MM TÊTE HEXAGONALE) 16 PCS HEXAGONALE) 10 PCS Φ 6.5mm x 100mm Φ 4mm x 35mm BOULON DE RACCORDEMENT BOIS (4MM TÊTE VIS À... -
Página 41: Liste De Pièces
LITS SIMPLES SUPERPOSÉS LISTE DE PIÈCES PIED SUPÉRIEUR PIED SUPÉRIEUR PIED SUPÉRIEUR 1 PC 2 PCS 1 PC PIED INFÉRIEUR PIED INFÉRIEUR TRAVERSE SUPÉRIEURE TÊTE DE LIT 2 PCS 2 PCS 4 PCS... - Página 42 LITS SIMPLES SUPERPOSÉS LISTE DE PIÈCES TRAVERSE INFÉRIEURE TÊTE DE LIT BARRE LATÉRALE SUPÉRIEURE AVANT BARRE LATÉRALE INFÉRIEURE AVANT 4 PCS 1 PC 1 PC BARRE LATÉRALE ARRIÈRE BARRE LATÉRALE INFÉRIEURE ARRIÈRE LATTE SANS GOUJON DE BOIS 1 PC 1 PC 12 PCS BARRIÈRE LONGUE BARRIÈRE COURTE...
- Página 43 LITS SIMPLES SUPERPOSÉS Etiqueta de advertencia ÉTAPE 1 Insérez des goujons de bois (7) dans les extrémités de la traverse supérieure de la tête de lit (F), dans la traverse inférieure de la tête de lit (G) et dans la traverse centrale de la tête de lit (S). Fixez-les aux pieds supérieurs (A et B) avec des boulons de raccordement pour bois (3) tel qu’illustré.
- Página 44 LITS SIMPLES SUPERPOSÉS ÉTAPE 2 Insérez des goujons de bois (7) dans les extrémités de la traverse supérieure de tête de lit (F), dans la traverse inférieure de tête de lit (G) et dans la traverse centrale de tête de lit (S) et fixez-les aux pieds inférieurs (D) et (E) avec des boulons de raccordement pour bois (3) tel qu’illustré.
- Página 45 LITS SIMPLES SUPERPOSÉS ÉTAPE 3 Fixez les deux têtes de lit aux pieds inférieurs (D et E), à la barre latérale inférieure avant (I) et à la barre latérale inférieure arrière (K) avec des boulons de raccordement (1) et des écrous transversaux (9) tel qu’illustré.
- Página 46 LITS SIMPLES SUPERPOSÉS ÉTAPE 4 Insérez des goujons de bois (7) dans les extrémités des barrières longues (M). Fixez les deux barrières longues (M) et les barres latérales supérieures (H et J) aux pieds supérieurs (A et B) et (C et B) tel qu’illustré. Fixez les barres latérales supérieures (H et J) avec des boulons de raccordement (1) et des écrous transversaux (9).
- Página 47 LITS SIMPLES SUPERPOSÉS ÉTAPE 5 Insérez des goujons de bois (7) dans les barrières courtes (N). Fixez les barrières courtes (N) au support de barrière (U) avec des boulons de raccordement pour bois (3) tel qu’illustré. Fixez les barrières courtes (N) au pied supérieur (B) avec des boulons de raccordement pour bois (3).
- Página 48 LITS SIMPLES SUPERPOSÉS ÉTAPE 6 Fixez un support de barrière (R) aux barrières courtes (N) et à la barre latérale supérieure avant (H) avec des vis à tête plate (6). Fixez l’autre support de barrière (R) (de l’autre côté du lit) aux barrières longues (M) et à la barre latérale supérieure arrière (J) avec des vis à...
- Página 49 LITS SIMPLES SUPERPOSÉS ÉTAPE 7 Insérez des goujons de bois (7) dans les extrémités des marches (Q). Fixez le côté gauche de l’échelle (O) et le côté droit de l’échelle (P) aux marches (Q) avec des boulons de raccordement pour bois (2). Serrez les boulons de raccordement pour bois (2) à...
- Página 50 LITS SIMPLES SUPERPOSÉS Trous Trous Trous ÉTAPE 8 Insérez des goujons de métal (5) dans les trous des pieds inférieurs (D et E). Avec l’aide d’une autre personne, placez le lit supérieur sur le lit inférieur.
- Página 51 LITS SIMPLES SUPERPOSÉS back view Vue arrière ÉTAPE 9 Fixez l’échelle à la barre latérale supérieure avant (H) et à la barre latérale inférieure avant (I) avec des boulons de raccordement pour bois (2) tel qu’illustré. Servez-vous de la clé Allen (8) pour serrer les boulons de raccordement.
- Página 52 LITS SIMPLES SUPERPOSÉS Lattes : 8 pièces pour le lit supérieur 8 pièces pour le lit inférieur ÉTAPE 10 Insérez deux lattes avec goujons de bois (T) dans les rainures situées au centre des barres latérales supérieures (H et J) du lit supérieur tel qu’illustré. Fixez les lattes sans goujons de bois (L) aux barres latérales supérieures (H et J) du lit supérieur avec des vis à...
- Página 53 LITS SIMPLES SUPERPOSÉS Le premier lit simple Le deuxieme lit simple Pour convertir les lits superposés en deux lits simples, retirez l’échelle et toutes les barrières. Avec l’aide d’une autre personne, séparez le lit supérieur du lit inférieur.
- Página 54 LITS SIMPLES SUPERPOSÉS ATTENTION: Cette unité est destinée à être utilisé seulement avec des produits et/ou les poids maximum indiqués. L'utilisation avec d'autres produits et/ou des produits plus lourds que les poids maximum indiqués peut entraîner une instabilité ou causer des blessures. NE PAS PERMETTRE DE SE CHAMAILLER SUR OU SOUS LE LIT ET NE PAS PERMETTRE À...