Tabla de contenido
Publicidad
Enlaces rápidos
Aquasource® is a registered trademark of
LF, LLC. All rights reserved.
ATTACH YOUR RECEIPT HERE
Serial Number ____________________________ Purchase Date _________________________
Questions, problems, missing parts? Before returning to your retailer, call our
customer service department at 1-866-417-7564, 8 a.m. - 8 p.m., EST, Monday - Friday.
EB15385
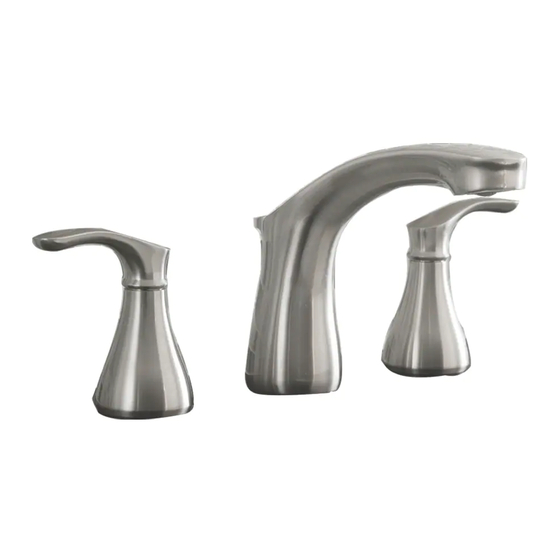
BATHROOM FAUCET
1
ITEM #0749675
TWO HANDLE
MODEL #FW0AC001NP
Français / Español p. 14
Publicidad
Tabla de contenido

Manuales relacionados para AquaSource FW0AC001NP

Resumen de contenidos para AquaSource FW0AC001NP
- Página 1 ITEM #0749675 TWO HANDLE BATHROOM FAUCET Aquasource® is a registered trademark of MODEL #FW0AC001NP LF, LLC. All rights reserved. Français / Español p. 14 ATTACH YOUR RECEIPT HERE Serial Number ____________________________ Purchase Date _________________________ Questions, problems, missing parts? Before returning to your retailer, call our customer service department at 1-866-417-7564, 8 a.m.
-
Página 2: Package Contents
PACKAGE CONTENTS PART DESCRIPTION QUANTITY Faucet Aerator (preassembled) Cold Handle Hot Handle Rubber Washer (preassembled) Guide Washer (preassembled) Rubber Spacer (preassembled) Metal Spacer (preassembled) Lock Nut (preassembled) Metal Washer (preassembled) Guide Washer Screw (preassembled) Faucet Connecting Hose Rubber Washer Large Rubber Washer Lock Nut Drain Body Plunger... -
Página 3: Safety Information
SAFETY INFORMATION Please read and understand this entire manual before attempting to assemble, operate or install the product. WARNING • Follow these installation instructions carefully. Proper installation is the installer’s responsibility. • Failure to follow correct installation procedures can cause the faucet to become loose, which can result in serious injury. - Página 4 ASSEMBLY INSTRUCTIONS 1. Turn off water supply. Remove existing faucet if necessary. 2. Remove lock nut (I), metal spacer (H), and rubber spacer (G) from faucet (A). 3. Install faucet (A) through top of sink (not included).
- Página 5 ASSEMBLY INSTRUCTIONS 4. From underneath sink, install rubber spacer (G), metal spacer (H), and lock nut (I) to faucet (A). Note: The slotted space must face rear of sink. 5. Remove pre-assembled guide washer (F), metal washer (J) and rubber washer (E) from shanks of hot handle (C) and cold handle (D).
- Página 6 ASSEMBLY INSTRUCTIONS 7. Insert hot handle (C) and cold handle (D) through the appropriate faucet hole. Note: The minimum mounting distance for the hot and cold handles (C/D) is 6 in. on center and the maximum mounting distance is 12 in. on center. Min.
- Página 7 ASSEMBLY INSTRUCTIONS 10. Remove caps from quick connect tubes. 11. Attach faucet connecting hose (L) to faucet (A), cold handle (D) and hot handle (C). Note: Quick connect attaches by pushing up until you hear a click, then pull hose down slightly until it stops.
- Página 8 ASSEMBLY INSTRUCTIONS 13. Install drain body (DD) and rubber washer (AA) through top of sink (not included). Secure with large rubber washer (BB) and lock nut (CC). Note: Opening for ball rod (HH) must face rear of sink. 14. Insert plunger (EE). Note: Plastic loop on plunger (EE) facing rear of sink is in locked mode and plunger cannot be removed.
- Página 9 ASSEMBLY INSTRUCTIONS 16. Insert lift rod (FF) through faucet (A). From underneath the sink, connect the lift rod (FF) to the lift rod strap (GG) by pushing the button and inserting the lift rod (FF) all the way into the seated space of the lift rod strap (GG). Release the button to lock.
- Página 10 ASSEMBLY INSTRUCTIONS 19. Turn on water supply. OPERATING INSTRUCTIONS 1. Using a coin, remove aerator (B) from faucet (A). 2. Flush out any debris and check for leaks around drain.
- Página 11 OPERATING INSTRUCTIONS 3. Replace aerator (B). QUICK CONNECTOR REMOVAL 1. Push quick connector housing upward. Hold clip and housing together and pull down- ward. CAUTION: Be careful in removal of quick connector to not cut hands.
-
Página 12: Care And Maintenance
CARE AND MAINTENANCE • Clean periodically with a soft cloth. Avoid abrasive cleaners, steel wool and harsh chemicals as these will dull the finish and void your warranty. TROUBLESHOOTING PROBLEM POSSIBLE CAUSE CORRECTIVE ACTION Leak from under handle. Damaged cartridge. Remove handle. -
Página 13: Replacement Parts List
WARRANTY The manufacturer warrants this faucet to be free from defects in workmanship and material present at time of shipment from the factory for a limited lifetime from the date of purchase. This warranty applies only to the original purchaser. The manufacturer agrees to correct such defects at no charge or, at our option, replace the faucet with a comparable or superior model. - Página 14 ROBINET DE LAVABO À UNE POIGNÉE AquaSource® est une marque de commerce MODÈLE #FW0AC001NP déposée de LF, LLC. Tous droits réservés. Aquasource® es una marca registrada de LF, ARTÍCULO #0749675 LLC. Todos los derechos reservados. GRIFO PARA BAÑO DE UNA MANIJA MODELO #FW0AC001NP JOIGNEZ VOTRE REÇU ICI / ADJUNTE SU RECIBO AQUÍ...
- Página 15 CONTENU DE L’EMBALLAGE / CONTENIDO DEL PAQUETE PIÈCE DESCRIPTION / DESCRIPCIÓN QUANTITÉ PIEZA CANTIDAD Robinet / Grifo Aérateur (préassemblé) / Aireador (preensamblado) Poignée d’eau froide / Manija de agua fría Poignée d’eau chaude / Manija de agua caliente Rondelle en caoutchouc (préassemblée) / Arandela de goma (preensamblada) Rondelle guide (préassemblée) / Arandela guía (preensamblada) Espaceur en caoutchouc (préassemblé) / Separador de caucho (preensamblado)
-
Página 16: Consignes De Sécurité / Información De Seguridad
CONSIGNES DE SÉCURITÉ / INFORMACIÓN DE SEGURIDAD Assurez-vous de lire et de comprendre l’intégralité du présent manuel avant de tenter d’assembler, d’installer ou d’utiliser l’article. AVERTISSEMENT • Suivez attentivement ces instructions pour l’installation. Il incombe à l’installateur d’effectuer une installation adéquate. •... - Página 17 PRÉPARATION / PREPARACIÓN Avant de commencer l’assemblage du produit, assurez-vous d’avoir toutes les pièces. Comparez le contenu de l’emballage avec la liste des pièces et celle de la quincaillerie. S’il y a des pièces manquantes ou endommagées, ne tentez pas d’assembler le produit. Temps d’assemblage approximatif : 12 minutes.
- Página 18 INSTRUCTIONS POUR L’ASSEMBLAGE / INSTRUCCIONES DE ENSAMBLAJE 1. Coupez l’alimentation en eau. Retirez le robinet existant, le cas échéant. Interrumpa el suministro de agua. Si es necesario, retire el grifo existente. 2. Retirez l’écrou de blocage (I), la rondelle d’espacement en métal (H) et la rondelle d’espacement en caoutchouc (G) du robinet (A).
- Página 19 INSTRUCTIONS POUR L’ASSEMBLAGE / INSTRUCCIONES DE ENSAMBLAJE 4. En vous positionnant sous le lavabo, in- stallez la rondelle d’espacement en caou- tchouc (G), la rondelle d’espacement en métal (H) et l’écrou de blocage (I) sur le robinet (A). REMARQUE: L’espace à fente doit être tournée vers l’arrière de l’évier.
- Página 20 INSTRUCTIONS POUR L’ASSEMBLAGE / INSTRUCCIONES DE ENSAMBLAJE 7. Insérez la poignée d’eau chaude (C) et la poi- gnée d’eau froide (D) dans les trous appropriés du lavabo. Remarque : À partir du centre de chaque trou, la distance minimale de montage entre les poi- gnées d’eau chaude et d’eau froide (C/D) est de 15,24 cm et la distance maximale de montage est de 30,48 cm.
- Página 21 INSTRUCTIONS POUR L’ASSEMBLAGE / INSTRUCCIONES DE ENSAMBLAJE 10. Retirez les capuchons des tubes à branchement rapide. Retire las tapas de los tubos de conexión rápida. 11. Fixez le tuyau de raccordement du robinet (L) au robinet (A), à la poignée d’eau froide (D) et à la poignée d’eau chaude (C).
- Página 22 INSTRUCTIONS POUR L’ASSEMBLAGE / INSTRUCCIONES DE ENSAMBLAJE 13. Installez le corps du drain (DD) et la rondelle en caoutchouc (AA) à travers le haut du lavabo (non inclus). Fixez le tout à l’aide d’une grande rondelle en caoutchouc (BB) et d’un écrou de blocage (CC).
- Página 23 INSTRUCTIONS POUR L’ASSEMBLAGE / INSTRUCCIONES DE ENSAMBLAJE 16. Insérez la tige de levage (FF) à travers le robinet (A). Sous le lavabo, raccordez la tige de levage (FF) à la courroie de tige de levage (GG) en enfonçant le bouton et en insérant complètement la tige de levage (FF) dans le logement de la courroie de tige de levage (GG).
- Página 24 INSTRUCTIONS POUR L’ASSEMBLAGE / INSTRUCCIONES DE ENSAMBLAJE INSTRUCTIONS POUR L’ASSEMBLAGE / INSTRUCCIONES DE ENSAMBLAJE 19. Rétablissez l’alimentation en eau. Abra el suministro de agua. MODE D’EMPLOI / INSTRUCCIONES DE FUNCIONAMIENTO 1. Retirez l’aérateur (B) du robinet (A) à l’aide d’une pièce de monnaie. Con una moneda, retire el aireador (B) del grifo (A).
- Página 25 MODE D’EMPLOI / INSTRUCCIONES DE FUNCIONAMIENTO 3. Remettez l’aérateur (B) en place. Vuelva a colocar el aireador (B) y la arandela del aireador (A). RETRAIT DU RACCORD RAPIDE / RETIRAR EL CONECTOR RÁPIDO 1. Poussez le boîtier du raccord rapide vers le haut.
-
Página 26: Entretien / Cuidado Y Mantenimiento
ENTRETIEN / CUIDADO Y MANTENIMIENTO • Nettoyez l’article périodiquement à l’aide d’un linge doux. N’utilisez pas de nettoyant abrasif, de laine d’acier ni de produit chimique puissant; ceux-ci risquent de ternir le fini et leur utilisation annulera votre garantie. • Limpie periódicamente con un paño suave. Evite utilizar limpiadores abrasivos, lana de acero y químicos agresivos, ya que pueden dañar el acabado y anular la garantía. - Página 27 GARANTIE / GARANTÍA Le fabricant garantit le robinet contre les défauts de matériaux ou de fabrication présents au moment de l’expédition de l’usine pendant une période limitée à compter de la date d’achat. Cette garantie ne s’applique qu’à l’acheteur initial. Le fabricant convient de corriger un tel défaut sans frais ou, à sa discrétion, de remplacer le robinet par un modèle comparable ou de qualité...
- Página 28 LISTE DES PIÈCES DE RECHANGE / LISTA DE PIEZAS DE REPUESTO Pour obtenir des pièces de rechange, veuillez communiquer avec notre service à la clientèle au 1 866 417-7564, entre 8 h et 20 h (HNE), du lundi au vendredi. Para obtener piezas de repuesto, llame a nuestro Departamento de Servicio al Cliente al 1-866-417-7564, de lunes a viernes de...