
Manuales relacionados para Comelit SMON156A


Resumen de contenidos para Comelit SMON156A
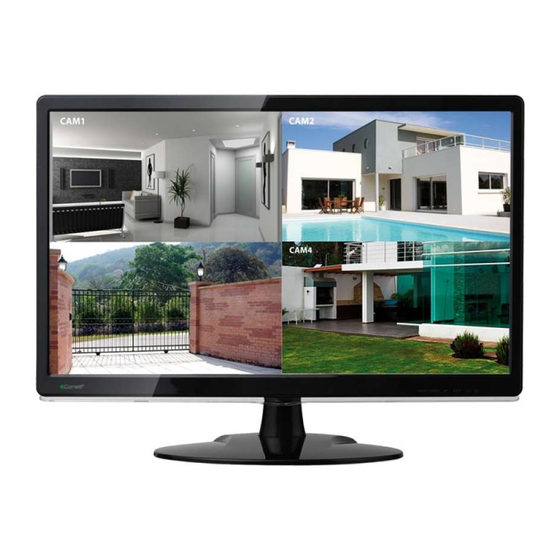
- Página 1 MONITOR ART. SMON156A SMON185A MMON185A MMON215A Please read this manual thoroughly before use and keep it for future reference...
- Página 2 F. VGA INPUT: D-SUB 15 pins connector G. HDMI INPUT: HDMI connector SMON156A SMON185A 1 .AUDIO INPUT: phone jack, Stereo 2. DVI-I INPUT: DVI-I connector (art. SMON185A only, DVI-I – VGA cable in equipment) 2A. VGA INPUT: VGA connector (art. SMON156A only) 3. POWER...
- Página 3 Controls and indicators art. MMON185A SOURCE/EXIT button Press the button to show source menu. Select HDMI, S-Video,VGA or VIDEO input signal (BNC) “ ” UP button Press the button to scrolling the cursor to desired function. “ ” Down button Press the button to scrolling the cursor to desired function.
- Página 4 POWER LED Indication Green - Power on LED light off - Power off Flash Green – No signal input Controls and indicators art. SMON156A and SMON185A UP button Press the button to scrolling the cursor to desired function. Press the button to increase the value of selected function in sub OSD menu DOWN button Press the button to scrolling the cursor to desired function.
- Página 5 Mounting Guide art. MMON185A and MMON215A Wall or Other Mounting with VESA Standard CAUTION : the wall mount must be a minimum of five times the monitor’s net weight. To mount your MONITOR to the wall or another surface, you need to purchase a VESA wall mount. Use four M4 x 8 mm screws (not included) to attach the mount.
- Página 6 Specifications ▶ ▶ NOTE: technical specifications are subject to change without notice.
- Página 7 MONITOR ART. SMON156A SMON185A MMON185A MMON215A Prima di utilizzare questo dispositivo, si prega di leggere attentamente questo manuale e di conservarlo per future consultazioni...
- Página 8 G. HDMI INPUT (ingresso HDMI): connettore HDMI SMON156A SMON185A 1 .AUDIO INPUT (ingresso audio): Jack, Stereo 2. DVI-I INPUT (ingresso DVI-I): connettore DVI-I (solo art. SMON185A, cavo DVI-I – VGA in dotazione) 2A. VGA INPUT (ingresso VGA): connettore VGA (solo art. SMON156A) 3. POWER (alimentazione)
- Página 9 Controlli e indicatori art. MMON185A Pulsante SOURCE/EXIT (sorgente video/uscita) Premere il pulsante per visualizzare il menu Sorgente Video. Selezionare tra gli ingressi video HDMI, S-Video,VGA o VIDEO (BNC) “ ” pulsante SU Premere il pulsante per spostare il cursore sulla funzione desiderata. “...
- Página 10 Led verde indicatore dell’alimentazione Led acceso – monitor acceso Led spento – monitor spento Led acceso lampeggiante – nessun segnale in ingresso Controlli e indicatori art. SMON156A e SMON185A Pulsante UP (su) Premere il pulsante per spostare il cursore sulla funzione desiderata.
-
Página 11: Montaggio A Muro Con Fissaggio Standard Vesa
Guida al montaggio art. MMON185A e MMON215A Montaggio a muro con fissaggio standard VESA Attenzione : la parete su cui viene fissato il monitor deve pesare minimo 5 volte il peso netto del monitor . Per fissare il monitor a parete è necessario acquistare un fissaggio a standard VESA. Utilizzare viti M4 x 8 mm (non incluse). -
Página 12: Specifiche Tecniche
Specifiche tecniche ▶ ▶ NOTA: le specifiche tecniche sono soggette a variazioni senza preavviso. - Página 13 MONITEUR ART. SMON156A SMON185A MMON185A MMON215A Veuillez bien lire le présent manuel avant l'utilisation et le conserver pour référence future...
- Página 14 G. HDMI INPUT (entrée HDMI): connecteur HDMI SMON156A SMON185A 1 .AUDIO INPUT (entrée audio): Jack, Stereo 2. DVI-I INPUT (entrée DVI-I): connecteur DVI-I (seulement art. SMON185A, câble DVI- I – VGA fourni) 2A. VGA INPUT (entrée VGA): connecteur VGA (seulement art. SMON156A) 3. POWER (alimentation)
- Página 15 Commandes et indicateurs art. MMON185A Bouton SOURCE/EXIT (source video/sortie) Appuyez sur le bouton pour afficher le menu Source Vidéo. Choisissez parmi les entrées vidéo HDMI, S-Video,VGA et VIDEO (BNC) “ ” bouton HAUT Appuyez sur le bouton pour déplacer le curseur sur la fonction souhaitée. “...
- Página 16 LED verte témoin d'alimentation Led allumé – moniteur allumé Led spento – moniteur éteinte Led aalumé clignotant – pas de signal Commandes et indicateurs art. SMON156A et SMON185A Bouton UP (haut) Appuyez sur le bouton pour déplacer le curseur sur la fonction souhaitée.
- Página 17 Guide pour le montage art. MMON185A et MMON215A Montage mural avec montage standard VESA Attention : le mur sur lequel est fixé le moniteur doit peser un minimum de 5 fois le poids net du moniteur. Pour fixer le moniteur sur un mur, vous devez acheter un montage standard VESA. Utilisez des vis M4 x 8 mm (pas compris).
-
Página 18: Caractéristiques Techniques
Caractéristiques techniques ▶ ▶ NOTE: les spécifications sont sujettes à modification sans préavis. - Página 19 MONITOR ART. SMON156A SMON185A MMON185A MMON215A Lea este manual del usuario atentamente para asegurarse de que puede utilizar el dispositivo de forma correcta y segura...
- Página 20 G. HDMI INPUT (entrada HDMI): conectore HDMI SMON156A SMON185A 1 .AUDIO INPUT (entrada audio): Jack, Stereo 2. DVI-I INPUT (entrada DVI-I): conectore DVI-I (solamente art. SMON185A, cable DVI- I – VGA suministrado) 2A. VGA INPUT (entrada VGA): conectore VGA (solamente art. SMON156A) 3. POWER (alimentación)
- Página 21 Controles y indicadores art. MMON185A Botón SOURCE/EXIT (fuente de vídeo / salida) Pulse el botón para mostrar la fuente de vídeo. Seleccione una de las entradas de vídeo HDMI, S-Video,VGA y VIDEO (BNC) “ ” botón ARRIBA Pulse el botón para mover el cursor hasta la función deseada. “...
- Página 22 Led encendido – monitor encendido Led apagado – monitor apagado Led encendido que destella – ninguna entrada de señal Controles y indicadores art. SMON156A y SMON185A Botón UP (arriba) Pulse el botón para mover el cursor hasta la función deseada.
-
Página 23: Montaje En La Pared Con El Estándar De Montaje Vesa
Guía para el montaje art. MMON185A y MMON215A Montaje en la pared con el estándar de montaje VESA Atención: la pared sobre la que se fija el monitor debe pesar un mínimo de 5 veces el peso neto del monitor. Para conectar el monitor en una pared usted necesita comprar un montaje estándar VESA. Utilice tornillos M4 x 8 mm (no incluido). -
Página 24: Especificaciones
Especificaciones ▶ ▶ NOTA: las especificaciones están sujetas a cambios sin previo aviso. - Página 25 MONITOR ART. SMON156A SMON185A MMON185A MMON215A Lees deze handleiding vóór gebruik van het apparaat zorgvuldig door en bewaar hem voor toekomstig gebruik...
- Página 26 E. INGANG S-VIDEO (Y/C): mini-DIN 4-pins-connector (alleen art. MMON185A) F. VGA-INGANG: D-SUB 15-pins-connector G. HDMI-INGANG: HDMI-connector SMON156A SMON185A 1. AUDIO-INGANG: telefoonaansluiting, stereo 2. DVI-I-INGANG: DVI-I-connector (alleen art. SMON185A, kabel DVI-I – VGA in apparatuur) 2A. VGA-INGANG: VGA-connector (alleen art. SMON156A) 3. VOEDING...
- Página 27 Bedieningen en indicatoren art. MMON185A Knop SOURCE/EXIT [bron/afsluiten] Druk op de knop om het menu Source [Bron] weer te geven. Selecteer ingangssignaal HDMI, S-Video, VGA of VIDEO (BNC) “ ” Knop Omhoog Druk op de knopen om de cursor naar de gewenste functie te verplaatsen. “...
- Página 28 Led uit - apparaat uitgeschakeld Groen knipperend - geen ingangssignaal Bedieningen en indicatoren art. SMON156A en SMON185A Kinop UP (omhoog) Druk op de knopen om de cursor naar de gewenste functie te verplaatsen. Druk op de knopen om de waarde van de geselecteerde functie in het OSD-submenu te verhogen.
- Página 29 Montagehandleiding art. MMON185A en MMON215A Wandsteun of andere bevestiging met VESA-standaard Let op : de wandsteun moet minstens vijfmaal het nettogewicht van de monitor zijn. Voor bevestiging van uw monitor op de wand of een ander oppervlak dient u een VESA-wandsteun aan te schaffen. Gebruik vier M4 x 8 mm schroeven (niet meegeleverd) om de steun te bevestigen.
-
Página 30: Specificaties
Specificaties ▶▶ NB: de technische specificaties kunnen zonder voorafgaande kennisgeving worden gewijzigd. - Página 31 MONITOR ART. SMON156A SMON185A MMON185A MMON215A Bitte lesen Sie sich dieses Handbuch gründlich durch und bewahren Sie es zum späteren Nachschlagen auf...
- Página 32 E. S-VIDEO (Y/C) EINGANG: Mini-DIN 4-polige Steckverbindung (nur art. MMON185A) F. VGA-EINGANG: D-SUB 15-polige Steckverbindung G. HDMI-EINGANG: HDMI-Steckverbindung SMON156A SMON185A 1. AUDIO-EINGANG: Klinkenbuchse, Stereo 2. DVI-I-EINGANG: DVI-I-Buchse (nur art. SMON185A, Kabel DVI-I – VGA in Ausrüstungen) 2A. VGA-EINGANG: VGA-Buchse (nur art. SMON156A) 3. POWER...
- Página 33 Bedienelemente und Anzeigen MMON185A Taste SOURCE/EXIT (Quelle/Beenden) Drücken Sie diese Taste, um das Menü Source (Quelle) aufzurufen. Wählen Sie HDMI, S-Video,VGA oder VIDEO als Eingangssignal aus “ ” Taste nach oben Drücken Sie diese Taste, um den Cursor bis zur gewünschten Funktion zu scrollen. “...
- Página 34 LED-Betriebsanzeige Grün – Strom EIN LED Licht aus – Strom AUS Blinkt grün – Kein Eingangssignal Bedienelemente und Anzeigen SMON156A und SMON185A Taste UP (nach oben) Drücken Sie diese Taste, um den Cursor bis zur gewünschten Funktion zu scrollen. Drücken Sie diese Taste, um den Wert der ausgewählten Funktion im OSD-Untermenü zu erhöhen.
- Página 35 Leitfaden für die Aufstellung von Art. MMON185A und MMON215A Wandmontage oder sonstige Installationsarten mit VESA- Standard ACHTUNG : Das Gewicht der Wandhalterung muss mindestens fünfmal so hoch sein wie das Eigengewicht des Monitors. Für die Wandmontage oder anderweitige Installation des MONITORS ist es notwendig, eine VESA- Wandhalterung zu erwerben.
- Página 36 Spezifikationen ▶▶ HINWEIS: Die technischen Spezifikationen können sich ohne Vorankündigung oder Benachrichtigung ändern.