Publicidad
Enlaces rápidos
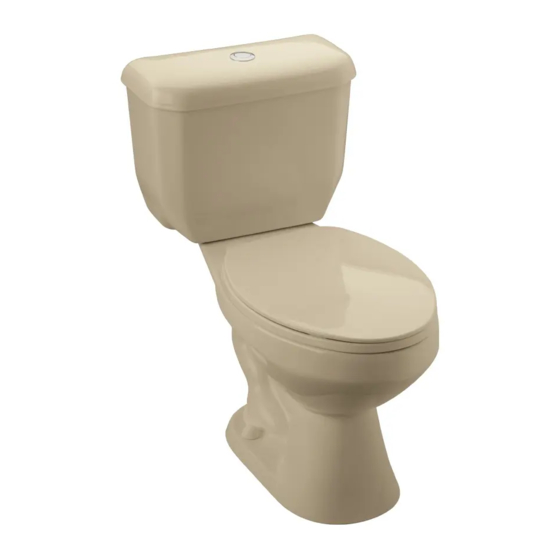
Inodoro Ginebra / Toilet Ginebra
Código:
RECOMENDACIONES:
Asegúrese que la persona que vaya a instalar el
producto sea un profesional en la materia, para
prevenir errores que afecten las instalaciones o
el correcto funcionamiento del producto.
Realice los ajuste del sanitario UTILIZANDO
una herramienta adecuada para que la
superficie y el acabado del producto no se raye
o lastime.
Recuerde que todos los productos tienen un
mecanismo de control que debe ser revisado y
cambiado de ser necesario, ya que este puede
deteriorarse debido a la frecuencia de uso.
RECOMMENDATIONS:
To prevent any error that may affect the facilities
or the correct functioning of the product, make
sure that the person who is going to install the
product is a professional. Install the product
using suitable tools, so that it is not scratched.
Remember that all products have a control
mechanism that must be reviewed and changed
if necessary, since it can deteriorate due to the
frequency of use.
FV se reserva el derecho de modificar,
cambiar, mejorar y/o anular materiales,
COLORES DISPONIBLES /
productos y/o diseños sin previo aviso.
COLORS AVAILABLE:
llave angular F.V. /
F.V. angle stop set
• Blanco / White : BL
• Bone / Bone : BO
agujeros
INSTRUCCIONES DE INSTALACIÓN / INSTALLATION INSTRUCTIONS:
para fijación /
fixation holes
LEA LAS INSTRUCCIONES COMPLETAMENTE ANTES DE INSTALAR / READ ALL INSTRUCTIONS BEFORE INSTALLING
1. Ubique el inodoro en la posición en la que irá, verifique la alineación del inodoro
respecto a la pared y posicione de acuerdo a las dimensiones indicadas en el
gráfico.
Verify the alignment of toilet regarding the wall and place it according to the dimen-
sions (see graphic). For drilling mark on the floor the hole's position.
pared terminada / nished wall
acometida de agua /
water connection
desagüe
del inodoro /
piso terminado /
toilet draining
nished oor
1 cm
30,5 cm
2. Marque en el piso los orificios para su fijación.
Mark the holes in the floor to mount the product correctly.
E152
MEDIDAS / MEASURES:
MEDIDAS SUGERIDAS PARA LA INSTALACIÓN (en cm):
Dimensiones en milímetros / Dimensions in millimeters
Dimensiones en pulgadas / Dimensions in inches
2
1
305
12"
ECAP-DH
E150.1-COLOR
E101.04-COLOR
3. Retire el inodoro para perforar y colocar los tacos de fijación EPER-DH (no
incluidos) para fijar el inodoro al piso.
Remove the toilet to drill and fit the EPER-DH fitting plugs (not included) to
attach the toilet to the floor.
4- Voltee el inodoro sobre una superficie suave para no rasparlo y coloque el anillo de
cera en la salida del desagüe.
3
Turn the toilet around (on its ring) over a soft surface so that it will not be scraped
and install the wax ring in the drain outlet.
llave angular F.V. /
F.V. angle stop set
llave angular F.V. /
pared terminada / nished wall
F.V. angle stop set
acometida de agua /
water connection
desagüe
del inodoro /
piso terminado /
toilet draining
nished oor
1 cm
agujeros
para fijación /
agujeros
fixation holes
para fijación /
30,5 cm
fixation holes
430
16-15/16"
146
146
146
5-3/4"
363
14-9/32"
E150.2.2
E150.2.1
E150.2-COLOR
version anterior
llave angular F.V. /
F.V. angle valve
1
agujeros
para fijación /
fixation holes
2
3
E102.13
version anterio
Publicidad

Resumen de contenidos para FV E152
- Página 1 E150.2.2 FV se reserva el derecho de modificar, cambiar, mejorar y/o anular materiales, COLORES DISPONIBLES / productos y/o diseños sin previo aviso.
- Página 2 FV - ÁREA ANDINA S.A. se re ser va el de re cho de mo di fi car, cam biar, me jo rar y/o anu lar ma te ria les, pro duc tos y/o di se ños sin pre vio avi so.
- Página 3 FV - ÁREA ANDINA S.A. se re ser va el de re cho de mo di fi car, cam biar, me jo rar y/o anu lar ma te ria les, pro duc tos y/o di se ños sin pre vio avi so.


