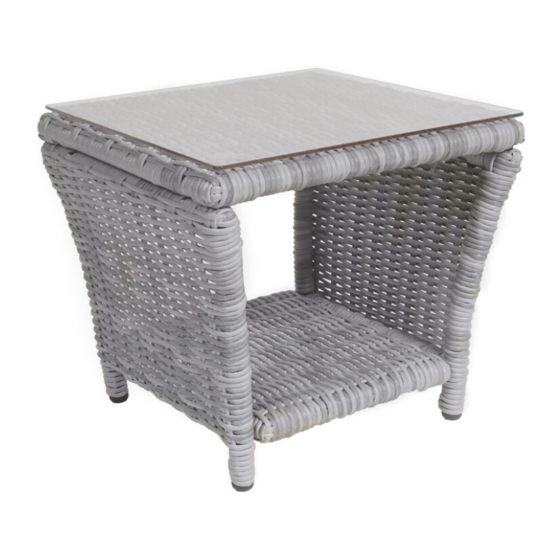
Resumen de contenidos para Elle Decor Vallauris
- Página 1 Vallauris Three Pièce Set Assembly Instructions INCLUDES IMPORTANT SAFETY INFORMATION. PLEASE READ AND KEEP FOR FUTURE REFERENCE.
- Página 2 Should you prefer to speak with a customer service representative, you may call toll free : 1-855-372-2315.
- Página 3 The exceptions or exclusions to this warranty are: Limited Warranty • Upholstery material and foam cushion material is warranted against defects in material and workmanship for a period of one year, beginning on the date of Milwork Holdings seating products are warranted against purchase as shown on the original sales receipt.
- Página 4 Guidelines FAILURE TO FOLLOW THESE WARNINGS Thank you for selecting an Elle Decor piece! WHEN IN USE COULD RESULT IN INJURY Our primary objective is to provide fast, friendly customer service to all of our customers. We are here to help if you have any questions, comments, or are in •...
- Página 5 WARNING: DO NOT LET CHILDREN PLAY IN OR AROUND THE UNIT DUE TO THE POSSIBLE RISK OF FINGER ENTRAPMENT. Pre-Assembly Preparation: Cleaning & Maintenance: Please read through this instruction before beginning • Wash frame parts with mild soap and water, rinse assembly of this item.
- Página 6 1 Step One: Inventory Parts Top Panel Side Panel Bottom Panel Glass Table Top Quantity: 1 Quantity: 2 Quantity: 1 Quantity: 1 Allen Wrench Washer 5mm Bolt 40mm Quantity: 1 Quantity: 8 Quantity: 8...
- Página 7 2 Step Two: Attach Side Panels Flip Top Panel (A) upside down to begin. Attached two Side Panels (B) to Top Panel (A) by using Screw (G) with Washer (F). Screw all bolts by using Allen Wrench (E). Do not tighten bolts completely. 3 Step Three: Attach Bottom Panel Repeat step two to attach the Bottom Panel (C).
- Página 8 4 Step Four: Tighten Bolts WARNING: DO NOT USE THIS Turn table over and tighten all bolts completely using the Allen Wrench (E). SIDE TABLE FOR SEATING. Next place the glass (D) on the Top Panel (A). All finished!
- Página 9 Recliner Operating Instructions The side lever will adjust the angle To adjust chair back to upright position: of the back and footrest. When sitting Before getting out of the chair, pull the on the chair, use one hand to pull side lever outward while leaning slightly the side lever outward until you have forward.
-
Página 10: Instrucciones De Ensemblaje
Vallauris - Jeugo de Tres Piezas Instrucciones de Ensemblaje ESTE INSTRUCTIVO CONTIENE INFORMACION IMPORTANTE DE SEGURIDAD. FAVOR DE LEER Y GUARDAR PARA FUTURAS REFERENCIAS. -
Página 11: Garantía Limitada
Garantía Limitada Los productos de Millwork Holdings están garantizados Las excepciones o exclusiones a esta garantía son las siguientes: contra defectos en el material y mano de obra. mientras sea propiedad del Comprador Original. El • Cualquier reclamación de garantía que se presenta término Comprador Original se define como la parte después del período de garantía limitada, o sin prueba o entidad que adquiere muebles Millwork Holdings... - Página 12 • Para reclamaciones o dudas respecto a esta garantía, por favor póngase en contacto con el departamento de servicio al Cliente de Millwork Holdings en la web en www.truecustomersupport.com. Esté preparado Si usted prefiere hablar para proporcionar su nombre, dirección, número de teléfono durante el día, el modelo y el número de orden con un representante de de compra del producto, la fecha de compra, y el lugar...
- Página 13 Directrices En no seguir estas advertencias mientras Gracias por elegir una pieza de Elle Decor! este en uso podria resultar en lesiones. Nuestro objetivo primario es proveer un servicio al cliente rápido y amigable a todos nuestros clientes. • No se pare sobre el articulo o lo utilice como una Estamos aquí...
- Página 14 ADVERTENCIA: NO PERMITA QUE LOS NIÑOS JUEGUEN EN O ALREDEDOR DE LA UNIDAD DEBIDO AL POSIBLE RIESGO DE ATRAPAMIENTO DEDO. Pre-Ensamblaje y Preparación: • Mantenga las partes y piezas pequeñas alejadas de los niños hasta que este completamente ensamblado. ADVERTENCIA! NO PERMITA QUE NIÑOS JUEGUEN •...
- Página 15 1 Paso Uno: Inventario de Partes Pánel Superior Pánel Lateral Pánel Inferior Vidrio de Mesa Cantidad: 1 Cantidad: 2 Cantidad: 1 Cantidad: 1 Llave Allen Arandelas 5mm Tornillos 40mm Cantidad: 1 Cantidad: 8 Cantidad: 8...
- Página 16 2 Paso Dos: Fije Los Páneles Fije Los Dos Pánel Lateral (B) con Pánel Superior (A) con Tornillos (G) y Arandelas (F). Atornille todas Los Tornillos con Llave Allen (E). No atornille completamente Los Tornillos. 3 Paso Tres: Conectar El Panel Inferior Repita el paso dos para conectar El Panel Inferior (C).
- Página 17 4 Paso Cuatro: Apriete Los Tornillos ADVERTENCIA: NO UTILICE LA Voltee la mesa y apriete todos Los Tornillos completamente con MESA PARA llave Allen (E). ASIENTO. Coloque El Vidrio de Mesa (D) sobre el Pánel Superior (A). Terminado!
- Página 18 Instrucciones de operación del sillón reclinable La Palanca Lateral Ajusta el ángulo del Para adjustar la silla en posición vertical: Antes de levantarse de la silla, tire la respaldo y del reposapiés. Cuando este sentado en la silla, busque la palanca palanca lateral hacia fuera mientras que se incla ligeramente hacia delante.
