Publicidad
Idiomas disponibles
Idiomas disponibles
Enlaces rápidos
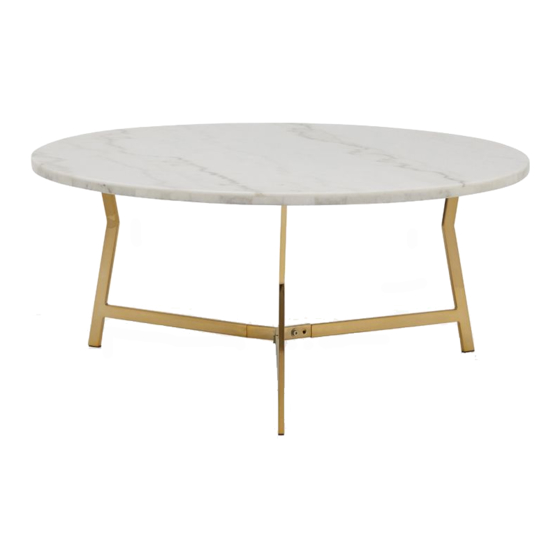
ASSEMBLY INSTRUCTIONS
Model: #8683C
Lot Number: _________________
Date of Purchase: ___ / ___ / ____
WARNING The maximum load capacity as listed above may not be exceeded and is assumed
!
to be distributed evenly. Exceeding load capacity may result in collapse and possible injury.
THIS INSTRUCTION BOOKLET CONTAINS IMPORTANT SAFETY INFORMATION. PLEASE READ AND KEEP FOR FUTURE REFERENCE.
Thank you for your purchase. We want to make sure it is to your complete satisfaction. Hardware is separated individually for easy
identi cation. Please, identify and count all parts and hardware to make sure they match with the illustrations herein and are all
present.
If any parts are missing or defective please contact our customer service department.
Customer Service - 1-866-528-8364 / support@dimensionsfurniture.com
Your satisfaction is our top priority. Our products are designed and manufactured to meet the highest quality. In the event that
you have assembly questions, or parts are missing or damaged, please do not return the product.
Our customer service department would appreciate the opportunity to provide any help necessary regarding assembly and to
provide any necessary parts.
Manufactured by: Dimensions Furniture, Inc
341 Gradle Drive, Carmel, IN 46032
1-866-528-8364 / support@dimensionsfurniture.com
75 lbs
Maximum load
distributed evenly
1/6
Publicidad

Manuales relacionados para MōDRN 8683C

Resumen de contenidos para MōDRN 8683C
- Página 1 ASSEMBLY INSTRUCTIONS Manufactured by: Dimensions Furniture, Inc Model: #8683C 341 Gradle Drive, Carmel, IN 46032 1-866-528-8364 / support@dimensionsfurniture.com Lot Number: _________________ Date of Purchase: ___ / ___ / ____ Maximum load 75 lbs distributed evenly WARNING The maximum load capacity as listed above may not be exceeded and is assumed to be distributed evenly.
-
Página 2: Pre-Assembly Preparation
PRE-ASSEMBLY PREPARATION: CAUTION ! Please read below statements before beginning assembly. Assembly should take place in a secure environment that is clean and dry. Assembly can be done by one person, but two persons are recommended. Allen wrench available for assembly. - Página 3 STEP-BY-STEP ASSEMBLY Step 1 Insert the Legs into the Connector as shown.
- Página 4 STEP-BY-STEP ASSEMBLY Step 2 Hand tighten the Legs to the Connector using six Short Bolts with Washers as shown. NOTE: To avoid likely alignment issues, bolts need to remain loose until otherwise instructed. Short Bolt with Washers (1/4” x 3/8”)
- Página 5 STE P-BY-STEP ASSEMB LY Step 3 and hand tighten them together using six Large Bolts with Washers as shown. Once all bolts have been properly inserted, tighten the bolts in the Connector with an Allen Wrench . Lastly, tighten the bolts in the Table Top with an Allen Wrench .
- Página 6 STEP-BY-STEP ASSEMBLY Step 4 Assembly is now complete. LIMITED ONE YEAR WARRANTY Warranty available to original purchaser only. Proof of purchase is required. This warranty is your sole remedy for product defect and does not cover damage due to mishandling, misuse, or abuse. The manufacturer is not responsible for incidental or consequential damages.
- Página 7 Printed in China...
- Página 8 INSTRUCIONES DE ENSAMBLAJE Fabricado por: Dimensions Furniture, Inc Modelo: #8683C 341 Gradle Drive, Carmel, IN 46032 1-866-528-8364 / support@dimensionsfurniture.com Número de Lote: _________________ Fecha de Compra: ___ / ___ / ____ Peso máximo 75 lbs distribuido uniformemente ADVERTENCIA La capacidad de peso máxima indicada anteriormente no puede excederse y debe ser distribuido uniformemente.
- Página 9 PREPARACION DE PRE-ENSAMBLAJE: ¡ATENCIÓN! Por favor lea las instrucciones antes de comenzar el ensamblaje. El ensamblaje debe realizarse en un ambiente seguro, limpio y seco. El ensamblaje puede hacerlo una sola persona pero se recomienda dos personas. ...
- Página 10 ENSAMBLAJE PASO POR PASO Inserte las Patas en el Conector como se muestra en la gura. Paso 1...
- Página 11 ENSAMBLAJE PASO POR PASO Paso 2 Ajuste las Patas al Conector utilizando seis Pernos Corto con Arandelas como se muestra en la gura. NOTA: para evitar problemas de alineación, los pernos deben permanecer sueltos hasta que se indique lo contrario. Perno Corto con Arandelas (1/4”...
- Página 12 ENSAMBLAJE PASO POR PASO Paso 3 correspondientes en las Patas y la Parte Superior de la Mesa y apriételos con los seis Pernos Largo con Arandelas tal como se muestra. Una vez que todos los pernos se hayan insertado correctamente, apriete los pernos en el Conector con una Llave Allen.
-
Página 13: Garantía Limitada De Un Año
ENSAMBLAJE PASO POR PASO Paso 4 El ensamblaje ya está completo. GARANTÍA LIMITADA DE UN AÑO Garantía disponible solo para el comprador original. Se requiere comprobante de compra. Esta garantía es su única solución para defecto del producto y no cubre daños debido a mal manejo, mal uso o abuso. El fabricante no es responsable por daños fortuitos o generados. - Página 14 Impresso en China...