Publicidad
Enlaces rápidos
MAXWELL
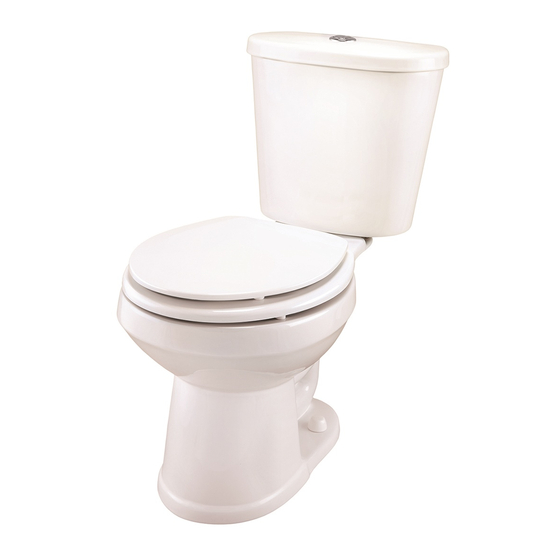
DIRECTIONS FOR TANK TO BOWL ASSEMBLY
This water closet has been designed for easy installation. Conventional fittings
have been used throughout so that the working parts and operation of this
assembly may be easily understood.
1. Before assembling tank (B) to bowl (K) check tightness of lock nuts on both
flush valve and fill valve.
2. Assemble the tank bolts (D) in tank with rubber washers (E) and metal
washers and nuts (F). Nuts should be tightened sufficiently to compress
rubber washers and insure water seal.
3. Assemble bevel washer (G) to flush valve shank so that lock nut is enclosed in
recess, making sure that the entire surface of the washer is in contact with the
tank bottom.
4. Place two channel pads (H) in recesses on back of bowl ledge to prevent
china-to-china contact.
5. Place tank assembly in place. All parts are supplied. USE NO PUTTY.
Assemble metal washers and nuts (F) onto the tank bolts (D). Tighten the
nuts (F) sufficiently to prevent rocking. Since the tank bolt are already sealed,
the tank can be leveled by the relative amount that each nut is pulled down
on the three points of contact...bevel washer (G) and two channel pads (H).
6. Plastic bolt caps and washers (J) are provided to be used as indicated in the
illustration.
7. The fill valve coupling nut (I) is provided to connect the water supply line to
the fill valve. USE NO PIPE DOPE! HAND TIGHTEN ONLY!
OVERTIGHTENING MAY SPLIT THE FILL VALVE AND WILL VOID THE
WARRANTY!
8. Adjust water level in tank to marked water line by adjusting water level screw.
9. The full and reduced flush volumes have been preset to deliver optimal
performance. Tampering with the flush volume will void the warranty.
10. Make sure refill tube is inserted into overflow tube.
1 1. Check to make sure that the large (full flush) button of the push button (C) is
positioned over the full flush button on the top of the flush valve. The small
(reduced flush) button of the push button (C) should be positioned over the
reduced flush button on the top of the flush valve.
DO NOT EXPOSE PLASTIC TRIM PARTS TO STRONG OXIDIZING AGENTS,
CHLORINE, OR ACID LEVELS OF LOWER THAN 5.0 pH. SOME BOWL/TILE
CLEANERS CONTAIN SUCH AGENTS.
TANK TYPE BOWL CLEANERS CAN CAUSE TANK COMPONENT FAILURE AND
DAMAGE. OUR WARRANTY EXCLUDES SUCH FAILURES.
MAXWELL
is the registered trademark of GERBER Plumbing Fixtures LLC
®
PN 8069 Maxwell DUAL FLUSH, rev. 2-09
®
DUAL FLUSH
I
*(1) BC Coupling Nut
Écrou de raccordement
B/C Tuerca de unión
F
J
(2) #99-287 Plastic Bolt Caps & Washers
Rondelle et chapeau de boulon en plastique
Casquete plástico para tornillo y arandela
(k) Bowl
K
Cuvette
Taza
NOTE: Parts with * are included in unit bag,99-782
REMAQUE: Les piéces portant un * sont incluses dans ie sac 99-782.
AVISO: Las partes con * están incluidas en la bolsa de la unidad 99-782.
Flush valve seal Replaced by 99-789
Joint d'étanchéité du robinet de chasse
Sello de la válvula de descarga
(A) #TC-DF-190
A
#TC-DF-195 Tank Cover
Couvercle du réservoir
Tapa del tanque
(B) #DF-28-190
B
#DF-28-192
#DF-28-195Tank
Réservoir
Tanque
C
#99-792 Push
(C)
Bouton-poussoir
Botón de descarga
D
*(2) Tank Bolt
Boulon de réservoír
Tornillo de tanque
E
*(2) Rubber Washer
Rondelle en caoutchouc
Arandela de goma
F
*(4) Metal Washer & Nut
Les rondelles en métal et les écrous
Las arandelas metálicas y las tuercas
G
*(1) Bevel Washer
Rondelle oblique
Arandela cónica
H
*(2) Channel Pads
Coussinet de canal
Tacos acanalados
W ater Level A djustm ent Screw
Vis de réglage du niveau d'eau
Tornillo de regulación del nivel del agua
Fill valve replaced by 99-790
Robinet de remplissage remplacé par
Válvula de llenado sustituida por
Button
Publicidad

Resumen de contenidos para Gerber MAXWELL DUAL FLUSH
- Página 1 Fill valve replaced by 99-790 Joint d’étanchéité du robinet de chasse Robinet de remplissage remplacé par MAXWELL is the registered trademark of GERBER Plumbing Fixtures LLC Sello de la válvula de descarga Válvula de llenado sustituida por ® PN 8069 Maxwell DUAL FLUSH, rev. 2-09...
- Página 2 MAXWELL MAXWELL ® ® TOILETTE INODORO INSTRUCTIONS POUR MONTER LE RÉSERVOIR À LA CUVETTE INSTRUCCIONES PARA ACOPLAR EL TANQUE A LA TAZA Cette toilette a été conçue pour une installation facile. On utilise des raccords Este inodoro se diseñó para una sencilla instalación. Se han usado accesorios conventionnels pour tout le montage pour faciliter la compréhension des convencionales en todo el sistema para que las partes funcionales y la pièces et du fonctionnement de l’appareil.
