Tabla de contenido
Publicidad
Enlaces rápidos
sauder.com
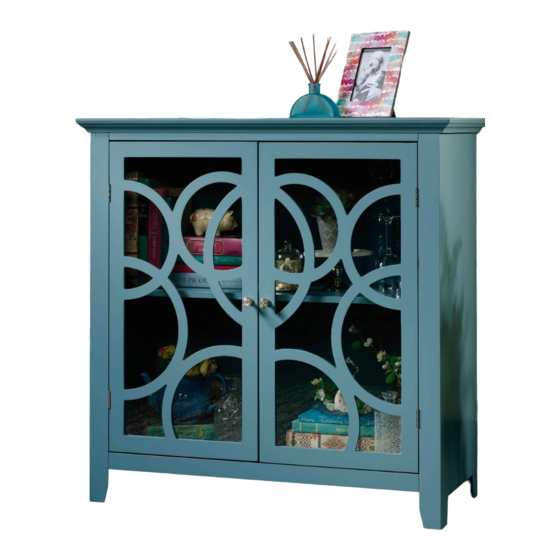
Elise Display Cabinet
Shoal Creek Collection | 420272
Need help? Visit Sauder.com to view video assembly tips or chat with a live rep.
Prefer the phone? Call 1-800-445-1527.
Share your journey!
Store behind
closed doors.
NOTE: THIS INSTRUCTION
BOOKLET CONTAINS IMPORTANT
SAFETY INFORMATION.
PLEASE READ AND KEEP FOR
FUTURE REFERENCE.
English pg 1-12
Français pg 13-14
Español pg 15-16
Lot #: 394248
Date Purchased: __________________
07/08/16
Be sure to give us a ring before
making any returns. 1-800-445-1527
Publicidad
Tabla de contenido

Manuales relacionados para Sauder Elise


Resumen de contenidos para Sauder Elise
- Página 1 NOTE: THIS INSTRUCTION BOOKLET CONTAINS IMPORTANT SAFETY INFORMATION. PLEASE READ AND KEEP FOR Need help? Visit Sauder.com to view video assembly tips or chat with a live rep. FUTURE REFERENCE. Prefer the phone? Call 1-800-445-1527. English pg 1-12 Français pg 13-14 Español pg 15-16...
- Página 2 Assembly Tools Required Part Identifi cation No. 2 Phillips Screwdriver Tip Shown Actual Size Hardware Identifi cation Assembly Steps 5-12 Hammer Not actual size Français 13-14 Español 15-16 Skip the power trip. Safety 17-18 This time. Warranty Page 2 www.sauder.com 420272...
-
Página 3: Part Identifi Cation
Use this part identifi cation to help identify similar parts. TOP (1) RIGHT END (1) LEFT END (1) SHELF (1) BOTTOM (1) MOLDING (1) BACK (2) RIGHT DOOR (1) LEFT DOOR (1) 420272 www.sauder.com Page 3... - Página 4 HIDDEN CAM - 14 WOOD DOWEL - 16 9/16" BLACK SCREW - 6 MAGNETIC CATCH - 2 HINGE - 4 KNOB - 2 3/4" SCREW - 2 STRIKEPLATE - 2 1/2" SCREW - 27 9/16" SILVER SCREW - 16 Page 4 www.sauder.com 420272...
- Página 5 Look for this icon. It means a Step 1 video assembly tip is available at www.sauder.com/services/tips Assemble your unit on a carpeted fl oor or on the empty å carton to avoid scratching your unit or the fl oor. Turn eight CAM SCREWS (A) into the ENDS (2 and 3).
- Página 6 Fasten the MAGNETIC CATCHES (D) to the TOP (1). Use å four 9/16" BLACK SCREWS (E). The arrow must point toward the edge of the board. 9/16" BLACK SCREW (4 used in this step) (6 used) (8 used) Page 6 www.sauder.com 420272...
- Página 7 Fasten the RIGHT END (2) to the SHELF (4) and å BOTTOM (5). Tighten four HIDDEN CAMS. NOTE: Be sure the WOOD DOWELS in the RIGHT END å insert into the SHELF and BOTTOM. The arrow must point toward the edge of the board. 420272 www.sauder.com Page 7...
- Página 8 Fasten the LEFT END (3) to the SHELF (4) and BOTTOM (5). å Tighten four HIDDEN CAMS. NOTE: Be sure the WOOD DOWELS in the LEFT END and å MOLDING insert into the holes. The arrow must point toward the edge of the board. Page 8 www.sauder.com 420272...
- Página 9 Fasten the TOP (1) to the ENDS (2 and 3). Tighten four å HIDDEN CAMS. NOTE: Be sure the WOOD DOWELS in the TOP insert into å the holes in the edges of the ENDS. The arrow must point toward the edge of the board. Flat edge 420272 www.sauder.com Page 9...
- Página 10 3/4" SCREWS (I). Fasten the STRIKE PLATES (G) to the DOORS (8 and 9). å Use two 9/16" BLACK SCREWS (E). 3/4" SCREW (2 used for the KNOBS) 9/16" SILVER SCREW (16 used for the HINGES Page 10 www.sauder.com 420272...
- Página 11 Step 7 Fasten the reversible red/white BACKS (7) to your unit. å Use twenty-seven 1/2" SCREWS (J). 1/2" SCREW (27 used in this step) 420272 www.sauder.com Page 11...
- Página 12 This completes assembly. Clean with your favorite å furniture polish or a damp cloth. Wipe dry. And to celebrate, why not share your success story? 50 lbs. 25 lbs. limit for the SHELF 30 lbs. limit for the BOTTOM Page 12 www.sauder.com 420272...
-
Página 13: Liste De Pièces
élément et conserver le livret pour future référence. DESSUS ................1 VIS D'EXCENTRIQUE ..........14 Pour contacter Sauder EXTRÉMITÉ DROITE ..........1 EXCENTRIQUE ESCAMOTABLE ....14 en ce qui concerne cet EXTRÉMITÉ GAUCHE ..........1 CHEVILLE EN BOIS ..........16 élément, faire référence... - Página 14 Fixer l'EXTRÉMITÉ GAUCHE (3) à la TABLETTE (4) et au DESSOUS (5). Serrer quatre EXCENTRIQUES ESCAMOTABLES. REMARQUE : S'assurer de bien insérer les CHEVILLES EN BOIS situées sur l'EXTRÉMITÉ GAUCHE et la MOULURE dans les trous. Page 14 www.sauder.com 420272...
-
Página 15: Tabla De Contenido
PANEL SUPERIOR ............1 BIELA DE EXCÉNTRICO ........14 et conserver le livret pour future référence. EXTREMO DERECHO ..........1 EXCÉNTRICO ESCONDIDO ......14 Pour contacter Sauder EXTREMO IZQUIERDO ..........1 PASADOR DE MADERA ........16 en ce qui concerne cet ESTANTE ................1 AGARRADOR MAGNÉTICO .......2 élément, faire référence... -
Página 16: Panel Superior
Fije el EXTREMO IZQUIERDO (3) al ESTANTE (4) y al FONDO (5). Apriete cuatro EXCÉNTRICOS ESCONDIDOS. NOTA: Asegúrese de que los PASADORES DE MADERA sujetados al EXTREMO IZQUEIRDO y a la MOLDURA se inserten dentro de los agujeros. Page 16 www.sauder.com 420272... - Página 17 • Ne pas pousser le mobilier, surtout sur la être très lourd. moquette. Se faire aider par une autre personne pour soulever l’élément et le mettre en place • Cette unité doit être placée contre un mur.. 420272 www.sauder.com Page 17...
- Página 18 • No empuje la unidad, especialmente sobre ser muy pesado. un piso alfombrado. Pide la ayuda de otra persona para levantar la unidad y colocarla en lugar. • Esta unidad debe ser colocada contra una pared. Page 18 www.sauder.com 420272...
-
Página 19: Garantía Limitada De 1 Año
GARANTIE LIMITÉE DE 1 AN 1. Sauder Woodworking Co. (Sauder®) off re une couverture de garantie limitée à l’ a cheteur 4. La présente garantie ne s’ a pplique qu’ a ux défauts garantis qui se produisent pour initial du présent produit pendant une période un an à... - Página 20 Dear Valued Customer: So, how did it go? Thanks so much for choosing Sauder® furniture. I hope the Set a world record for speed? purchase and assembly process was a positive experience Feeling good about yourself? and you feel good about the furniture you just built. If you Nice.