
Resumen de contenidos para Nexxt Solutions Smart Wi-Fi surge protector
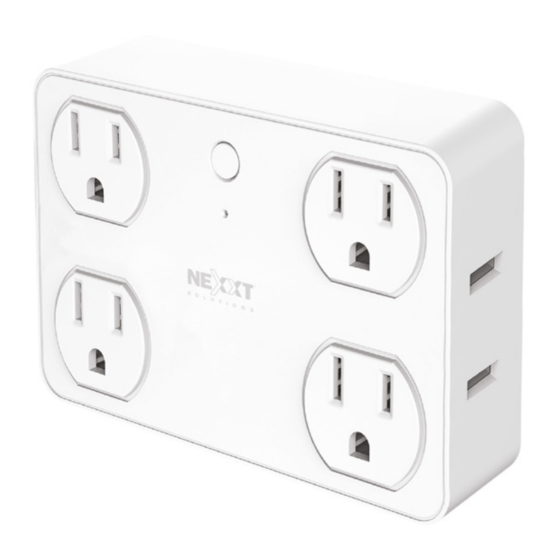
- Página 1 YEAR WARRANTY nexxtsolutions.com/warranty SmartWi-Fi surge protector with four outlets and USB charging ports...
-
Página 2: Package Content
• Smart surge protector plug Thank you for purchasing the Smart Wi-Fi surge protector • Quick start guide plug from Nexxt Solutions. We are excited to be part of making your life easier, safer and for bringing peace of mind into your home. - Página 3 Installing the Nexxt Solutions Step 1 Home App 9:41 AM 60 % 9:41 AM 60 % 9:41 AM 60 % Nexxt Home Cancel Nexxt Home Cancel Register by email Nexxt Solutions Home App Nexxt Solutions Home App INSTALL Accvent LLC...
-
Página 4: Set Password
Step 2 Step 3 9:41 AM 9:41 AM 60 % 60 % Set Password Enter veri cation code 6-20 characters, including letters and numbers Completed Veri cation code has been sent to your Create a new password and then select Completed. Enter the veri cation code you received. - Página 5 LED on the device is blinking, indicating that it has entered into the pairing process. Otherwise, press and hold The Nexxt Solutions Home App has been successfully the power/reset button until the red LED light starts set up.
-
Página 6: Add Device
Add device Step 2 Step 1 9:41 AM 60 % 9:41 AM 60 % 9:41 AM 60 % You must connect to a 2.4GHz WiFi network. Enter your network password. Make sure you enter the correct Select Add device, followed by the smart surge protector password, otherwise the device will not connect. - Página 7 Step 3 Step 4 9:41 AM 60 % 9:41 AM 60 % 9:41 AM 60 % When Device added successfully is displayed, assign a Make sure the indicator light on the app is blinking. Tap on Con rm the indicator light blinks rapidly to continue. location and click on Done.
-
Página 8: Main Switch
Main device Configuration tools Countdown Enables the countdown timer to turn the device on and o . Countdown setup 9:41 AM 60 % Main switch Click on the power button image on the app to turn the plug on and o . Plug 1, 2, 3 and 4 Plug 1 and plug 2 Click on the plug icon to turn the device on or o . - Página 9 Schedule Schedule setup Step 1 Click on the schedule icon, select which plug or USB port To create a schedule, click on the corresponding icon to set you want to con gure, then tap on Add schedule. the time as needed to turn on or o each plug and USB port.
- Página 10 Step 2 Delete setup 9:41 AM 60 % 9:41 AM 60 % Press and hold the Schedule Set the time you wish to schedule. Select Repeat to set To remove a schedule on iOS, slide item to the left , and for weekly settings.
- Página 11 Settings Device name: changes the icon and the name of the device, and it also allows the user to assign a di erent location. Click on pencil icon on the upper right-hand corner. Note: click on the pencil icon to access the device name menu.
- Página 12 Rename device Feedback: let us know if you have any issues setting up the product. Add home screen: adds a shortcut of the device to the main screen on your phone. Check for rmware update: we will sometimes add Smart Plug new features or provide updates with a new rmware upgrade.
-
Página 13: Delete User
FCC ID: X4YHASPT610 Note: family or friends will need their own Nexxt Solutions Nexxt Solutions® is a registered trademark. All rights reserved. Amazon, Alexa and all related logos are trademarks of Amazon.com, Inc. or its a liates. Google, Home Account to access the device. -
Página 14: Contenido Del Empaque
Gracias por adquirir el Enchufe protector de sobretensión • Guía de con guración rápida inteligente con conexión Wi-Fi de Nexxt Solutions. Nos complace ser parte de la solución destinada a no sólo simpli car su vida, sino además poder brindar mayor Indicador de estado seguridad y tranquilidad al interior de su hogar. -
Página 15: Instalación De La Aplicación Nexxt Solutions Home
S O L U T I O N S Create New Account Crear Cuenta Nueva Log in with existing account Iniciar sesión con cuenta existente Get authentication code Registro por email. Complete los campos requeridos. Descargue la aplicación Nexxt Solutions Home de Google Play o Apple App Store. - Página 16 Paso 2 Paso 3 9:41 AM 9:41 AM 60 % 60 % Set Password Enter veri cation code 6-20 characters, including letters and numbers Completed Veri cation code has been sent to your Cree una contraseña nueva y seleccione Completo a Ingrese el código de veri cación que recibió.
-
Página 17: Conexión
Nexxt en un tomacorriente. Aségurese de que el LED de color rojo del dispositivo parpadea rápidamente, para indicar que ha iniciado el proceso de emparejamiento. De La aplicación Nexxt Solutions Home ha sido instalada lo contrario, mantenga presionado el botón de encendi- satisfactoriamente. -
Página 18: Agregar Dispositivo
Agregar dispositivo Paso 2 Paso 1 9:41 AM 60 % 9:41 AM 60 % 9:41 AM 60 % Debe conectarse a la red Wi-Fi de 2.4GHz. Ingrese la Seleccione Agregar dispositivo, y a continuación el contraseña de la red. Asegúrese de utilizar la contraseña enchufe inteligente. - Página 19 Paso 4 Paso 3 9:41 AM 60 % 9:41 AM 60 % 9:41 AM 60 % Cuando la noti cación Dispositivo incorporado exitosamente aparezca en la pantalla, asigne la ubicación Asegúrese de que el indicador luminoso en la aplicación y seleccione Terminar al nal. aparezca intermitente.
-
Página 20: Dispositivo Principal
Dispositivo principal Herramientas de configuración Cuenta regresiva Habilita el temporizador regresivo para encender y apagar el dispositivo. Configuración del temporizador regresivo 9:41 AM 60 % Interruptor principal Haga clic en el botón de encendido en la aplicación para activar y desactivar el dispositivo. Enchufe 1, 2, 3 y 4 Permite ver icar el estado de cada receptáculo, además de Haga clic en el ícono del enchufe para encender o apagar... -
Página 21: Configuración De Horarios
Horario Configuración de horarios Paso 1 Con el n de con gurar un horario, pulse el ícono Haga clic en el ícono del horario y seleccione el correspondiente para programar los períodos de conexión tomacorriente o puerto USB que desea programar. Haga o desconexión de cada tomacorriente o puerto USB clic en la opción Agregar horario. -
Página 22: Borrar Configuración
Borrar configuración Paso 2 9:41 AM 60 % 9:41 AM 60 % Mantenga presionado el Horario De na el horario que desea programar. Seleccione Repetir para con gurarlo semanalmente. Seleccione prender/apa- Con el n de eliminar un horario, deslice el ítem a la gar para alternar el estatus del horario entre activo e izquierda en iOS, pero mantenga presionado el Horario inactivo. -
Página 23: Configuración
Configuración Denominación del dispositivo: cambia el ícono y el nombre del dispositivo, además de permitir la asignación de una nueva ubicación. Haga clic en el ícono del lápiz ubicado en el borde superior Nota: haga clic en el ícono del lápiz para acceder al menú derecho de la pantalla. -
Página 24: Denominación Del Dispositivo
Denominación del dispositivo Comentarios: comuníquese con nosotros si ha tenido alguna di cultad al instalar el producto. Agregar pantalla de inicio: incorpora el acceso instantáneo al dispositivo desde la pantalla de su teléfono móvil. Smart Plug Actualización del rmware: cada cierto tiempo se integran nuevas funciones o actualizaciones mediante versiones mejoradas del microprograma. -
Página 25: Compartir Dispositivo
FCC ID: X4YHASPT610 Nota: amigos o familiares necesitan establecer su propia Nexxt Solutions® es marca registrada. Todos los derechos reservados. Amazon, Alexa y todos los logos relacionados son marcas registradas de Amazon.com, Inc. o sus cuenta de Nexxt Home Solutions para tener acceso al a liados. - Página 26 SmartWi-Fi surge protector with four outlets and USB charging ports...