Tabla de contenido
Publicidad
Idiomas disponibles
Idiomas disponibles
Enlaces rápidos
Publicidad
Tabla de contenido

Resumen de contenidos para Panacom PA-7018
- Página 1 Pg. 1...
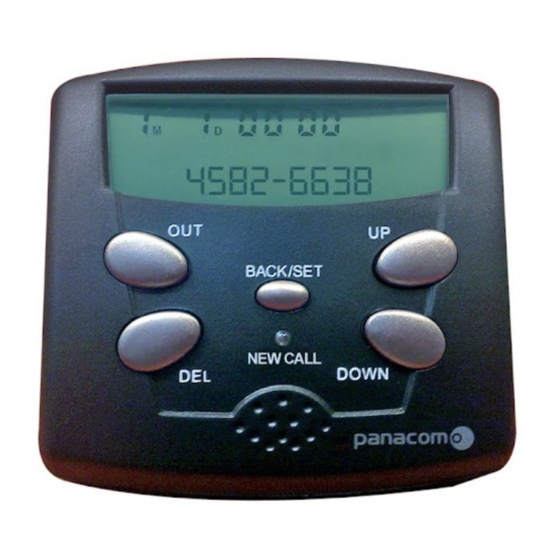
- Página 3 PA-7018 - USER MANUAL Thanks for purchasing Panacom Caller ID PA-7018. Please read this manual carefully before using this Device, which is the best guideline offering best service. CALLER ID INSTRUCTION Remind:This device can be used normally after opening the call ID function through the Telecommunication Bureau.
- Página 4 delete the original calls and store new ones automatically. 2. 12 digits LCD display with backlight control. Adjust- able 16 levels LCD contrast. 3. Missed calls indicator 4. Support Power Fail Safeguard for some time. 5. Three pieces of No. 7 batteries/DC jack. C.
- Página 5 When there are missed calls,the indicator will flash for every seconds,until they are reviewed. E.FUNCTION SETTING Setting items orderly:Year, Month, Day, Hour, Minute, Area codes, PABX and LCD contrast . Press BACK/SET to enter the setting menu;Press the UP or DOWN buttons to select it. 1.
- Página 6 08”.Press the UP or DOWN buttons to adjust the con- trast level step by step.Press the BACK/SET to save it and the settings have been finished. Total levels:16 levels (from 00 -15). 4. Setting PABX code Press DEL button and hold it for 3 seconds and then the LCD will display “–”.
-
Página 7: Instrucciones Del Identificador De Llamadas
PA-7018 - MANUAL DEL USURARIO Gracias por la compra de su Identificador de llamada PANACOM PA-7018. Por favor lea este manual cuidadosa- mente antes de utilizar este aparato, para seguir las mejores pautas tendientes a ofrecer el mejor servicio. INSTRUCCIONES DEL IDENTIFICADOR DE LLAMADAS... -
Página 8: Instalacion
1. Memoria de 40 llamadas entrantes con fecha y hora y memoria de 10 llamadas con el tiempo de conversación. Cuando el Identificador de llamadas PA7018 haya alma- cenado 40 entrantes / 10 salientes, eliminará las llamadas antiguas y almacenará las nuevas automáticamente. 2. -
Página 9: Menu De Opciones
5. Indicador de Llamadas Perdidas. Cuando haya llamadas perdidas el indicador flasheara en rojo por unos segundos hasta que sean revisadas. E. MENU DE OPCIONES Configurando los items en orden: Año, Mes, Días, Hora, Mi- nuto, Códigos de Area, Central y Contraste. Presione el botón BACK/SET para ingresar al menu de op- ciones. - Página 10 dos, presione los botones UP y DOWN para ver la pantalla mostrando “SET 3 LCD”, presione el botón SET para en- trar a la configuración. La pantalla LCD mostrará “LCD 3”. Presione los botones UP-DOWN para ajustar el nivel de contraste paso a paso.
-
Página 11: International Warranty
NTERNATIONAL WARRANTY Terms and Conditions 1. PANACOM warrants the operation of this product to be free from any manufacturing and/or material defect for a pe- riod of 12 months from the date of purchase by the user. 2. This warranty is limited to the repair and/or replace-... -
Página 12: Authorized Service Centers
Phone: (591-3) 35158244 Miami, FL 33166 Fax: (591-3) 3145491 Phone: 1(305) 887-7100 E-mail: bolivia@panacom.info Fax: 1 (305) 887-9177 E -mail: usa@panacom.info Brazil Alzyon Sistemas Ltda. Alameda Itapecuru, 1245, S. 829 - Sao Paulo Phone: (55) 4195-3232 Fax: (55) 4195-3280 E -mail: brasil@panacom.info... -
Página 13: Garantia Internacional
GARANTIA INTERNACIONAL Términos y Condiciones 1. PANACOM garantiza el funcionamiento de este producto ante cualquier defecto de fabricación y/o vicio de material por el término de 12 meses contado a partir de la fecha de compra por parte del usuario. -
Página 14: Centro De Servicios Autorizado
Phone: (591-3) 35158244 Miami, FL 33166 Fax: (591-3) 3145491 Phone: 1(305) 887-7100 E-mail: bolivia@panacom.info Fax: 1 (305) 887-9177 E -mail: usa@panacom.info Brazil Alzyon Sistemas Ltda. Alameda Itapecuru, 1245, S. 829 - Sao Paulo Phone: (55) 4195-3232 Fax: (55) 4195-3280 E -mail: brasil@panacom.info... - Página 16 Pg. 16...