
Resumen de contenidos para My Arcade Retro Champ
- Página 1 User guide Manuel de l’utilisateur Guía del usuario Manuale dell’Utente Guia do usuário Bedienungsanleitung Gebruikershandleiding ユーザー ガイド www.MyArcadeGaming.com...
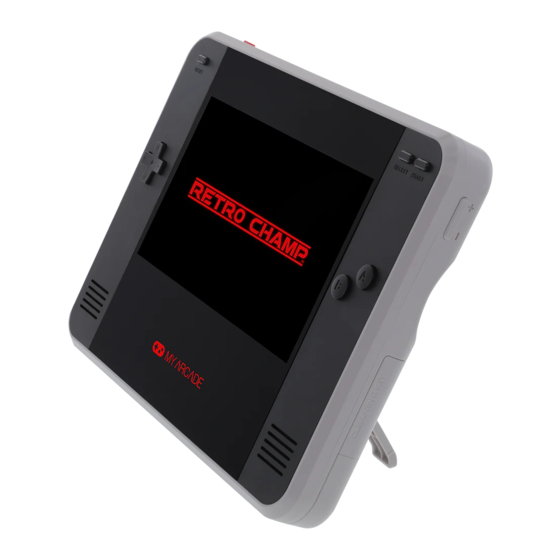
- Página 2 ENGLISH Includes Retro Champ™ console, AC charger and user guide. Please read and follow this user guide thoroughly before using. 1. Directional pad 11. Headphone jack ( 2. RESET button 12. Charge port (5V IN) 3. SELECT button 13. Battery indicator LED ( 4.
-
Página 3: Top View
TOP VIEW BACK VIEW BOTTOM VIEW... - Página 4 1. Plug the Micro-USB end of the included AC charger into the charge port located on the top of the Retro Champ™. Plug the other end of the AC charger into a powered source. Solid orange – Device is charging.
- Página 5 • When the Retro Champ™ is plugged into your TV, the screen on the Retro Champ™ will turn o . • The aspect ratio will work in both 4:3 and 16:9 when using the Retro Champ™ on a TV. • The directional pad and buttons on the Retro Champ™ will still function while the console is connected to the TV via an HDMI®...
- Página 6 To use the CLEANING KIT 1. Slide the RELEASE switch located on the bottom of the Retro Champ™ from right to left. 2. While holding the RELEASE switch to the left, slide the CLEANING KIT downwards and remove from the Retro Champ™.
- Página 7 If a defect covered by this warranty occurs to a product purchased in the U.S. or Canada, My Arcade, at its option, will repair or replace the product purchased at no charge or refund the original purchase price. If a replacement is necessary and your product is no longer available, a comparable product may be substituted at the sole discretion of My Arcade.
-
Página 8: Service Information
Save a tree, register online My Arcade is making the eco-friendly choice to have all products registered online. This saves the printing of physical paper registration cards. All the information you need to register your recent My Arcade purchase is available at:... - Página 9 FRANÇAIS Inclus Console Retro Champ™, chargeur secteur et guide de l’utilisateur. Veuillez lire attentivement le présent manuel de l’utilisateur et suivre ses consignes. 1. Croix directionnelle 11. Prise écouteurs ( 2. Bouton RESET (réinitialisation) 12. Port de charge (5 V IN) 3.
-
Página 10: Vue De Dessus
VUE DE DESSUS VUE ARRIÈRE VUE DE DESSOUS... - Página 11 REMARQUE : Veuillez charger la console Retro Champ™ avant de l’utiliser. 1. Branchez l’embout micro-USB du chargeur secteur inclus sur le port de charge situé sur le dessus de la console Retro Champ™. Branchez l’autre embout du chargeur secteur sur une source d’alimentation.
- Página 12 2. Branchez l’autre embout du câble sur le port HDMI® de votre téléviseur. 3. Confirmez que votre téléviseur est réglé sur la bonne entrée vidéo. REMARQUES : • Lorsque la console Retro Champ™ est branchée sur votre téléviseur, l’écran de la console Retro Champ™ s’éteint.
- Página 13 1. Insérez des piles à l’arrière de la Super GamePad (non inclus). 2. Allumez la console Retro Champ™. Une fois la console Retro Champ™ allumée, les voyants LED des MANETTES situés à l’arrière de la console Retro Champ™ clignotent puis s’éteignent.
- Página 14 Essayez toujours d’abord avec un coton-tige sec. Problème : la console Retro Champ™ ne s’allume pas. Solution : dans le cas peu probable où votre console Retro Champ™ ne s’allume pas, vérifiez qu’elle est complètement chargée avant d’essayer de l’allumer. Reportez-vous à la rubrique «...
- Página 15 Information sur la garantie Tous les produits My Arcade® sont assortis d’une garantie limitée et ont été soumis à une série de tests pour assurer la meilleure fiabilité et la meilleure compatibilité. Il est peu probable que vous ayez un problème, mais si un défaut se manifeste pendant l’utilisation du produit, My Arcade®...
- Página 16 ESPAÑOL Incluye Consola Retro Champ™, cargador de CA y guía del usuario. Lea y siga minuciosamente esta guía del usuario antes de usar. 1. Cruceta de control 11. Conector de auriculares ( 2. Botón RESET (Restablecer) 12. Puerto de carga (5V IN) 3.
-
Página 17: Vista Superior
VISTA SUPERIOR VISTA POSTERIOR VISTA INFERIOR... - Página 18 NOTA: Cargue por completo la Retro Champ™ antes de usarla. 1. Conecte el extremo micro USB del cargador de CA que se incluye en el puerto de carga ubicado en la parte superior de la Retro Champ™. Conecte el otro extremo del cargador de CA a la fuente alimentada.
- Página 19 • Cuando se conecta la Retro Champ™ en su televisor, la pantalla de la Retro Champ™ se apagará. • La relación de aspecto funcionará en 4:3 y 16:9 cuando use la Retro Champ™ en un televisor. • La cruceta de control y los botones de la Retro Champ™ funcionarán de todos modos...
- Página 20 5. Si usa un segundo Super GamePad para juegos con 2 jugadores, siga las mismas instrucciones para conectar el controlador 2. NOTA: La Retro Champ™ solo es compatible con Super GamePad de My Arcade® y no se debe usar con controladores de otras marcas. Para comprar nuestro Super GamePad, visite nuestro sitio web: https://www.myarcadegaming.com/products/super-gamepad.
- Página 21 Problema: La Retro Champ™ no enciende. Solución: En el caso improbable de que su Retro Champ™ no encienda, asegúrese de que la consola esté completamente cargada antes de intentar encenderla. Consulte la sección “Cómo cargar la Retro Champ™” para obtener instrucciones de carga.
- Página 22 Salve un árbol, regístrese en línea My Arcade ha tomado la decisión ecológica de que todos sus productos se registren en línea. Esto ahorra la impresión de las tarjetas de registro en papel. Toda la información que necesita para registrar su reciente compra de My Arcade está disponible en:...
- Página 23 ITALIANO ______ ______ Include Console Retro Champ™, caricatore c.a. e manuale dell'Utente. Leggere e seguire accuratamente il presente manuale. 1. Pad direzionale 11. Spina jack per auricolari ( 2. Pulsante RESET 12. Porta di ricarica 5V IN (ingresso di 5 V) 3.
- Página 24 VISTA LATO SUPERIORE VISTA RETRO VISTA FONDO...
- Página 25 Porta HDMI OUT (uscita HDMI) - è l'uscita per utilizzare la console con lo schermo di visualizzazione del televisore. Slot per cartuccia Famicom™ - è l'alloggiamento dedicato per le cartucce Famicom™. Interruttore RELEASE - permette di sganciare il CLEANING KIT (kit di pulizia) dalla console Retro Champ™.
- Página 26 Ricarica della console Retro Champ™ NOTA: prima di utilizzare la console Retro Champ™ è consigliabile caricarla fino al massimo livello possibile. 1. Inserire l'estremità Micro-USB dell'adattatore c.a. incluso in dotazione nella porta di ricarica della Retro Champ™ (lato superiore). Collegare l'altra estremità del caricatore c.a. a una fonte di alimentazione.
- Página 27 • Quando la Retro Champ™ viene collegata al televisore, lo schermo della console si spegne. • Quando si usa la Retro Champ™ con un televisore, è possibile attivare sia il fattore di forma 4:3 sia il fattore di forma 16:9.
- Página 28 In alcuni casi, la cartuccia non funzionerà più. Questo problema non è imputabile alla console Retro Champ™, ma è dovuto alla cartuccia di gioco stessa, che non può più essere utilizzata a causa dei danneggiamenti apportati dal tempo. È comunque sempre possibile tentare di risolvere il problema pulendo la cartuccia.
- Página 29 Informazioni sulla garanzia Tutti i prodotti My Arcade vengono forniti con una garanzia limitata e sono stati sottoposti a un’intensiva serie di collaudi che ne ha assicurato il più alto livello di a idabilità e compatibilità. Benché il verificarsi di un problema debba essere ritenuto un evento altamente improbabile, non è...
- Página 30 Facendo una scelta ecologica, My Arcade ha stabilito che tutti i prodotti debbano essere registrati online. In questo modo, si eviterà la stampa di schede di registrazione cartacee. Tutte le informazioni utili per registrare il più recente acquisto di un prodotto My Arcade sono disponibili all’indirizzo www.MyArcadeGaming.com/product-registration.
- Página 31 PORTUGUÊS _____ _____ Inclui Retro Champ™, carregador CA e guia do usuário. Leia e siga este guia do usuário com atenção. 1. Botões direcionais 11. Entrada do fone de ouvido ( 2. Botõe RESET 12. Porta de carregamento (5V IN) 3.
-
Página 32: Visão Superior
VISÃO SUPERIOR VISÃO ANTERIOR VISÃO INFERIOR... - Página 33 Porta da HDMI OUT (saída HDMI) – para mostrar a tela em sua TV. Slot do cartucho Famicom™ – inserir o cartucho Famicom™. Interruptor de RELEASE (liberação) – para liberar o kit de limpeza do Retro Champ™. Como carregar o Retro Champ™...
- Página 34 1. Insira gentilmente um cartucho NES™ com a etiqueta virada para frente no slot do cartucho NES™ na parte superior do Retro Champ™. 2. Ligue o Retro Champ™ movendo o interruptor de energia de ( ) para ( ). 3. Use os botões direcionais para navegar pelo menu do jogo e começar a jogar.
- Página 35 Infelizmente, nesses casos, o cartucho não funcionará mais e isso não é considerado um defeito do Retro Champ™, mas um caso em que o cartucho do jogo não funciona mais devido a danos ou tempo de uso. Para limpar o cartucho, consulte nossa seção "Como limpar seus cartuchos".
- Página 36 Se um defeito coberto por esta garantia ocorrer em um produto adquirido nos EUA ou no Canadá, a My Arcade, a seu critério, efetuará o reparo ou a substituição do produto adquirido sem custo, ou reembolsará o preço de compra original. Se for necessária a substituição e o produto não estiver mais disponível, poderá...
- Página 37 Salve uma árvore, faça a inscrição online A My Arcade tomou a decisão ecológica de registrar todos os produtos online. Isso evita a impressão de cartões de registro em papel. Todas as informações necessárias para você registrar sua recente compra da My Arcade estão disponíveis em:...
- Página 38 DEUTSCHE _______ Im Lieferumfang enthalten Retro Champ™ Konsole, AC-Ladegerät und Bedienungsanleitung. Bitte lesen Sie vor dem Gebrauch sorgfältig durch und befolgen Sie alle Anweisungen. 1. Steuerkreuz 11. Kopfhöreranschluss ( 2. RESET-Taste 12. Ladeanschluss (5 V IN) 3. SELECT-Taste 13. Batterieanzeige-LED ( 4.
-
Página 39: Ansicht Von Oben
ANSICHT VON OBEN ANSICHT VON HINTEN ANSICHT VON UNTEN... - Página 40 Laden des Retro Champ™ HINWEIS: Der Retro Champ™ sollte vor dem Gebrauch vollständig aufgeladen werden. 1. Schließen Sie das Micro-USB-Ende des beiliegenden AC-Ladegeräts an den Ladeanschluss auf der Oberseite des Retro Champ™ an. Verbinden Sie das andere Ende des AC-Ladegeräts mit einer Energiequelle.
- Página 41 1. Setzen Sie die NES™-Kassette mit dem Etikett nach vorn in ihren Steckplatz auf der Oberseite des Retro Champ™ ein. 2. Schalten Sie den Retro Champ™ ein, indem Sie den Netzschalter von ( ) nach ( ) bewegen. 3. Navigieren Sie mithilfe des Steuerkreuzes und der Tasten durch das Spielmenü und beginnen Sie das Spiel.
- Página 42 • Wenn der Retro Champ™ an einen Fernseher angeschlossen ist, schaltet sich der Bildschirm des Retro Champ™ aus. • Das Bildformat ist bei Verwendung des Retro Champ™ mit einem Fernseher sowohl in 4:3 als auch in 16:9 verfügbar. • Steuerkreuz und Tasten des Retro Champ™ behalten ihre Funktionen, wenn die Konsole über ein HDMI®-Kabel an einen Fernseher angeschlossen ist.
- Página 43 Anweisungen zum Aufladen entnehmen Sie bitte dem Abschnitt „Laden des Retro Champ™“. Fehler: Der Bildschirm erscheint verpixelt oder „friert ein“. Lösung: Schalten Sie den Retro Champ™ für 5 Sekunden aus und dann wieder ein. Vergewissern Sie sich, dass der Retro Champ™ vollständig aufgeladen ist. FCC-Hinweise Dieses Gerät wurde getestet und hält die Grenzwerte für digitale Geräte der Klasse B...
- Página 44 Produkt gebührenfrei wahlweise reparieren oder ersetzen, jedoch nicht den ursprünglichen Kaufpreis zurückerstatten. Wenn Sie einen Ersatz benötigen, Ihr Produkt jedoch nicht länger erhältlich ist, behält sich My Arcade vor, nach eigenem Ermessen ein vergleichbares Produkt als Ersatz zur Verfügung zu stellen.
- Página 45 NEDERLANDS ________ In dit pakket Retro Champ™-console, netstroomoplader en gebruikershandleiding. Lees aandachtig volgende gebruikershandleiding. 1. Richtingsknoppen 11. Koptelefoonaansluiting ( 2. RESET-knop 12. Oplaadpoort (5 V IN) 3. SELECT-knop 13. Led-indicator batterij ( 4. START-knop 14. CLEANING KIT (schoonmaakset) 5. B-knop 15.
- Página 46 BOVENKANT ACHTERKANT ONDERKANT...
-
Página 47: Knop-En Poortfuncties
Sleuf voor Famicom™-cartridge - hier kun je de Famicom™-cartridge plaatsen. RELEASE-schakelaar - hiermee haal je de CLEANING KIT (schoonmaakset) uit de Retro Champ™. De Retro Champ™ opladen OPMERKING: Laad de Retro Champ™ vóór gebruik volledig op. 1. Plug het Micro-USB-uiteinde van de meegeleverde netstroomoplader in de oplaadpoort... - Página 48 1. Plaats voorzichtig een NES™-cartridge met het label naar voren in de sleuf voor de NES™-cartridge bovenin de Retro Champ™. 2. Schakel de Retro Champ™ in door de aan-uitknop van ( ) op ( ) te zetten. 3. Gebruik de richtingsknoppen om door het game-menu te navigeren en te beginnen met spelen.
- Página 49 OPMERKINGEN: • Wanneer de Retro Champ™ is aangesloten op een tv, gaat het scherm van de Retro Champ™ uit. • De beeldverhouding kan worden ingesteld op zowel 4:3 als 16:9 wanneer de Retro Champ™ wordt aangesloten op een tv. • De richtingsknoppen op de Retro Champ™ werken zoals normaal wanneer de console via en HDMI®-kabel is aangesloten op de tv.
- Página 50 Famicom™-console). Na een tijdje kunnen de pinnetjes in een cartridge verslijten of breken. In dat geval werkt de cartridge helaas niet meer. Dit ligt niet aan de Retro Champ™, maar aan het feit dat de cartridge niet meer functioneert vanwege slijtage of ouderdom.
- Página 51 Het is onwaarschijnlijk dat u enig probleem zult ondervinden, maar als een defect tijdens het gebruik van dit product zou blijken, garandeert My Arcade de oorspronkelijke koper van de consument dat dit product gedurende 120 dagen vrij zal zijn van defecten in materiaal en vakmanschap.
- Página 52 付属品 Retro Champ™コンソール、 AC充電器、 ユーザーガイド。 ご使用の前にこのユーザーガイ ドをよく お読みになり。 1. 十字ボタン 11. ヘッ ドフォン差し込み口 ( ) 12. 電源ポート (5V IN) 2. RESETボタン 13. バッテリーインジケーターLED ( ) 3. SELECTボタン 14. クリーニングキッ ト 4. STARTボタン 15. コントローラ1インジケーターLED 5. Bボタン 6. Aボタン 16. HDMI OUTポート...
- Página 53 上面図 裏面図 下面図...
- Página 54 示します。 ク リーニングキッ ト - クリーニング用品が入ったポータブルキッ ト。 コントローラ1&2インジケーターLED – ワイヤレスコントローラ (別売) が前述のRetro Champ™ペアリングモードに接続されていることを示します。 HDMI OUTポート – 画面をテレビに映します。 Famicom™カートリ ッジスロッ ト – Famicom™カートリッジを挿入します。 RELEASEスイッチ – Retro Champ™からクリーニングキッ トを外します。 Retro Champ™の充電方法 注 : ご使用の前にRetro Champ™の充電を完了してください。 1.付属のAC充電器のMicro-USB端子をRetro Champ™の上部にある充電ポートに差し込みま す。 AC充電器のもう一方の端子を電源に差し込みます。 オレンジ色に点灯 – デバイスを充電中です。...
- Página 55 注 : カートリッジを挿入する前に、 Retro Champ™の動作不良の原因となる汚れやごみがカー トリッジにないか確認してください。 乾いた綿棒でカートリッジの接点をきれいにしておく こ とをお勧めします。 1. Retro Champ™の上部にあるNES™カートリッジスロッ トに、 ラベルを前に向けた状態で NES™カートリッジを静かに差し込みます。 2. 電源スイッチを ( ) から ( ) に動かしてRetro Champ™をオンにします。 3. 十字パッ ドとボタンを使用してゲームメニューを操作し、 プレイを開始します。 4. カートリッジを取り外すには、 デバイスの電源を切り、 Retro Champ™から静かに 引き上げます。 注 : カートリッジがRetro Champ™で動作しない場合は、 きれいに拭いてください。 それでも動...
- Página 56 5. 2プレイヤーゲームで2つのSuper GamePadを使用している場合は、 コントローラ2につい ても同じ手順に従ってください。 注 : Retro Champ™は、 My Arcade® Super GamePadのみと互換性があり、 その他のコントロー ラを使用することはできません。 Super GamePadのご購入には、 こちらのウェブサイトをご覧 ください : https://www.myarcadegaming.com/products/super-gamepad ク リーニングキッ トを使用するには 1. Retro Champ™の底部にあるRELEASEスイッチを右から左にスライドします。 2. RELEASEスイッチを左に押しながらクリーニングキッ トを下にスライドさせて、 Retro Champ™から取り外します。 3. クリーニングキッ トのOPENボタンを押して2つのパーツに切り離します。 洗浄液ボトル (付 属) と綿棒が収納されています。 4. 交換する場合は、 パーツを接続してクリーニングキッ トをスライドさせてRetro Champ™に...
- Página 57 性は低いものの、 本製品の使用中に不具合 が明らかになった場合、 My Arcade は製品を購入されたお客様本人に対し、 本製品の購入日 から 120 日間は材料 および製造上の欠陥がないことを保証します。 米国またはカナダで購入された製品に、 本保証の対象となる不具合が発生した場合、 My Arcade は購入された製品を無償にて修理または交換を行うか、 購入金額を払い戻します。 交換が必要なものの、 その製品が入手できない場合、 My Arcade の独自の裁量により、 同等 品をこれに代える場合もあります。 米国およびカナダ以外で購入された My Arcade 製品に つきましては、 購入店舗に詳細をお問い合わせください。 通常の摩耗および裂け、 不正または誤った使用、 修正、 改造または材料および製造に関連し ないその他の原因については、 本保証は一切適用されません。 産業または専門的、 商業目的 で使用される製品については、 本保証は一切適用されません。...
- Página 58 を要求する 権利を有します。 注: My Arcade では、 返品認証番号がない場合、 瑕疵製品の補償の手続きを行わないもの とします。 お客様サポートホッ トライン 877-999-3732 (米国、 カナダ専用) 310-222-1045 (米国、 カナダ以外) お客様サポート電子メール support@MyArcadeGaming.com ウ ェブサイ ト www.MyArcadeGaming.com 環境保護のため、 オンラインでの登録をお願いいたします My Arcade では、 環境に配慮し、 すべての製品の登録をオンラインで行っています。 これによ り、 登録カードの印刷に使用する用紙削減に取り組んでいます。 お買い求めいただきました My Arcade 製品を登録するために必要な情報は、 以下を参照にしてください www.MyArcadeGaming.com/product-registration...
- Página 59 Retro Champ™ RESET SELECT CLEANING KIT .14 START CONTROLLER LED HDMI OUT CONTROLLER LED ( ) ( ) Famicom™ (16:9 <-> 4:3) RELEASE NES™...
- Página 61 – ( RESET – ( SELECT – ( START – – .( ) – .9:61 3:4 – (16:9 <-> 4:3) – NES™ .NES ™ – ( ) – ( Micro-USB – ( – CONTROLLER LED Retro Champ™ – HDMI OUT...
- Página 62 – Famicom™ Famicom™ – ( Retro Champ™ RELEASE Retro Champ™ Retro Champ™ Micro-USB Retro Champ™ – – – Retro Champ™ NES™ Retro Champ™ NES ™ NES ™ Retro Champ™ .( ) Retro Champ™ Retro Champ™ Retro Champ™ Retro Champ™ Famicom™...
- Página 63 Retro Champ™ 16:9 4:3 • Retro Champ™ HDMI® Retro Champ™ Super GamePad Retro Champ™ Retro Champ™ Retro Champ™ CONTROLLER Super GamePad Super GamePad Super GamePad My Arcade Retro Champ™ Super GamePad http://www.myarcadegaming.com/products/super-gamepad CLEANING KIT Retro Champ™ RELEASE CLEANING KIT RELEASE...
- Página 64 Retro Champ™ OPEN Retro Champ™ Famicom™ ™ Retro Champ™ " " Retro Champ™ Retro Champ™ " " Retro Champ™ Retro Champ™ Retro Champ™...
- Página 65 (FCC) • • • • My Arcade My Arcade My Arcade My Arcade...
- Página 66 My Arcade My Arcade 877-999-3732 310-222-1045 support@MyArcadeGaming.com www.MyArcadeGaming.com My Arcade Arcade www.MyArcadeGaming.com/product-registration...
- Página 68 www.MyArcadeGaming.com...