Publicidad
Idiomas disponibles
Idiomas disponibles
Enlaces rápidos
H-5640
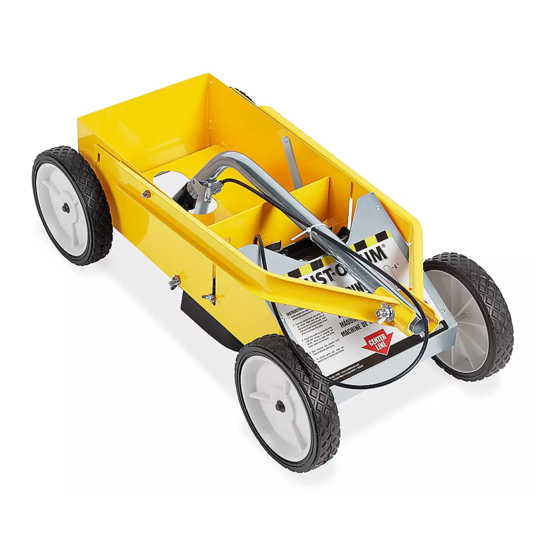
STRIPING PAINT MACHINE
ASSEMBLY
1.
Pull handle upright and tighten wing nut in center of
handle until handle locks into place. (See Figure 1a)
2. Loosen wing nuts on sides of machine. (See Figure 1b)
3. Slide handle around wing nuts on sides of machine.
(See Figure 1b)
4. Tighten wing nuts on sides of machine until handle is
secure.
LOADING AND OPERATION
1.
Shake aerosol can vigorously for one minute and
occasionally during use.
2. Turn aerosol can upside down and place in can
holder. Make sure long side of the spray tip is
parallel to axle. (See Figure 2a) Then, slide paint can
toward center of cart where it will snap into place.
(See Figure 2b)
3. Adjust line width by loosening wing nuts and raising
or lowering can holder. Raise to make line wider,
lower to make narrower. (See Figure 3)
4. Push machine and squeeze hand lever to activate
paint spray.
5. To remove spray can, slide can toward side of
machine and lift out.b
PAGE 1 OF 3
1-800-295-5510
uline.com
ASSEMBLY AND OPERATION
Figure 2a
Handle
Wing
Nut
Figure 1a
Wing
Nut
Para Español, vea página 2.
Pour le français, consulter la page 3.
Handle
Wing
Nut
Figure 1b
Figure 2b
Aerosol
Can
Wing
Nut
Figure 3
0621 IH-5640
Publicidad

Resumen de contenidos para Uline H-5640
- Página 1 Para Español, vea página 2. Pour le français, consulter la page 3. H-5640 1-800-295-5510 uline.com STRIPING PAINT MACHINE ASSEMBLY AND OPERATION ASSEMBLY Handle Pull handle upright and tighten wing nut in center of handle until handle locks into place. (See Figure 1a) 2.
- Página 2 H-5640 800-295-5510 uline.mx MÁQUINA PINTARRAYAS ENSAMBLE Y FUNCIONAMIENTO ENSAMBLE 1. Jale del asa para colocarla en posición vertical y apriete la tuerca de alas ubicada en el centro del asa hasta que el asa se asegure en su lugar. Tuerca (Vea Diagrama 1a) 2.
- Página 3 H-5640 1-800-295-5510 uline.ca MACHINE POUR PEINTURE DE MARQUAGE ASSEMBLAGE ET FONCTIONNEMENT ASSEMBLAGE Poignée 1. Tirez la poignée à la verticale et serrez l'écrou à oreilles au centre de la poignée jusqu'à ce que la poignée soit verrouillée en position. (Voir Figure 1a) Écrou 2.