Tabla de contenido
Publicidad
Idiomas disponibles
Idiomas disponibles
Enlaces rápidos
Publicidad
Capítulos
Tabla de contenido
Solución de problemas

Manuales relacionados para VALBERG DHP 8 A++ W205T


Resumen de contenidos para VALBERG DHP 8 A++ W205T
- Página 2 WARRANTY CONDITION This product is guaranteed for a period of 2 years from the date of purchase* against any failure resulting from a manufacturing or material defect. This warranty does not cover defects or damage resulting from incorrect installation, improper use or abnormal wear of the product.
- Página 3 07/2021 – V1 Dryer Sèche-linge Droogtrommel Secadora 971201 DHP 8 A++ W205T INSTRUCTIONS FOR USE ....02 CONSIGNES D'UTILISATION ....32 GEBRUIKSAANWIJZINGEN ....64 INSTRUCCIONES DE USO ....96...
- Página 9 Thanks! T h a n k y o u f o r c h o o s i n g t h i s VA L B E R G p ro d u c t . Chosen, tested and recommended by ELECTRO DEPOT, t h e p ro d u c t s o f t h e VA L B E R G b r a n d a re e a s y t o u s e , re l i a b le a n d o f a n i m p e c c a b le s t a n d a rd .
-
Página 10: Tabla De Contenido
Table of contents Protective measures Preview of the Technical specifications appliance Description of the appliance Product fiche Installation Using the appliance Preparation Operating the product Maintenance and cleaning Useful information Troubleshooting Packaging and the environment Disposing of your old appliance... -
Página 11: Preview Of The Appliance
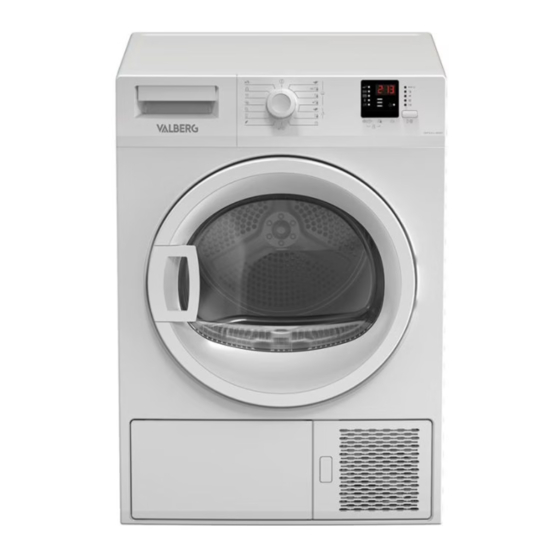
Preview of the appliance Description of the appliance In models where the tank is placed Top panel below, the water tank is inside the toe board Control panel Type label Loading door Lint filter Water tank drawer (in models where Kick plate opening button the tank is placed above) Ventilation grids... -
Página 12: Installation
Using the appliance Installation • Before the calling the nearest Authorized Service for the installation of the dryer, ensure that electrical installation and water drain is appropriate referring to the user’s manual.If they are not suitable, contact a qualified electrician and technician to make necessary arrangements. NOTE: Preparation of the dryer’s location as well as the electrical and waste water installations is under customer’s responsibility. - Página 13 Using the appliance • The rear surface of the tumble dryer shall be placed against a wall. DANGER! Do not place the dryer on the power cable. * Ignore following warning if your product’s system does not contains R290. DANGER! •...
- Página 14 Using the appliance Connecting to the drain You can directly drain accumulated water through the water drain hose supplied with the product instead of periodically draining the water collected in the water tank. Connecting the water drain hose Pull hose at the behind of the dryer by hand in order to disconnect it from where it is connected.
- Página 15 Using the appliance Transportation of the dryer Drain all water that has remained in the dryer. If direct water drain connection is made, then remove the hose connections. WARNING! • We recommend carrying the dryer in upright position. If it is not possible to carry the machine in the upright position, we recommend carrying it by tilting towards the right side when looked from the front.
-
Página 16: Preparation
Using the appliance Preparation Laundry suitable for drying in the dryer Always obey the instructions given on the garment tags. Dry only the laundry having a label stating that they are suitable for drying in a dryer. Laundry not suitable for drying in the dryer Items with this symbol should not be dried in the dryer. - Página 17 Using the appliance • Clean the filter periodically. Read the Maintenance and cleaning of filters for detalied information. • For models with flue unit: comply with the flue connection instructions and clean the flue. • During the drying process, air the room well where your tumble dryer is operating. Correct load capacity Follow the instructions in the “Programme selection and consumption table”.
-
Página 18: Operating The Product
Using the appliance Operating the product Control Panel On/Off/Program selection button Drying Level Button Start/Stand-by button Buzzer volume/Time programs selection button End Time button Symbols Filter drawer Filter / Heat Child-proof Tank full cleaning exchanger lock cleaning Mute Buzzer Delicates Time Sport Synthetics... - Página 19 Using the appliance Preparation of drying machine • Plug the drying machine. • Open the loading door. • Place the laundry to the drying machine without jamming them. • Push and close the loading door. WARNING! • Ensure that no laundry is jammed to the loading door. Select the desired program using the On/Off/Program selection knob, the machine will turn on.
-
Página 20: Shirts
Using the appliance Spin speed in Drying Capacity Programmes Programme Description washing Time (kg) machine (minutes) (rpm) It dries single layer, casual cotton textiles in the Cottons Eco 1000 most economical way. You may use this program for extra dryness in thick Cottons laundry such as pants, tracksuit. - Página 21 Using the appliance Spin speed in Drying Capacity Programmes Programme Description washing Time (kg) machine (minutes) (rpm) It is a long-term program that you can use for the clothes (baby clothes, towels, underwear, etc. cotton) you require hygeine. Hygiene is provided Hygiene with high temperature.
- Página 22 Using the appliance Allergy UK is the brand of the British Allergy Association. Seal of Approval is created to guide people that require recommendation about a product that the related product restricts / reduces / eliminates the allergens or reduces the allergen content significantly in the ambient where allergy patients exist. It aims to provide assurance that the products are tested scientifically or examined in a way to provide measurable results.
- Página 23 Using the appliance Cancel the program by turning the On/Off/Program selection knob. Select the program you want and press the Start/Stand-by button. Warning indicators NOTE: Warning indicators may vary depending on the model of your dryer Filter cleaning When the program is completed, the warning indicator for filter cleaning turns on. Water tank When the program is completed, the warning indicator to empty the water tank turns on.
- Página 24 Using the appliance Changing the program after it is started You can change the program you selected to dry your laundry with a different program after the drying machine starts running. • For instance, select Extra Dry program by turning the On/Off/Program selection knob to select Extra Dry instead of Iron Dry.
- Página 25 Using the appliance WARNING! • The inside of the drying machine shall be extremely hot when you cancel the program during machine operation, so run the refresh program to allow it to cool down. End of program When the program ends, the Fibre Filter Cleaning and Water Tank warning symbols on the program observation indicator turn on.
-
Página 26: Useful Information
Useful information Maintenance and cleaning Loading Door Inner Surface The hair and fibres that are separated from the laundry during drying process is collected by the Fibre Filter. NOTE • Fibres are formed during wearing and washing clothes. • You can clean the filter slot with a vacuum cleaner. WARNING After each drying cycle, clean the fibre filter and the inner surface of the loading door. - Página 27 Useful information NOTE • Ensure that hair, fibre and cotton balls do not fall into the slot where the filters are installed. • Open both filters (top and bottom filters) and to remove the lint with your hand, or use cleaning brush at air routing cover.
- Página 28 Useful information • Insert the fibre filters on one another and place it back in its place. • Clean the front door interior surface and its gaskets with a soft damp cloth or with the brush on air routing cover.
-
Página 29: Cleaning The Sensors
Useful information Cleaning the sensors • There are temperature sensor in the dryer that detect whether the laundry is dry or not. To clean the sensors: • Open the loading door of the dryer. • Remove the lint filter by pulling it up. •... - Página 30 Useful information Draining the water tank Dampness of the laundry is removed and condensed during drying process and the water that arise accumulates in the water tank. Drain the water tank after each drying cycle. WARNING • Condensed water is not drinkable! •...
-
Página 31: Cleaning The Condenser
Useful information 2. Drain the water in the tank. • If there is lint accumulation in the funnel of the water tank, clean it under running water. • Place the water tank into its seat. NOTE If the direct water draining is used as an option, there is no need to empty the water tank. - Página 32 Useful information • Open the toe board by pressing on it. • To open the air routing door, move the release latch. • Pull the brush to the left side and remove it. You can use the cleaning brush for removing collected fluff on the metal surface of the condenser.
- Página 33 Useful information • Please do not clean condenser fins in right-left direction to avoid damage. • You can also use a vacuum cleaner with a brush for cleaning. Condenser cleaning is not recommended with a brushless vacuum cleaner. • Insert the brush into its slot pushing to the right, after cleaning condenser, front cover and lint filter.
- Página 34 Useful information WARNING You can clean by hand, provided you wear protective gloves. Do not try to clean with bare hands. Condenser fins may damage your hands. Cleaning by the left to right movements may damage the condenser fins. This may lead to drying issues.
-
Página 35: Troubleshooting
Useful information Troubleshooting Problem Cause Solution Fibre filter (interior and Wash the fibre filters with exterior filter) pores may be warm water and dry. clogged. Evaporator front side may Clean the front side of the be clogged. evaporator The ventilation grills in Remove any object in front front of the machine may be of the ventilation grills that... - Página 36 Useful information Problem Cause Solution Power plug might be Make sure the power cord is unplugged. plugged in. Loading door might be Ensure that the loading door Drying machine does not open. is properly closed. turn on or program cannot be started.
- Página 37 Useful information Problem Cause Solution Anti-Crease mode that prevents the laundry in Turn the drier off and Anti-crease icon is lit. the drier to crease may be remove the laundry. activated. Fibre filter (interior and Wash the filters with warm exterior filter) may be water and dry.
- Página 38 Useful information Problem Cause Solution Excess amount of laundry Place specified amount of may have been placed laundry. Wrinkles are not removed Steam application time may Choose a program with high with wrinkle removing be selected in low level amount of steam. program.
- Página 39 Merci ! M e rc i d ’ a v o i r c h o i s i c e p ro d u i t VA L B E R G . S é le c t i o n n é s , t e s t é s e t re c o m m a n d é s p a r E L E CT R O D E P O T , le s p ro d u i t s d e l a m a rq u e VA L B E R G s o n t f a c i le s à...
- Página 40 Table des matières Spécifications techniques Aperçu de l’appareil Description de l’appareil Fiche produit Installation Préparation Utilisation de Utilisation du produit l’appareil Entretien et nettoyage Dépannage Informations Emballage et environnement Pratiques...
-
Página 41: Aperçu De L'appareil
Aperçu de l’appareil Description de l’appareil Dans les modèles où le bac est placé dans la partie inférieure, le bac Bandeau supérieur de récupération d’eau se trouve à l’intérieur de la plinthe. Bandeau de commande Plaque signalétique Hublot Filtre à peluches Tiroir du bac de récupération d’eau Bouton d’ouverture de la plaque (pour les modèles où... -
Página 42: Utilisation De L'appareil
Utilisation de l’appareil Installation • Avant d’appeler le service agréé le plus proche pour l’installation du sèche-linge, assurez-vous que l’installation électrique et l’évacuation de l’eau sont adéquates en vous référant au manuel d’utilisation. Dans le cas contraire, contactez un électricien ou un technicien qualifié pour prendre les dispositions nécessaires. - Página 43 Utilisation de l’appareil • Votre sèche-linge peut fonctionner à des températures comprises entre +5°C et +35°C. Si les conditions de fonctionnement se situent en dehors de cette plage, cela nuira au fonctionnement du sèche-linge et il pourrait être endommagé. • La face arrière du sèche-linge doit être placée contre un mur. DANGER ! Ne posez pas le sèche-linge sur le câble d’alimentation.
- Página 44 Utilisation de l’appareil Raccordement du tuyau de vidange d’eau Tirez à la main le tuyau à l’arrière du sèche-linge afin de le débrancher de son point de raccordement. N’utilisez aucun outil pour retirer le tuyau. Branchez une extrémité du tuyau de vidange fourni avec le sèche-linge au point de raccordement situé...
- Página 45 Utilisation de l’appareil Transport du sèche-linge Vidangez toute l’eau restée dans le sèche-linge. En cas de raccordement direct à l’évacuation de l’eau, retirez les raccordements de tuyaux. ATTENTION ! • Nous recommandons de transporter le sèche-linge en position verticale. S’il n’est pas possible de transporter la machine en position verticale, nous recommandons de la transporter en l’inclinant vers le côté...
-
Página 46: Préparation
Utilisation de l’appareil Préparation Linge adapté à un séchage en machine Suivez toujours les instructions fournies sur les étiquettes des vêtements. Ne séchez que le linge dont l’étiquette indique qu’il peut être séché en sèche-linge. Linge non adapté au séchage en sèche-linge. Les articles portant ce symbole ne doivent pas être séchés dans le sèche-linge. -
Página 47: Jeans
Utilisation de l’appareil une fois par mois ou après 30 opérations. • Nettoyez périodiquement le filtre. Lisez la section Entretien et nettoyage des filtres pour plus d’informations. • Pour les modèles équipés d’un conduit d’évacuation : respectez les instructions de raccordement au conduit et nettoyez celui-ci. -
Página 48: (10 Pieces)
Utilisation de l’appareil Mouchoirs Serviette à thé (10 pièces) Serviette de bain T-Shirt Essuie-main * Poids du linge sec avant le lavage. Préparation du sèche-linge • Branchez le sèche-linge. • Ouvrez le hublot. • Placez le linge dans le sèche-linge sans le coincer. •... -
Página 49: Utilisation Du Produit
Utilisation de l’appareil Utilisation du produit Bandeau de commande Bouton de sélection Marche/Arrêt/ Bouton de degré de séchage Programme Bouton Démarrage/Pause Bouton de sélection du volume de la sonnerie/des programmes horaires Bouton de délai de fin Symboles Nettoyage du Nettoyage du tiroir du filtre / Bac plein Sécurité... - Página 50 Utilisation de l’appareil ATTENTION ! • Assurez-vous qu’aucun linge n’est coincé dans le hublot. Sélectionnez le programme souhaité à l’aide du bouton de sélection Marche/Arrêt/Programmes : la machine s’allume. REMARQUE : La sélection d’un programme à l’aide du bouton Marche/Arrêt/ Programme ne signifie pas que le programme a démarré. Appuyez sur le bouton Démarrage/ Pause pour lancer le programme.
- Página 51 Utilisation de l’appareil Vitesse d’esso- Temps de Capacité Programmes Description du programme rage en séchage (kg) lave-linge (minutes) (tr/min) Synthétic Iron Séchage du linge en matière synthétique à repasser Dry (Synthétique afin qu’il soit légèrement humide pour faciliter le à repasser) repassage.
- Página 52 Utilisation de l’appareil Vitesse d’esso- Temps de Capacité Programmes Description du programme rage en séchage (kg) lave-linge (minutes) (tr/min) Programme à long terme pour le séchage des vêtements (vêtements de bébé, serviettes, sous- Hygiene vêtements, etc. en coton) nécessaires à votre - BabyProtect+ hygiène.
- Página 53 Utilisation de l’appareil Allergy UK est la marque de l’association britannique d’allergologie. Le label de qualité est créé pour guider les personnes qui ont besoin d’être assurées qu’un produit restreint / réduit / élimine les allergènes ou réduit le contenu allergène de manière significative dans l’environnement où se trouvent des patients allergiques.
- Página 54 Utilisation de l’appareil REMARQUE : Vous pouvez ajouter ou retirer du linge avant le démarrage d’un programme différé. Le temps affiché est la somme du temps de séchage normal et du délai de démarrage. Le voyant de délai de fin s’éteint à la fin du compte à rebours, le séchage commence et le voyant de séchage s’allume.
- Página 55 Utilisation de l’appareil La sécurité enfant doit être désactivée pour pouvoir lancer un nouveau programme une fois le programme en cours terminé ou pour pouvoir intervenir dans le programme. Pour désactiver la sécurité enfant, maintenez les mêmes boutons enfoncés pendant 3 secondes. REMARQUE : •...
- Página 56 Utilisation de l’appareil REMARQUE : • Si vous ajoutez du linge après le début du séchage, le linge séché à l’intérieur de la machine risque de se mélanger au linge humide, laissant le linge humide à la fin du cycle. • L’ajout ou le retrait de linge pendant le séchage peut être répété autant de fois que vous le souhaitez.
-
Página 57: Informations Pratiques
Informations pratiques Entretien et nettoyage Surface intérieure du hublot Les cheveux et les fibres séparés du linge pendant le processus de séchage sont collectés par le filtre à fibres. REMARQUE • Des fibres se forment pendant le port et le lavage des vêtements. - Página 58 Informations pratiques REMARQUE • Veillez à ce que des cheveux, des fibres et des boules de coton ne tombent dans le logement des filtres. • Ouvrez les deux filtres (supérieur et inférieur) et retirez les peluches à la main ou à l’aide de la brosse de nettoyage située sur le couvercle du circuit d’air.
- Página 59 Informations pratiques • Insérez les filtres à fibres l’un sur l’autre et remettez-les en place. • Nettoyez la surface intérieure du hublot et ses joints à l’aide d’un chiffon doux et humide ou de la brosse située sur le couvercle du circuit d’air.
- Página 60 Informations pratiques Nettoyage des capteurs • Des capteurs de température situés dans le sèche-linge détectent si le linge est sec ou non. Pour nettoyer les capteurs : • Ouvrez le hublot du sèche-linge. • Retirez le filtre à peluches en le tirant vers le haut. •...
- Página 61 Informations pratiques REMARQUE • Nettoyez le capteur 4 fois par an. • N’utilisez pas d’outils métalliques pour nettoyer le capteur. • Laissez refroidir la machine si elle est encore chaude en raison du processus de séchage. ATTENTION N’utilisez jamais de solvants, de produits de nettoyage ou de substances analogues pour le nettoyage en raison du risque d’incendie et d’explosion ! Vidange du bac à...
- Página 62 Informations pratiques clignotera. Dans ce cas, videz le bac à eau et appuyez sur le bouton Démarrage/Pause pour reprendre le cycle de séchage. Pour vider le bac à eau : 1. Retirez soigneusement le bac à eau du tiroir ou du conteneur.
- Página 63 Informations pratiques REMARQUE En cas d’utilisation de l’option d’évacuation directe de l’eau, il n’est pas nécessaire de vider le bac à eau. Nettoyage du condenseur Une petite quantité de peluches peut passer à travers le filtre à peluches et s’accumuler sur la surface métallique du condenseur.
- Página 64 Informations pratiques • Tirez la brosse vers le côté gauche et retirez-la. Vous pouvez utiliser la brosse de nettoyage pour enlever les peluches accumulées sur la surface métallique du condenseur. REMARQUE La brosse se trouve dans le sac de documentation imprimée. Vous pouvez la placer dans son logement sur le couvercle du circuit d’air après la première utilisation.
- Página 65 Informations pratiques • Après avoir nettoyé le condenseur, le couvercle avant et le filtre à peluches, insérez la brosse dans son logement en la poussant vers la droite. • Une fois le processus de nettoyage terminé, remettez la porte du circuit d’air à sa place, déplacez les loquets pour la fermer et fermez la plinthe.
-
Página 66: Dépannage
Informations pratiques Dépannage Problème Cause Solution Les pores du filtre à fibres Lavez les filtres à fibres à l’eau (filtre intérieur et extérieur) chaude et séchez-les. sont peut-être obstrués. La face avant de l’évaporateur Nettoyez la face avant de est peut-être obstruée. l’évaporateur. - Página 67 Informations pratiques Problème Cause Solution La fiche d’alimentation est Assurez-vous que le cordon peut-être débranchée. d’alimentation est branché. Assurez-vous que le hublot est Le hublot est peut-être ouvert. Le sèche-linge ne s’allume pas correctement fermé. ou il est impossible de lancer Il se peut qu’un programme ne le programme.
- Página 68 Informations pratiques Problème Cause Solution Le mode anti-froissement qui L’icône anti-froissement est empêche le linge de se froisser Arrêtez le sèche-linge et retirez allumée. dans le sèche-linge est peut- le linge. être activé. Le filtre à fibres (filtre intérieur Lavez les filtres à l’eau chaude et extérieur) est peut-être sale.
- Página 69 Informations pratiques Problème Cause Solution L’odeur du linge n’est pas Une quantité excessive de linge Placez la quantité de linge atténuée par le programme a peut-être été placée. indiquée. d’élimination des odeurs. Le temps d’application de (Pour les produits avec un Choisissez un programme à...
- Página 70 Notes...
- Página 71 Bedankt ! B e d a n k t o m v o o r d i t p r o d u c t v a n VA L B E R G g e k o z e n t e h e b b e n .
- Página 72 Inhoudstafel Technische specificaties Overzicht van het Beschrijving van het toestel toestel Productfiche Installatie Voorbereiding Gebruik van het Gebruik van het product toestel Onderhoud en reiniging Probleemoplossing Praktische informatie Verpakking en milieu...
-
Página 73: Overzicht Van Het Toestel
Overzicht van het toestel Beschrijving van het toestel Bij de modellen waar de bak in het Bovendeksel onderste deel is geplaatst, bevindt de wateropvangbak zich in de plint. Bedieningspaneel Kenplaatje Deur Pluisfilter Lade van de wateropvangbak (voor Knop voor het openen van de modellen waar de bak in het bovenste beschermingsplaat deel is geplaatst) -
Página 74: Gebruik Van Het Toestel
Gebruik van het toestel Installatie • Alvorens de dichtstbijzijnde erkende service te contacteren voor de installatie van de droogkast, vergewis u ervan dat de elektrische installatie en de waterafvoer geschikt zijn door te verwijzen naar de gebruikshandleiding. Mocht dit niet het geval zijn, contacteer dan een elektricien of een gekwalificeerd technicus om de noodzakelijke maatregelen te nemen. - Página 75 Gebruik van het toestel • Uw droogkast kan werken bij temperaturen die liggen tussen +5°C en +35°C. Wanneer de werkingsomstandigheden buiten dit bereik liggen, zal dit een nadelige invloed hebben op de werking van de droogkast en zou ze beschadigd kunnen raken. •...
- Página 76 Gebruik van het toestel Aansluiting van de waterafvoerslang Verwijder met de hand de slang aan de achterkant van de droogkast om deze los te maken van zijn aansluitpunt. Gebruik geen gereedschap om de slang te verwijderen. Sluit een uiteinde van de met de droogkast meegeleverde slang aan op het aansluitpunt daar waar u de slang van het toestel bij de vorige stap hebt verwijderd.
- Página 77 Gebruik van het toestel OPGELET! • We raden u aan de droogkast in verticale positie te transporteren. Indien het niet mogelijk is de machine in verticale positie te transporteren, transporteer ze dan door ze naar rechts te kantelen (vooraanzicht). Waarschuwingen met betrekking tot geluiden OPMERKING: •...
- Página 78 Gebruik van het toestel Voorbereiding Wasgoed dat geschikt is om te drogen in een machine Volg altijd de instructies die vermeld staan op de labels van de kledij. Droog enkel wasgoed met een label waarop staat dat het in een droogkast kan worden gedroogd. Wasgoed dat niet geschikt is om te worden gedroogd in een droogkast.
- Página 79 Gebruik van het toestel • Voeg geen nat wasgoed toe terwijl de droogkast aan staat. • Voor modellen die uitgerust zijn met een condensatie-eenheid: reinig de condensator regelmatig één keer per maand of na 30 droogbeurten. • Reinig regelmatig de filter. Lees het deel “Onderhoud en reiniging van de filters” voor meer informatie.
- Página 80 Gebruik van het toestel Katoenen Laken (dubbel) jurk Groot tafellaken Jurk Klein tafellaken Jeans Zakdoeken Theedoek (10 stuks) Badhanddoek T-shirt Handdoek * Gewicht van het wasgoed voor het wassen. Voorbereiding van de droogkast • Stop de stekker van de droogkast in het stopcontact. •...
-
Página 81: Gebruik Van Het Product
Gebruik van het toestel Gebruik van het product Bedieningspaneel Keuzeknop Aan/Uit/Programma Knop voor de droogtegraad Knop Start/Pauze Keuzeknop voor het volume van de zoemer/de uurprogramma’s Knop voor de eindtijd Symbool Reiniging van de lade van de Reiniging Volle bak filter/van de Kinderslot van de filter warmtewisse-... - Página 82 Gebruik van het toestel OPGELET! • Zorg ervoor dat geen wasgoed geklemd raakt tussen de deur. Selecteer het gewenste programma met behulp van de keuzeknop Aan/Uit/Programma’s: de machine wordt ingeschakeld. OPMERKING: Het selecteren van een programma met behulp van de knop Aan/Uit/ Programma betekent niet dat het programma is gestart.
- Página 83 Gebruik van het toestel Centrifu- geersnel- Lading heid in de Droogtijd Programma's Beschrijving van het programma (kg) wasma- (minuten) chine (tr/ min) Synthétic Iron Strijkdroog drogen van wasgoed in synthetische Dry (Synthetisch stof zodat het nog licht vochtig is om het strijken te strijkdroog) vergemakkelijken.
- Página 84 Gebruik van het toestel Centrifu- geersnel- Lading heid in de Droogtijd Programma's Beschrijving van het programma (kg) wasma- (minuten) chine (tr/ min) Lang programma voor het drogen van kledij Hygiene (babykledij, handdoeken, ondergoed, enz. in katoen) - BabyProtect+ die nodig is voor uw hygiëne. De hygiëne wordt (Hygiëne - gewaarborgd door een hoge temperatuur.
- Página 85 Gebruik van het toestel Allergy UK is het merk van de Britse vereniging voor allergologie. Het kwaliteitslabel is in het leven geroepen om personen te helpen die zeker moeten zijn dat een product allergenen beperkt / vermindert / elimineert of de hoeveelheid allergenen in de omgeving waar zich allergische personen bevinden, aanzienlijk vermindert.
- Página 86 Gebruik van het toestel OPMERKING: U kunt wasgoed toevoegen of verwijderen voor de start van een uitgesteld programma. De weergegeven tijd is de som van de normale droogtijd en de starttijd. Het lampje eindtijd dooft op het einde van het aftellen, het drogen begint en het drooglampje gaat branden.
- Página 87 Gebruik van het toestel Het kinderslot moet worden uitgeschakeld om een nieuw programma te starten eenmaal het lopende programma is beëindigd of om tussen te komen in het programma. Om het kinderslot uit te schakelen, houd dezelfde knoppen 3 seconden lang ingedrukt. OPMERKING: •...
- Página 88 Gebruik van het toestel OPMERKING: • Indien u wasgoed toevoegt na het begin van het drogen, bestaat het risico dat het gedroogde wasgoed in de machine vermengd wordt met het vochtig wasgoed, waardoor het wasgoed op het einde van de cyclus vochtig blijft. •...
-
Página 89: Praktische Informatie
Praktische informatie Onderhoud en reiniging Binnenoppervlak van de deur De haren en vezels die tijdens het droogproces loskomen van het wasgoed worden opgevangen door de pluizenfilter. OPMERKING • Er vormen zich pluizen tijdens het dragen en wassen van kledij. • U kunt de behuizing van de filter reinigen met behulp van een stofzuiger. - Página 90 Praktische informatie OPMERKING • Zorg ervoor dat geen haren, vezels en katoenbollen in de behuizing van de filters vallen. • Open de twee filters (bovenaan en onderaan) en verwijder de pluizen met de hand of met de reinigingsborstel die zich op het deksel van het luchtcircuit bevindt.
- Página 91 Praktische informatie • Voeg de pluizenfilters boven op elkaar in en breng ze opnieuw op hun plaats. • Reinig het binnenoppervlak van de deur en de dichtingen ervan met een zachte en vochtige doek of met de borstel die zich op het deksel van het luchtcircuit bevindt.
- Página 92 Praktische informatie Reiniging van de sensoren • De temperatuursensoren in de droogkast detecteren of het wasgoed al dan niet droog is. Om de sensoren te reinigen: • Open de deur van de droogkast. • Verwijder de pluizenfilter door deze naar boven te trekken. •...
- Página 93 Praktische informatie OPGELET Gebruik nooit oplosmiddelen, schoonmaakproducten of gelijkaardige substanties voor het reinigen wegens op het risico op brand en ontploffing! Leeg maken van de waterbak Het vocht van het wasgoed wordt geëlimineerd en gecondenseerd tijdens het droogproces en het water wordt opgevangen in de waterbak.
- Página 94 Praktische informatie 2. Maak de waterbak leeg. • Ingeval zich pluizen hebben opgehoopt in de trechter van de waterbak, reinig deze dan onder stromend water. • Plaats de waterbak terug in zijn behuizing. OPMERKING Ingeval de optie wordt gebruikt om het water rechtstreeks af te voeren, is het niet nodig de waterbak leeg te maken.
- Página 95 Praktische informatie Indien het icoon van de verstuiver knippert op het scherm, gelieve dan het metalen oppervlak van de condensator te inspecteren. Reinig het wanneer het vuil is. Dit onderdeel moet minstens één keer om de 6 maanden worden gecontroleerd. •...
- Página 96 Praktische informatie OPMERKING De borstel zit in de zak met drukwerk. U kunt deze na het eerste gebruik in zijn behuizing op het deksel van het luchtcircuit plaatsen. • De pluizen die zich op het oppervlak van de sensor hebben opgehoopt, moeten worden verwijderd met behulp van een vochtige doek of door deze van boven naar onder op de condensator weg te vegen met de borstel die zich op het...
- Página 97 Praktische informatie • Eenmaal het reinigingsproces voltooid is, plaats de deur van het luchtcircuit opnieuw op zijn plaats, verplaats de klepje om ze te sluiten en sluit de plint. OPGELET U kunt met de hand reinigen, op voorwaarde dat u beschermingshandschoenen draagt.
-
Página 98: Probleemoplossing
Praktische informatie Probleemoplossing Probleem Oorzaak Oplossing De poriën van de pluizenfilter Was de pluizenfilters af met (binnen- en buitenfilter) zitten warm water en droog ze af. misschien verstopt. De voorzijde van de verstuiver Reinig de voorzijde van de zit misschien verstopt. verstuiver. - Página 99 Praktische informatie Probleem Oorzaak Oplossing Misschien zit de stekker niet in Zorg ervoor dat de stekker in het stopcontact. het stopcontact zit. Controleer of de deur goed De deur staat misschien open. De droogkast gaat niet aan gesloten is. of het is onmogelijk het Het is mogelijk dat er geen programma te starten.
- Página 100 Praktische informatie Probleem Oorzaak Oplossing De pluizenfilter (binnen- en Was de filters af met warm buitenfilter) is misschien vuil. water en droog ze af. Het reinigingsicoon van de Er heeft zich misschien een pluizen brandt. laagje gevormd op de poriën Was de filters af met warm van de pluizenfilter wat leidt tot water en droog ze af.
- Página 101 Praktische informatie Probleem Oorzaak Oplossing De geur van het wasgoed Er is misschien een te grote Plaats de aangegeven wordt niet verzacht door hoeveelheid wasgoed geplaatst. hoeveelheid wasgoed. het programma voor het verwijderen van geurtjes. (Voor De toepassingstijd van de Kies een programma met een producten met een programma stoom is misschien ingesteld...
- Página 102 Notities...
- Página 103 ¡Muchas gracias! M u c h a s g r a c i a s p o r h a b e r e l e g i d o n u e s t r o p r o d u c t o VA L B E R G .
- Página 104 Contenidos Especificaciones técnicas Descripción del Descripción del aparato aparato Ficha del producto Instalación Preparación Utilización del Utilización del producto aparato Mantenimiento y limpieza Resolución de problemas Información práctica Embalaje y medio ambiente...
-
Página 105: Descripción Del
Descripción del aparato Descripción del aparato En los modelos con depósito en la parte inferior, el depósito colector de Panel superior agua se encuentra en el interior de la base. Panel de control Placa de características Puerta Filtro de pelusas Compartimento del depósito colector Botón de apertura de la placa de de agua (en los modelos en los que... -
Página 106: Utilización Del
Utilización del aparato Instalación • Antes de llamar al servicio técnico autorizado más cercano para la instalación de la secadora, asegúrese de que la instalación eléctrica y el sistema de desagüe sean adecuados consultando el manual de instrucciones. En caso contrario, contacte con un electricista o un técnico cualificado para realizar las adaptaciones necesarias. - Página 107 Utilización del aparato • La secadora puede funcionar con temperaturas comprendidas entre +5 °C y +35 °C. Si las condiciones de funcionamiento sobrepasan este rango, la secadora podrá sufrir daños. • La cara posterior de la secadora debe colocarse contra una pared. ¡PELIGRO! No coloque la secadora sobre el cable de alimentación.
- Página 108 Utilización del aparato Conexión del tubo de desagüe Tire manualmente del tubo en la parte posterior de la secadora para extraerlo de su punto de conexión. No utilice ninguna herramienta para retirar el tubo. Conecte un extremo del tubo de desagüe suministrado con la secadora al punto de conexión situado en el lugar de donde ha retirado el tubo del electrodoméstico en el paso anterior.
- Página 109 Utilización del aparato Transporte de la secadora Vacíe todo el agua que haya quedado acumulada en la secadora. En caso de conexión directa al desagüe de agua, retire las conexiones de los tubos. ¡ATENCIÓN! • Recomendamos transportar la secadora en posición vertical. Si esto no fuera posible, recomendamos transportarla inclinándola hacia el lado derecho (vista de frente).
-
Página 110: Preparación
Utilización del aparato Preparación Textiles adaptados a un secado en secadora Siga siempre las instrucciones que figuran en las etiquetas de las prendas. No introduzca la prenda en la secadora si la etiqueta no indica que puede secarse de este modo. Textiles no adaptados a un secado en secadora Los artículos que estén marcados con el símbolo no deben introducirse en la secadora. - Página 111 Utilización del aparato • En los modelos equipados con una unidad de condensación: limpie regularmente el condensador una vez al mes o tras 30 programas de secado. • Limpie periódicamente el filtro. Lea la sección Limpieza y mantenimiento de los filtros para más información.
- Página 112 Utilización del aparato Mantel pequeño Pantalones vaqueros Pañuelos Paño de cocina (10 unidades) Toalla Camiseta Toalla de lavabo *Peso de la colada seca antes del lavado. Preparación de la secadora • Enchufe la secadora. • Abra la puerta. • Coloque la colada en la secadora evitando que quede atrapada. •...
-
Página 113: Utilización Del Producto
Utilización del aparato Utilización del producto Panel de control Botón selector Encendido/ Botón de nivel de secado Apagado/Programa Botón de Inicio/Pausa Botón selector del volumen de la señal sonora/de los programas horarios Botón de final diferido Símbolo Limpieza del Depósito Limpieza del cajón del filtro/ Seguridad... - Página 114 Utilización del aparato ¡ATENCIÓN! • Asegúrese de que no queden partes de la colada atrapadas en la puerta. Seleccione el programa deseado con el botón selector Encendido/Apagado/Programas: la secadora se enciende. NOTA: La selección de un programa con el botón de Encendido/Apagado/Programa no significa que el programa haya comenzado.
- Página 115 Utilización del aparato Velocidad de centri- Tiempo Capaci- Programas Descripción del programa fugado en de secado dad (kg) lavadora (minutos) (rpm) Synthetics Secado de todas las prendas de tejidos sintéticos. Cupboard (Camisa, camiseta, ropa interior, mantel, etc.) Secado La colada seca no necesita plancharse y puede (Sintéticos para guardarse directamente en el armario.
- Página 116 Utilización del aparato Velocidad de centri- Tiempo Capaci- Programas Descripción del programa fugado en de secado dad (kg) lavadora (minutos) (rpm) Secado de textiles rellenos de plumas o fibras sintéticas que lleven la indicación «Se puede secar Duvet/Downwear en secadora» en la etiqueta como una única pieza (Edredones de ropa.
- Página 117 Utilización del aparato Allergy UK es la marca de la asociación británica de alergología. Esta certificación de calidad se ha creado para orientar a las personas que necesiten tener la certeza de que un producto limita/reduce/ elimina los alérgenos o reduce el contenido de alérgenos de manera significativa en entornos con personas alérgicas.
- Página 118 Utilización del aparato Modificación del final diferido Si desea modificar la duración durante la cuenta atrás: Cancele el programa girando el botón selector Encendido/Apagado/Programas. Seleccione el programa deseado y repita el proceso de selección del final diferido. Anulación de la función de final diferido. Si desea anular la cuenta atrás del final diferido e iniciar el programa de inmediato;...
- Página 119 Utilización del aparato NOTA: • Cuando la seguridad infantil está activada, el indicador luminoso de aviso de seguridad infantil se enciende en la pantalla. • La seguridad infantil se desactiva cuando la secadora se apaga y se enciende con el botón de Encendido/Apagado/Programa.
- Página 120 Utilización del aparato NOTA: • Si añade colada tras el inicio del ciclo de secado, las prendas secas en el interior del aparato corren el riesgo de mezclarse con la colada húmeda y el resultado puede ser que la ropa no se seque por completo al final del ciclo. •...
-
Página 121: Información Práctica
Información práctica Mantenimiento y limpieza Superficie interior de la puerta El cabello y las fibras que produce la colada durante el proceso de secado se recogen en el filtro de fibras. NOTA • Durante la utilización y el lavado de las prendas, se forman fibras. - Página 122 Información práctica NOTA • Evite la caída de cabellos, fibras y pelusas de algodón en el compartimento de los filtros. • Abra los dos filtros (superior e inferior) y retire las pelusas a mano o con ayuda del cepillo de limpieza situado en la tapa del circuito de aire.
- Página 123 Información práctica • Inserte el filtro de fibras interior en la pieza exterior y vuelva a colocarlos en su lugar. • Limpie la superficie interior de la puerta y sus juntas con un paño suave y húmedo o el cepillo situado en la tapa del circuito de aire.
-
Página 124: Limpieza De Los Sensores
Información práctica Limpieza de los sensores • Los sensores de temperatura situados en la secadora detectan si la colada está seca o no. Para limpiar los sensores: • Abra la puerta de la secadora. • Retire el filtro de pelusas tirando de él hacia arriba. •... - Página 125 Información práctica NOTA • Limpie el sensor 4 veces al año. • No utilice herramientas metálicas para limpiar el sensor. • Deje enfriar el electrodoméstico si sigue caliente tras un ciclo de secado. ATENCIÓN No utilice nunca disolventes, productos de limpieza o sustancias similares para la limpieza a causa del riesgo de incendio y explosión.
- Página 126 Información práctica Para vaciar el depósito de agua: 1. Retire con cuidado el depósito de agua de su compartimento. 2. Vacíe el depósito. • En caso de acumulación de pelusas en el embudo del depósito de agua, proceda a retirarlas con agua corriente. •...
- Página 127 Información práctica Limpieza del condensador Una pequeña cantidad de pelusas puede pasar a través del filtro de pelusas y acumularse en la superficie metálica del condensador. La superficie metálica del condensador debe limpiarse con regularidad. Si el icono del evaporador parpadea en la pantalla, revise la superficie metálica del condensador.
- Página 128 Información práctica NOTA El cepillo se encuentra en la bolsa de la documentación impresa. Puede colocarlo en su ubicación en la tapa del circuito de aire tras la primera utilización. • Las pelusas acumuladas en la superficie del condensador deberán retirarse con ayuda de un paño húmedo o pasando el cepillo situado sobre la tapa del circuito de aire sobre el condensador (de arriba a abajo).
- Página 129 Información práctica • Una vez limpio el condensador, la tapa delantera y el filtro de pelusas, inserte el cepillo en posición presionando hacia la derecha. • Una vez finalizado el proceso de limpieza, vuelva a colocar la tapa del circuito de aire en su lugar, desplace los dispositivos para bloquearla y cierre la base.
-
Página 130: Resolución De Problemas
Información práctica Resolución de problemas Problema Causa Solución Los poros del filtro de fibras Lave los filtros de fibras con (filtro interior y exterior) agua caliente y séquelos. pueden estar obstruidos. La parte frontal del evaporador Limpie la parte frontal del puede estar obstruida. - Página 131 Información práctica Problema Causa Solución Asegúrese de que el cable de Es posible que el aparato no alimentación esté conectado esté correctamente enchufado. correctamente. Es posible que la puerta esté Asegúrese de que la puerta esté La secadora no se enciende abierta.
- Página 132 Información práctica Problema Causa Solución Es posible que la secadora no se haya puesto en Compruebe que la secadora funcionamiento con el botón de esté encendida. La iluminación interior de la Encendido/Apagado. secadora no se enciende. (En los modelos con lámpara) Contacte con el servicio técnico Es posible que la lámpara esté...
- Página 133 Información práctica Problema Causa Solución Es posible que se haya Coloque la cantidad de ropa introducido una colada indicada. demasiado grande. Un programa de eliminación Es posible que el tiempo de Elija un programa con mayor de arrugas no elimina aplicación de vapor se haya cantidad de vapor.
- Página 134 Notas...
- Página 135 Notes / Note / Notities / Notas...
- Página 136 Notes / Note / Notities / Notas...