Tabla de contenido
Publicidad
Idiomas disponibles
Idiomas disponibles
Enlaces rápidos
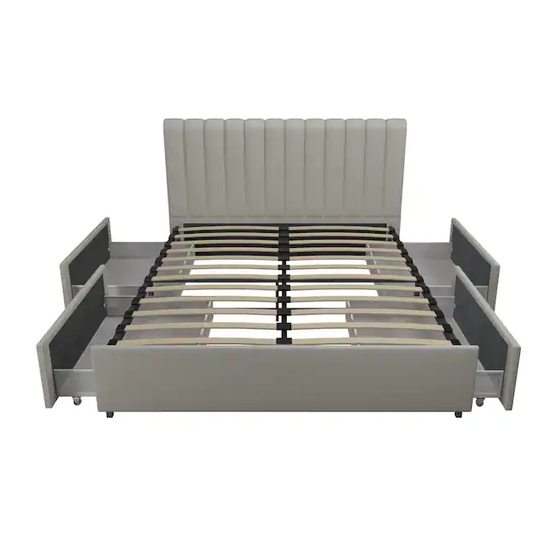
Weight Limit:
Bed: 450Lb/204Kg
Drawer: 40Lb/18Kg
KT - 2020/6/24
© 2014 Dorel Home Products All Rights Reserved
Upholstered Bed with Storage Drawers
Thank you for purchasing from DHP!
Date of Purchase
THIS INSTRUCTION BOOKLET CONTAINS IMPORTANT SAFETY
INFORMATION. PLEASE READ AND KEEP FOR FUTURE REFERENCE.
4545429N (Gray Linen)
DO NOT RETURN TO THE STORE !
If parts are missing or damaged, we will gladly ship your
replacement parts free of charge.
Visit www.dhpfurniture.com/eng/replacement-parts
or call Toll-Free 1-800-267-1739
Lot Number
Full Size
(TAKEN FROM CARTON)
B344545429N00
1
Publicidad
Tabla de contenido

Manuales relacionados para Dorel Home Products 4545429N


Resumen de contenidos para Dorel Home Products 4545429N
- Página 1 Visit www.dhpfurniture.com/eng/replacement-parts or call Toll-Free 1-800-267-1739 Date of Purchase Lot Number (TAKEN FROM CARTON) THIS INSTRUCTION BOOKLET CONTAINS IMPORTANT SAFETY INFORMATION. PLEASE READ AND KEEP FOR FUTURE REFERENCE. KT - 2020/6/24 B344545429N00 © 2014 Dorel Home Products All Rights Reserved...
- Página 2 Limited 1 year Warranty Read Before Beginning Assembly ● Work in a spacious area and near where the unit will be used, preferably on a DHP warrants this product to be free from defects in material and workmanship and agrees to remedy any such defect. This warranty covers one year from the carpet, or use a piece of the cardboard packaging to protect your floor and product.
- Página 3 PARTS...
-
Página 4: Part Numbers
Drawer Panel Guide Headboard Fabric Back Panel Footboard Center Rail Side Rail Bracket Support Rail Side Rail PART NUMBERS 4545429N PART IMPORTANT: (Gray Linen) LABELS T991290 • Each part has unique part number. T991300 Please reference the appropriate part T991310 number when contacting customer service for replacement parts. - Página 5 Drawer Side Panel X 20 Wooden Slats Single Slat Cap Double Slat Cap X 24 X 24 X 12 PART NUMBERS 4545429N PART IMPORTANT: (Gray Linen) LABELS T953380 • Each part has unique part number. T953390 Please reference the appropriate part...
-
Página 6: Hardware List
Please do not completely tighten all the hardware, until the entire assembly is complete, unless otherwise indicated in the step-by-step instructions. 4545429N (Gray Linen) HP#:T4546429-00 The screw(s), bolt(s) to be used at each step are shown in actual size in the lower right corner of the... - Página 7 Stick A1 to the back of A with Velcro as illustrated.
- Página 8 ❶ Attach J x 4 to A and B with...
- Página 9 ❸ Attach G X 2 to K with Fully tighten all bolts in this Step.
- Página 10 ❶ Attach E/F to G with Don't completely tighten the bolts until STEP 6 is complete.
- Página 11 ❹ Attach E/F to A & B with...
- Página 12 The slat holes should be ❶ 6.1 Attach I x 2 to A & B with oriented towards upside. ❹ 6.2 Attach I x 2 to K with Then properly tighten all the bolts.
- Página 13 7.1 Insert P into X, 7.2 Press X into E/F, repeat the same procedure for the opposite side with a new P and X . 7.3 Insert ends of both slats P into Y, then press Y into I as illustrated. Repeat the same procedure going backwards for every row of slats.
- Página 14 ❼ Attach M to S and N with don't completely tighten the bolts until STEP 11 is complete. Please orient the plastic sheet towards the inside of the drawer. Note: Make sure that these holes are all located on the top side before assembling X 16...
- Página 15 ❻ Attach Q to L with...
- Página 16 ❽ 11.1 Attach Q X 4 and L to S and N with ❼ 11.2 Attach L to M with 11.1 11.2 X 32...
- Página 17 Attach sub-assembly L/S/N/M from ❽ previous step to C with , then properly tighten all the bolts. X 24...
- Página 18 ❷ and ❾ Attach to C.
- Página 19 Align Drawers with the bed frame and push them into the bed. Lock drawers by slightly lifting drawer and inserting the Pin into the Slot. Slot Slot...
-
Página 20: Helpful Hints
CAUTION: This unit is intended for use only with the products and/or maximum Helpful Hints weights indicated. Use with other products and/or products heavier than the maximum weights indicated may result in instability or cause possible injury. ● Move your new furniture carefully, with two people lifting and carrying the unit to its new location. -
Página 21: Cama Tapizada Con Cajones Para Almacenamiento
4545429N (Lino Gris) ¡NO LO REGRESE A LA TIENDA! Si le faltan piezas o las que se incluyen están dañadas, con Cama Tapizada con Cajones para mucho gusto le enviaremos sus piezas de reemplazo sin cargo extra. Almacenamiento Visite www.dhpfurniture.com/spa/replacement-parts... -
Página 22: Paquete De Componentes
También confirme que ha recibido todos los componentes necesarios para el real en la esquina inferior derecha de cada página. ensamblaje al compararlos con la tabla de piezas indicadas en la sección en inglés. NÚMERO DE PIEZA 4545429N ETIQUETAS DE PIEZAS DESCRIPCIÓN (Lino Gris) Cabecera... -
Página 23: Instrucciones
Instrucciones Limites de peso - Cama : 450Lb/204Kg Limites de peso - Cama deslizable: 40Lb/18Kg Paso 1 Paso 13 Coloque A1 en la parte posterior de A con el cierre mágico como se ilustra. Por favor alinee ambos cajones y luego empújelos hacia adentro. Paso 2 Bloquee los cajones levantándolos ligeramente y luego insertando el Pin dentro de la ❶... - Página 24 4545429N (Lin Gris) NE PAS RETOURNER CE PRODUIT AU MAGASIN ! Si une pièce est manquante ou endommagée, nous vous Lit Tapissé avec Tiroirs pour Rangement expédierons avec plaisir vos pièces de remplacement gratuitement. Visitez www.dhpfurniture.com/fre/replacement-parts ou appelez au 1-800-267-1739...
-
Página 25: Liste Des Pièces
à l'assemblage en les comparant avec le tableau des pièces (illustrations disponibles dans la section en anglais). LISTE DES PIÈCES 4545429N ÉTIQUETTE DESCRIPCIÓN (Lin Gris) DES PIÈCES Tête de lit... -
Página 26: Conseils Utiles
Instructions Limite de Poids - Lit : 450Lb/204Kg Limite de Poids -Lit gigogne:40Lb/18Kg Étape 1 Étape 13 Coller A1 à l'arrière de A avec le Velcro, comme illustré. Alignez les tiroirs et puis poussez-les vers l'intérieur. Verrouillez le tiroir le soulevant Étape 2 légèrement vers le haut pour insérer l'épingle dans la fente.