Publicidad
Idiomas disponibles
Idiomas disponibles
UNITED KINGDOM
CANADA
RUSSIA
GERMANY
UNITED STATES
FRANCE
ITALY
JAPAN
SPAIN
AUSTRALIA
With your inspiring rating, COSTWAY will be more consistent to offer you EASY
SHOPPING EXPERIENCE, GOOD PRODUCTS and EFFICIENT SERVICE!
Mit Ihrer inspirierenden Bewertung wird COSTWAY konsistenter sein, um Ihnen
EIN SCHÖNES EINKAUFSERLEBNIS, GUTE PRODUKTE und EFFIZIENTEN
SERVICE zu bieten!
Avec votre évaluation inspirante, COSTWAY continuera à fournir une
EXPÉRIENCE D'ACHAT PRATIQUE, des PRODUITS DE QUALITÉ et un
SERVICE EFFICACE !
Con su calificación inspiradora, COSTWAY será más consistente para ofrecerle
EXPERIENCIA DE COMPRA FÁCIL, BUENOS PRODUCTOS y SERVICIO
EFICIENTE.
Con la tua valutazione incoraggiante, COSTWAY sarà più coerente per offrirti
ESPERIENZA DI ACQUISTO FACILE, BUONI PRODOTTI e SERVIZIO
EFFICIENTE!
Dzięki twojej opinii COSTWAY będzie mógł oferować jeszcze WYGODNIEJSZE
ZAKUPY, LEPSZE PRODUKTY i SPRAWNIEJSZĄ OBSŁUGĘ KLIENTA.
USER'S MANUAL/HANDBUCH/MANUEL DE L'UTILISATEUR
US office: Fontana
/MANUAL DEL USUARIO/MANUALE UTENTE/INSTRUKCJA OBSŁUGI
UK office: Ipswich
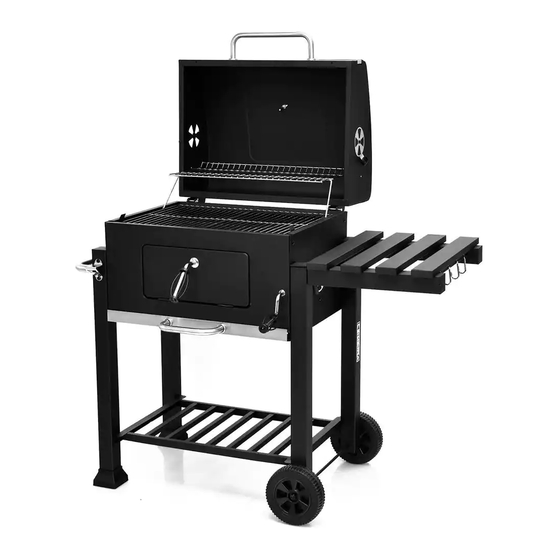
Charcoal Grill / Grillwagen / Barbecue à Charbon de Bois
DE office: FDS GmbH, Neuer Höltigbaum 36, 22143 Hamburg, Deutschland
FR office : 26 RUE DU VERTUQUET, 59960 NEUVILLE EN FERRAIN, FRANCE
/Barbacoa de Carbón/Barbecue a Carbonella
/Grill na węgiel drzewny
OP70812
EN
DE
FR
ES
IT
PL
Publicidad
Tabla de contenido

Manuales relacionados para Costway OP70812


Resumen de contenidos para Costway OP70812
- Página 1 JAPAN SPAIN AUSTRALIA With your inspiring rating, COSTWAY will be more consistent to offer you EASY SHOPPING EXPERIENCE, GOOD PRODUCTS and EFFICIENT SERVICE! Mit Ihrer inspirierenden Bewertung wird COSTWAY konsistenter sein, um Ihnen EIN SCHÖNES EINKAUFSERLEBNIS, GUTE PRODUKTE und EFFIZIENTEN SERVICE zu bieten! Avec votre évaluation inspirante, COSTWAY continuera à...
- Página 2 WARNINGS • Outdoor use only. DO NOT use the grill indoors or in an enclosed or non-ventilated area. • Keep a fire extinguisher near this product at all times. • For household use only. DO NOT operate this grill for other than its intended use. •...
-
Página 3: Parts List
Parts List Parts List Lid handle... - Página 4 Assembly Assembly Note: Please do not tighten the screws and nuts till all assembly steps are completed. 1. Fix side panels LH*RH (10, 11) with eight M6*12 screws (B) to front panel (13) 2. Fix leg end cover (16) on two legs (14 & 15). and rear panel (9).
- Página 5 Assembly Assembly 3. Fix two legs (14 & 15) with four M6*12 screws (B) to the left side panel. 4. Fix bottom shelf (21) to the legs with four M6*12 screws (B). Fix the two remaining legs (25 & 26) to the right side panel with four M6*12 screws Fix the wheel axle (22) into the legs (25 &...
- Página 6 Assembly Assembly 5. Fix the charcoal door handle (28), the charcoal door handle washer (29) and 6. Charcoal pan (17) is fixed into the body with six M6*12 screws (B). charcoal door locking part (30) to the front panel by one M6 nut (A).
- Página 7 Assembly Assembly 7. Handle grip (32) is fixed to the front panel (13) with two M6*12 screws (B). 8. The lever handle (31) goes thru the front panel hole. One M6*20 shoulder screw (H) goes thru charcoal tray connecting bar hole from inside, then fixed with lever handle thread hole at the top end.
- Página 8 Assembly Assembly 9. Fix Ash tray handle (20) and two washers (3) to Decorating strip (19) and ash 10. Lower hingers (8) are fixed to the back panel (9) with four M6*40 screws (C). tray (18) by two M6*16 screws (D). Then fix the ash tray to the body.
- Página 9 Assembly Assembly 11. Bottle opener (12) is fixed on the left front leg with two M6*12 screws (B). Fix 12. Fix side table (27) to right side by four M6*20 shoulder screws (H). side handle (34) and side handle washer (35) with two M6*70 screws (I). Use four M4*8 screws (K) to fix the hook (7) to the end of the side table which has threaded holes.
- Página 10 Assembly Assembly 13. Fix the lid handle (4), handle washer (3) to lid (1) by two M6*40 screws (C). 14. Fix the 2 air doors (24) to the lid by two M6*12 screws (B) and two M6 nuts (A). Fix the upper hinges (33) to lid by four M6*40 screws (C) and four M6 nuts (A). Fix the thermometer (2) on the top of lid by its own nut.
- Página 11 Assembly Assembly 15. The lid is fixed to the body by locking the upper and lower hinges with 2 pins (F) 16. Fix the warming grid (5) into the lid and body. See details for fixing into the body. and 2 R clips (G). Put the cooking grids (6) on and ready for cooking.
- Página 12 WARNHINWEISE Teileliste • Nur für den Außenbereich. Verwenden Sie den Grill NICHT in Innenräumen oder in Bild Menge Bild Menge Beschreibung Unteres Regal geschlossenen oder nicht belüfteten Bereichen. • Halten Sie immer einen Feuerlöscher in der Nähe dieses Produkts bereit. •...
- Página 13 Teileliste Montage Hinweis: Ziehen Sie die Schrauben und Muttern erst an, wenn alle Montageschritte Beschreibung Bild Menge Beschreibung Bild Menge abgeschlossen sind. M6 Mutter R-Klammer Schulterschraube M6*12 Schraube M6*20 M6*40 Schraube M6*70 Schraube M6*16 Schraube M10 Mutter Stift M4*8 Schraube 1.
- Página 14 Montage Montage 2. Befestigen Sie die Beinendabdeckung (16) an zwei Beinen (14 und 15). 3. Befestigen Sie zwei Beine (14 und 15) mit M6*12-Schrauben (B) an der linken Seitenwand. Befestigen Sie die beiden verbleibenden Beine (25 und 26) mit 4 Stück M6*12-Schrauben (B) an der rechten Seitenwand.
- Página 15 Montage Montage 4. Befestigen Sie die untere Ablage (21) mit vier M6*12-Schrauben (B) an den 5. Befestigen Sie den Türgriff (28) für Holzkohle, die Unterlegscheibe (29) für den Beinen. Türgriff für Holzkohle und das Verriegelungsteil (30) für Holzkohle mit der M6-Mutter Befestigen Sie die Radachse (22) in den Beinen (25 &...
- Página 16 Montage Montage 6. Die Holzkohlepfanne (17) wird mit 6 Stück M6*12-Schrauben (B) im Gehäuse 7. Der Griff (32) wird mit M6*12 Schrauben (B) an der Frontplatte (13) befestigt. befestigt.
- Página 17 Montage Montage 8. Der Hebelgriff (31) geht durch das Loch der Frontplatte. Die Schulterschraube 9. Befestigen Sie den Aschenbechergriff (20) und die Unterlegscheiben (3) mit M6*20 (H) geht von innen durch das Verbindungsloch der Holzkohleschale und wird M6*16-Schrauben (D) am Dekorstreifen (19) und am Aschenbecher (18). dann mit dem Gewindeloch des Hebelgriffs am oberen Ende befestigt.
- Página 18 Montage Montage 10. Die unteren Scharniere (8) werden mit M6*40-Schrauben (C) an der Rückwand 11. Der Flaschenöffner (12) wird mit M6*12-Schrauben (B) am linken Vorderbein (9) befestigt. befestigt. Seitengriff (34) und Seitengriffscheibe (35) mit M6*70-Schrauben (I) befestigen.
- Página 19 Montage Montage 12. Befestigen Sie den Beistelltisch (27) mit M6*20 Schulterschrauben (H) an der 13. Befestigen Sie den Deckelgriff (4) und die Unterlegscheibe (3) mit vier M6*40 rechten Seite. -Schrauben (C) am Deckel (1). Befestigen Sie die Haken (7) mit M4*8-Schrauben (K) am Ende des Beistelltisches, Befestigen Sie den Haken (7) mit vier M4*8-Schrauben (K) am Ende des der bereits Gewindebohrungen aufweist.
- Página 20 Montage Montage 14. Befestigen Sie 2 Lufttüren (24) mit M6*12-Schrauben (B) und M6-Muttern (A) 15. Der Deckel wird am Körper befestigt, indem das obere und untere Scharnier mit am Deckel. 2 Stiften (F) und 2 R-Klammer (G) verriegelt werden. Befestigen Sie das Thermometer (2) mit einer eigenen Mutter oben am Deckel.
-
Página 21: Avertissements
Montage AVERTISSEMENTS • Utilisation à l’extérieur uniquement. N’utilisez pas le produit à l’intérieur ou dans un endroit clos ou non ventilé. • Gardez un extincteur à proximité de ce produit à tout moment. • Pour usage domestique uniquement. NE PAS utiliser ce produit pour un usage autre que celui auquel il est destiné. -
Página 22: Liste Des Pièces
Liste des pièces Liste des pièces N° Description Image Qté N° Description Image Qté N° Image Qté Image Qté Description Description Écrou M6 Clip en R Couvercle Étagère inférieure Vis M6*12 Vis à épaulement Thermomètre Arbre de roue Vis M6*40 Vis M6*70 Rondelle Roue... - Página 23 Assemblage Assemblage Remarque : Veuillez ne pas serrer les vis et les écrous tant que toutes les étapes de montage ne sont pas terminées. 1. Fixez les panneaux latéraux LH*RH (10, 11) avec huit vis M6*12 (B) au panneau 2. Fixez le couvercle d’extrémité de pied (16) sur deux pied (14 et 15). avant (13) et au panneau arrière (9).
- Página 24 Assemblage Assemblage 3. Fixez deux pieds (14 et 15) avec quatre vis M6*12 (B) sur le panneau latéral 4. Fixez l’étagère inférieure (21) aux pieds avec quatre vis M6*12 (B). Fixez l’axe de gauche. Fixez les deux autres pieds (25 et 26) au panneau latéral droit à l'aide de roue (22) dans les pieds (25 &...
- Página 25 Assemblage Assemblage 5. Fixez la poignée de la porte à charbon (28), la rondelle de la poignée de la porte 6. Le plateau de charbon de bois (17) est fixé dans le corps avec six vis M6*12 (B). à charbon (29) et la pièce de verrouillage de la porte à charbon (30) sur le panneau avant à...
- Página 26 Assemblage Assemblage 7. La poignée (32) est fixée au panneau avant (13) à l’aide de deux vis M6*12 (B). 8. La poignée à levier (31) passe par le trou du panneau avant. Une vis à épaulement M6*20 (H) passe à travers le trou de la barre de connexion du bac à charbon de l'intérieur, puis fixez avec le trou fileté...
- Página 27 Assemblage Assemblage 9. Fixez la poignée du cendrier (20) et deux rondelles (3) à la bande décorative (19) 10. Les charnières inférieures (8) sont fixées au panneau arrière (9) à l’aide de et au cendrier (18) à l’aide de deux vis M6*16 (D). Fixez ensuite le cendrier au quatre vis M6*40 (C).
- Página 28 Assemblage Assemblage 11. Fixez le décapsuleur (12) sur le pied avant gauche à l’aide de deux vis M6*12 12. Fixez la table latérale (27) sur le côté droit à l’aide de quatre vis à épaulement (B). Fixez la poignée latérale (34) et la rondelle de la poignée latérale (35) avec M6*20 (H).
- Página 29 Assemblage Assemblage 13. Fixez la poignée du couvercle (4), la rondelle de poignée (3) au couvercle (1) à 14. Fixez les 2 portes d’aération (24) au couvercle à l’aide de deux vis M6*12 (B) et l’aide de deux vis M6*40 (C). Fixez les charnières supérieures (33) au couvercle à de deux écrous M6 (A).
- Página 30 Assemblage Assemblage 15. Fixez le couvercle au corps en verrouillant les charnières supérieures et 16. Fixez la grille de réchauffement (5) dans le couvercle et le corps. Veuillez voir inférieures avec 2 goupilles (F) et 2 clips R (G). les détails pour la fixation dans le corps. Mettez les grilles de cuisson (6) en place et préparez pour la cuisson.
-
Página 31: Lista De Piezas
ADVERTENCIAS Lista de Piezas • Solo para uso en exteriores. NO utilice el producto en interiores o en un área cerrada o sin Núm. Imagen Cantidad Núm. Imagen Cantidad Descripción Descripción ventilación. • Mantenga un extintor de incendio cerca de este producto en todo momento. •... - Página 32 Lista de Piezas Montaje Nota: No apriete los tornillos y las tuercas hasta que se hayan completado todos Núm. Descripción Imagen Cantidad Núm. Descripción Imagen Cantidad los pasos de montaje. Tuerca M6 Clip en R Tornillo Tornillo M6*12 de hombro M6*20 Tornillo M6*40 Tornillo M6*70 Tornillo M6*16...
-
Página 33: Montaje
Montaje Montaje 2. Fije las cubiertas del extremo de pata (16) en las dos patas (14 y 15). 3. Fije las dos patas (14 y 15) con cuatro tornillos M6*12 (B) al panel lateral izquierdo. Fije las dos patas restantes (25 y 26) al panel lateral derecho con cuatro tornillos M6*12 (B). - Página 34 Montaje Montaje 4. Fije el estante inferior (21) a las patas con cuatro tornillos M6*12 (B). Fije el eje 5. Fije la manija de la puerta de carbón (28), la arandela de la manija de la puerta de rueda (22) en las patas (25 y 26). Luego fije las 2 ruedas (23) con dos tuercas de carbón (29) y la pieza de bloqueo de la puerta de carbón (30) al panel frontal M10 (J).
- Página 35 Montaje Montaje 6. Fije la bandeja de carbón (17) al cuerpo con seis tornillos M6*12 (B). 7. Fije el agarre de manija (32) al panel frontal (13) con dos tornillos M6*12 (B).
- Página 36 Montaje Montaje 8. Pase la manija de palanca (31) por el orificio del panel frontal. Pase un tornillo de 9. Fije la manija del cenicero (20) y dos arandelas (3) a la tira decorativa (19) y al hombro M6*20 (H) a través del orificio de la barra de conexión de la bandeja de cenicero (18) con dos tornillos M6*16 (D).
- Página 37 Montaje Montaje 10. Fije las bisagras inferiores (8) al panel posterior (9) con cuatro tornillos M6*40 11. El abrebotellas (12) se fija en la pata delantera izquierda con dos tornillos (C). M6*12 (B). Fije la manija lateral (34) y la arandela de la manija lateral (35) con dos tornillos M6*70 (I).
- Página 38 Montaje Montaje 12. Fije la mesa lateral (27) al lado derecho con cuatro tornillos de hombro M6*20 13. Fije la manija de la tapa (4), la arandela de la manija (3) a la tapa (1) con dos (H). Utilice cuatro tornillos M4*8 (K) para fijar el gancho (7) al extremo de la mesa tornillos M6*40 (C).
- Página 39 Montaje Montaje 14. Fije 2 puertas de aire (24) a la tapa con dos tornillos M6*12 (B) y dos tuercas 15. La tapa se fija al cuerpo bloqueando las bisagras superior e inferior con 2 M6 (A). Fije el termómetro (2) en la parte superior de la tapa con su propia tuerca. pernos (F) y 2 clips en R (G).
- Página 40 Montaje AVVERTENZA • Solo per uso esterno. NON utilizzare la griglia in interni o in un'area chiusa o non ventilata. • Tenere sempre un estintore vicino a questo prodotto. • Solo per uso domestico. NON utilizzare questo barbecue per un uso diverso da quello previsto.
-
Página 41: Lista Delle Parti
Lista delle Parti Lista delle Parti Descrizione Immagine Quantità Descrizione Immagine Quantità Immagine Quantità Immagine Quantità Descrizione Descrizione Dado M6 Clip R Coperchio Ripiano inferiore Vite di spalla Vite M6*12 M6*20 Termometro Albero della ruota Vite M6*40 Vite M6*70 Rondella Ruota Vite M6*16 Dado M10... - Página 42 Assemblaggio Assemblaggio Nota: Si prega di non serrare le viti e i dadi fino al completamento di tutte le fasi di assemblaggio. 1. Fissare i pannelli laterali LH * RH (10, 11) con otto viti M6 * 12 (B) al pannello 2.
- Página 43 Assemblaggio Assemblaggio 3. Fissare due gambe (14 e 15) con quattro viti M6 * 12 (B) al pannello laterale 4. Fissare il ripiano inferiore (21) alle gambe con 4 viti M6 * 12 (B). Fissare l'asse sinistro. Fissare le due gambe rimanenti (25 e 26) al pannello laterale destro con della ruota (22) nelle gambe (25 e 26).
- Página 44 Assemblaggio Assemblaggio 5. Fissare la maniglia della porta del carbone (28), la rondella della maniglia della 6. Il vassoio di carbone (17) è fissata al corpo con sei viti M6 * 12 (B). porta del carbone (29) e la parte di bloccaggio della porta del carbone (30) al pannello davanti con un dado M6 (A).
- Página 45 Assemblaggio Assemblaggio 7. Fissare la maniglia (32) al pannello davanti (13) con due viti M6 * 12 (B). 8. La maniglia della leva (31) passa attraverso il foro del pannello davanti. Una vite a spalla M6 * 20 (H) passa attraverso il foro della barra di collegamento del vassoio del carbone dall'interno, e poi fissata con il foro filettato della maniglia della leva all'estremità...
- Página 46 Assemblaggio Assemblaggio 9. Fissare la maniglia del portacenere (20) e due rondelle (3) alla striscia decorativa 10. Fissare i cardini inferiori (8) al pannello posteriore (9) con quattro viti M6 * 40 (19) e al portacenere (18) con due viti M6 * 16 (D). E poi fissare il portacenere al (C).
- Página 47 Assemblaggio Assemblaggio 11. Fissare l'apribottiglie (12) sulla gamba anteriore sinistra con due viti M6 * 12 (B). 12. Fissare il tavolino laterale (27) al lato destro con quattro viti a spalla M6 * 20 Fissare la maniglia laterale (34) e la rondella della maniglia laterale (35) con due viti (H).
- Página 48 Assemblaggio Assemblaggio 13. Fissare la maniglia del coperchio (4), la rondella della maniglia (3) al coperchio 14. Fissare le 2 porte d'aria (24) al coperchio con due viti M6 * 12 (B) e due dadi M6 (1) con due viti M6 * 40 (C). Fissare i cardini superiori (33) al coperchio con quattro (A).
- Página 49 Assemblaggio Assemblaggio 15. Il coperchio si fissa alla scocca bloccando i cardini superiori ed inferiori con 2 16. Fissare la griglia di riscaldamento (5) nel coperchio e nel corpo. Vedere i perni (F) e 2 clips R (G). dettagli per il fissaggio nel corpo. Posizionare le griglie di cottura (6) e pronte per la cottura.
-
Página 50: Ostrzeżenia
OSTRZEŻENIA LISTA CZĘŚCI • Tylko do użytku na zewnątrz. Nie używaj produktu w pomieszczeniach lub w zamkniętych, Ilustracja Ilość Ilustracja Ilość OPIS OPIS lub niewentylowanych miejscach. • Zawsze przechowuj gaśnicę w pobliżu tego produktu. PRODUKT PRZEZNACZONY WYŁĄCZNIE DO UŻYTKU DOMOWEGO NIE używaj tego Pokrowiec Dolna półka produktu do celów innych niż... - Página 51 LISTA CZĘŚCI MONTAŻ Uwaga: Proszę nie dokręcać śrub i nakrętek przed zakończeniem wszystkich OPIS Ilustracja ILOŚĆ OPIS Ilustracja ILOŚĆ etapów montażu. Klips w kształcie Nakrętka (M6) litery R. Śruba ramienna Śruba M6 * 12 Śruba M6 * 40 Śruba M6 * 70 Śruba M6 * 16 Nakretka M10 Zawleczka...
- Página 52 MONTAŻ MONTAŻ 2. Przymocuj osłonę końca nóg (16) do dwóch nóg (14 i 15). 3. Przymocuj dwie stopy (14 i 15) czterema śrubami M6 * 12 (B) do lewego panelu bocznego. Przymocuj pozostałe dwie nóżki (25 i 26) do prawego panelu bocznego za pomocą...
- Página 53 MONTAŻ MONTAŻ 4. Przymocuj dolną półkę (21) do nóg czterema śrubami M6 * 12 (B). Zamocuj oś 5. Zamocuj grafitową klamkę drzwi (28), grafitową podkładkę (29) i klamkę (30) do koła (22) w stopach (25 i 26). Następnie zabezpiecz 2 koła (23) za pomocą dwóch panelu przedniego za pomocą...
- Página 54 MONTAŻ MONTAŻ 6. Taca na węgiel drzewny (17) jest zabezpieczona w korpusie sześcioma śrubami 7. Uchwyt (32) jest przymocowany do panelu przedniego (13) za pomocą dwóch M6 * 12 (B). śrub M6 * 12 (B).
- Página 55 MONTAŻ MONTAŻ 8. Klamka (31) przechodzi przez otwór w panelu przednim. Śruba pasowana M6 * 9. Przymocuj uchwyt popielniczki (20) i dwie podkładki (3) do paska ozdobnego (19) 20 (H) przechodzi od wewnątrz przez otwór w listwie przyłączeniowej pojemnika na i do popielniczki (18) za pomocą...
- Página 56 MONTAŻ MONTAŻ 10. Dolne zawiasy (8) są przymocowane do panelu tylnego (9) czterema śrubami 11. Przymocuj otwieracz do butelek (12) do przedniej lewej nogi za pomocą dwóch M6 * 40 (C). śrub M6 * 12 (B). Zabezpiecz uchwyt boczny (34) i podkładkę uchwytu bocznego (35) za pomocą...
- Página 57 MONTAŻ MONTAŻ 12. Przymocuj stolik boczny (27) po prawej stronie czterema śrubami pasowanymi 13. Przymocuj uchwyt pokrywy (4), podkładkę uchwytu (3) do pokrywy (1) za M6 * 20 (H). pomocą dwóch śrub M6 * 40 (C). Przymocuj górne zawiasy (33) do pokrywy za Za pomocą...
- Página 58 MONTAŻ MONTAŻ 14. Przymocuj 2 drzwiczki wentylacyjne (24) do pokrywy za pomocą dwóch śrub M6 15. Przymocuj osłonę do korpusu, blokując górne i dolne zawiasy za pomocą 2 * 12 (B) i dwóch nakrętek M6 (A). Przymocuj termometr (2) do górnej części sworzni (F) i 2 zacisków R (G).
- Página 59 MONTAŻ 16. Zamocuj ruszt do podgrzewania (5) w pokrywie i korpusie. Zobacz szczegóły dotyczące mocowania w korpusie. Umieść kratki do gotowania (6) na miejscu i przygotuj do gotowania. Przed użyciem dokręć wszystkie śruby. Produkt gotowy do użycia!