
Manuales relacionados para AmazonBasics B07715R57K

Resumen de contenidos para AmazonBasics B07715R57K
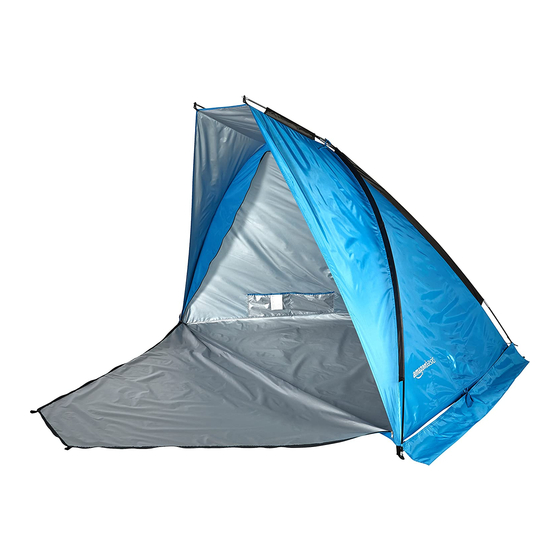
- Página 1 Beach Tent Tente De Plage Strandzelt Tenda da Spiaggia Refugio Para Playa ビーチテント 沙滩帐篷 B07715R57K...
- Página 2 English ........3 Français ......... 13 Deutsch ........23 Italiano ........33 Español ........43 日本語 ........53 中文 ........63...
- Página 3 Welcome Guide • English Beach Tent Contents: Before getting started, ensure the package contains the following components: Part...
- Página 4 Assembly Step 1: • Join the semi poles of both poles (A) and (D). Step 2: • Insert poles (A) into the sleeves at the back of the canvas (C).
- Página 5 Assembly Step 3: • Route the poles through the sleeves towards the front of the canvas. Step 4: • Insert one end of the poles (A) into the rings at the front of the canvas. • Insert the opposite end of the poles (A) into the rings located at the bottom of the back of the canvas.
- Página 6 Assembly Step 5: • Insert pole (D) into the sleeve that runs sideways on top of the canvas.
- Página 7 Assembly Step 6: • Insert end of pole (D) into the ring on one side of the canvas. Repeat on the other side.
- Página 8 Assembly Step 7: • Secure poles (A) and (D) at both their intersections by tying the ribbons (that are attached to the canvas) around them. Step 8: • Insert the pegs (E) through the loops around the perimeter of the canvas and stake them into the ground.
- Página 9 Assembly Step 9: • Fill the sand-bag anchors (B) with sand and place them inside the tent (at the sides or at the back) to weigh down the tent. Step 10:...
-
Página 10: Safety And Compliance
Safety and Compliance WARNING: Do not use as a camping tent! Do not have an open fire inside or in the proximity of the tent! The beach tent should not be completely shut while there are people inside! Risk of suffocation/heatstroke when the door is fully closed. -
Página 11: Care And Maintenance
Weight: 2 kg Dimensions: 240 x 145 x 145 cm Warranty Information To obtain a copy of the warranty for this product: For US - Visit amazon.com/AmazonBasics/Warranty For UK - Visit amazon.co.uk/basics-warranty — or — Contact Customer Service at 1-866-216-1072... - Página 12 Love it? Hate it? Let us know with a customer review. AmazonBasics is committed to delivering customer-driven products that live up to your high standards. We encourage you to write a review sharing your experiences with the product. Please visit: amazon.com/review/review-your-purchases# For further services: Visit amazon.com/gp/help/customer/contact-us...
-
Página 13: Tente De Plage
Guide de Bienvenue • Français Tente De Plage Contenu : Avant de commencer, veuillez vous assurer que l’emballage contient les composants suivants : Composant Qté... - Página 14 Montage Étape 1 : • Assemblez les demi-barres des deux barres (A) et (D). Étape 2 : • Insérez les barres (A) dans les manches situées à l’arrière de la toile (C).
- Página 15 Montage Étape 3 : • Faites passer les barres dans les manches vers l’avant de la toile. Étape 4 : • Insérez une extrémité des barres (A) dans les anneaux situés à l’avant de la toile. • Insérez l’extrémité opposée des barres (A) dans les anneaux situés en bas, à l’arrière de la toile.
- Página 16 Montage Étape 5 : • Insérez la barre (D) dans la manche latérale en haut de la toile.
- Página 17 Montage Étape 6 : • Insérez l’extrémité de la barre (D) dans l’anneau situé sur l’un des côtés de la toile. Répétez l'opération de l'autre côté.
- Página 18 Montage Étape 7 : • Fixez solidement les barres (A) et (D) au niveau de leurs deux intersections en nouant les rubans (fixés sur la toile) autour. Étape 8 : • Insérez les chevilles (E) dans les boucles situées le long du pourtour de la toile, puis plantez-les dans le sol.
- Página 19 Montage Étape 9 : • Remplissez les sacs de sable d’ancrage (B) avec du sable, puis placez-les à l’intérieur de la tente (sur les côtés ou à l’arrière) pour alourdir la tente. Étape 10 :...
-
Página 20: Sécurité Et Conformité
Sécurité Et Conformité AVERTISSEMENT : Ne pas utiliser comme tente de camping ! Ne pas placer de feux ouverts à l’intérieur ou à proximité de la tente ! La tente de plage ne doit pas être complètement fermée lorsque des personnes se trouvent à l’intérieur ! Risque d’étouffement/de coups de chaleur lorsque la porte est complètement fermée. -
Página 21: Soin Et Entretien
Pliage Et Rangement • Suivez les étapes de l’installation dans l’ordre inverse pour démonter la tente, en veillant à ce que l’ensemble des composants et le manuel soient correctement rangés dans l’emballage, en vous référant à la liste des composants. •... - Página 22 Vous l’adorez ? Vous le détestez ? Faites-le nous savoir en laissant un commentaire. AmazonBasics s’engage à vous offrir des produits axés sur les besoins de la clientèle et répondant à vos normes élevées. Nous vous encourageons à rédiger un commentaire visant à partager vos expériences sur le produit.
- Página 23 Bedienungsanleitung • Deutsch Strandzelt Inhalt: Bevor Sie beginnen, prüfen Sie, ob die Verpackung die folgenden Teile enthält: Teil Anzahl...
- Página 24 Montage Schritt 1: • Verbinden Sie die Teilstangen beider Stangen (A) und (D) miteinander. Schritt 2: • Stecken Sie die Stangen (A) in die Schläuche auf der Rückseite der Zeltleinwand (C).
- Página 25 Montage Schritt 3: • Führen Sie die Stangen durch die Schläuche zur Vorderseite der Zeltleinwand. Schritt 4: • Stecken Sie ein Ende der Stangen (A) in die Ringe an der Vorderseite der Zeltleinwand. • Führen Sie das gegenüberliegende Ende der Stangen (A) in die Ringe an der Unterseite der Zeltleinwand ein.
- Página 26 Montage Schritt 5: • Stecken Sie die Stange (D) in den Schlauch, der seitlich an der Zeltleinwand verläuft.
- Página 27 Montage Schritt 6: • Stecken Sie das Ende der Stange (D) in den Ring auf einer Seite der Zeltleinwand. Gehen Sie auf der anderen Seite genauso vor.
- Página 28 Montage Schritt 7: • Befestigen Sie die Stangen (A) und (D) an ihren beiden Schnittpunkten, indem Sie die Bänder (die an der Zeltleinwand befestigt sind) um sie herum binden. Schritt 8: • Stecken Sie die Stifte (E) durch die Schlaufen um den Rand der Zeltleinwand und stecken Sie sie in den Boden.
- Página 29 Montage Schritt 9: • Füllen Sie die Sandsackanker (B) mit Sand und legen Sie sie in das Zelt (an den Seiten oder auf der Rückseite), um das Zelt zu beschweren. Schritt 10:...
- Página 30 Sicherheit und Konformität WARNUNG: Nicht als Campingzelt verwenden! Kein offenes Feuer in oder in der Nähe des Zeltes! Das Strandzelt sollte nicht komplett geschlossen sein, solange sich Personen darin aufhalten! Erstickungs-/Hitzschlaggefahr, wenn die Tür komplett geschlossen ist. Lassen Sie Kinder niemals unbeaufsichtigt im Zelt. •...
-
Página 31: Wartung Und Pflege
Wartung und Pflege • Wischen Sie das Produkt nach Gebrauch mit einem feuchten Tuch ab. Technische Daten Gewicht: 2 kg Abmessungen: 240 x 145 x 145 cm Gewährleistung Eine Kopie der Gewährleistung für dieses Produkt erhalten Sie unter Besuchen Sie amazon.de/basics-garantie —... - Página 32 Gefällt es Ihnen? Gefällt es Ihnen nicht? Dann bewerten Sie das Produkt auf unserer Webseite! AmazonBasics setzt sich für die Bereitstellung kundenorientierter Produkte ein, um Ihre hohen Qualitätsstandards zu erfüllen. Bitte schreiben Sie eine Rezension, in der Sie Ihre Erfahrungen mit dem Produkt teilen.
- Página 33 Guida di Benvenuto • Italiano Tenda da Spiaggia Contenuto: Prima di iniziare, assicurarsi che la confezione contenga i seguenti componenti: Pezzo Qtà...
- Página 34 Montaggio Passo 1: • Unire i semi-pali di entrambi i pali (A) e (D). Passo 2: • Inserire i pali (A) nei manicotti sul retro del telone (C).
- Página 35 Montaggio Passo 3: • Spingere i pali attraverso i manicotti verso la parte anteriore del telone. Passo 4: • Inserire una estremità dei pali (A) negli anelli sulla parte anteriore del telone. • Inserire l’estremità opposta dei pali (A) negli anelli situati sul fondo del retro del telone.
- Página 36 Montaggio Passo 5: • Inserire il palo (D) nel manicotto che corre lateralmente in cima al telone.
- Página 37 Montaggio Passo 6: • Inserire l’estremità del palo (D) nell’anello su un lato del telone. Ripetere per l’altro lato.
- Página 38 Montaggio Passo 7: • Fissare i pali (A) e (D) su entrambe le loro intersezioni legando i nastri (che sono attaccati al telone) intorno a questi. Passo 8: • Far passare i picchetti (E) attraverso gli occhielli intorno al perimetro del telone e fissarli a terra.
- Página 39 Montaggio Passo 9: • Riempire gli ancoraggi a sacco di sabbia (B) con sabbia e posizionarli dentro la tenda (sui lati o sul retro) per appesantire la tenda. Passo 10:...
- Página 40 Sicurezza e Conformità AVVERTENZA: Non usare come tenda da campeggio! Non accendere fuochi dentro o in prossimità della tenda! La tenda da spiaggia non deve essere chiusa completamente mentre ci sono persone all’interno! Rischio di soffocamento/colpo di calore in caso di porta completamente chiusa. Mai lasciare i bambini all'interno della tenda senza supervisione.
-
Página 41: Cura E Manutenzione
Cura e Manutenzione • Strofinare il prodotto con un panno umido dopo l’uso. Specifiche Peso: 2 kg Dimensioni: 240 x 145 x 145 cm Informazioni Di Garanzia Per ottenere una copia della garanzia del prodotto: Visita amazon.de/basics-garantie — o — Contattare il Servizio Clienti al 800 62 88 05... - Página 42 Ti piace? Oppure no? Faccelo sapere scrivendo la tua recensione. AmazonBasics si impegna a distribuire prodotti orientati al cliente che siano all’altezza degli standard più elevati. Pertanto, invitiamo i clienti a scrivere una recensione per condividere le proprie esperienze con il prodotto.
-
Página 43: Refugio Para Playa
Guía de Bienvenida • Español Refugio Para Playa Contenido: Antes de comenzar, compruebe que el embalaje incluye los siguientes componentes: Componente Cant. -
Página 44: Montaje
Montaje Paso 1: • Una las mitades de ambas varillas (A) y (D). Paso 2: • Inserte las varillas (A) en las fundas de la parte posterior de la tela (C). - Página 45 Montaje Paso 3: • Pase las varillas por las fundas hacia la parte frontal de la tela. Paso 4: • Inserte uno de los extremos de la varilla (A) en los anillos de la parte delantera de la tela. • Inserte el extremo opuesto de la varilla (A) en los anillos situados de la parte inferior trasera de la tela.
- Página 46 Montaje Paso 5: • Inserte la varilla (D) en la funda lateral de la parte superior de la tela.
- Página 47 Montaje Paso 6: • Inserte el extremo de la varilla (D) en el anillo de un lateral de la tela. Repita el proceso en el lado opuesto.
- Página 48 Montaje Paso 7: • Fije las varillas (A) y (D) en ambas intersecciones atando las cintas de la tela a su alrededor. Paso 8: • Inserte las piquetas (E) por los círculos situados alrededor del perímetro de la tela y fíjelas en el suelo.
- Página 49 Montaje Paso 9: • Llene los anclajes de arena (B) con arena y colóquelos dentro de la tienda (en los laterales y en la parte posterior) para sujetar la tienda. Paso 10:...
-
Página 50: Seguridad Y Cumplimiento
Seguridad y Cumplimiento ADVERTENCIA: ¡No utilizar como tienda de campaña! ¡No encienda fuego dentro o cerca de la tienda! ¡El refugio para playa no debe cerrarse totalmente si hay personas dentro! Riesgo de asfixia / insolación si la puerta está totalmente cerrada. Nunca deje a los niños sin vigilancia dentro de la tienda. -
Página 51: Cuidado Y Mantenimiento
Cuidado y Mantenimiento • Limpie el producto con un paño húmedo después del uso. Especificaciones Peso: 2 kg Dimensiones: 240 x 145 x 145 cm Información Sobre La Garantía Para obtener una copia de la garantía de este producto: Visite amazon.de/basics-garantie —... -
Página 52: Comentarios
¿Le encanta? ¿No le gusta nada? Escriba una opinión como cliente. En AmazonBasics nos comprometemos a proveer productos pensados para satisfacer a nuestros clientes y que estén a la altura de sus elevados estándares de calidad. Le animamos a que escriba una opinión sobre su experiencia con el producto. - Página 53 ウェルカムガイド • 日本語 ビーチテント 内容: スタートする前に、パッケージに以下のものが含まれていることを必ず確認してく ださい。 パーツ 数量...
- Página 54 組み立て ステップ 1: • • ポール•(A)•および•(D)••の半ポールをつなげます。 ステップ 2: • • ポール•(A)•をカンバス•(C)•の後方にあるスリーブに差し込みます。...
- Página 55 組み立て ステップ 3: • • それぞれのポールをそれぞれのスリーブに、カンバス前方に向かって通します。 ステップ 4: • • ポール•(A)•の端をカンバス前方のリングに差し込みます。• • • ポール•(A)•の反対の端を、カンバス後方底部のリングに差し込みます。...
- Página 56 組み立て ステップ 5: • • ポール•(D)•をカンバスの一番上から横側に走るスリーブに差し込みます。...
- Página 57 組み立て ステップ 6: • • ポール•(D)•の端を、カンバスの片側にあるリングに通します。反対側も同じように繰り返 します。...
- Página 58 組み立て ステップ 7: • • リボン(カンバスについている)を結ぶことでポール•(A)•および•(D)••が交わる部分をしっ かり固定します。 ステップ 8: • • ペグ•(E)•をカンバスの周囲にあるループに通し、地面に打ち込みます。...
- Página 59 組み立て ステップ 9: • • サンドバッグアンカー•(B)•に砂を詰め、テントの内側(スライダーまたは後方)に置くこと によりテントが風の影響を受けないようにします。 ステップ 10:...
- Página 60 安全および守るべきこと 警告: キャンプ用テントとしては使用しないで ください! テントの中または付近で火を燃すのはや めてください。 中に人がいる間はテントが完全に閉じる ことがないようにしてください。 ドアを完全に閉じてしまうと窒息/熱射 病のリスクがあります。大人のいない状 態で子供をテントの中に残さないでくだ さい。 • • この製品はビーチテントとして意図されており、キャンプ用にはデザインされていません。 • • 強風や嵐の際には即座に分解する、または使用をおやめください。• • • 製品を安定した、平らで断熱性のある面においてください。 • • この製品は紫外線に対しては限られた保護しか提供しません。完全に保護するには然るべき 製品(サンスクリーンなど)をお使いになることをお勧めします。 • • 製品に重い物や尖った物・鋭い物を乗せないでください。• • • メンテナンスや修理は訓練された人のみが行うようにしてください。 たたみ方および保管 • • テントを分解するには組み立ての手順を逆に行い、パーツリストにある全てのパーツやマニ ュアルが、パーツリストどおりにパッケージに保管されていることを確認してください。 • • 製品をキャリーバッグに入れ、乾燥した場所に保管してください。 • • カンバスが完全に乾いた状態でのみたたんで保管してください。 •...
- Página 61 お手入れ • • ご使用後は製品を湿らせた布で拭いてください。• 規格 重量:• 2•kg 寸法:• 240•x•145•x•145•cm 保証について この製品の保証書のコピーを入手するには: ホームページ: amazon.jp/AmazonBasics/Warranty -•または•- カスタマーサービス 0120-899-276 にご連絡ください。...
- Página 62 フィードバック 気に入っていただけましたか?お気に召しませんでしたか? カスタマーレビューでお知らせください。 Amazonベーシック•は、皆様の高い水準に答えることのできるような消費者志向型の製品をお 届けするのを旨としています。この製品についてのレビューで製品についてのご意見をお聞か せください。 レビューはこちらへ:•amazon.jp/review/review-your-purchases# 更なるサービスについては: こちらのリンクへ•amazon.jp/gp/help/customer/contact-us -•または•- カスタマーサービス•0120-899-276•にご連絡ください。...
- Página 63 欢迎指南 • 中文 沙滩帐篷 内装物: 在开始组装之前,确保包装内包含以下组件: 部件 数量...
- Página 64 组装 步骤 1: • 将支杆(A)和(D)的两个半段部分连接起来。 步骤 2: • 将支杆(A)插入帐篷(C)背面的套管内。...
- Página 65 组装 步骤 3: • 将支杆通过套管向前穿至帐篷前部。 步骤 4: • 将支杆(A)的一端插入帐篷前部的环内。 • 将支杆(A)的另一相对端插入位于帐篷背面底部的环内。...
- Página 66 组装 步骤 5: • 将支杆(D)插入穿过帐篷侧部和顶部的管套内。...
- Página 67 组装 步骤 6: • 将支杆(D)的一端插入帐篷一侧的环内。在另一端重复上述操作。...
- Página 68 组装 步骤 7: • 通过用绑带(附带于帐篷之上)绑绕支杆(A)和(D),捆绑它们的交叉处并紧固。 步骤 8: • 将固定桩(E)穿过帐篷外围上的圈环,并将桩打入地面。...
- Página 69 组装 步骤 9: • 用沙子填充沙包锚袋(B)并将它们放于帐篷内(侧面或者后侧),以增加负重稳固帐篷。 步骤 10:...
- Página 70 安全和注意事项 警告: 切勿作为露营帐篷使用! 勿在帐篷内或者附近使用明火! 当有人员在内时,沙滩帐篷不应被完全 关闭! 帐篷门完全关闭时有窒息/中暑风险。切勿 将儿童在无人监管的情况下留于帐篷内。 • 本品目的用途为沙滩帐篷而不是被设计为野营使用。 • 如有强风和/或在暴雨期间,立即拆卸或者不搭建帐篷。 • 将产品放置于稳当、实心和平坦的表面上。 • 本品仅能提供有限的抗 UV 辐射保护能力。我们建议使用合适的产品(例如:防晒霜)确保 完全防护。 • 勿在产品上放置重物和/或尖锐物品。 • 所有维修和维护仅可由经过培训的人员进行。 折叠和存放 • 按进行搭建时的相反步骤拆卸帐篷,并且根据部件列表确保所有部件和手册被正确存放于包 装内。 • 将产品放置于其携带袋内并存放于干燥处。 • 仅在帐篷完全干燥后再折叠和存放。 • 将支杆和帐篷分开存放。...
- Página 71 保养和维护 • 使用后,用湿布擦拭产品。 规格 重量: 2 千克 尺寸: 240 x 145 x 145 厘米 保修信息 如需获得此产品的保修信息: 访问 amazon.cn/AmazonBasics/Warranty — 或 — 拨打 400-810-5666 联系客服人员...
- Página 72 反馈 喜欢这款产品?不喜欢这款产品? 让我们通过客户评论了解您的想法和意见。 亚马逊倍思以客户为导向,致力于供应满足客户高标准的产品。我们邀请您填写评论,分享您使 用产品的体验。 请访问:amazon.cn/review/review-your-purchases 如需更多服务: 访问 amazon.cn/gp/help/customer/contact-us — 或 — 拨打 400-810-5666 联系客服人员...
- Página 73 MADE IN CHINA...