Publicidad
Enlaces rápidos
Franklin Electric Co., Inc.
P. O. Box 12010
Oklahoma City, OK 73157-2010
405.947.2511 • Fax: 405.947.8720
www.LittleGiantPump.com
CustomerService-WTS@fele.com
INTRODUCTION
EN
This instruction sheet provides you with the information required
to safely own and operate your Little Giant product. Retain these
instructions for future reference.
The Little Giant product you have purchased is of the highest quality
workmanship and material, and has been engineered to give you
long and reliable service. Little Giant products are carefully tested,
inspected, and packaged to ensure safe delivery and operation. Please
examine your items carefully to ensure that no damage occurred
during shipment. If damage has occurred, please contact the place of
purchase. They will assist you in replacement or repair, if required.
READ THESE INSTRUCTIONS CAREFULLY BEFORE ATTEMPTING
TO INSTALL, OPERATE, OR SERVICE YOUR LITTLE GIANT
PRODUCT. KNOW THE PRODUCT'S APPLICATION, LIMITATIONS,
AND POTENTIAL HAZARDS. PROTECT YOURSELF AND OTHERS
BY OBSERVING ALL SAFETY INFORMATION. FAILURE TO COMPLY
WITH THESE INSTRUCTIONS COULD RESULT IN PERSONAL
INJURY AND/OR PROPERTY DAMAGE!
INSTALLATION (DFB36)
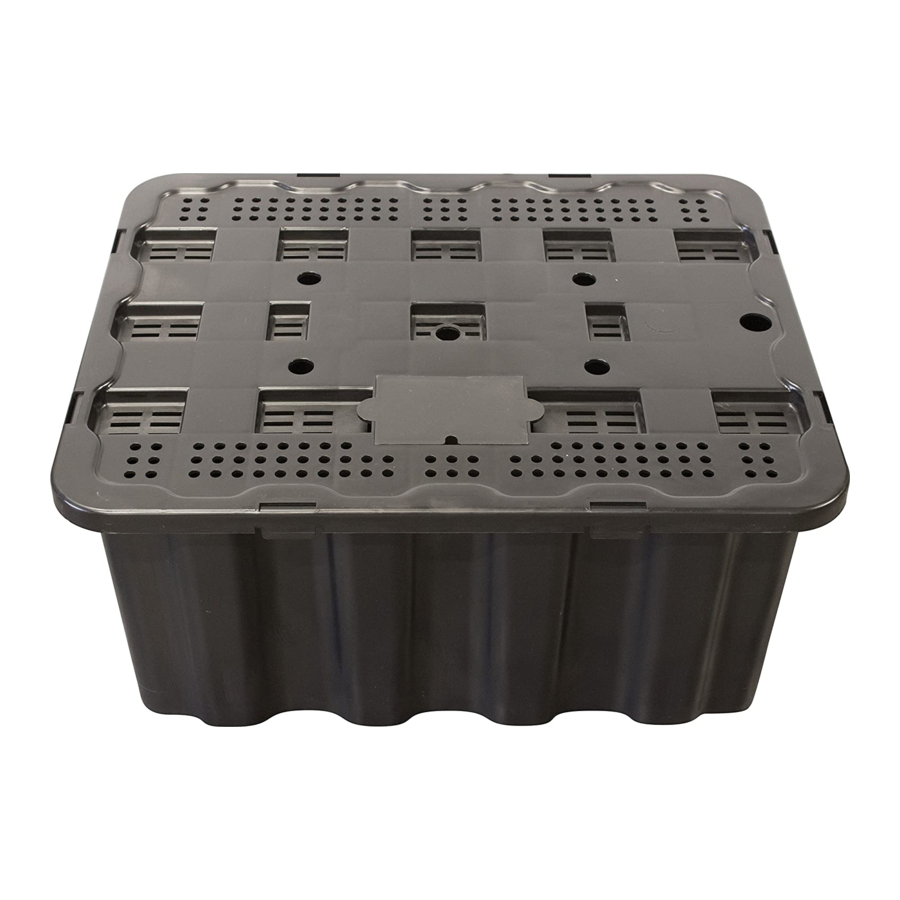
Refer to Figure 1 and the following instructions to install the DFB36 basin:
1. Dig a hole 9" deep, 30" in diameter at the bottom, and sloping to
35" in diameter at the top. Ensure that the ground at the bottom is
level and solid.
2. Place the basin into the hole, with the power cord cut-out facing
toward the power source.
3. Set the support into the circular receptacle in the center of the basin
and align the tubing cut-outs.
4. Place the pump into the basin, running the power cord through the
cord cut-out.
5. Cut a length of tubing long enough to reach from the bottom of the
basin to the top of the water feature.
6. Run the tubing through the center hole in the top of the support and
out the tubing cut-outs, then connect it to the pump outlet fitting.
7. Install the six top plates.
8. Refer to the water feature owner's manual to complete the
installation.
Center hole
Trou central
Orificio central
Tubing cut-outs
Découpes pour tuyauterie
Recortes para el tubo
Cord cut-out
Découpe pour cordon
d'alimentation
Recorte para el cable
Figure • Figure • Figura 1 - DFB36
DISAPPEARING WATER FEATURE BASIN • CUVETTE POUR JEUX
D'EAU EN CIRCUIT FERMÉ • CUBETA PARA FUENTE DE AGUA QUE
Top plates (6)
Plaques supérieures (6)
Placas superiores (6)
Support
Support
Soporte
Basin
Cuvette
Cubeta
Receptacle
Réceptacle
Receptáculo
DESAPARECE
DFB36
INSTALLATION (DFB44)
Refer to Figure 2 and the following instructions to install the DFB44
basin:
1. Dig a hole 10" deep, 29" square at the bottom, and sloping to 37"
square at the top. Ensure that the ground at the bottom is level and
solid.
2. Place the basin into the hole.
3. Insert the 8 supports into the 8 support holes.
4. Place the center plate (gray) onto the supports, pressing firmly to
ensure full installation.
5. Place the pump into the basin.
6. Cut a length of tubing long enough to reach from the bottom of the
basin to the top of the water feature.
7. Run the tubing through the center hole in the top of the center plate
and connect it to the pump outlet fitting.
8. Install the four top plates. On the side nearest the power supply, run
the pump power cord out the cord gap, under the edge of the top
plate, and through the cord cut-out.
9. Install the four access covers, ensuring that the cut-out in each
faces outward.
10. Refer to the water feature owner's manual to complete the
installation.
Cord gap
Espace prévu pour le cordon
d'alimentation
Espacio para el cable
Center hole
Trou central
Orificio central
Support holes
Trous pour supports
Orificios de soporte
Cord cut-out
Découpe pour cordon
d'alimentation
Recorte para el cable
Figure • Figure • Figura 2 - DFB44
DFB44
Access cover (4)
Couvercles d'accès (4)
Cubierta de acceso (4)
Top plates (4)
Plaques supérieures (4)
Placas superiores (4)
Edge
Bord
Borde
Center plate (gray)
Plaque centrale (gray)
Placa central (gris)
Supports (8)
Supports (8)
Soportes (8)
Basin
Cuvette
Cubeta
1
Publicidad

Resumen de contenidos para Franklin Electric Little Giant DFB36
- Página 1 DISAPPEARING WATER FEATURE BASIN • CUVETTE POUR JEUX D’EAU EN CIRCUIT FERMÉ • CUBETA PARA FUENTE DE AGUA QUE DESAPARECE Franklin Electric Co., Inc. P. O. Box 12010 Oklahoma City, OK 73157-2010 405.947.2511 • Fax: 405.947.8720 DFB36 www.LittleGiantPump.com CustomerService-WTS@fele.com INTRODUCTION...
- Página 2 INTRODUCTION INTRODUCCIÓN Cette feuille d’instructions vous fournit les informations nécessaires Esta hoja de instrucciones le proporciona la información requerida para pour entretenir et faire fonctionner votre produit Little Giant. Conserver tener y operar de forma segura su producto Little Giant. Guarde las instrucciones para referencia futura.
- Página 3 LIMITED WARRANTY GARANTIE LIMITÉE Your Little Giant product is guaranteed to be in perfect condition when La présente garantit que votre pompe Little Giant est en parfaite it leaves our Factory. It is warranted against defective materials and condition à sa sortie de l’usine. La pompe est garantie contre tout workmanship for a period of 12 months (90 day warranty on Models: défaut de matériau ou de fabrication pendant une période de 12 mois 1-AA-OM, GKPK-SC, PP-1, PPS-1, PP-12, PPS-12, PP-230 and Cooler...
- Página 4 ..... . . 1.888.572.9933 Para la ayuda técnica, por favor póngase en contacto ..1.888.956.0000 www.LittleGiantPump.com CustomerService-WTS@fele.com Form 998475 - 09/22/2009 ©2008 Franklin Electric Co., Inc. Little Giant® is a registered trademark of Franklin Electric Co., Inc.
