Publicidad
Idiomas disponibles
Idiomas disponibles
Enlaces rápidos
π
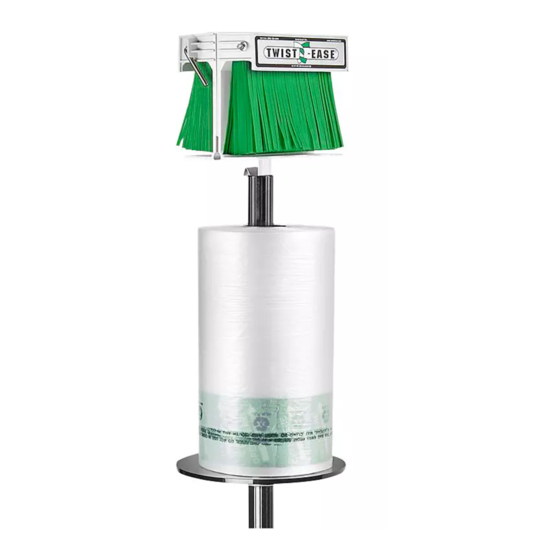
H-3900
PRODUCE BAG STAND
STANDARD
TOOL INCLUDED
Wrench
1. Attach the bottom pole to the base by inserting the
pole through the hole in the base from the bottom
(side with feet). (See Figure 1)
2. Insert black carriage bolt from top to bottom.
(See Figure 2)
3. Put the nut on the bottom side. Put all 4 bolts and
nuts on loosely. (See Figure 3)
PAGE 1 OF 6
1-800-295-5510
uline.com
ASSEMBLY
Figure 1
Figure 2
Figure 3
Pour le français, consulter les pages 5-6.
4. Tighten nuts with wrench provided. (See Figure 4)
5. Slide top pole over bottom pole. Insert set screw
through the hole of the top pole and tighten with
wrench. (See Figure 5)
Para Español, vea páginas 3-4.
Figure 4
Figure 5
0821 IH-3900
Publicidad

Resumen de contenidos para Uline H-3900
- Página 1 Para Español, vea páginas 3-4. Pour le français, consulter les pages 5-6. π H-3900 1-800-295-5510 uline.com PRODUCE BAG STAND STANDARD TOOL INCLUDED Wrench ASSEMBLY 1. Attach the bottom pole to the base by inserting the 4. Tighten nuts with wrench provided. (See Figure 4) pole through the hole in the base from the bottom (side with feet).
- Página 2 3/8" nut on the clip and moving it up or down. The clip needs to catch on the bag stand pole. (See Figure 6) Clip Push Figure 6 1-800-295-5510 uline.com PAGE 2 OF 6 0821 IH-3900...
-
Página 3: Ensamble
π H-3900 800-295-5510 uline.mx BASE DE BOLSAS PARA FRUTAS/VERDURAS ESTÁNDAR HERRAMIENTA INCLUIDA Llave ENSAMBLE Fije el poste inferior a la base insertándolo a través 4. Apriete las tuercas con la llave que se suministra. del orificio de la base desde abajo (vista lateral con (Vea Diagrama 4) patas). -
Página 4: Continuación De Ensamble
3/8" del clip y moviéndola hacia arriba o hacia abajo. El clip debe trabarse en el poste de la base para bolsas. (Vea Diagrama 6) Clip Presionar Diagrama 6 800-295-5510 uline.mx PAGE 4 OF 6 0821 IH-3900... - Página 5 π H-3900 1-800-295-5510 uline.ca SOCLE STANDARD À SACS POUR PRODUITS OUTIL COMPRISE Clé MONTAGE Reliez la partie inférieure du poteau à la base en 4. Serrez les écrous avec la clé fournie. (Voir Figure 4) l'insérant dans le trou de la base à partir du dessous (côté...
- Página 6 être réglée en desserrant l'écrou de 3/8 po sur la pince et en la déplaçant vers le haut ou vers le bas. La pince doit être fixée au support à sacs. (Voir Figure 6) Pince Pousser Figure 6 1-800-295-5510 uline.ca PAGE 6 OF 6 0821 IH-3900...


