Descargar Imprimir esta página
Ocultar thumbs Ver también para PERGOLA 4x6:

Publicidad

Idiomas disponibles

Idiomas disponibles

Enlaces rápidos

Et kvalitetsmerke fra Norge
A Quality Brand from Norway
Eine Qualitätsmarke aus Norwegen
Una marca de calidad de Noruega
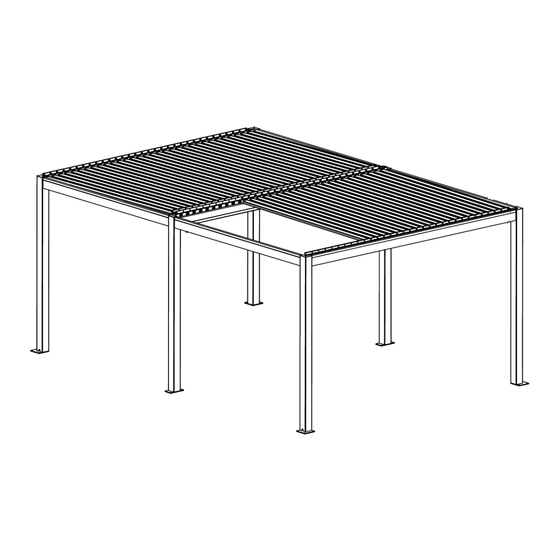
PERGOLUX PERGOLA 4 6
FRITTSTÅENDE / FREESTANDING /
FREISTEHEND / AUTO SOPORTANTE

Publicidad

loading

Resumen de contenidos para PERGOLUX PERGOLA 4x6

  • Página 1 Et kvalitetsmerke fra Norge A Quality Brand from Norway Eine Qualitätsmarke aus Norwegen Una marca de calidad de Noruega PERGOLUX PERGOLA 4 6 FRITTSTÅENDE / FREESTANDING / FREISTEHEND / AUTO SOPORTANTE...
  • Página 2 Innholdsfortegnelse / Table of Content / Inhaltsverzeichnis / Tabla de contenido Innholdsliste / List of Items / Artikelliste / Lista de partes ….……..……3 Verktøy / Tools / Werkzeuge / Herramientas ……..……………….……..…..4 Montasje / Instalation / Montage / Instalación .……………….…….…..5 45 - Norsk …………………………………..…….……………………………….……………………...…..
  • Página 3 Innholdsliste / List of Items / Artikelliste / Lista de partes Kontroller at du har alle delene før montering. Kontakt oss om noe skulle mangle/ Please check all parts according to the list of parts before assembling the pergola/ Bitte den Inhalt der Pakete auf Vollständigkeit überprüfen/ Controle que todas las partes estén presentes antes de comenzar la instalación.
  • Página 4 Merk: Noen av delene er allerede forhåndsskrudd Note: Some of the parts may already be pre-assembled Hinweis: Einige Teile sind bereits vorgeschraubt Atención: Algunas piezas ya están preensambladas...
  • Página 5 Verktøy / Tools / Werkzeuge / Herramienta Det anbefales å være minst 2 3 personer ved montasje av denne pergolaen / It is recommended to work with a minimum of 2 3 people / Es wird empfohlen die Montage mit 2 3 Personen durchzuführen / Se recomienda al menos 2 o 3 personas para la instalación.
  • Página 6 Montering Kjære kunde, Gratulerer med ny pergola og takk for at du handler hos PERGOLUX. Før du starter monteringen er det viktig at du kontroller innholdslisten. Sjekk at innholdet i de enkelte pakkene er komplette. Vær oppmerksom på at noen skruer allerede er forhåndsmontert.
  • Página 7 Trinn 2 Legg søylene ned (pass på at søylene ikke blir ripet) Monter bjelken fast til søylene. Legg merke til at skruene som skal benyttes for innfestning av bjelken allerede er skrudd fast til søylene. Disse må derfor løsnes før montering. Gjør det samme med søylene og bjelken Stram skruene.
  • Página 8 Trinn 3 Monter de resterende bjelkene og søylene i systematisk rekkefølge. Skru fast topp-platene ④ i alle hjørner med skruene ①, men vent med å stramme til til alle bjelkene og søylene er montert.
  • Página 9 Trinn 4 Sett bjelken på søylen Sett sammen med resten av den monterte strukturen.
  • Página 10 Trinn 5 Stram skruene ⑤ opp.
  • Página 11 Trinn 6 Skyv ⑬x2 inn i for montasje av tileggprodukter. Heng på bjelkene som vist på nedenfor. Skru dem sammen med skruene ⑭ .
  • Página 12 Trinn 7 Sett inn styrelamellene Ⓗx2 på den andre raden som vist nedenfor. Bruk gjerne litt kraft for å få dem inn. Monter deretter de andre lamellene i rekkefølge.
  • Página 13 Trinn 8 Fest lamellene og styringsskinnene Ⓙ med ⑥,⑦,⑧ som vist nedenfor. Stram skruene til med en sekskantnøkkel.
  • Página 14 Trinn 9 Du kan nå feste pergolaen til underlaget. Egnede festemidler kan kjøpes hos din nærmeste byggevareforhandler. Her er noen anbefalinger: - Betong: Ekspansjonsbolter. - Treverk: Grove lange treskruer. - Installasjoner nær sjø: Syrefast.
  • Página 15 Trinn 10 Monter stormsikringsplatene ⑩ og ⑪ på bjelkene med skruer som vist nedenfor.
  • Página 16 Please note that some screws are already pre-assembled. If the packaging or the pergola has visible damage, take a picture of it and contact us immediately at customerservice@pergolux.com or via the chat on our website. We hope you are satisfied with the ordering process, the delivery, the assembling instructions and the product itself.
  • Página 17 Step 2 Lay the pillars down and insert the beam . Note that the screws that are to be used for attaching the beam are already screwed to the columns. These must therefore be loosened before mounting. Repeat this process with the pillars Tighten the screws.
  • Página 18 Step 3 Install the remaining beams and columns. Screw the top plates ④ on all corners with the screws ①. Do not tighten until all the beams and columns are mounted.
  • Página 19 Step 4 Insert the beam ⟶ and connect them to the rest of the assembled structure.
  • Página 20 Step 5 Tighten the screws ⑤.
  • Página 21 Step 6 Insert ⑬x2 into for installing heaters. Hang onto the beams as seen in the pictures. Fasten them together with screws ⑭.
  • Página 22 Step 7 Insert the steering slats Ⓗx2 on the second row as shown below. After installing the steering slats, proceed by installing the other slats Ⓖ.
  • Página 23 Step 8 Connect the slats and the steering rails Ⓙ with ⑥,⑦,⑧ and tighten the screws using a hex key as shown below.
  • Página 24 Step 9 You can now attach the pergola to the ground. Suitable fasteners can be purchased from a building materials dealer. Here are some recommendations: - Concrete: Expansion bolts. - Wood: Coarse long wood screws. - Installations near the sea: Acid-proof.
  • Página 25 Step 10 Install the wind protection plates ⑧ and ⑨ onto the beams with screws as shown below:...
  • Página 26 Sehr geehrter Kunde, herzlichen Glückwunsch und vielen herzlichen Dank, dass Sie sich für eine PERGOLUX Pergola entschieden haben. Bevor Sie mit der Montage beginnen, kontrollieren Sie anhand der Produktliste die einzelnen Pakete auf Ihre Vollständigkeit, bitte beachten Sie das bereits einige Schrauben vormontiert sind.
  • Página 27 Schritt 2 Legen Sie die Pfeiler hin und setzen Sie den Balken ein. Beachten Sie, dass die Schrauben, die zur Befestigung des Trägers verwendet werden sollen, bereits an den Pfeilern montiert sind. Diese müssen daher vor der Montage gelöst werden. Wiederholen sie diesen Vorgang mit den Säulen Ziehen sie die Schrauben fest.
  • Página 28 Schritt 3 Fügen Sie die Träger ⟶ ⟶ ein. Ziehen Sie die Schrauben ① an.
  • Página 29 Schritt 4 Fügen Sie den Träger ⟶ ein und verbinden Sie es mit dem Rest der Konstruktion.
  • Página 30 Schritt 5 Ziehen sie die Schrauben ⑤ fest.
  • Página 31 Schritt 6 Fügen sie die Verbinder⑬x2 in ein, um Wärmelampen zu montieren. Hängen Sie die Träger an die Balken, wie auf der Abbildung zu sehen ist. Nutzen sie die Schrauben ⑭ um die Träger zu fixieren.
  • Página 32 Schritt 7 Setzen Sie die Steuerlamellen Ⓗx2 in der zweiten Reihe ein. Fahren Sie nach der Montage der Steuerlamellen, mit der Montage der restlichen Lamellen fort.
  • Página 33 Schritt 8 Verbinden Sie die Lamellen und die Lenkschienen Ⓙ mit ⑥,⑦,⑧ wie abgebildet und ziehen Sie die Schrauben fest. Hinweis: Ziehen Sie die Schrauben beginnend am Mittelträger fest - danach die restlichen Seiten)
  • Página 34 Schritt 9 Montieren Sie die Ankerbolzen, wie auf dem Bild unten gezeigt.
  • Página 35 Schritt 10 Montieren Sie die Windschutzplatten ⑩ und ⑪ mit den Schrauben an den Trägern.
  • Página 36 Estimado(a) cliente, Felicitaciones por nueva pérgola y muchas gracias por elegir invertir en una pérgola Pergolux. Agradeceremos mucho que nos comparta fotografías y comentarios sobre su experiencia de instalación, una vez que haya terminado de montar su pérgola. Para disfrutar el producto por muchos años, y para su propia seguridad y la de otras personas, le rogamos que siga cuidadosamente estas instrucciones.
  • Página 37 Paso 2 Ponga los pilares en el suelo. Tenga de cuidado de que no se rayen. Luego inserte la viga y utilice los pernos para fijarla a los pilares. Note que los pernos están preinstalados en los pilares. Retírelos para luego unir las vigas con los pilares.
  • Página 38 Paso 3 Instale el resto de los pilares y vigas de forma sistemática. Instale las placas superiores ④ en todas las ezquinas usando los pernos ①. No aprete totalmente los pernos aún, sino hasta haber instalado todas los pilares y vigas.
  • Página 39 Paso 4 Inserte la viga en los pilares y conecte con el resto de la estructura ya ensamblada.
  • Página 40 Paso 5 Inserte y apriete los pernos ⑤...
  • Página 41 Paso 6 Inserte ⑬x2 en las canaletas para la para la instalación futura de productos complementarios. Cuelgue las canaletas en las vigas como se ve en las imágenes. Fíjelas con los tornillos ⑭...
  • Página 42 Paso 7 Inserte las lamas principales Ⓗx2 en la segunda ranura de las vigas (presione con fuerza hacia abajo para que la lama quede bien embutida). Luego de instalar las lamas principales, continúe con las demás lamas Ⓖ.
  • Página 43 Paso 8 Fije las lamas con el perfil Ⓙ usando los pernos ⑤, golillas ⑥, tuerca ⑦ como se muestra en la imagen. Repita el proceso con las 3 perfiles restantes).
  • Página 44 Paso 9 Fije los pilares al suelo asegurándose primero de que los 6 pilares estén a plomo. Utilice una broca y pernos de anclaje adecuados según el tipo de suelo que tenga: Cemento: use pernos de expansión Madera: use tornillos tirafondo Instalación cerca del mar: use pernos de acero 316 (resistene a ácidos).
  • Página 45 Paso 10 Instale las placas antiviento ⑩ y ⑪ en las vigas utilizando tornillos como lo muestra la imagen a continuación.
  • Página 46 Do not install the pergola when you find damaged parts or parts that are missing. Contact us immediately at customerservice@pergolux.com if this is the case. //// Für ihre Sicherheit und die von anderen, ist es sehr wichtig die folgenden Anweisungen zu befolgen.
  • Página 47 La láminas de plástico transparente adheridas sobre las piezas de aluminio son para proteger la pintura. Retire estas láminas justo antes de montar las distintas partes. La pérgola Pergolux es un producto robusto apta para los climas de Chile. No obstante, puede sufrir daños en eventos climáticos catastróficos o si es expuesta a fuentes de calor elevado como calefactores o parrillas que estén muy...
  • Página 48 Congratulations on the assembled pergola! You have now burned some calories and really deserve to relax under the Pergolux pergola. We hope that you were satisfied with the ordering process, the delivery, the assembly and the product itself. We want to continuously improve and are very interested in your feedback.
  • Página 49 ¡Felicitaciones por haber armado su nueva pérgola! Ya quemó bastantes calorías en el proceso y se merece un buen descanso bajo su nueva PERGOLUX. Esperamos que esté satisfecho(a) con el proceso de compra, envío y montaje. Queremos mejorar continuamente y estamos muy interesados en su feedback.