Publicidad
Idiomas disponibles
Idiomas disponibles
Enlaces rápidos
S-9737, S-18045, S-20449
S-20961, S-23169, S-23947
3M PELTOR AND
CAP-MOUNTED EARMUFFS
NOTE: Prior to fitting, inspect the product to
ensure it is not damaged. If damage is found,
dispose of immediately and obtain a new pair.
Brush excess hair aside and remove any ear jewelry
that may affect acoustic seal before attempting to fit
the hearing protector.
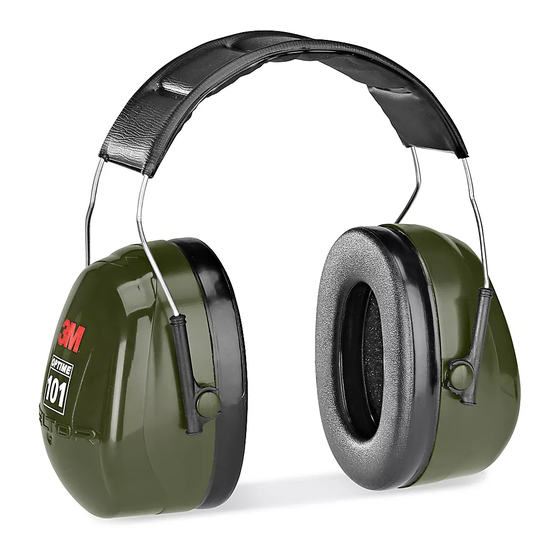
HEADBAND VERSION
(S-9737, S-20449, S-20961, S-23169)
1.
Pull the cups apart and place the
earmuffs over the ears so that the
cushions form a snug seal around the
ears. (See Figure 1)
2. Adjust the height for optimum comfort
and fit by sliding the cups up or down
the guide while holding the headband
in place. (See Figure 2)
3. Shows the product correctly fitted.
(See Figure 3)
CAP-MOUNTED VERSION
FITTING THE CUP
Push the attachment blade firmly into the
slot on the side of the hard hat until it clicks
into place. (See Figure 4)
PAGE 1 OF 3
1-800-295-5510
uline.com
INSTRUCTIONS
Figure 1
Figure 2
Figure 3
(S-18045, S-23947)
Figure 4
WORKING POSITION
With the cups over the ears, press the
wire bands inwards until you hear a click
on both sides (indicating a firm seal). If
necessary, adjust the cups by sliding up or
down until they form a snug seal around
the ears. Ensure the cups and wire band
do not chafe against the head harness or
edge of the hard hat, as this may result in
acoustic leakage. (See Figure 5)
STAND-BY POSITION
Lift the cups to the fixed stand-by position.
In a noisy environment, the ear muffs must
be worn in the working position at all times.
(See Figure 6)
PARKING POSITION
Lift cups to the stand-by position, then
rotate them up to the next fixed position.
(See Figure 7)
IMPORTANT! Do not press the cups
onto the hard hat shell as this will
lock the spring in the earmuff arm,
damage the attachment slot on the side of the
helmet and damage the sealing cushion.
STORAGE POSITION
When the helmet is not in use, lower the
earmuffs and press them inward. Keep the
cups clean and dry. Store at normal room
temperature. (See Figure 8)
Para Español, vea página 2.
Pour le français, consulter la page 3.
Figure 5
Figure 6
Figure 7
Figure 8
1021 IS-9737
Publicidad

Manuales relacionados para Uline S-20961


Resumen de contenidos para Uline S-20961
- Página 1 Ensure the cups and wire band HEADBAND VERSION do not chafe against the head harness or edge of the hard hat, as this may result in (S-9737, S-20449, S-20961, S-23169) acoustic leakage. (See Figure 5) Pull the cups apart and place the Figure 1...
- Página 2 VERSIÓN CON BANDA EN LA CABEZA las copas y la banda de alambre no rocen contra el arnés para la cabeza o el borde del casco, (S-9737, S-20449, S-20961, S-23169) ya que esto podría provocar una fuga acústica. Separe las copas y coloque las...
- Página 3 Assurez-vous que les VERSION SERRE-TÊTE coquilles et la bague de fil ne frottent pas contre le harnais de tête ou le bord du casque, car (S-9737, S-20449, S-20961, S-23169) cela pourrait entraîner des fuites acoustiques. Figure 1 Séparez les coquilles et placez le (Voir Figure 5)