Publicidad
Idiomas disponibles
Idiomas disponibles
Enlaces rápidos
Quick Start Guide
Schnellstartanleitung
Guía de inicio rápido
Guide de démarrage rapide
Краткое руководство по
началу работы
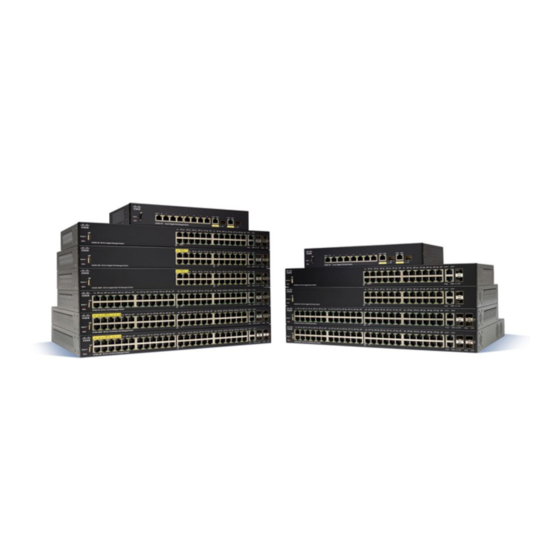
Cisco 350 Series Managed Switches
Cisco Managed Switches der Serie 350
Switches administrados Cisco serie 350
Commutateurs administrables Cisco 350
Управляемые коммутаторы Cisco серии 350
Publicidad

Manuales relacionados para Cisco SF350-24P


Resumen de contenidos para Cisco SF350-24P
- Página 1 Quick Start Guide Schnellstartanleitung Guía de inicio rápido Guide de démarrage rapide Краткое руководство по началу работы Cisco 350 Series Managed Switches Cisco Managed Switches der Serie 350 Switches administrados Cisco serie 350 Commutateurs administrables Cisco 350 Управляемые коммутаторы Cisco серии 350...
- Página 2 Welcome Thank you for choosing the Cisco 350 Series Managed Switches. The switches are designed to be operational right out-of-the-box as standard layer 2 and 3 switches. Using the default configuration, your switch forwards packets between the connecting devices after power up.
- Página 3 (included) on the bottom of the switch. • Mount the switch in a standard rack (1 rack unit high). • Many of the 350 Series Cisco switches include wall-mounting slots on the bottom of the device.
- Página 4 After the brackets are securely attached, the switch is now ready to be installed into a standard 19-inch rack. Wall Mounting Most of the 350 Series Cisco switches include wall-mounting slots on the bottom of the device. Insecure mounting may damage the device or cause injury.
- Página 5 Connect the other end of the Ethernet cable to one of the numbered Ethernet ports of the switch. The Ethernet port light turns green when the connection is active. Refer to Cisco 350 Series Switch Features for details about the different ports and LEDs on each switch. Repeat...
- Página 6 740 Watts 1–48 802.3af/at *60-Watt PoE: ports 4-pair PoE 1,2,3,4,25,26,27, 28 SG350-8PD 124 Watts 1–8 802.3af/at *60-Watt PoE extends the IEEE Power over Ethernet Plus standard to double the power per port to 60 watts. Cisco 350 Series Managed Switches...
- Página 7 Using the console port requires advanced user skills. These are the default settings used when configuring your switch for the first time. Parameter Default Value Username cisco Password cisco LAN IP 192.168.1.254 Cisco 350 Series Managed Switches...
- Página 8 Enter the switch IP address in the address bar and press Enter. For example, http://192.168.1.254. When the login page appears, choose the language that you prefer to use in the web-based interface and enter the username and password. Cisco 350 Series Managed Switches...
- Página 9 The default username is cisco. The default password is cisco. Usernames and passwords are both case sensitive. Click Log In. If this is the first time that you have logged on with the default username and password, the Change Password page opens. The rules for constructing a new password are displayed on the page.
- Página 10 Static and change the static IP address and subnet mask to match your network topology. Failure to do so may result in multiple switches using the same factory default IP address of 192.168.1.254. Cisco 350 Series Managed Switches...
- Página 11 Cisco 350 Series Switch Features This section describes the exterior of the switch to help familiarize you with your switch. Product Models Model Description SF350-08 8-Port 10/100 Managed Switch SF350-24 24-Port 10/100 Managed Switch SF350-24MP 24-Port 10/100 PoE Managed Switch...
- Página 12 Multigigabit Ethernet Ports—Highlighted in blue, these ports support speeds of 100 Mbps, 1 Gbps, and 2.5 Gbps, on Cat 5e cables. Much of the cabling deployed worldwide is limited to 1 Gbps at 100 meters. Cisco Multigigabit Ethernet enables speeds up to 2.5 Gbps on the same infrastructure without replacing a cable.
- Página 13 To use the Reset button to reboot or reset the switch, do the following: • To reboot the switch, press and hold the Reset button for less than ten seconds. • To restore the switch to its factory default settings: Cisco 350 Series Managed Switches...
- Página 14 • Check the connectors of the Ethernet cable to ensure that they are firmly plugged into the switch and your computer. • Use a different Ethernet cable or port. Bad Console port connection Cisco 350 Series Managed Switches...
- Página 15 • Verify the console port utility is configured with the correct parameters. IP Addressing Issues • The Cisco switches can also be accessed by the Cisco FindIT Network Discovery Utility that automatically discovers all Cisco Small Business devices in the same local network segment as your computer.
- Página 16 (such as the GNU Lesser/General Public License), please send your request to: externalopensource-requests@cisco.com In your requests please include the Cisco product name, version, and the 18 digit reference number (for example: 7XEEX17D99-3X49X081) found in the product open source documentation.
- Página 17 Cisco 350 Series Managed Switches...
- Página 18 Cisco and the Cisco logo are trademarks or registered trademarks of Cisco and/or its affiliates in the U.S. and other countries. To view a list of Cisco trademarks, go to this URL: www.cisco.com/go/trademarks. Third-party trademarks mentioned are the property of their respective owners.
- Página 19 Schnellstartanleitung Cisco Managed Switches der Serie 350...
- Página 20 Willkommen Danke, dass Sie sich für Cisco Managed Switches der Serie 350 entschieden haben. Diese Switches wurden so entwickelt, dass sie sofort als Standard-Layer-2- und Layer-3-Switches eingesetzt werden können. In der standardmäßigen Konfiguration werden Pakete zwischen den angeschlossenen Geräten vom Switch umgeleitet, nachdem diese hochgefahren wurden.
- Página 21 Gummifüße (enthalten) am Boden des Switches. • Montieren Sie den Switch in einem Standard-Rack (1 HE Höhe). • Viele der Cisco Switches der Serie 350 verfügen über Schlitze zu Wandmontage an der Unterseite des Geräts. Cisco Managed Switches der Serie 350...
- Página 22 Wiederholen Sie den vorherigen Schritt, um die andere Klammer CHRITT an der gegenüberliegenden Seite des Switches zu befestigen. Nachdem die Klammern ordnungsgemäß befestigt wurden, CHRITT kann der Switch nun in einem standardmäßigen 48-cm-Rack installiert werden. Cisco Managed Switches der Serie 350...
- Página 23 Wandmontage Die meisten der Cisco Switches der Serie 350 verfügen über Schlitze zu Wandmontage an der Unterseite des Geräts. Eine unsichere Montage kann das Gerät beschädigen und ARNUNG zu Verletzungen führen. Cisco trägt keine Verantwortung für Schäden, die durch unsichere Wand- oder Deckenmontage entstehen.
- Página 24 Switches der Serie 350 mit Power over Ethernet Modell Strom für Anzahl der Ports, Unterstützter PoE- die PoE Standard unterstützen SF352-08P 62 Watt 802.3af/at SF352-08MP 128 Watt 802.3af/at SF350-24P 185 Watt 1 bis 24 802.3af/at *60-Watt PoE: Ports 4-Paar-PoE 1,2,13,14 Cisco Managed Switches der Serie 350...
- Página 25 SG350-52MP 740 Watt 1 bis 48 802.3af/at *60-Watt PoE: Ports 4-Paar-PoE 1,2,3,4,25,26,27,28 SG350-8PD 124 Watt 802.3af/at *60-Watt PoE erweitert den IEEE Power over Ethernet Plus-Standard auf die doppelte Leistung pro Port auf 60 Watt. Cisco Managed Switches der Serie 350...
- Página 26 Der Zugriff auf den Switch und dessen Verwaltung kann auf zwei verschiedene Arten erfolgen: über Ihr IP-Netzwerk anhand der webbasierten Benutzeroberfläche oder mithilfe der Kommandozeilenschnittstelle des Switches über den Konsolen-Port. Die Verwendung des Konsolen-Ports erfordert fortgeschrittene Benutzerfertigkeiten. Cisco Managed Switches der Serie 350...
- Página 27 Wenn die IP-Adresse per DHCP zugewiesen wird, stellen Sie sicher, dass der DHCP-Server läuft und von Switch und Computer erreicht werden kann. Sie müssen die Geräte möglicherweise trennen und wieder verbinden, damit Sie die neuen IP-Adressen vom DHCP-Server erkennen. Cisco Managed Switches der Serie 350...
- Página 28 CHRITT Sprache, die Sie für die webbasierte Benutzeroberfläche verwenden möchten, und geben Sie Benutzername und Passwort ein. Der Standardbenutzername lautet cisco. Das Standardkennwort lautet cisco. Bei Benutzernamen und Passwörtern wird zwischen Groß- und Kleinschreibung unterschieden. Klicken Sie auf Anmelden. CHRITT Wenn Sie sich zum ersten Mal mit Standard-Benutzername und -Passwort anmelden, wird die Seite „Passwort ändern“...
- Página 29 Geben Sie einen Benutzernamen und ein Passwort ein. Der CHRITT Standard-Benutzername lautet cisco und das Standard- Passwort lautet cisco. Bei Benutzernamen und Passwörtern wird zwischen Groß- und Kleinschreibung unterschieden. Wenn Sie sich zum ersten Mal mit Standard-Benutzername und -Passwort anmelden, wird die folgende Mitteilung angezeigt: Bitte ändern Sie Ihr Passwort in den...
- Página 30 Tun Sie dies nicht, kann es passieren, dass mehrere Switches dieselbe werkseitig voreingestellte IP-Adresse 192.168.1.254 verwenden. Funktionen der Cisco Switches Serie 350 In diesem Abschnitt wird die Außenseite des Smart Switches erläutert, um Sie mit Ihrem Switch vertraut zu machen.
- Página 31 Geschwindigkeiten von 100 Mbit/s, 1 Gbit/s und 2,5 Gbit/s auf Kabeln der Kategorie 5e. Ein Großteil der verwendeten Kabel weltweit ist auf 1 Gbit/s auf 100 Meter beschränkt. Das Multigigabit-Ethernet von Cisco ermöglicht Geschwindigkeiten von bis zu 2,5 Gbit/s in der gleichen Infrastruktur, ohne Kabel auszutauschen.
- Página 32 Rücksetztaste Der Switch kann zurückgesetzt werden, indem Sie eine Nadel oder eine Büroklammer in die Öffnung zum Zurücksetzen an der Vorderseite des Switches einführen. Details finden Sie unter Zurücksetzen der Switches auf die Werkseinstellungen. Cisco Managed Switches der Serie 350...
- Página 33 Öffnen Sie ein Befehlsfenster, indem Sie Start > Ausführen CHRITT wählen und cmd eingeben. Geben Sie im Befehlsfenster Ping und die IP-Adresse des CHRITT Switches ein. Zum Beispiel Ping 192.168.1.254 (die standardmäßige IP-Adresse des Switches). Cisco Managed Switches der Serie 350...
- Página 34 • Verwenden Sie ein anderes Ethernet-Kabel oder einen anderen Port. Fehlerhafte Verbindung mit dem Konsolen-Port • Prüfen Sie, ob die Anschlüsse des Konsolenkabels fest mit Switch und Computer verbunden sind. • Prüfen Sie, ob das Konsolen-Port-Dienstprogramm mit den korrekten Parametern konfiguriert wurde. Cisco Managed Switches der Serie 350...
- Página 35 Falsche IP-Adresse • Der Zugriff auf die Cisco Switches kann auch über das Cisco FindIT Network Discovery Utility erfolgen. Dieses erkennt automatisch alle Cisco Small Business-Geräte im selben lokalen Netzwerksegment wie Ihr Computer. Sie können Geräteinformationen wie die aktuelle IP- Adresse anzeigen, die neueste Firmware für das Gerät herunterladen...
- Página 36 Lesser/General Public License) berechtigt sind, senden Sie eine Anfrage an: externalopensource-requests@cisco.com Geben Sie in Ihrer Anfrage bitte den Namen und die Version des Cisco Produkts sowie die 18-stellige Referenznummer an (zum Beispiel: 7XEEX17D99-3X49X081), die Sie in der Open Source-Dokumentation des Produkts finden.
- Página 37 Cisco Managed Switches der Serie 350...
- Página 38 78-101213-01A0 Cisco und das Cisco Logo sind Marken oder eingetragene Marken von Cisco und/oder Partnerunternehmen in den USA und anderen Ländern. Eine Liste der Marken von Cisco finden Sie unter dieser URL: www.cisco.com/go/trademarks. Die genannten Marken anderer Anbieter sind Eigentum der jeweiligen Inhaber. Die Verwendung des Worts „Partner“ impliziert keine gesellschaftsrechtliche Beziehung zwischen Cisco und einem anderen Unternehmen.
- Página 39 Guía de inicio rápido Switches administrados Cisco serie 350...
- Página 40 Bienvenido Gracias por elegir los switches administrados Cisco de la serie 350. Estos switches se diseñaron y configuraron de fábrica para funcionar como switches estándares de capa 2 y 3. En la configuración predeterminada, su switch reenvía paquetes entre los dispositivos de conexión tras el encendido.
- Página 41 • Instalar el switch montado en un bastidor estándar (una unidad de bastidor de alto). • Muchos de los switches Cisco de la serie 350 incluyen ranuras para montaje en pared en la parte inferior del dispositivo. Consejos para la colocación No implemente el switch en una ubicación donde exista alguna de las...
- Página 42 Repita el paso anterior para conectar el otro soporte en el lado opuesto del switch. Después de fijar los soportes en forma segura, el switch estará listo para instalarse en un rack estándar de 19 in. Switches administrados Cisco serie 350...
- Página 43 Montaje en pared La mayoría de los switches Cisco de la serie 350 incluyen ranuras para montaje en pared en la parte inferior del dispositivo. Un montaje poco firme puede dañar el dispositivo o DVERTENCIA provocar lesiones. Cisco no se responsabiliza por los daños ocasionados por un montaje inseguro en la pared o el techo.
- Página 44 25, 26, 27, 28 SF350-48MP 740 vatios 1–48 802.3af/at *PoE de 60 vatios: 4-pair PoE puertos 1, 2, 3, 4, 25, 26, 27, 28 SG350-10P 62 vatios 802.3af/at SG350-10MP 128 vatios 802.3af/at SG355-10P 62 vatios 802.3af/at Switches administrados Cisco serie 350...
- Página 45 4-pair PoE puertos 1, 2, 3, 4, 25, 26, 27, 28 SG350-8PD 124 vatios 802.3af/at *PoE de 60 vatios extiende la norma de alimentación por Ethernet Plus para duplicar la alimentación por puerto a 60 vatios. Switches administrados Cisco serie 350...
- Página 46 IP mediante la interfaz basada en la Web, o con la interfaz de línea de comandos del switch a través del puerto de la consola. Para usar el puerto de la consola se requieren habilidades de usuario avanzado. Switches administrados Cisco serie 350...
- Página 47 DHCP esté en funcionamiento y que pueda acceder a él desde el switch y la computadora. Es posible que deba desconectar y volver a conectar los dispositivos para que detecten las nuevas direcciones IP del servidor DHCP. Switches administrados Cisco serie 350...
- Página 48 Web e ingrese el nombre de usuario y la contraseña. El nombre de usuario predeterminado es cisco y La contraseña predeterminada es cisco. Los nombres de usuario y las contraseñas distinguen entre mayúsculas y minúsculas.
- Página 49 Ingrese un nombre de usuario y una contraseña. El nombre de usuario predeterminado es cisco y la contraseña predeterminada es cisco. Los nombres de usuario y las contraseñas distinguen entre mayúsculas y minúsculas. Si es la primera vez que inicia sesión con el nombre de usuario y la contraseña predeterminados, aparece el siguiente mensaje:...
- Página 50 Si esto no se realiza, es posible que muchos switches utilicen la misma dirección IP predeterminada de fábrica 192.168.1.254. Funciones de los switches Cisco Serie 350 En esta sección se describe el exterior del switch para permitirle familiarizarse con su switch.
- Página 51 SYSLOG a través del dispositivo USB conectado. Puertos Ethernet RJ-45: los puertos Ethernet RJ-45 conectan dispositivos de red, como computadoras, impresoras y puntos de acceso, al switch. Switches administrados Cisco serie 350...
- Página 52 100 Mbps, 1 Gbps y 2,5 Gbps, en cables de categoría 5e. La mayoría del cableado implementado a nivel mundial se limita a 1 Gbps cada 100 metros. El Ethernet Multigigabit de Cisco permite velocidades de hasta 2,5 Gbps en la misma infraestructura sin reemplazar un cable.
- Página 53 • Para restaurar el switch a los valores predeterminados de fábrica: – Desconecte el switch de la red o desactive todos los servidores DHCP de la red. – Con el dispositivo encendido, mantenga presionado el botón Reset (Restablecer) durante al menos diez segundos. Switches administrados Cisco serie 350...
- Página 54 Para obtener más información, consulte Panel frontal. • Revise los conectores del cable Ethernet para asegurarse de que estén firmemente conectados al switch y a la computadora. • Use un puerto o un cable Ethernet diferente. Switches administrados Cisco serie 350...
- Página 55 • Asegúrese de estar usando la dirección IP correcta del switch. Determine la dirección IP actual del switch desde la CLI a través del puerto de la consola, Cisco FindIT o desde el administrador de red. El indicador LED del sistema proporciona una indicación de la ubicación desde donde el switch recibió...
- Página 56 Pública General/Reducida de GNU), envíe su solicitud a: externalopensource- requests@cisco.com En sus solicitudes, incluya el nombre del producto de Cisco, la versión y el número de referencia de 18 dígitos (por ejemplo: 7XEEX17D99-3X49X081) que figura en la documentación del código abierto del producto.
- Página 57 Este es un producto de clase A. En un entorno doméstico, DVERTENCIA este producto puede causar radiointerferencias, en cuyo caso el usuario deberá adoptar las medidas adecuadas. Switches administrados Cisco serie 350...
- Página 58 78-101213-01A0 Cisco y el logo de Cisco son marcas o marcas registradas de Cisco y/o sus filiales en los EE. UU. y otros países. Para ver una lista de las marcas de Cisco, visite la siguiente dirección URL: www.cisco.com/go/trademarks. Las marcas de terceros mencionadas son propiedad de sus respectivos dueños.
- Página 59 Guide de démarrage rapide Commutateurs administrables Cisco 350...
- Página 60 Bienvenue Merci d'avoir choisi les commutateurs administrables Cisco 350. Ces appareils sont conçus pour être immédiatement opérationnels en tant que commutateurs standard de couche 2 et 3. Dans sa configuration par défaut, votre commutateur transfère des paquets entre des appareils connectés après sa mise sous tension.
- Página 61 • Température ambiante : pour éviter toute surchauffe de l'appareil, n'installez pas le commutateur dans une zone dont la température ambiante dépasse 50 °C (122 °F). • Ventilation : vérifiez que l'air circule librement autour du commutateur. Commutateurs administrables Cisco 350...
- Página 62 à l'aide des quatre vis fournies. Renouvelez cette étape pour fixer l'autre support sur le côté É TAPE opposé du commutateur. Lorsque les supports sont correctement fixés, vous pouvez É TAPE installer le commutateur dans un rack standard de 19 pouces. Commutateurs administrables Cisco 350...
- Página 63 Montage mural Sur la plupart des commutateurs Cisco 350 se trouvent des encoches de montage mural au bas des appareils. Tout montage non conforme peut endommager l'appareil ou TTENTION entraîner des blessures. Cisco ne peut en aucun cas être tenu responsable de tout dommage découlant d'un montage mural...
- Página 64 Le commutateur ne doit être relié qu'à des réseaux PoE sans TTENTION branchement sur secteur. Si votre commutateur est un modèle alimenté par câble Ethernet (PoE), prenez en considération les éléments suivants : Commutateurs Cisco 350 avec alimentation PoE Modèle Puissance Nombre de ports Norme PoE prise en dédiée au...
- Página 65 Commutateurs Cisco 350 avec alimentation PoE Modèle Puissance Nombre de ports Norme PoE prise en dédiée au prenant en charge charge le PoE SF350-48MP 740 watts 1 à 48 802.3af/at *PoE 60 watts : PoE 4 paires ports 1, 2, 3, 4, 25,...
- Página 66 Avant de commencer Pour administrer le commutateur, vous pouvez utiliser soit l'interface Web via votre réseau IP, soit l'interface de ligne de commande du commutateur via le port de console. L'utilisation de ce port nécessite des connaissances avancées. Commutateurs administrables Cisco 350...
- Página 67 DHCP est en cours d'exécution et qu'il peut être atteint depuis le commutateur et l'ordinateur. Vous devrez peut-être débrancher et rebrancher les périphériques pour qu'ils puissent détecter leur nouvelle adresse IP à partir du serveur DHCP. Commutateurs administrables Cisco 350...
- Página 68 Web, puis saisissez le nom d'utilisateur et le mot de passe. Le nom d'utilisateur par défaut est cisco. Le mot de passe par défaut est cisco. Ils sont tous les deux sensibles à la casse.
- Página 69 Saisissez un nom d'utilisateur et un mot de passe. Le nom É TAPE d'utilisateur par défaut est cisco, tout comme le mot de passe par défaut. Ils sont tous les deux sensibles à la casse. S'il s'agit de votre première connexion à l'aide du nom d'utilisateur et du mot de passe par défaut, un message semblable au suivant...
- Página 70 IP statique et le masque de sous-réseau en fonction de la topologie de votre réseau. Faute de quoi, l'adresse IP par défaut 192.168.1.254 risque d'être utilisée par plusieurs commutateurs. Fonctionnalités des commutateurs Cisco de la Gamme350 Cette section permet de vous familiariser avec le commutateur. Elle comprend une description des éléments externes du commutateur.
- Página 71 Commutateur administrable PoE à 10 ports Gigabit SG350-8PD Commutateur administrable PoE à 8 ports 2,5 G Panneau avant Les ports, les voyants et le bouton de réinitialisation sont situés sur le panneau avant du commutateur (voir illustrations suivantes). SF350-48MP SG350-8PD SG355-10P Commutateurs administrables Cisco 350...
- Página 72 5e. La plupart des câbles déployés dans le monde sont limités à 1 Gbit/s au bout de 100 mètres de câble. L'Ethernet multigigabit Cisco permet d'atteindre des débits de 2,5 Gbit/s sur ce type d'infrastructure, sans avoir à remplacer les câbles.
- Página 73 • Pour restaurer les paramètres d'usine par défaut : – Déconnectez le commutateur ou désactivez tous les serveurs DHCP du réseau. – Une fois l'appareil sous tension, appuyez sur le bouton de réinitialisation et maintenez-le enfoncé pendant plus de 10 secondes. Commutateurs administrables Cisco 350...
- Página 74 à la section Panneau avant. • Vérifiez les connecteurs du câble Ethernet pour vous assurer qu'ils sont bien branchés au niveau du commutateur et de votre ordinateur. • Utilisez un câble Ethernet ou un port différent. Commutateurs administrables Cisco 350...
- Página 75 • Assurez-vous que l'utilitaire pour port de console est configuré avec les paramètres appropriés. Problèmes d'adressage IP. • Les commutateurs Cisco sont également accessibles à partir de l'utilitaire Cisco FindIT Network Discovery, qui vous permet de trouver automatiquement tous les appareils Cisco Small Business pris en charge dans le même segment du réseau local que votre ordinateur.
- Página 76 à l'adresse : externalopensource- requests@cisco.com N'oubliez pas de préciser le nom de votre produit Cisco, sa version, ainsi que son numéro de référence à 18 chiffres (par exemple : 7XEEX17D99-3X49X081) que vous trouverez dans la documentation open source du produit.
- Página 77 Il s'agit d'un produit de classe A. Chez les particuliers, il peut TTENTION générer des interférences radio. Dans ce cas, l'utilisateur devra prendre les mesures nécessaires. Commutateurs administrables Cisco 350...
- Página 78 78-101213-01A0 Cisco et le logo Cisco sont des marques commerciales ou déposées de Cisco et/ou de ses filiales aux États-Unis et dans d’autres pays. Pour consulter la liste des marques commerciales de Cisco, rendez-vous sur : www.cisco.com/go/trademarks. Les autres marques commerciales mentionnées dans ce document sont la propriété...
- Página 79 Краткое руководство по началу работы Управляемые коммутаторы Cisco серии 350...
- Página 80 Добро пожаловать! Благодарим за выбор коммутаторов Cisco Smart серии 350! Эти устройства поставляются готовыми к эксплуатации как стандартные коммутаторы уровней 2 и 3. В конфигурации по умолчанию коммутатор начинает пересылать пакеты между подключенными устройствами сразу после включения. В данном руководстве представлена схема коммутатора и процедура его...
- Página 81 коммутатор на столе, закрепите четыре резиновые ножки (входят в комплект поставки) на днище коммутатора. • Монтировать коммутатор в стандартной стойке (высотой 1 RU). • У многих коммутаторов Cisco серии 350 на днище имеются пазы для настенного крепления. Советы по размещению...
- Página 82 кронштейнов совпали с отверстиями для винтов, затем закрепите четырьмя винтами из комплекта. Повторите предыдущий шаг, чтобы закрепить другой кронштейн Ш АГ на противоположной стороне коммутатора. Коммутатор с прикрепленными кронштейнами готов к установке Ш АГ в стандартную 19-дюймовую стойку. Управляемые коммутаторы Cisco серии 350...
- Página 83 Настенный монтаж У большинства коммутаторов Cisco серии 350 на днище имеются пазы для настенного крепления. Ненадежный монтаж может привести к повреждению П РЕДУПРЕЖДЕНИЕ устройства или травме. Cisco не несет ответственности за ущерб в результате непрочного крепления устройства к стене или потолку.
- Página 84 1–24 802.3af/at * Порты PoE 4-pair PoE мощностью 60 Вт: 1, 2, 13, 14. SF350-48P 382 Вт 1–48 802.3af/at * Порты PoE 4-pair PoE мощностью 60 Вт: 1, 2, 3, 4, 25, 26, 27, 28. Управляемые коммутаторы Cisco серии 350...
- Página 85 1, 2, 3, 4, 25, 26, 27, 28. SG350-8PD 124 Вт 1–8 802.3af/at * PoE мощностью 60 Вт расширяет возможности стандарта IEEE PoE Plus, увеличивая мощность PoE на один порт в два раза до 60 Вт. Управляемые коммутаторы Cisco серии 350...
- Página 86 в сеть питающее устройство, а затем подключить его к коммутатору PoE. Если устройство по ошибке распознано как питаемое, следует отключить его от порта PoE, затем отключить и снова подключить устройство к сети переменного тока и после этого заново подключить к портам PoE. Управляемые коммутаторы Cisco серии 350...
- Página 87 в браузере для использования веб-интерфейса. При управлении коммутатором через подключение к порту консоли соединение сохраняется. Чтобы настроить коммутатор через веб-интерфейс, сделайте следующее. Включите компьютер и коммутатор. Ш АГ Подключите компьютер к любому сетевому порту. Ш АГ Управляемые коммутаторы Cisco серии 350...
- Página 88 Когда откроется страница входа, выберите язык веб-интерфейса Ш АГ и введите имя пользователя и пароль. Имя пользователя по умолчанию — cisco. Пароль по умолчанию — cisco. Имена пользователей и пароли вводятся с учетом регистра. Щелкните Log In (Вход в систему).
- Página 89 Введите имя пользователя и пароль. Имя пользователя по Ш АГ умолчанию — cisco, пароль по умолчанию — cisco. Имена пользователей и пароли вводятся с учетом регистра. При первом входе в систему с именем пользователя и паролем по умолчанию появятся следующие сообщения.
- Página 90 SF350-48P Управляемый коммутатор с 48 портами 10/100 SF352-08 Управляемый коммутатор с 8 портами 10/100 SF352-08MP Управляемый коммутатор с 8 портами 10/100 SF352-08P Управляемый коммутатор с 8 портами 10/100 SG350-10 Управляемый коммутатор с 10 портами Gigabit Управляемые коммутаторы Cisco серии 350...
- Página 91 Управляемый коммутатор с 10 портами Gigabit SG350-8PD Управляемый коммутатор с 8 портами 2,5 Гбит/с, с PoE Передняя панель Порты, светодиодные индикаторы и кнопка Reset расположены на передней панели коммутатора так, как показано на приведенных иллюстрациях. SF350-48MP SG350-8PD Управляемые коммутаторы Cisco серии 350...
- Página 92 кабелям категории 5e. Большинство сетевых подключений сегодня ограничены скоростью 1 Гбит/с и расстоянием 100 м. Мультигигабитная технология Cisco Multigigabit Ethernet поднимает скорость передачи до 2,5 Гбит/с в той же инфраструктуре без замены кабелей. Порты PoE мощностью 60 Вт — отмечены желтым. Эти порты...
- Página 93 Восстановление заводских настроек по умолчанию Чтобы воспользоваться кнопкой Reset для перезагрузки или изменения параметров, сделайте следующее. • Чтобы перезагрузить коммутатор, удерживайте нажатой кнопку Reset менее 10 с. • Чтобы восстановить заводские настройки коммутатора по умолчанию, сделайте следующее. Управляемые коммутаторы Cisco серии 350...
- Página 94 • Проверьте правильность показаний светодиодных индикаторов. Подробные сведения см. в разделе Передняя панель. • Проверьте разъемы кабеля Ethernet: они должны быть надежно вставлены в гнезда на коммутаторе и вашем компьютере. • Используйте другой кабель или порт Ethernet. Управляемые коммутаторы Cisco серии 350...
- Página 95 • Проверьте правильность параметров, настроенных в утилите порта консоли. Проблемы с IP-адресацией • К коммутаторам Cisco можно также получить доступ с помощью утилиты сетевого обнаружения Cisco FindIT, которая автоматически обнаруживает все устройства Cisco для малого бизнеса в том сегменте локальной сети, где находится ваш компьютер. Вы можете...
- Página 96 3X49X081), который можно найти в документации по открытому исходному коду продукта. Портал Cisco Partner www.cisco.com/web/partners/sell/smb Central (необходима учетная запись партнера) Документация по продуктам Серия 350 www.cisco.com/go/350switches Информация www.cisco.com/en/US/docs/switches/lan/ о безопасности csb_switching_general/rcsi/Switch_RCSI.pdf и соответствии нормативным требованиям Гарантийные www.cisco-warrantyfinder.com обязательства Управляемые коммутаторы Cisco серии 350...
- Página 97 Это продукт класса А. В жилых помещениях данный П РЕДУПРЕЖДЕНИЕ продукт может стать причиной радиопомех. В этом случае от пользователя может потребоваться принять надлежащие меры. Управляемые коммутаторы Cisco серии 350...
- Página 98 15 A, 125 Vac, or 10A, 240 Vac Statement 1008—Class 1 Laser Product Statement 1009—Laser Radiation Statement 1010—Staring into Laser Beam Statement 1011—Staring into Laser Beam Statement 1012—Laser Beam Exposure Statement 1013—Avoid Radiation Statement 1014—Laser Radiation Управляемые коммутаторы Cisco серии 350...
- Página 99 Statement 1016—Invisible Laser Radiation Statement 1019—Main Disconnecting Device Statement 1021—SELV Circuit Statement 1022—Disconnect Device Statement 1027—Class 1 LED Product Statement 1040—Product Disposal Statement 1047—Overheating Prevention Statement 1051—Laser Radiation Statement 1053—Class 1M Laser Radition Управляемые коммутаторы Cisco серии 350...
- Página 100 Statement 1054—Laser Viewing Statement 1055—Class I and Class 1M Laser Statement 1056—Unterminated Fiber Cable Statement 1057—Hazardous Radiation Exposure Statement 1074—Comply with Local and National Electrical Codes Statement 1086—Power Terminals, Replace Cover Управляемые коммутаторы Cisco серии 350...
- Página 101 упаковке в крытых транспортных средствах любым видом транспорта. • Правила и условия реализации оборудования определяются условиями договоров, заключаемых компанией Cisco или авторизованными партнерами Cisco c покупателями оборудования. • Утилизация этого изделия по завершении его срока службы должна выполняться в соответствии с требованиями всех государственных...
- Página 102 обнаружении неисправности технического средства В случае обнаружения неисправности технического средства, а также для принятия претензий к качеству оборудования обратитесь в компанию, у которой приобретен данный продукт. Кроме того информацию о технической поддержке Cisco можно получить на официальном веб-сайте Cisco: http://www.cisco.com/cisco/web/RU/ support/index.html.
- Página 103 затем наберите остальные цифры; наберите PIN 800 721 75 49). При наличии действующего контракта на сервисную поддержку в Службе поддержки Cisco Technical Assistance Center (TAC) обратитесь в службу технической поддержки по телефону +7 495 961 13 82 (Москва), (8 800) 700 05 22 (Россия) — меню...
- Página 104 изготовителем лица ООО «Сиско Системс» Адрес местонахождения: 115054, г. Москва, Космодамианская наб., 52, стр. 1. Телефон: (495) 961 14 10. E-mail: rus-cert@cisco.com. Cохраните упаковку и этикетку. В случае, если упаковка утрачена, повреждена или на ней отсутствует информация об Импортере или...
- Página 105 Управляемые коммутаторы Cisco серии 350...
- Página 106 Управляемые коммутаторы Cisco серии 350...
- Página 107 Управляемые коммутаторы Cisco серии 350...
- Página 108 78-101213-01A0 Cisco и логотип Cisco являются товарными знаками или зарегистрированными товарными знаками корпорации Cisco и/или ее дочерних компаний в США и других странах. Чтобы просмотреть список товарных знаков Cisco, перейдите по ссылке: www.cisco.com/go/ trademarks. Товарные знаки сторонних организаций, упомянутые в настоящем документе, являются...