Hotpoint Ariston FHS 83 C IX/HA S Manual De Instrucciones
Ocultar thumbs
Ver también para FHS 83 C IX/HA S:
- Instrucciones de uso (68 páginas) ,
- Instrucciones de uso (68 páginas)
Publicidad
Idiomas disponibles
Idiomas disponibles
Enlaces rápidos
FHS 83 C IX/HA S
FH 83 IX/HA S
Italiano
Istruzioni per l'uso
FORNO
Sommario
Istruzioni per l'uso,1
Avvertenze,3
Assistenza,7
Descrizione dell'apparecchio,9
Descrizione dell'apparecchio,11
Installazione,13
Avvio e utilizzo,15
Il programmmatore di cottura elettronico,15
Programmi,16
Precauzioni e consigli,18
Manutenzione e cura,19
English
Operating Instructions
OVEN
Contents
Operating Instructions,1
Warnings,3
Assistance,7
Description of the appliance,9
Description of the appliance,11
Installation,20
Start-up and use,22
The electronic programmer,22
Cooking modes,23
Precautions and tips,25
Maintenance and care,26
Français
Mode d'emploi
FOUR
Sommaire
Mode d'emploi,1
Avertissements,4
Assistance,7
Description de l'appareil,9
Description de l'appareil,11
Installation,27
Mise en marche et utilisation,29
Le programmateur électronique,29
Programmes,30
Précautions et conseils,32
Nettoyage et entretien,33
Español
Manual de instrucciones
HORNO
Sumario
Manual de instrucciones,1
Advertencias,4
Asistencia,7
Descripción del aparato,9
Descripción del aparato,11
Instalación,34
Puesta en funcionamiento y uso,36
El programador electrónico,36
Programas,37
Precauciones y consejos,39
Mantenimiento y cuidados,40
Portuges
Instruções para a utilização
FORNO
Índice
Instruções para a utilização,1
Advertências,5
Assistência,8
Descrição do aparelho,9
Descrição do aparelho,12
Instalação,41
Início e utilização,43
O programador electrónico,43
Programas,44
Precauções e conselhos,46
Manutenção e cuidados,47
Publicidad

Manuales relacionados para Hotpoint Ariston FHS 83 C IX/HA S


Resumen de contenidos para Hotpoint Ariston FHS 83 C IX/HA S
- Página 1 FHS 83 C IX/HA S FH 83 IX/HA S Français Mode d’emploi FOUR Sommaire Mode d’emploi,1 Avertissements,4 Assistance,7 Description de l’appareil,9 Description de l’appareil,11 Installation,27 Mise en marche et utilisation,29 Le programmateur électronique,29 Programmes,30 Précautions et conseils,32 Nettoyage et entretien,33 Italiano Español...
- Página 2 Deutsch Bedienungsanleitung BACKOFEN Inhaltsverzeichnis Bedienungsanleitung,2 Hinweise,5 Kundendienst,8 Beschreibung Ihres Gerätes,10 Beschreibung Ihres Gerätes,12 Installation,48 Inbetriebsetzung und Gebrauch,50 Der elektronische Garzeitprogrammierer,50 Programme,51 Vorsichtsmaßregeln und Hinweise,53 Reinigung und Pflege,54 Nederlands Gebruiksaanwijzing OVEN Inhoud Gebruiksaanwijzing,2 Belangrijk,6 Service,8 Beschrijving van het apparaat,10 Beschrijving van het apparaat,12 Het installeren,55 Starten en gebruik,57 Elektronische programmering,57...
- Página 3 Avvertenze Warnings ATTENZIONE: Questo apparecchio e le sue parti WARNING: The appliance and its accessible parts accessibili diventano molto caldi durante l’uso. become hot during use. Care should be taken to Bisogna fare attenzione ed evitare di toccare gli avoid touching heating elements. Children less than 8 elementi riscaldanti.
- Página 4 Avertissements Advertencias ATTENTION : Cet appareil ainsi que ses parties ATENCIÓN: Este aparato y sus partes accesibles se accessibles deviennent très chauds pendant leur vuelven muy calientes durante el uso. Por lo tanto, es fonctionnement. Il faut faire attention à ne pas toucher importante evitar tocar los elementos calentadores.
- Página 5 Advertências Hinweise ATENÇÃO: Este aparelho e as suas partes ZUR BEACHTUNG: Bei Gebrauch wird dieses acessíveis aquecem muito durante a utilização. Gerät und alle zugänglichen Teile sehr heiß. É preciso ter atenção e evitar tocar os elementos Es ist darauf zu achten, dass die Heizelemente que aquecem.
- Página 6 Предупреждения Belangrijk ВНИМАНИЕ: Данное изделие и его доступные PAS OP: Dit apparaat en zijn bereikbare onderdelen комплектующие сильно нагреваются в процессе worden tijdens gebruik zeer heet. Zorg ervoor de эксплуатации. verwarmende elementen niet aan te raken. Zorg Будьте осторожны и не касайтесь нагревательных ervoor dat kinderen die kleiner dan 8 jaar oud zijn элементов.
- Página 7 Assistenza Assistance ! Non ricorrere mai a tecnici non autorizzati. ! Never use the services of an unauthorised technician. Comunicare: Please have the following information to hand: • Il tipo di anomalia; • The type of problem encountered. • Il modello della macchina (Mod.) •...
- Página 8 En el SAT encontrará recambios, accesorios y productos específicos para la limpieza y mantenimiento de su electrodoméstico a precios competitivos. ESTAMOS A SU SERVICIO Сервисное обслуживание ! Никогда не обращайтесь к неуполномоченным техникам. При обращении в Центр Технического обслуживания сообщите: Assistência •...
- Página 9 Descrizione dell’apparecchio Descripción del aparato Vista d’insieme Vista en conjunto 1 POSIzIONE 1 1 POSICIóN 1 2 POSIzIONE 2 2 POSICIóN 2 3 POSIzIONE 3 3 POSICIóN 3 4 POSIzIONE 4 4 POSICIóN 4 5 POSIzIONE 5 5 POSICIóN 5 6 GUIDE di scorrimento dei ripiani 6 GUÍAS de deslizamiento de las bandejas 7 Ripiano LECCARDA...
- Página 10 Beschreibung Ihres Gerätes Geräteansicht 1 EINSCHUBHöHE 1 2 EINSCHUBHöHE 2 3 EINSCHUBHöHE 3 4 EINSCHUBHöHE 4 5 EINSCHUBHöHE 5 6 GLEITFÜHRUNGEN für die Einschübe 7 Einschub FETTPFANNE 8 Einschub BACKOFENROST 9 Bedienfeld Beschrijving van het apparaat Algemeen aanzicht 1 POSITIE 1 2 POSITIE 2 3 POSITIE 3 4 POSITIE 4...
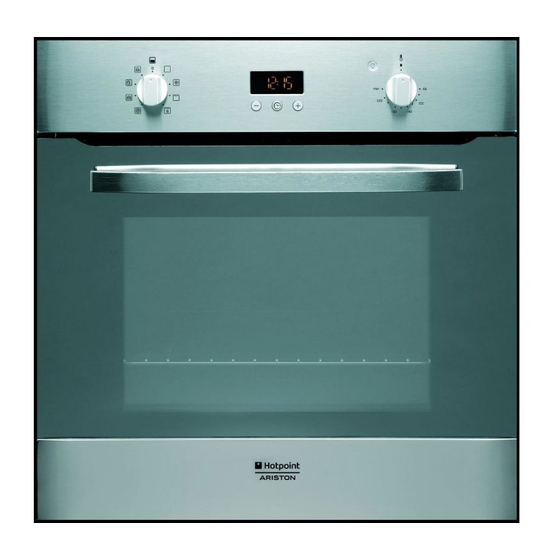
- Página 11 Descrizione dell’apparecchio Pannello di controllo 1 Spia TERMOSTATO 2 Manopola PROGRAMMI 3 Programmatore ELETTRONICO 4 Manopola TERMOSTATO Description of the appliance Control panel 1 THERMOSTAT indicator light 2 SELECTOR knob 3 ELECTRONIC programmer 4 THERMOSTAT knob Description de l’appareil Tableau de bord 1 Voyant THERMOSTAT 2 Bouton PROGRAMMES 3 Programmateur ELECTRONIQUE...
- Página 12 Descrição do aparelho Painel de comandos 1 Indicador luminoso TERMOSTATO 2 Selector PROGRAMAS 3 Programador ELECTRóNICO 4 Selector do TERMóSTATO Beschreibung Ihres Gerätes Bedienfeld 1 Kontrollleuchte THERMOSTAT 2 Drehknopf PROGRAMME 3 ELEKTRONISCHER Pogrammierer 4 Drehknopf THERMOSTAT Beschrijving van het apparaat Bedieningspaneel 1 Controlelampje THERMOSTAAT 2 Knop PROGRAMMA’S...
- Página 13 Centraggio e fissaggio Installazione Per fissare l’apparecchio al mobile: aprire la porta del forno e avvitare 4 viti a legno nei 4 fori posti sulla cornice perimetrale. ! È importante conservare questo libretto per poterlo consultare in ogni momento. In caso di vendita, di cessione o di trasloco, assicurarsi che resti insieme all’apparecchio per informare il nuovo proprietario sul funzionamento e sui relativi avvertimenti.
- Página 14 Prima di effettuare l’allacciamento accertarsi che: TARGHETTA CARATTERISTICHE • la presa abbia la messa a terra e sia a norma di legge; • la presa sia in grado di sopportare il carico massimo di potenza della larghezza cm 43,5 Dimensioni* macchina, indicato nella targhetta caratteristiche (vedi sotto);...
- Página 15 Avvio e utilizzo Il programmmatore di cottura elettronico ATTENZIONE ! Il forno è dotato di un sistema di arresto griglie che consente di estrarle senza che queste fuoriescano dal forno. (1) DISPLAY Per estrarre completamente le griglie è sufficiente, come indicato Icona Icona ••...
- Página 16 Programmare la fine di una cottura ! La programmazione della fine di una cottura è possibile solo dopo aver Programma MULTICOTTURA Si attivano tutti gli elementi riscaldanti (superiore e inferiore) ed entra in impostato una durata di cottura. funzione la ventola. Poiché il calore è costante in tutto il forno, l’aria cuoce e rosola il cibo in modo uniforme.
- Página 17 Tabella cottura Programmi Alimenti Peso Posizione Preriscaldamento Temperatura Durata (Kg) dei ripiani (minuti) consigliata cottura (minuti) Lievitazione degli impasti con lievito naturale Lievitazione (brioche, pane, torta allo zucchero, croissant, ecc.) Anatra 65-75 Arrosto di vitello o manzo 70-75 Forno Arrosto di maiale 70-80 Tradizionale Biscotti (di frolla)
- Página 18 Precauzioni e consigli Quando si acquista una nuova apparecchiatura equivalente si può consegnare il RAEE al negoziante, che è tenuto a ritirarlo gratuitamente; i RAEE di “piccolissime dimensioni” (nessun lato sopra i 25 cm) possono ! L’apparecchio è stato progettato e costruito in conformità alle norme essere consegnati gratuitamente ai negozianti anche se non si acquista internazionali di sicurezza.
- Página 19 Manutenzione e cura Sostituire la lampadina Per sostituire la lampadina di Escludere la corrente elettrica illuminazione del forno Prima di ogni operazione isolare l’apparecchio dalla rete di alimentazione 1. Svitare il coperchio in vetro del elettrica. portalampada. 2. Svitare la lampadina e sostituirla Pulire l’apparecchio con una analoga: potenza 25 W, •...
- Página 20 Centring and fixing Installation Secure the appliance to the cabinet by opening the oven door and inserting 4 screws into the 4 holes on the outer frame. ! Please keep this instruction booklet in a safe place for future reference. If the appliance is sold, given away or moved, please make sure the booklet is also passed on to the new owners so that they may benefit from the advice contained within it.
- Página 21 Before connecting the appliance to the power supply, make sure that APPLIANCE SPECIFICATIONS • The appliance is earthed and the plug is compliant with the law. • The socket can withstand the maximum power of the appliance, which is width 43,5 cm Dimensions* height 32,4 cm indicated on the data plate.
- Página 22 Start-up and use The electronic programmer WARNING! The oven is provided DISPLAY with a stop system to extract the racks and prevent them from coming out of the oven (1). END OF CLOCK icon COOKING icon As shown in the drawing, to extract DURATION them completely, simply lift the TIMER icon...
- Página 23 Setting the end time for a cooking mode MULTI-COOKING mode ! A cooking duration must be set before the cooking end time can be scheduled. All the heating elements (top, bottom and circular), as well as the fan, will come on.
- Página 24 Cooking advice table Cooking Foods Weight Rack Position Pre-heating Recommended Cooking modes (in kg) time temperature time (minutes) (minutes) Leavening process of dough made with Leavening yeast or baking powder (brioches, bread, sugar pie, croissants, etc.) Duck 65-75 Roast veal or beef 70-75 Traditional Pork roast...
- Página 25 Precautions and tips The crossed out “wheeled bin” symbol on the product reminds you of your obligation, that when you dispose of the appliance it must be separately collected. ! This appliance has been designed and manufactured in compliance with Consumers should contact their local authority or retailer for information international safety standards.
- Página 26 Maintenance and care Replacing the light bulb To replace the oven light bulb: Switching the appliance off 1. Remove the glass cover of the Disconnect your appliance from the electricity supply before carrying out lamp-holder. any work on it. 2. Remove the light bulb and replace it with a similar one: Wattage 25 W, Cleaning the appliance cap E 14.
- Página 27 Centrage et fixation Installation Pour fixer l’appareil au meuble : ouvrir la porte du four et visser 4 vis à bois dans les 4 trous du cadre. ! Conservez ce mode d’emploi pour pouvoir le consulter à tout moment. En cas de vente, de cession ou de déménagement, veillez à ce qu’il suive l’appareil pour informer le nouveau propriétaire sur son fonctionnement et lui fournir les conseils correspondants.
- Página 28 Avant de procéder au branchement, assurez-vous que : PLAQUE SIGNALETIQUE • la prise est bien munie d’une terre conforme à la loi; • la prise est bien apte à supporter la puissance maximale de l’appareil, largeur 43,5 cm Dimensions* indiquée sur la plaquette signalétique; hauteur 32,4 cm •...
- Página 29 Mise en marche et utilisation Le programmateur électronique ATTENTION ! Le four est équipé d’un système d’arrêts de grilles qui permet de les retirer sans que ces dernières sortent entièrement du four (1). •• •• Pour sortir complètement les grilles il suffit, comme illustré, de les soulever en les saisissant par l’avant et de les tirer (2).
- Página 30 Programmer la fin d’une cuisson ! La programmation d’une fin de cuisson n’est possible qu’après avoir Programme MULTICUISSON Mise en marche de toutes les résistances (sole, voûte et circulaire) ainsi sélectionné une durée de cuisson. que du ventilateur. La chaleur est constante et bien répartie à l’intérieur du 1.
- Página 31 Tableau de cuisson Programmes Aliments Poids Niveau Préchauffage Température Durée (Kg) enfournement (minutes) préconisée cuisson (minutes) Levage de pâtes à base de levure de étuve boulanger (brioches, pain, tarte au sucre, croissants, etc.) Canard 65-75 Rôti de veau ou de bœuf 70-75 Four Rôti de porc...
- Página 32 Précautions et conseils et réduire l’impact sur la santé humaine et l’environnement. Le symbole de la ‘‘poubelle barrée’’ est apposée sur tous les produits pour rappeler les obligations de collecte séparée. ! Cet appareil a été conçu et fabriqué conformément aux normes Les consommateurs pourront confier leur appareil usagé...
- Página 33 Nettoyage et entretien Remplacement de l’ampoule d’éclairage* Pour changer l’ampoule d’éclairage Mise hors tension du four: Avant toute opération de nettoyage ou d’entretien coupez l’alimentation 1. Dévissez le couvercle en verre du électrique de l’appareil. boîtier de la lampe. 2. Dévissez l’ampoule et remplacez- Nettoyage de l’appareil la par une autre de même type : •...
- Página 34 Centrado y fijación Instalación Para fijar el aparato al mueble: abra la puerta del horno y enrosque 4 tornillos para madera en los 4 orificios del marco. ! Es importante conservar este manual para poder consultarlo en todo momento. En caso de venta, de cesión o de mudanza, verifique que permanezca junto al aparato para informar al nuevo propietario sobre su funcionamiento y sobre las advertencias correspondientes.
- Página 35 Antes de efectuar la conexión verifique que: DATOS TÉCNICOS • la toma tenga conexión a tierra y que sea conforme con la ley; • la toma sea capaz de soportar la carga máxima de potencia de la máquina ancho 43,5 cm Dimensiones* indicada en la placa de características;...
- Página 36 Puesta en funcionamiento y uso El programador electrónico ATENCIÓN! El horno está dotado de un sistema de bloqueo de las parrillas que permite quitarlas sin que sobresalgan del horno (1). •• •• Para quitar completamente las parrillas, como se indica en el dibujo, es suficiente levantarlas cogiéndolas de la parte delantera y tirar (2).
- Página 37 Programar el final de una cocción ventilador ofreciendo un calor constante y uniforme. El programa no necesita ! La programación del final de una cocción es posible sólo después de haber precalentamiento. Este programa es particularmente indicado para cocciones fijado la duración de la cocción. veloces de alimentos congelados o precocidos.
- Página 38 Tabla de cocción Programas Alimentos Peso Posición de Precalenta- Temperatura Duración (Kg) los estantes miento aconsejada de la (minutos) cocción (minutos) Leudado de los amasijos con levadura Leudado natural (brioche, pan, torta de azúcar, croissant, etc. Pato 65-75 Asado de ternera o de vaca 70-75 Horno Asado de cerdo...
- Página 39 Precauciones y consejos tachado se marca sobre todos los productos para recordar al consumidor la obligación de separarlos para la recogida selectiva. El consumidor debe contactar con la autoridad local o con el vendedor para ! El aparato ha sido proyectado y fabricado en conformidad con las normas informarse en relación a la correcta eleminación de su electrodoméstico internacionales de seguridad.
- Página 40 Mantenimiento y cuidados Sustituir la bombilla Para sustituir la bombilla de Cortar la corriente eléctrica iluminación del horno: Antes de realizar cualquier operación, desconecte el aparato de la red de 1. Desenrosque la tapa de vidrio del alimentación eléctrica. portalámpara. 2.
- Página 41 Instalação Colocar no centro e prender Para prender o aparelho no móvel: abra a porta do forno e atarraxe 4 parafusos na madeira, nos 4 furos situados na moldura ao redor. ! É importante guardar este folheto para poder consultá-lo a qualquer momento.
- Página 42 Antes de efectuar a ligação, certifique-se que: PLACA DAS CARACTERÍSTICAS • a tomada tenha uma ligação à terra e seja em conformidade com a legislação; largura cm 43,5 • a tomada tenha a capacidade de suportar a carga máxima de potência Medidas altura cm 32,4 da máquina, indicada na placa de identificação;...
- Página 43 Início e utilização O programador electrónico ATENÇÃO! O forno está equipado com um sistema de bloqueio das grelhas que permite retirá-las sem que estas ressaiam do forno (1). •• •• Para retirar completamente as grelhas, tal como indicado no desenho, basta levantá-las, segurando-as pela parte da frente, e puxá-las (2).
- Página 44 Programar o fim de uma cozedura especificamente indicado para cozeduras rápidas de alimentos previamente ! A programação do fim da cozedura é possível somente depois de ter definido preparados (congelados ou previamente cozidos). Os melhores resultados uma duração para a cozedura. são obtidos se utilizar apenas uma prateleira.
- Página 45 Tabela de cozedura Programmas Alimentos Peso Posição das Pré Temperatura Duração (Kg) prateleiras aquecimento aconselhada (minutos) cozedura (minutos) Fermentação das massas com lêvedo Levitação natural (bolos, pão, tortas doces, croissant etc.) Pato 65-75 Carne de vitela ou vaca assada 70-75 Forno Carne de porco assada 70-80...
- Página 46 Precauções e conselhos para optimizar a taxa de recuperação e reciclagem dos materiais que os compõem e impedir potenciais danos à saúde e ao meio ambiente. O símbolo da lixeira cancelada está indicado em todos os produtos para ! Este aparelho foi projectado e fabricado em conformidade com as normas lembrar o dever de colecta selectiva.
- Página 47 Manutenção e cuidados Substituição da lâmpada Para substituir a lâmpada de Desligar a corrente eléctrica iluminação do forno: Antes de realizar qualquer operação, desligue o aparelho da alimentação 1. Desatarraxe a tampa em vidro do eléctrica. bocal da lâmpada. 2. Desenrosque a lâmpada e Limpeza do aparelho troque-a por outra análoga: potência •...
- Página 48 Installation zentrieren und Befestigen Befestigung des Gerätes am Möbel: Öffnen Sie die Backofentür und schrauben Sie die 4 Holzschrauben in die 4 im Backofenrahmen vorgesehenen Löcher ! Bewahren Sie diese Bedienungsanleitung bitte sorgfältig auf, damit Sie sie ein. jederzeit zu Rate ziehen können. Sorgen Sie dafür, dass sie im Falle eines Verkaufs, eines Umzugs oder einer Übergabe an einen anderen Benutzer das Gerät stets begleitet, damit auch der Nachbesitzer die Möglichkeit hat, darin nachschlagen zu können.
- Página 49 Vor dem Anschluss stellen Sie bitte sicher, dass: TYPENSCHILD • die Steckdose geerdet ist und den gesetzlichen Bestimmungen entspricht; • die Netzsteckdose für die auf dem Typenschild angegebene maximale Breite 43,5 cm Abmessungen* Höhe 32,4 cm Leistungsaufnahme des Gerätes ausgelegt ist; Tiefe 41,5 cm •...
- Página 50 Inbetriebsetzung und Gebrauch Der elektronische Garzeitprogrammierer ACHTUNG! Der Ofen ist mit einem Arretierungssystem der Roste ausgestattet. Damit lassen diese sich ausziehen, ohne aus dem Ofen hervorzustehen (1). Um die Roste komplett auszuziehen, •• •• braucht man sie nur, wie auf der Zeichnung zu sehen, vorne zu greifen und zu ziehen (2).
- Página 51 Um das Gerät anzuhalten drücken Sie eine beliebige Taste. • Beispiel: Es ist 9:00 Uhr und es wird eine Programmdauer von 1 Std. und Programm GEBäCK Das hintere Heizelement schaltet sich ein, und das Gebläse wird in Betrieb 15 Min. programmiert. Das Programm stoppt automatisch um 10:15 Uhr. genommen, wodurch eine äußerst schonende, im Backofen gleichmäßig verteilte Wärme gewährleistet wird.
- Página 52 GRILL PIZZA • Schieben Sie den Grillrost in die Position 3 oder 4 ein und geben Sie die • Verwenden Sie eine Leichtmetallform und stellen Sie diese direkt auf den zu garenden Speisen in die Mitte des Grillrostes. Rost. • Es empfiehlt sich, die höchste Energiestufe zu verwenden. Im Übrigen ist Bei Verwendung der Fettpfanne wird die Garzeit verlängert, und man wird es bei dieser Funktion völlig normal, dass das obere Heizelement nicht kaum eine knusprige Pizza erhalten.
- Página 53 Vorsichtsmaßregeln und Hinweise über den herkömmlichen Haushaltsmüllkreislauf entsorgt werden. Altgeräte müssen separat gesammelt werden, um die Wiederverwertung und das Recycling der beinhalteten Materialien zu optimieren und die ! Das Gerät wurde entsprechend den strengsten internationalen Einflüsse auf die Umwelt und die Gesundheit zu reduzieren. Das Symbol Sicherheitsvorschriften entworfen und gebaut.
- Página 54 Reinigung und Pflege Lampenaustausch Verfahren Sie zum Austausch der Abschalten Ihres Gerätes vom Stromnetz Backofenlampe wie folgt: Vor jeder Reinigung und Pflege ist das Gerät vom Stromnetz zu trennen. 1. Drehen Sie die Glasabdeckung der Lampenhalterung heraus. Reinigung Ihres Gerätes 2.
- Página 55 Het installeren Centreren en bevestigen Om het apparaat aan het keukenkastje te bevestigen: open de ovendeur en schroef de 4 houtschroeven in de 4 gaten in de zijrand. ! Bewaar dit boekje zorgvuldig voor eventuele verdere raadpleging. Wanneer u het product weggeeft, verkoopt, of wanneer u verhuist, dient u dit boekje bij het apparaat te bewaren zodat alle nodige informatie voorhanden blijft.
- Página 56 Voor het aansluiten moet u controleren dat: TYPEPLAATJE • het stopcontact geaard is en voldoet aan de geldende normen; • het stopcontact in staat is het maximale vermogen van het apparaat te breedte cm 43,5 dragen, zoals aangegeven op het typeplaatje; Afmetingen hoogte cm 32,4...
- Página 57 Starten en gebruik Elektronische programmering BELANGRIJK! De oven is uitgerust met een blokkeringssysteem voor DISPLAY de grill dat het mogelijk maakt om Symbool de gril naar buiten te trekken zonder EINDE Symbool dat deze buiten de oven komt (1). •• •• BEREIDING KLOK Om de grill volledig te verwijderen,...
- Página 58 ! Het programmeren van het einde van een bereiding is alleen mogelijk nadat / Programma MULTIKOKEN u een kookduur heeft geselecteerd. Alle verwarmingselementen gaan aan (onder, boven en cirkelvormig) en de 1. Volg de procedure van de duur van punt 1 t/m 3; ventilator gaat draaien.
- Página 59 Kooktabel Programma's Gerechten Gewicht Roosterstanden Voorverwar Aangeraden Kooktijd (kg) ming temperatuur (minuten) (minuten) Rijzen van deeg met bakkersgist Rijzen (brioches, brood, suikertaart, croissants, enz.) Eend 65-75 Braadstuk 70-75 Traditionele Varkensrollade 70-80 Oven Koekjes (kruimeldeeg) 15-20 Vruchtentaart 30-35 Taarten 20-30 Vruchtentaart 2 of 3 40-45 Plum-cake...
- Página 60 Voorzorgsmaatregelen en advies symbool op het product van de “afvalcontainer met een kruis erdoor” herinnert u aan uw verplichting, dat wanneer u het apparaat vernietigt, het apparaat apart moet worden ingezameld. Dit apparaat is ontworpen en vervaardigd volgens de geldende internationale Consumenten moeten contact opnemen met de locale autoriteiten voor veiligheidsvoorschriften.
- Página 61 Onderhoud en verzorging Vervangen van het lampje Voor het vervangen van het De elektrische stroom afsluiten ovenlampje: Sluit altijd eerst de stroom af voordat u tot enige handeling overgaat. 1. Schroef het glazen lampenkapje los. Schoonmaken van het apparaat 2. Schroef het lampje los en vervang •...
- Página 62 Установка ! Важно сохранить данное руководство для его последующих консультации. В случае продажи, передачи изделия или при переезде на новое место жительства необходимо проверить, чтобы руководство оставалось вместе с изделием, для того чтобы его новыи владелец мог ознакомиться с правилами эксплуатации и с соответствующими предупреждениями.
- Página 63 Подсоединение сетевого шнура изделия к сети электропитания ПАСПОРТНАЯ ТАБЛИЧКА Установите на сетевой кабель нормализованную штепсельную вилку, расчитанную на нагрузку, указанную на паспортной табличке (см. сбоку). ширина 43,5 см. Габаритные В случае прямого подключения к сети электропитания между изделием высота 32,4 см. размеры* и...
- Página 64 Включение и эксплуатация Электронный таймер программирования выпечки ВНИМАНИЕ! Духовой шкаф у к о м п л е к то ва н с и с те м о й б л о к и р о в к и р е ш е т о к , позволяющей...
- Página 65 Порядок программирования окончания выпечки Программа FAST COOKING (БЫСТРОе ПРиГОТОВление) ! Запрограммировать окончание выпечки можно только после настройки Включаются нагревательные элементы и вентилятор, обеспечивая ее продолжительности. постоянный и однородный жар. Программа не нуждается в предварительном нагреве духовки. Данная 1. Выполните операции с пункта 1 по пункт 3, в которых описывается программа...
- Página 66 ПИЦЦА • Используйте противень из легкого алюминия, устанавливая его на прилагающуюся решетку. При использовании противеня время выпечки удлиняется, что затрудняет получение хрустящей пиццы. • В случае выпечки пиццы с обильной начинкой рекомендуется положить на пиццу сыр моццарелла в середине выпечки. Таблица...
- Página 67 Предосторожности и рекомендации Утилизация • Уничтожение упаковочных материалов: соблюдаите местные нормативы с целью повторного использования упаковочных ! Изделие спроектировано и изготовлено в соответствии с материалов. международными нормативами по безопасности. Необходимо • Согласно Европеискои Директиве 2012/19/ЕU касательно утилизации внимательно прочитать настоящие предупреждения, составленные в электронных...
- Página 68 195123116.01 10/2014 - XEROX FABRIANO Техническое обслуживание и уход Проверка уплотнений Регулярно проверяйте состояние уплотнения вокруг дверцы духового шкафа. В случае повреждения уплотнения обращайтесь в ближайший Отключение электропитания Центр Сервисного Обслуживания (см. Сервисное обслуживание). Не Перед началом какой-либо операции по обслуживанию или чистке рекомендуется...