
Manuales relacionados para EVGA 80 Plus Serie


Resumen de contenidos para EVGA 80 Plus Serie
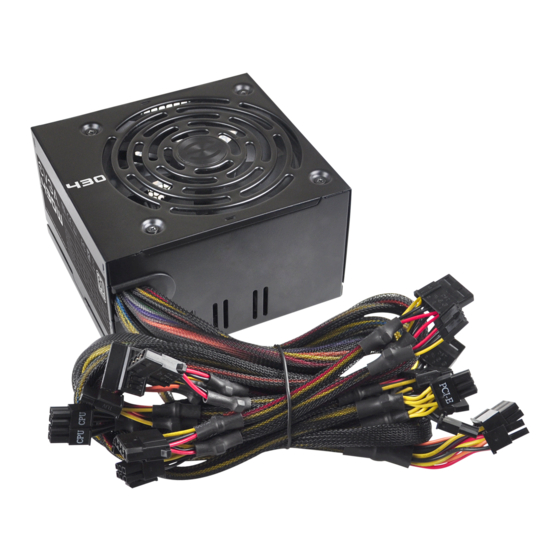
- Página 1 User Manual of Product 1: EVGA 500 W1, 80+ WHITE 500W Power Supply( 100-W1-0500-KR) User Manual of Product 2: Thermaltake Versa H18 Tempered Glass Black Spcc Micro ATX Gaming Computer Case CA-1J4-00S1WN-01...
- Página 3 This unit has no user-serviceable parts inside. Opening the casing presents a risk of electrocution and will void the warranty. EVGA will not be responsible for any result of improper use, use for which the product was not intended, or use inconsistent with the warranty and this manual also available at www.evga.com/support/manuals.
- Página 4 Netzteil jedoch unten in lhrem Gehause installiert und sind keine Luflungsschlilze vorhanden, kann es besser sein, das Nelzteil mil Danke, dass Sie sich fiir den Kaul eines EVGA Netzteil entschieden haben. Das 430W/500W/600W sind hochwertige dem Lufler nach oben zu installieren, um mehr Effizienz und Netzteile, welche die Sicherheitsstandards fiir eine zuverlassige Zuverliissigkeit zu gewiihrleisten.
- Página 5 La apertura de la carcasa presenta un 3. Conecte el cable ATX 20 + 4 pines a la placa madre. riesgo de electrocuci6n y se anulara la garantia. EVGA no sera responsable par cualquier consecuencia de un uso inadecuado,...
- Página 6 • (OCP) protection contra la surinlensile • (OTP) protection contre la surchauffe GARANTIE SATISFACTION Les alimentations EVGA 430W / 500W / 600W sont couvertes par une garantie de 3 ans. Ces alimentations bénéficient également du 8. Connectez le cordon d'alimentation AC. au bloc d'alimentation et service après-vente qui a fait la renommée d’EVGA.
- Página 7 Desenvolvidas para atender o onyamento de gamers au usu8rios casuais, as fontes EVGA sao a melhor escolha para seu pr6ximo PC. lnforma�oes de Seguran�a 3.
- Página 8 5. Collegare i cavi PCI-E 6/6+2 pin alla scheda grafica o schede 430W/500W/600W di potenza. Questa la caratteristica che grafiche. differenzia un alimentatore EVGA da tutte le altre unita che offrono solo prestazioni nominali di picco. PROTEZIONI DI SICUREZZA Gli alimentatori EVGA offrono una serie di protezioni di sicurezza 6.
- Página 10 User's Manual Benutzerhandbuch Mode d’emploi Manual del usuario Manuale dell’utente Manual do Utilizador 安裝說明書 用戶手冊 ユーザーズマニュアル Руководство пользователя © 2017 Thermaltake Technology Co., Ltd. All Rights Reserved. A-2017.08 kullanıcı elkitabı All other registered trademarks belong to their respective companies. www.thermaltake.com (EEE Yönetmeliğine Uygundur) คู...
- Página 11 Contents Model Versa H18 Case Type Micro Case Dimension (H*W*D) 390 x 205 x 380mm (15.4 x 8.1 x 15 inch) Chapter 1. Product Introduction Side Panel Transparent Window Specification Material SPCC Accessory Rear (exhaust) : Cooling System 120 x 120 x 25 mm fan (1000rpm, 16dBA) Warning and Notice Drive Bays -Accessible...
- Página 12 Warning and Notice CPU Cooler Height Limitation VGA ( Add- on card) Length Limitation Atenção!! - Limite de altura para o dissipador do CPU: O limite de altura para o dissipador do CPU é 155 mm (6,1 polegadas). - Limite de comprimento para VGA (placa gráfica): <155 mm O limite de comprimento para VGA (placa gráfica) é...
- Página 13 PSU Installation Side Panel Disassembly English / 繁體中文 / Place the power supply in proper location and 將電源供應器放在正確的位置,並用螺絲固定 English / 繁體中文 / secure it with screws. 鎖上。 Remove the screws on the back of the chassis, 移除機殼後方螺絲,將側窗打開。 and open the side panel. Deutsch / 简体中文...
- Página 14 3.5” & 2.5" HDD Installation Motherboard Installation 2.5" HDD 3.5" HDD English / 繁體中文 / 1.Lay down the chassis. 1. 將機殼平放。 2.Install the motherboard in proper location and 2. 將主機板放置在合適的位置並用零件包中之螺 secure it with screws. 絲固定。 Deutsch / 简体中文 / 1.Legen Sie das Gehäuse auf die Seite. 1.
- Página 15 PCI Slot Usage Radiator Installation 120mm x 1 280mm x 1 240mm x 1 English / 繁體中文 / 1. Loosen the screws with a screwdriver. 1. 用螺絲起子將螺絲取下. 2. Install the PCI card in proper location and secure 2. 將擴充卡放置在合適的位置並用螺絲固定。 it with screws. Air Cooling Installation 简体中文...
- Página 16 Leads Installation Français English Guide d'installation des fils Leads Installation Guide Connexion des voyants du boîtier / Sur la face avant du boîtier, vous trouverez plusieurs voyants et les fils des Case LED Connection / On the front of the case, you can find some LEDs and switch leads. Please consult your user boutons.
- Página 17 Italiano 繁體中文 線材安裝說明 Guida di installazione dei contatti 機殼LED連接方式 / 在機殼前方的面板後面,可以找到一些LED與開關線材(POWER Switch….),請參考主機板使用說明書, Connessione del LED del case / Nella parte anteriore del case, sono presenti alcuni contatti per interruttori e LED. 並將機殼上的線材正確地連接到主機板上,這些線材通常都會印有標籤在上面,如果沒有的話,請找出機殼前方面板上線材原 Consultare il manuale utente del produttore della scheda madre, quindi connettere i contatti alla parte superiore del 本的位置以知道正確的來源。...
- Página 18 日本語 Türkçe リード線の取り付けガイド Ara Kablo Kurulum Kılavuzu Kasa ışık bağlantısı / Kasanın ön kısmında bazı ışıklar ve anahtar ara kabloları görebilirsiniz. Lütfen anakart üreticinizin ケース LED の接続 / ケース前面には、LEDとスイッチリード線があります。 マザーボードメーカーのユーザーマニュアル sağladığı kullanım kılavuzuna bakın ve daha sonra, bu ara kabloları, anakart üzerindeki panel bağlantı noktalarına bağlayın. を参照し、これらのリード線をマザーボードのパネルヘッダに接続してください。...
- Página 19 Thermaltake Power Supply Series (Optional) As today’s technology updates rapidly, consumers are always requesting for higher and higher PC performance, which also increases loads to power supplies. Therefore, selecting a suitable and reliable power supply becomes a necessary lesson for all PC users. Why Choose Thermaltake Power Supply? Quality From Within Every power supply units from Thermaltake should pass a very strict quality control before sent to...