
Manuales relacionados para Springlane Frida


Resumen de contenidos para Springlane Frida
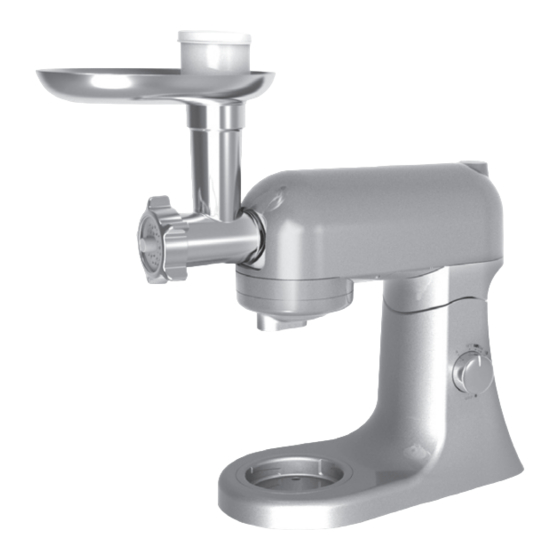
- Página 1 Frida ZUBEHÖR KÜCHENMASCHINE Bedienungsanleitung Instruction manual Istruzioni per l’uso Mode d’emploi Manual de instrucciones...
- Página 2 IMPRESSUM Bedienungsanleitung Zubehör Küchenmaschine Frida Art.-Nr.: 940212 Druck- und Satzfehler vorbehalten. Copyright © Springlane GmbH Reisholzer Werftstr. 25a 40589 Düsseldorf Telefon: +49 (0)211 749 55 10 Telefax: +49 (0)211 749 55 11 0 E-Mail: info@springlane.de Internet: www.springlane.de...
-
Página 3: Service-Hotline
Bei Fragen zum Gebrauch des Gerätes wende dich bitte an unseren Kundendienst. Rufnummer Deutschland: +49 (0)800 270 70 27 (innerhalb Deutschlands kostenlos) Rufnummer Österreich: +49 (0)800 886 673 53 (innerhalb Österreichs kostenlos) Rufnummer Schweiz: +49 (0)800 740 198 (innerhalb der Schweiz kostenlos) E-Mail: service@springlane.de... -
Página 4: Tabla De Contenido
Assembly of the sausage-filling cap Assembly of the kebbe cap Assembly of the cookies cap Guideline for speed setting Cleaning and maintenance Accessori robot da cucina Frida Istruzione per l’uso Dati tecnici Assemblaggio e funzionamento del tritacarne Assemblaggio del insaccatore per salsicce... - Página 5 Montage de l’accessoire à kebbe Montage de l’accessoire à biscuits Guide pour le variateur de la vitesse Nettoyage et entretien Accesorios para el robot de cocina Frida Manual de instrucciones Datos técnicos Instrucciones de montaje y uso de la picadora de carne...
-
Página 6: Technische Daten
TECHNISCHE DATEN Leistung Küchenmaschine mit Fleischwolf: 600 Watt Ausstattung: Fleischwolf mit feiner, mittlerer und grober Lochscheibe, Wurstfüll-Vorsatz, Kebbe-Vorsatz und Spritzgebäckvorsatz ZUSAMMENSETZEN UND BEDIENUNG DES FLEISCHWOLFS (INKL. WURSTFÜLL-VORSATZ, KEBBE-VORSATZ UND SPRITZGEBÄCKVORSATZ) - Página 7 Achtung: Fülle die Fleischstücke mit Hilfe des Stopfers (1) nacheinander über den Einfüll- trichter ein. Fülle das Fleisch niemals mit den Fingern oder anderen Hilfsmitteln in den Fleischwolf ein. ZUR VERWENDUNG DES FLEISCHWOLFS: Stelle die Küchenmaschine auf eine flache, saubere und trockene Arbeitsfläche. 2.
-
Página 8: Zusammensetzen Des Wurstfüll-Vorsatzes
ZUSAMMENSETZEN DES WURSTFÜLL-VORSATZES Halte das Fleischwolfgehäuse (3) mit der größten Öffnung nach oben. 2. Setze die Schnecke (4) in das Gehäuse ein. 3. Setze den Former (8) und den Wurstfüll-Vorsatz (9) vor der Schnecke ein. Drehe den Verschlussring (7) fest, sodass der Wurstfüll-Vorsatz sicher sitzt. 4. -
Página 9: Zusammensetzen Des Kebbe-Vorsatzes
ZUSAMMENSETZEN DES KEBBE-VORSATZES Halte das Fleischwolfgehäuse (3) mit der größten Öffnung nach oben. 2. Setze die Schnecke (4) in das Gehäuse ein. 3. Setze den Former (8) und den kurzen Tubus (10) vor der Schnecke ein. Drehe den Verschlussring (7) fest, sodass der Kebbe-Vorsatz sicher aufsteckt. 4. -
Página 10: Zusammensetzen Des Spritzgebäckvorsatzes
ZUSAMMENSETZEN DES SPRITZGEBÄCKVORSATZES Halte das Fleischwolfgehäuse (3) mit der größten Öffnung nach oben. 2. Setze die Schnecke (4) in das Gehäuse ein. 3. Setze den Abstandshalter (11) ein und stelle sicher, dass die zwei Haltevorrichtun- gen am Halter genau in die zwei Aussparungen im Fleischwolfgehäuse eingepasst sind. -
Página 11: Leitfaden Zur Geschwindigkeitseinstellung
LEITFADEN ZUR GESCHWINDIGKEITSEINSTELLUNG Zutat Max. Menge Geschwindigkeit Rindfleisch, Fleischwolf 2000 g 3-Max Schweinefleisch REINIGUNG UND PFLEGE Fleischwolf und Zubehör sind nicht für die Reinigung in der Spülmaschine geeignet. -
Página 12: Specifications
SPECIFICATIONS Power stand mixer with mincer: 600 watts Equipment: Mincer with fine, medium, and rough cap, sausage-filling cap, kebbe cap and cookies cap ASSEMBLY AND USE OF MINCER (INCL. SAUSAGE-FILLING CAP, KEBBE CAP AND COOKIES CAP) - Página 13 Note: Fill the mincer with the darner (1) continuously through the funnel. Never use your fingers or other tools. USING THE MINCER: Place the stand mixer onto an even, clean and dry work place. 2. Hold the mincer’s case (3) with the largest opening facing towards the top. 3.
-
Página 14: Assembly Of The Sausage-Filling Cap
ASSEMBLY OF THE SAUSAGE-FILLING CAP Hold the mincer’s case (3) with the largest opening facing towards the top. 2. Put the screw (4) into the case. Place the cap (8) and the sausage-filling cap (9) in front of the screw. Seize the lock (7) until the sausage-filling cap is fixated. -
Página 15: Assembly Of The Kebbe Cap
ASSEMBLY OF THE KEBBE CAP Hold the mincer’s case (3) with the largest opening facing towards the top. 2. Put the screw (4) into the case. 3. Place the cap (8) and the short lens tube (10) in front of the screw. Seize the lock (7) until the kebbe cap is fixated. -
Página 16: Assembly Of The Cookies Cap
ASSEMBLY OF THE COOKIES CAP Hold the mincer’s case (3) with the largest opening facing towards the top. 2. Put the screw (4) into the case. 3. Insert the spacer (11) and make sure the two clips are inserted correctly into the two holes in the mincer’s case. -
Página 17: Guideline For Speed Setting
GUIDELINE FOR SPEED SETTING Ingredients Max. amount Speed Mincer Beef, pork 2000 g 3-Max CLEANING AND MAINTENANCE Mincer and accessories should not be cleaned in the dishwasher. -
Página 18: Dati Tecnici
DATI TECNICI Potenza del robot da cucina con tritacarne: 600 Watt Contiene: Tritacarne con 3 trafile di diversa grandezza, insaccatore per salsicce, inserto per kebbe e inserto per biscotti. ASSEMBLAGGIO E FUNZIONAMENTO DEL TRITA- CARNE (INCLUSI I INSACCATORE PER SALSICCE, INSERTO PER KEBBE E INSERTO PER BISCOTTI) - Página 19 Attenzione: Inserire con l’aiuto del tappo (1), uno dopo l’altro, i pezzi di carne attraverso l’imbuto di riempimento. Mai inserire la carne nel tritacarne aiutandosi con le dita o altri attrezzi. PER L’UTILIZZO DEL TRITACARNE: Posizionare il robot da cucina su un piano di lavoro piatto, pulito ed asciutto. 2.
-
Página 20: Assemblaggio Del Insaccatore Per Salsicce
ASSEMBLAGGIO DEL INSACCATORE PER SALSICCE Inserire il supporto del tritacarne (3) con l’apertura maggiore rivolta verso l’alto. 2. Inserire la spirale (4) nel supporto. 3. Posizionare il formatore (8) ed il insaccatore per salsicce (9) prima della spirale. Avvitare l’anello di bloccaggio (7), cosicché il insaccatore per salsicce sia ben fissato. -
Página 21: Assemblaggio Del Inserto Per Kebbe
ASSEMBLAGGIO DEL INSERTO PER KEBBE Inserire il supporto del tritacarne (3) con l’apertura maggiore rivolta verso l’alto. 2. Inserire la spirale (4) nel supporto. 3. Posizionare il formatore (8) ed il tubo corto (10) prima della spirale. Avvitare l’anello di bloccaggio (7), cosicché il inserto per kebbe sia ben posizionato. 4. -
Página 22: Assemblaggio Del Inserto Per Biscotti
ASSEMBLAGGIO DEL INSERTO PER BISCOTTI Inserire il supporto del tritacarne (3) con l’apertura maggiore rivolta verso l’alto. 2. Inserire la spirale (4) nel supporto. 3. Collocare il distanziale (11) e posizionarlo in modo sicuro, cosicchè i due dispo- sitivi di bloccaggio al sostegno siano accuratamente adatti alle due cavità del supporto del tritacarne. -
Página 23: Linee Guida Per Regolare La Velocità
7. Posizionare l’imbuto di riempimento (2) sul tritacarne. LINEE GUIDA PER REGOLARE LA VELOCITÀ Ingrediente Massa Max. Velocità Carne bovina, Tritacarne 2000 g 3-Max carne suina PULIZIA E MANUTENZIONE Il tritacarne ed i suoi accessori non possono essere lavati in lavastoviglie. -
Página 24: Caractéristiques Techniques
CARACTÉRISTIQUES TECHNIQUES Puissance du robot ménager avec hachoir : 600 watts Équipement : Tête du hachoir avec plaque fine, moyenne et grosse, accessoire à saucisses, accessoire à kebbe et accessoire à biscuits MONTAGE ET UTILISATION DE HACHOIR (INCL. ACCESSOIRE À SAUCISSES, ACCESSOIRE À KEBBE ET ACCESSOIRE À... - Página 25 Attention : Poussez les morceaux de viande à l´aide du pilon (1) l´un après l´autre sur la trémie. Ne jamais utiliser les doigts ou d‘autres outils de travail pour verser la viande dans le hachoir. POUR L‘UTILISATION DU HACHOIR : Mettez le robot ménager sur un espace plat, propre et un plan de travail sec.
-
Página 26: Montage De L'accessoire À Saucisses
MONTAGE DE L’ACCESSOIRE À SAUCISSES Posez le plus grand orifice de la tête du hachoir (3) vers le haut. 2. Posez la vis sans fin (4) dans le boîtier. 3. Placez l´outil pour le façonnage (8) et l´accessoire à saucisses (9) avant la vis sans fin. -
Página 27: Montage De L'accessoire À Kebbe
MONTAGE DE L’ACCESSOIRE À KEBBE Posez le plus grand orifice de la tête du hachoir (3) vers le haut. 2. Posez la vis sans fin (4) dans le boîtier. 3. Placez l´outil pour le façonnage (8) et le petit tube (10) avant la vis sans fin. Bien serrer l´anneau d´obturation (7), telle façon que l‘accessoire à... -
Página 28: Montage De L'accessoire À Biscuits
MONTAGE DE L’ACCESSOIRE À BISCUITS Posez le plus grand orifice de la tête du hachoir (3) vers le haut. 2. Posez la vis sans fin (4) dans le boîtier. 3. Placez l´écarteur (11) et assurez-vous que les deux dispositifs de support de la plaque sont correctement placés dans les deux orifices du boîtier du hachoir. -
Página 29: Guide Pour Le Variateur De La Vitesse
GUIDE POUR LE VARIATEUR DE LA VITESSE Ingrédient Quantité maxi Vitesse Hachoir Bœuf, porc 2000 g 3-Max NETTOYAGE ET ENTRETIEN Le hachoir et ses accessoires ne puevent pas passer au lave-vaiselle. -
Página 30: Datos Técnicos
DATOS TÉCNICOS Potencia del robot de cocina con la picadora de carne: 600 vatios Equipamiento: picadora de carne con discos para picado fino, medio y grueso, cono para hacer embutidos, accesorio para kibbeh y accesorio para pastelería IINSTRUCCIONES DE MONTAJE Y USO DE LA PICADORA DE CARNE (INCLUIDO CONO PARA HACER EMBUTIDOS, ACCESORIO PARA KIBBEH Y ACCESORIO PARA PASTELERÍA) -
Página 31: Cómo Usar La Picadora De Carne
Atención: Introduce los trozos de carne uno a uno a través del orificio de la bandeja de llenado con ayuda del empujador (1). No introduzcas nunca la carne con los dedos u otros objetos en la picadora de carne. CÓMO USAR LA PICADORA DE CARNE: Coloca el robot de cocina en una superficie de trabajo plana, limpia y seca. -
Página 32: Montaje Del Cono Para Hacer Embutidos
MONTAJE DEL CONO PARA HACER EMBUTIDOS Coge la tolva (22) con la apertura más grande mirando hacia arriba. 2. Introduce el eje en espiral (16) en la tolva. 3. Coloca el moldeador (23) y el cono para hacer embutidos (24) delante del eje en espiral. -
Página 33: Montaje Del Accesorio Para Kibbeh
MONTAJE DEL ACCESORIO PARA KIBBEH Coge la tolva (22) con la apertura más grande mirando hacia arriba. 2. Introduce el eje en espiral (16) en la tolva. 3. Coloca el moldeador (23) y el pequeño tubo (25) delante del eje en espiral. Enrosca la rosca de ajuste (19) con fuerza para que el accesorio para kibbeh quede bien fijado. -
Página 34: Montaje Del Accesorio Para Pastelería
MONTAJE DEL ACCESORIO PARA PASTELERÍA Coge la tolva (22) con la apertura más grande mirando hacia arriba. 2. Introduce el eje en espiral (16) en la tolva. 3. Coloca el separador (26) y asegúrate de que las dos sujeciones del separador se ajusten perfectamente a las dos ranuras de la tolva. -
Página 35: Guía Para Ajustar La Velocidad
GUÍA PARA AJUSTAR LA VELOCIDAD Ingrediente Cantidad máx. Velocidad Ternera, Picadora de carne 2000 g 3-Máx cerdo LIMPIEZA Y CUIDADO La picadora de carne y los accesorios no son aptos para su uso en el lavavajillas.