Tabla de contenido

Manuales relacionados para Xiaomi Mi Drone Mini


Resumen de contenidos para Xiaomi Mi Drone Mini
- Página 1 Mi Drone Mini User Manual · 1 Manual de usuario de Mi Drone Mini · 16 Руководство пользователя Мини-дрона Mi · 29 Manuale utente per Mi Drone Mini · 42 Mode d’emploi de Mi Drone Mini · 55...
- Página 2 V1.0...
-
Página 3: Safety Instructions
1 . Do not use this product in areas prohibited by government regulation and policy, such as airports, densely populated areas and so forth. 2. The Mi Drone Mini is not suitable for use by children 14 and under nor by any individuals who may not be fully capable of using it. -
Página 4: Product Overview
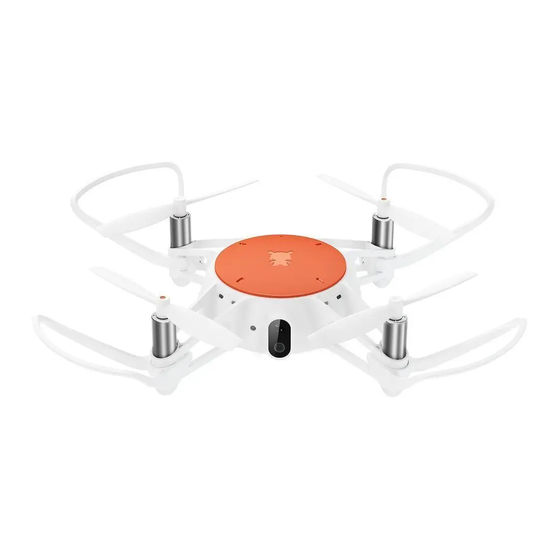
Mi Drone Mini × 1 Ba ery × 1 USB Cable × 1 Mi Drone Mini User Manual · 1 Manual de usuario de Mi Drone Mini · 16 Руководство пользователя Мини-дрона Mi · 29 Manuale utente per Mi Drone Mini ·... - Página 5 2. Component Instructions Ba ery Forward Propeller Reverse Propeller Protective Frame Camera Power Bu on Infrared Receiver 1 Infrared Transmi er...
- Página 6 Ultrasonic Probe Orange Indicator Light Optical Streaming Camera Silicon Base Blue Indicator Light Base Ba ery Release Infrared Receiver 2...
- Página 7 Installing and Disassembling 1. Installing and Disassembling the Ba ery Installing: Place the ba ery inside the drone’s ba ery compartment and ensure that the arrow on the cartridge is pointing in the same direction as the ba ery release. Press the ba ery into place, making sure that both ends are firmly and tightly in place.
- Página 8 2. Installing and Disassembling the Propellers Installing: Install the propeller marked with orange on the sha marked with orange and press into place. Disassembling: Tightly grip the machine with one hand while gripping the propeller sha with the other as you forcefully pull the sha upwards, which will allow you to remove the propeller.
- Página 9 3. Installing and Disassembling the Protective Frame Installing: Line up the protruding points on the protective frame with the sunken grooves on the drone and insert them together. Tightly press both sides of the frame into place a er the sunken grooves and protruding points have completely interlocked. Disassembling: Lightly pull on the clip on one of the ends of the protective frame outwards until the frame has separated from the inside of the drone, at which point the protective frame can be fully removed.
- Página 10 When being charged, the Mi Drone Mini will shut down and the blue light will flash; a er charging, the blue and orange lights will stay on. It takes about 60 minutes for the drone to be fully charged.
- Página 11 Operating Instructions 1. Turn the drone on Turn on: Press the drone’s power bu on for 2 seconds or longer, and the orange light at the base of the drone should light up when the drone is on. Turn off: Press the power bu on on the drone for 3 seconds or longer, and the indicator light at the base of the drone should disappear when the drone is off.
- Página 12 4. Joystick control Ascend Go Forward Rotate Coun- Rotate Turn Le Turn Right terclockwise Clockwise Descend Go Back Le Joystick Right Joystick Illustrated with an American hand Joystick se ings can be modified from the MiDroneMini app 5. Photos/Videos Photos: tap once to take one photo.
- Página 13 One Tap Ascend/Descend: Tap once the drone is ready to fly and you can select either ‘One Tap Ascend’ or ‘Palm Takeoff’; will automatically become when in flight, will begin an automatic, slow descent. Palm Takeoff: place the drone in the palm of your hand a er it has finished initializing. Tap the Palm Takeoff...
-
Página 14: Firmware Upgrades
e. You do not need to do anything more than turn on the drone and Bluetooth Joystick when they have been previously paired. Check the drone’s indicator lights to see whether the pairing has indeed occurred. Note: See the MiDroneMini app for more information on the definitions associated with the Bluetooth remote bu ons. - Página 15 Do not put the ba ery in a flame; do not handle the ba ery roughly; the storage capacity of lithium-ion ba eries will be significantly reduced in very low temperatures. Do not use the ba eries in an environment under 0°C. Specifications Name: Mi Drone Mini Wireless Connectivity: Wi-Fi IEEE 802.11a 5GHz Model: YKFJ01FM Input: 5V...
-
Página 16: Environmentally-Friendly Disposal
Environmentally friendly disposal Old electrical appliances must not be disposed of together with the residual waste, but have to be disposed of separately. The disposal at the communal collecting point via private persons is for free. The owner of old appliances is responsible to bring the appliances to these collecting points or to similar collection points. - Página 17 exposure compliance. This transmi er must not be co-located or operating in conjunction with any other antenna or transmi er.
-
Página 18: Instrucciones De Seguridad
1 . No use este producto en zonas en las que esté prohibido por las regulaciones y políticas gubernamentales, como aeropuertos, zonas densamente pobladas, etc. 2. Mi Drone Mini no es adecuado para niños menores de 14 años ni para personas que no sean completamente capaces de usarlo. -
Página 19: Descripción Del Producto
Mi Drone Mini × 1 Batería × 1 Cable USB × 1 Mi Drone Mini User Manual · 1 Manual de usuario de Mi Drone Mini · 16 Руководство пользователя Мини-дрона Mi · 29 Manuale utente per Mi Drone Mini ·... -
Página 20: Instrucciones De Los Componentes
2. Instrucciones de los componentes Batería Hélice delantera Hélice inversa Marco protector Cámara Botón de encendido Receptor infrarrojo 1 Transmisor infrarrojo... - Página 21 Sonda ultrasónica Luz indicadora naranja Cámara de transmisión óptica Base de silicio Luz indicadora azul Base Liberación de la batería Receptor infrarrojo 2...
-
Página 22: Instalación Y Desmontaje
Instalación y desmontaje 1. Instalación y desmontaje de la batería Instalación: coloque la batería dentro del compartimento de la batería del dron y asegúrese de que la flecha del cartucho esté apuntando en la misma dirección que la liberación de la batería. - Página 23 2. Instalación y desmontaje de las hélices Instalación: instale la hélice con una marca naranja en el eje marcado en naranja y presiónela en su lugar. Desmontaje: sujete firmemente la máquina con una mano mientras sujeta el eje de la hélice con la otra y empuje con fuerza el eje hacia arriba, lo que le permitirá...
-
Página 24: Instalación Y Desmontaje Del Marco Protector
3. Instalación y desmontaje del marco protector Instalación: alinee los puntos prominentes del marco protector con las ranuras hundidas del dron e insértelos. Presione firmemente ambos lados del marco en su lugar después de que las ranuras hundidas y los puntos prominentes hayan encajado por completo. Desmontaje: tire ligeramente hacia fuera de la pestaña de uno de los extremos del marco de protección, hasta que el marco se haya separado del interior del dron. -
Página 25: Preparación Del Dron
5 V o a una fuente de alimentación móvil para recargar el dron. b. Durante la carga, Mi Drone Mini se apagará y la luz azul empezará a parpadear. Una vez cargado, las luces azul y naranja seguirán encendidas; se tarda alrededor de 60 minutos en cargar el dron por completo. -
Página 26: Descargue E Instale La Aplicación Midronemini
Instrucciones de uso 1. Encienda el dron Encender: pulse el botón de encendido del dron durante 2 segundos o más. La luz naranja situada en la base del dron se iluminará cuando el dron esté encendido. Apagar: pulse el botón de encendido del dron durante 3 segundos o más. La luz indicadora situada en la base del dron se apagará... -
Página 27: Control Y Vuelo Inteligente
4. Control con joystick Ascender Ir hacia delante Girar en Girar en Girar a la Girar a la sentido sentido izquierda derecha antihorario horario Descender Ir hacia atrás Joystick izquierdo Joystick derecho Ilustrado con una mano estadounidense Los ajustes del joystick se pueden modificar desde la aplicación MiDroneMini 5. - Página 28 Ascender/descender de un toque: pulse una vez cuando el dron esté listo para volar. Puede seleccionar "Ascender de un toque" o "Despegue desde la palma". Durante el vuelo, pasará automáticamente a comenzará a descender de forma lenta y automática. Despegue desde la palma: coloque el dron en la palma de su mano después de que se haya terminado de iniciar.
-
Página 29: Actualizaciones De Firmware
d. La luz indicadora del joystick Bluetooth permanecerá encendida después de que se haya vinculado y las dos luces del dron seguirán parpadeando lentamente. e. Solo tendrá que encender el dron y el joystick Bluetooth cuando se hayan vinculado. Compruebe las luces indicadoras del dron para ver si la vinculación se ha completado. Nota: consulte la aplicación MiDroneMini para obtener más información sobre las definiciones asociadas con los botones de control remotos por Bluetooth. -
Página 30: Mantenimiento
No use las baterías en un ambiente que esté por debajo de los 0 °C. Especificaciones Entrada: 5 V, 1A Nombre: Mi Drone Mini Modelo: YKFJ01FM Rango de control: 50 m Altura de control: 25 m... -
Página 31: Инструкции По Технике Безопасности
Перед использованием устройства внимательно прочитайте данное руководство и сохраните его Возможно, оно понадобится вам в будущем. Инструкции по технике безопасности 1 . Не используйте изделие в тех местах, где это запрещено нормативными актами и правилами, например в аэропортах, густонаселенных районах и т. д. 2. -
Página 32: Обзор Изделия
Мини-дрон Mi,1 шт Аккумулятор, 1 шт Кабель USB, 1 шт Mi Drone Mini User Manual · 1 Manual de usuario de Mi Drone Mini · 16 Руководство пользователя Мини-дрона Mi · 29 Manuale utente per Mi Drone Mini · 42 Mode d’emploi de Mi Drone Mini... - Página 33 2. Инструкции по установке и снятию компонентов Пропеллер прямого хода Аккумулятор Пропеллер обратного хода Защитная рама Камера Кнопка питания Передатчик инфракрасного излучения Приемник инфракрасного излучения 1...
- Página 34 Ультразвуковой зонд Камера оптического диапазона с Оранжевый световой индикатор потоковой передачей видео Силиконовое днище Синий световой индикатор Днище Кнопка извлечения аккумулятора Приемник инфракрасного излучения 2...
- Página 35 Установка и снятие 1. Установка и снятие аккумулятора Установка: поместите аккумулятор в предназначенный для него отсек в дроне и убедитесь, что стрелка на картридже направлена в ту же сторону, что и стрелка на кнопке извлечения аккумулятора. Надавите на аккумулятор до щелчка и убедитесь, что...
- Página 36 2. Установка и снятие пропеллеров Установка: установите пропеллер, помеченный оранжевым цветом, на вал, также помеченный оранжевым цветом. Надавите на пропеллер, чтобы зафиксировать его на валу. Снятие: крепко удерживая дрон одной рукой, с усилием потяните вал пропеллера вверх другой рукой. Оранжевая метка Примечание.
- Página 37 3. Установка и снятие защитной рамы Установка: совместите выступы защитной рамы с пазами на дроне и вставьте защитную раму в дрон. После полного смыкания выступов и пазов надавите на обе стороны рамы, чтобы они стали на свое место. Снятие: без усилия потяните наружу зажим на одном из концов защитной рамы, пока рама...
- Página 38 Подготовка дрона 1. Зарядка аккумулятора a. Чтобы зарядить аккумулятор дрона, подключите кабель USB, входящий в комплект поставки, к блоку питания с выходным напряжением 5 В либо к мобильному источнику питания. b. Без подзарядки Мини-дрон Mi завершит работу после чего начнет мигать синий индикатор;...
-
Página 39: Инструкции По Эксплуатации
Инструкции по эксплуатации 1. Включите дрон Включение: удерживайте кнопку питания дрона в течение 2 или более секунд. Когда дрон включится, загорится оранжевый индикатор на днище. Выключение: удерживайте кнопку питания дрона в течение 3 или более секунд. Когда дрон выключится, оранжевый индикатор на днище погаснет. 2. - Página 40 4. Управление джойстиком Набор высоты Полет вперед Поверните против Поверните по Поверните Поверните часовой стрелки часовой стрелке влево вправо Снижение Полет назад Левый джойстик Правый джойстик Проиллюстрировано на примере джойстика для США Настройки джойстиков можно изменить в приложении "Мини-дрон Mi". 5.
- Página 41 Набор высоты и снижение одним касанием. Нажмите один раз, когда дрон будет готов к полету. Вы можете выбрать вариант "Набор высоты одним касанием" или "Взлет с ладони"; во время полета автоматически превратится в , нажмите чтобы начать автоматическое медленное снижение. Взлет...
-
Página 42: Обновление Встроенного По
d. Чтобы начать сопряжение, нажмите кнопку на Bluetooth-джойстике. Световой индикатор Bluetooth-джойстика начнет быстро мигать (на различных джойстиках поведение индикатора может немного отличаться). e. Если дрон и Bluetooth-джойстик были сопряжены ранее, то вам достаточно просто включить их, чтобы использовать дрон. С помощью световых индикаторов на дроне убедитесь, что... -
Página 43: Техническое Обслуживание
Техническое обслуживание 1. Пропеллеры Пропеллеры легко повредить. Если на пропеллере имеются признаки износа или повреждения, немедленно замените его. В противном случае характеристики дрона могут ухудшиться. 2. Защитная рама Защитную раму легко повредить. Замените раму при обнаружении признаков деформации или повреждения. 3. -
Página 44: Istruzioni Di Sicurezza
2. Mi Drone Mini non è indicato per l’utilizzo da parte di bambini so o i 14 anni di età né da parte di persone che non siano in grado di controllarlo perfe amente. - Página 45 Mi Drone Mini × 1 Ba eria × 1 Cavo USB × 1 Mi Drone Mini User Manual · 1 Manual de usuario de Mi Drone Mini · 16 Руководство пользователя Мини-дрона Mi · 29 Manuale utente per Mi Drone Mini ·...
- Página 46 2. Istruzioni sui componenti Ba eria Elica senso orario Elica senso antiorario Carter di protezione Telecamera Pulsante di accensione Trasme itore a infrarossi Ricevitore a infrarossi 1...
- Página 47 Sensore a ultrasuoni Telecamera o ica per Spia arancione riprese in tempo reale Base in silicone Spia blu Base Pulsante di sblocco della ba eria Ricevitore a infrarossi 2...
- Página 48 Installazione e rimozione dei componenti 1. Installazione e rimozione della ba eria Installazione: inserire la ba eria nell’apposito vano e assicurarsi che la freccia presente sulla cartuccia sia rivolta nella stessa direzione del pulsante di sblocco della ba eria. Premere la ba eria per bloccarla in posizione, verificando che le due estremità siano saldamente fissate al vano.
- Página 49 2. Installazione e rimozione delle eliche Installazione: installare l’elica con il contrassegno arancione sull’albero con il contrassegno arancione e premere fino a bloccarla in posizione. Rimozione: tenendo fermo il dispositivo con una mano, con l’altra mano tirare con forza l’albero dell’elica verso l’alto per rimuoverla. Contrassegno arancione Nota: la figura illustra l’installazione dell’elica sul contrassegno arancione A enzione:...
- Página 50 3. Installazione e rimozione del carter di protezione Installazione: allineare le parti sporgenti del carter alle scanalature presenti sul drone e provvedere a incastrarle. Premere quindi saldamente le due parti del telaio una volta che le sporgenze del carter e le scanalature sono perfe amente interbloccate. Rimozione: tirare uno degli agganci all’estremità...
-
Página 51: Allestimento Del Drone
5 V o a un’unità di alimentazione mobile. b. Durante la ricarica, il Mi Drone Mini si spegne e la luce blu lampeggia; dopo la ricarica, le luci blu e arancione rimangono accese. Sono necessari circa 60 minuti affinché il drone sia completamente carico. -
Página 52: Istruzioni Di Funzionamento
Istruzioni di funzionamento 1. Accensione del drone Accensione: premere il pulsante di accensione del drone per 2 secondi o più; la spia arancione alla base del drone si accende per indicare che il drone è alimentato. Spegnimento: premere il pulsante di accensione del drone per 3 secondi o più; la spia arancione alla base del drone si spegne per indicare che il drone è... -
Página 53: Volo E Controllo Intelligente
4. Joystick di comando Ascesa Avanti Rotazione in Rotazione in Svolta a Svolta a destra sinistra senso antiorario senso orario Discesa Indietro Joystick di sinistra Joystick di destra L’esempio riporta la mano di un utente americano È possibile modificare le impostazioni del joystick tramite l’app MiDroneMini 5. - Página 54 Un tocco Ascesa/Discesa: toccando una volta il drone è pronto per il volo ed è possibile selezionare ‘One Tap Ascend’ (un tocco ascesa) o ‘Palm Takeoff’ (decollo dalla mano); diventa automaticamente durante il volo, e avvia automaticamente una lenta discesa. Decollo dalla mano: una volta completata l’inizializzazione, posizionare il drone sul palmo della mano.
-
Página 55: Aggiornamento Firmware
d. La spia del joystick Bluetooth resta accesa una volta completata l’associazione ed entrambe le spie sul drone continueranno a lampeggiare lentamente. e. A questo punto è sufficiente accendere il drone e il joystick Bluetooth di cui si è eseguita l’associazione. -
Página 56: Specifiche Tecniche
Non usare le ba erie in presenza di temperature inferiori a 0°C. Specifiche tecniche Denominazione: Mi Drone Mini Conne ività wireless: Wi-Fi IEEE 802,11a 5 GHz Modello: YKFJ01FM... -
Página 57: Consignes De Sécurité
1 . N’utilisez pas ce produit dans des lieux interdits par la réglementation et politique gouvernementale, tels que les aéroports, les lieux très fréquentés, etc. 2. Le Mi Drone Mini n’est pas adapté aux enfants de moins de 14 ans ni aux personnes i ncapables de le contrôler. -
Página 58: Présentation Du Produit
Mi Drone Mini × 1 Ba erie x 1 Câble USB x 1 Mi Drone Mini User Manual · 1 Manual de usuario de Mi Drone Mini · 16 Руководство пользователя Мини-дрона Mi · 29 Manuale utente per Mi Drone Mini ·... - Página 59 2. Consignes liées aux composants Ba erie Hélice avant Hélice arrière Cadre de protection Caméra Bouton d’alimentation Transme eur infrarouge Récepteur infrarouge 1...
- Página 60 Sonde ultrasonique Indicateur lumineux orange Caméra de diffusion optique Socle en silicone Indicateur lumineux bleu Socle Couvercle de la ba erie Récepteur infrarouge 2...
- Página 61 Installation et démontage 1. Installation et démontage de la ba erie Installation : Placez la ba erie dans le compartiment de la ba erie du drone, et assurez-vous que la flèche sur la cartouche pointe en direction du couvercle de la ba erie. Insérez la ba erie, en vérifiant que les deux extrémités tiennent bien en place.
- Página 62 2. Installation et démontage des hélices Installation : Installez l’hélice à la marque orange sur l’axe à la marque orange, et enfoncez-la. Démontage : Tenez fermement la machine avec une main et l’axe de l’hélice avec l’autre. Tirez fort l’axe vers le haut. Vous pourrez alors retirer l’hélice. Marque orange Remarque : illustration de l’installation sur la marque orange A ention :...
- Página 63 3. Installation et démontage du cadre de protection Installation : Alignez les points protubérants du cadre de protection avec les encoches sur le drone, et enclenchez-les. Appuyez fermement sur les deux côtés du cadre pour le faire tenir, après que les encoches et les points protubérants se soient enclenchés. Démontage : Tirez légèrement sur la langue e d'une des extrémités du cadre de protection jusqu’à...
-
Página 64: Précautions Avant Utilisation
5V ou à bloc d’alimentation pour recharger le drone. b. Lorsqu’il est en charge, le Mi Drone Mini s’éteint et le voyant bleu clignote. Une fois qu’il est chargé, les voyants bleu et orange restent allumés. Le chargement complet du drone prend environ 60 minutes. - Página 65 Instructions d’utilisation 1. Allumer le drone Allumer : Appuyez sur le bouton d’alimentation du drone pendant au moins 2 secondes. L’indicateur lumineux orange à la base du drone apparaîtra lorsque le drone sera allumé. Éteindre : Appuyez sur le bouton d’alimentation du drone pendant au moins 3 secondes. L’indicateur lumineux orange à...
- Página 66 4. Commande du joystick Monter Avancer Rotation dans le Rotation dans le Tourner à droite Tourner à gauche sens inverse des sens des aiguilles aiguilles d'une d’une montre montre Descendre Reculer Joystick gauche Joystick droit Illustrée avec une main Les paramètres des Joysticks peuvent être modifiés depuis l’application MiDroneMini 5.
- Página 67 Appuyer une fois pour Monter/Descendre : Appuyez sur lorsque le drone est prêt à voler et vous aurez le choix entre « Appuyer une fois pour Monter » et « Décollage à la paume » ; deviendra automatiquement en plein vol, et enclenchera une descente lente et automatique.
- Página 68 d. L’indicateur lumineux de la mane e Bluetooth restera allumé après la synchronisation, et les deux indicateurs lumineux du drone continueront de clignoter lentement. e. Vous n’avez besoin que d’allumer le drone et le joystick Bluetooth s’ils ont déjà été synchronisés. Regardez les indicateurs lumineux du drone pour savoir si la synchronisation a fonctionné.
- Página 69 à de très basses températures. N’utilisez pas les ba eries dans un environnement où les températures sont négatives. Caractéristiques Nom : Mi Drone Mini Connectivité sans fil : Wi-Fi IEEE 802.11a 5GHz Modèle : YKFJ01FM Entrée : 5 V...
- Página 72 Indirizzo: 348, Level 3, Building Complex 1 Jia, Qing He Yong Tai Park, Distre o di Haidian, Pechino Fabriqué par : Beijing Fimi Technology Co., Ltd. Fabriqué pour : Xiaomi Communications Co., Ltd. Pour plus d’informations, consultez le site www.mi.com.
- Página 73 纸张: 105g京东太空梭 成品尺寸: 115*115mm(公差正负0.5mm) 文字&线条为专色潘通冷灰11C、 潘通1505C 骑马钉, 共72P...