Tabla de contenido
Publicidad
Enlaces rápidos
© 2010 Thermaltake Technology Co., Ltd. All Rights Reserved. 2010.09
All other registered trademarks belong to their respective companies.
Tested To Comply
With FCC Standards
FOR HOME OR OFFICE USE
www.thermaltake.com
Single Bay Docking Station on Top
Single Bay Docking Station on Top
User's Manual
Benutzerhandbuch
Mode d'emploi
Manual del usuario
Manuale dell'utente
Manual do Utilizador
Εγχειρίδιο Χρήσης
安裝說明書
用戶手冊
ユーザーズマニュアル
Руководство пользователя
kullanıcı elkitabı
(EEE Yönetmeliğine Uygundur)
คู ่ ม ื อ การใช้
VM6000 Series
Publicidad
Tabla de contenido

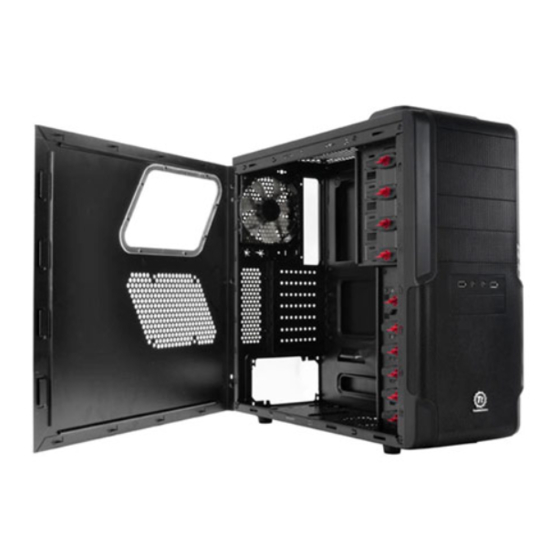
Resumen de contenidos para Thermaltake VM6000 Series
- Página 1 Manuale dell’utente Manual do Utilizador Εγχειρίδιο Χρήσης 安裝說明書 用戶手冊 ユーザーズマニュアル © 2010 Thermaltake Technology Co., Ltd. All Rights Reserved. 2010.09 All other registered trademarks belong to their respective companies. www.thermaltake.com Руководство пользователя kullanıcı elkitabı Tested To Comply With FCC Standards (EEE Yönetmeliğine Uygundur)
-
Página 2: Tabla De Contenido
Specification Contents Model VM600M1W2Z VM60001W2Z Case Type Mid Tower Side Panel Window Chapter 1. Product Introduction Net Weight 5.9Kg / 12.9 lb 5.7Kg / 12.7lb Dimension 470 x 200 x 485 mm 470 x 200 x 455 mm Specification (18.5 x 7.9 x 19.1 inch) (18.5 x 7.9 x 17.9 inch) (D*W*H) Front (intake) : Optional... -
Página 3: Warning And Notice
Atenção!! Warning and Notice - Limite de altura para o dissipador do CPU: O limite de altura para o dissipador do CPU é 162 mm (6,4 polegadas). - Limite de comprimento para VGA (placa gráfica): O limite de comprimento para VGA (placa gráfica) é 320 mm (12,6 polegadas). CPU Cooler Height Limitation VGA ( Add- on card) Length Limitation - Se estiver a instalar uma ventoinha na parte frontal superior da caixa, não instale o dispositivo da... -
Página 4: Side Panel Disassembly
PSU Installation Side Panel Disassembly English / 繁體中文 / English / 繁體中文 Place the power supply in proper location and 將電源供應器放在正確的位置,並用螺絲固定 Remove the screws on the back of the chassis, 移除機殼後方螺絲,將側窗打開 。 secure it with screws. and open the side panel. 鎖上。... -
Página 5: Motherboard Installation
Motherboard Installation 5.25" Device Installation English / 1.Lay down the chassis. 繁體中文 / 2.Install the motherboard in proper location and English / Español / 1. 將機殼平放。 secure it with screws. 1. Pull out the front panel. 1. Tire del panel frontal. 2. -
Página 6: External 3.5" Device Installation
External 3.5” Device Installation Português/ 日本語 / 1. Puxe o painel dianteiro para fora. 1. 前面パネルを引き出します。 2. Remova a cobertura da baía da unidade de 5,25”. 2. 5.25”ドライブベイのカバーを取り外します。 3. Remova a tampa de metal da baía da unidade de 5,25”. 3. -
Página 7: Hdd Installation
HDD Installation Português/ 日本語 / 1. 前面パネルを引き出します。 1. Puxe o painel dianteiro para fora. 2. Remova a cobertura da baía da unidade de 3,5”. 2. 3.5" ドライブベイのカバーを取り外します 3. Remova a tampa de metal da baía da unidade de 3. 3.5" ドライブベイのメタルカバーを取り外しま す。 3,5”. -
Página 8: Hdd Installation
2.5" HDD Installation Italiano / 日本語 / 1. Ruotare il dispositivo di blocco in senso 1. ロックデバイスを反時計方向に回してロック解 antiorario per sbloccarlo e rimuoverlo. 除し、ロックデバイスを取り外します。 2. Posizionare l HDD nel vano unità 2. HDD をドライブベイに取り付けます。 3. Riposizionare il dispositivo di blocco e ruotarlo 3. -
Página 9: Top Hdd Docking
Top HDD Docking (for VM600M1W2Z only) Français / La station d’accueil verticale de disque dur est intégrée pour permettre le transfert ultra rapide (jusqu’à 3,0 Gbits/s) de données volumineuses vers un disque dur SATA sans devoir utiliser un boîtier de stockage externe. -
Página 10: Pci Slot Usage
PCI Slot Usage Leads Installation English Leads Installation Guide Case LED Connection / On the front of the case, you can find some LEDs and switch leads. Please consult your user manual of your motherboard manufacturer, then connect these leads to the panel header on the motherboard. USB 2.0 Connection / Please consult your motherboard manual to find out the section of “USB connection”. - Página 11 Français Italiano Guide d'installation des fils Guida di installazione dei contatti Connexion des voyants du boîtier / Sur la face avant du boîtier, vous trouverez plusieurs voyants et les fils des Connessione del LED del case / Nella parte anteriore del case, sono presenti alcuni contatti per interruttori e LED. boutons.
-
Página 12: Toughpower/ Purepower/Tr2 Power Supply Series (Optional)
Toughpower/ Purepower/ Note: TR2 power supply series (optional)


