Tabla de contenido

Publicidad

Idiomas disponibles
  • ES

Idiomas disponibles

  • ESPAÑOL, página 57

Enlaces rápidos

Grind & Brew Kaffeemaschine
Aromatica II Thermo
Coffee Maker Aromatica II Thermo
Cafetière Aromatica II Thermo
Cafetera Aromatica II Thermo
Caffettiera Aromatica II Thermo
Kávovar Aromatica II Thermo
Koffiezetapparaat Aromatica II Thermo
10032875 10032876

Publicidad

Tabla de contenido
loading

Resumen de contenidos para Klarstein Aromatica II Thermo

  • Página 1: Technische Gegevens 1

    Grind & Brew Kaffeemaschine Aromatica II Thermo Coffee Maker Aromatica II Thermo Cafetière Aromatica II Thermo Cafetera Aromatica II Thermo Caffettiera Aromatica II Thermo Kávovar Aromatica II Thermo Koffiezetapparaat Aromatica II Thermo 10032875 10032876...
  • Página 3: Tabla De Contenido

    Sehr geehrter Kunde, wir gratulieren Ihnen zum Erwerb Ihres Gerätes. Lesen Sie die folgenden Hinweise sorgfältig durch und befolgen Sie diese, um möglichen Schäden vorzubeugen. Für Schäden, die durch Missachtung der Hinweise und unsachgemäßen Gebrauch entstehen, übernehmen wir keine Haftung. Scannen Sie den folgenden QR-Code, um Zugriff auf die aktuellste Bedienungsanleitung und weitere Informationen rund um das Produkt zu erhalten:...
  • Página 4: Sicherheitshinweise

    SICHERHEITSHINWEISE Allgemeine Sicherheitshinweise • Lesen Sie alle Hinweise vor Gebrauch sorgfältig durch und bewahren Sie die Anleitung zum Nachschlagen auf. • Verwenden Sie das Gerät und das Zubehör nur für den vorgesehenen Zweck und nicht für andere Zwecke als in der Bedienungsanleitung beschrieben werden. •...
  • Página 5 • Verwenden Sie das Gerät nicht, wenn das Netzkabel oder der Netzstecker beschädigt oder defekt sind. • Wenn das Netzkabel oder der Netzstecker beschädigt oder defekt sind, müssen sie durch den Hersteller, einen autorisierten Fachbetrieb oder einer ähnlich qualifi zierten Person ersetzt werden. •...
  • Página 6: Geräteübersicht

    GERÄTEÜBERSICHT...
  • Página 7 Ein/Aus-Taste Kaffeemengen-Anzeige Mahlwerk-Taste Kaffeestärken-Anzeige Kaffeemengen-Wähler Timer-Anzeige Kaffeestärken-Wähler Entkalkungsanzeige Timer-Taste Stunden-Taste Minuten-Taste Display Mahl-Feinheitsgrad-Wähler Permanentfi lter Filterhalterung Entriegelungsknopf (Filterhalterung) Kaffeebohnenfach Wasserbehälter Wasserstandsanzeige Kaffeekanne Abstellplatte Mahlkammer Kohlefi lterhalter Bürste/Schraubenzieher Wasserdampföffnung Entkalkungstaste (Taste 3+4) Wassertankdeckel Kohlefi lterbefestigung Kohlefi lter Abdeckung Bohnenbehälter Abdeckung Reinigungsöffnung...
  • Página 8: Bedienfeld, Tasten Und Anzeigen

    BEDIENFELD, TASTEN UND ANZEIGEN...
  • Página 9: Inbetriebnahme Und Bedienung

    INBETRIEBNAHME UND BEDIENUNG Vor dem ersten Betrieb • Reinigen Sie das Gerät. Siehe dazu den Abschnitt „Reinigung und Wartung“. • Reinigen Sie das Zubehör. Siehe dazu den Abschnitt: „Reinigung und Wartung“. Uhr einstellen (Abb. B & C) Wenn Sie den Netzstecker in die Steckdose stecken, leuchtet das Display (8) auf, um anzuzeigen, dass die Uhr eingestellt werden kann.
  • Página 11 Kaffeestärke einstellen (Abb. B & C) • Der Kaffeestärken-Wähler (4) wird verwendet für die Einstellung der gewünschten Kaffeestärke. Er kann auf milden Kaffee (MILD), mittelstarken Kaffee (MEDIUM) und starken Kaffee (STRONG) eingestellt werden. • Drücken Sie mehrmals den Kaffeestärken-Wähler (4), um die gewünschte Kaffeestärke einzustellen.
  • Página 13 So befüllen Sie den Wasserbehälter: Öffnen Sie den Deckel (24). Befüllen Sie den Wasserbehälter (14) bis zur gewünschten Markierung an der Wasserstandsanzeige (15) mit Wasser. Füllen Sie nicht mehr Wasser in den Wasserbehälter, als für die Zubereitung des Kaffees erforderlich ist. Verwenden Sie nur die für die Zubereitung des Kaffees benötigte Wassermenge.
  • Página 15 Schließen Sie den Deckel (27). Stellen Sie die Feinheit des gemahlenen Kaffees ein. Siehe dazu den Abschnitt „Mahlkaffee-Feinheitsgrad einstellen”. Drücken Sie den Entriegelungsknopf (12), um die Filterhalterung (1 1) zu öffnen. Setzen Sie einen geeigneten Kaffeefilter in den Kaffeefilterhalter (10) ein. Schließen Sie die Filterhalterung (1 1), bis der Entriegelungsknopf (12) einrastet.
  • Página 17: Reinigung Und Wartung

    REINIGUNG UND WARTUNG • Schalten Sie das Gerät vor der Reinigung oder Wartung immer aus, ziehen Sie den Netzstecker aus der Steckdose und warten Sie, bis das Gerät abgekühlt ist. • Tauchen Sie das Gerät nicht in Wasser oder andere Flüssigkeiten. •...
  • Página 18 • Bevor Sie das Gerät entkalken, ziehen Sie den Netzstecker aus der Steckdose und warten Sie, bis das Gerät abgekühlt ist. • Tauchen Sie das Gerät nicht in Wasser oder andere Flüssigkeiten. • Stellen Sie sicher, dass die Mahlfunktion beim Entkalken des Gerätes nicht aktiviert ist.
  • Página 19: Fehlersuche Und Fehlerbehebung

    Kohlefilter austauschen Öffnen Sie den Deckel (24). Falls nötig, leeren sie den Wasserbehälter (14). Entfernen Sie den Kohlefilterhalter (20) aus dem Wasserbehälter (14). Öffnen Sie die Abdeckung (25). Entfernen Sie den alten Kohlefilter (26). Setzen Sie den neuen Kohlefilter ein (26). Schließen Sie die Abdeckung (25).
  • Página 20: Hinweise Zur Entsorgung

    HINWEISE ZUR ENTSORGUNG Befindet sich die linke Abbildung (durchgestrichene Mülltonne auf Rädern) auf dem Produkt, gilt die Europäische Richtlinie 2012/19/EU. Diese Produkte dürfen nicht mit dem normalen Hausmüll entsorgt werden. Informieren Sie sich über die örtlichen Regelungen zur getrennten Sammlung elektrischer und elektronischer Gerätschaften.
  • Página 21: Technical Data

    Dear Customer, Congratulations on purchasing this equipment. Please read this manual carefully and take care of the following hints to avoid damages. Any failure caused by ignoring the mentioned items and cautions mentioned in the instruction manual are not covered by our warranty and any liability. Scan the QR code to get access to the latest user manual and other information about the product: CONTENT...
  • Página 22: Safety Instructions

    SAFETY INSTRUCTIONS General safety • Read the manual carefully before use and keep the manual for future reference. • Only use the appliance and the accessories for their intended purposes and do not use the appliance and the accessories for other purposes than described in the manual.
  • Página 23 Safety instructions for coffee makers • Do not use the appliance outdoors. • Do not use the appliance in damp environments. • Only use the appliance in frost-free environments if the appliance is fi lled with water. • Place the appliance on a stable and fl at surface. •...
  • Página 24: Product Description

    PRODUCT DESCRIPTION...
  • Página 25 On/off button Coffee quantity indicator Grinding button Coffee strength indicator Coffee quantity selector Timer indicator Coffee strength selector Descaling indicator Timer button Hour button Minute button Display Ground coffee fi neness selector Permanent fi lter Filter holder assembly Release button (fi lter holder assembly) Coffee bean compartment Water reservoir Water level indicator...
  • Página 26: Control Panel, Buttons And Indicators

    CONTROL PANEL, BUTTONS AND INDICATORS...
  • Página 27: Start And Operation

    START AND OPERATION Before Initial Use • Clean the appliance. Refer to the section "Cleaning and maintenance". • Clean the accessories. Refer to the section "Cleaning and maintenance". Setting the clock (fi g. B & C) If the mains plug is inserted into the wall socket, the display (8) will light to indicate that the clock can be set.
  • Página 29 Setting the coffee strength (fig. B & C) • The coffee strength selector (4) is used for setting the required coffee strength. It can be set to mild coffee (MILD), medium coffee (MEDIUM) and strong coffee (STRONG). • Repeatedly press the coffee strength selector (4) to set the coffee strength. The coffee strength (B) is shown on the display (8).
  • Página 31 To fill the water reservoir: Open the cover (24). Fill the water reservoir (14) with water up to the required mark on the water level indicator (15). Do not fill the water reservoir with more water than required for making the coffee. Only use the amount of water required for making the coffee.
  • Página 33 Place a suitable coffee filter in the coffee filter holder (10). Close the filter holder assembly (1 1) until the release button (12) clicks into place. 10 Set the coffee quantity. Refer to the section "Setting the coffee quantity". 1 1 Set the coffee strength. Refer to the section "Setting the coffee strength". 12 Place the coffee pot (16) on the storage plate (18).
  • Página 35: Cleaning And Maintenance

    CLEANING AND MAINTENANCE • Before cleaning or maintenance, always switch off the appliance, remove the mains plug from the wall socket and wait until the appliance has cooled down. • Do not immerse the appliance in water or any other liquids. •...
  • Página 36 • Before descaling the appliance, remove the mains plug from the wall socket and wait until the appliance has cooled down • Do not immerse the appliance in water or any other liquids. • Make sure that the grinding function is not activated when descaling the appliance. To start the descaling process: Open the cover (24).
  • Página 37: Troubleshooting

    Replacing carbon filter Open the cover (24). If necessary, empty the water reservoir (14). Remove the carbon filter holder (20) from the water reservoir (14). Open the cover (25). Remove the old carbon filter (26). Place the new carbon filter (26). Close the cover (25).
  • Página 38: Hints On Disposal

    HINTS ON DISPOSAL According to the European waste regulation 2012/19/EU this symbol on the product or on its packaging indicates that this product may not be treated as household waste. Instead it should be taken to the appropriate collection point for the recycling of electrical and electronic equipment.
  • Página 39: Fiche Technique

    Chère cliente, cher client, Toutes nos félicitations pour l’acquisition de ce nouvel appareil. Veuillez lire attentivement et respecter les instructions de ce mode d’emploi afin d’éviter d’éventuels dommages. Nous ne saurions être tenus pour responsables des dommages dus au non-respect des consignes et à...
  • Página 40: Consignes De Sécurité

    CONSIGNES DE SÉCURITÉ Consignes générales de sécurité • Lisez attentivement toutes les instructions avant utilisation de l’appareil et conservez- les pur vous y référer ultérieurement. • Utilisez l’appareil et ses accessoires uniquement aux fins prévues et non à d’autres fins que celles décrites dans le mode d’emploi. •...
  • Página 41 • Ne tirez pas sur le câble d’alimentation pour le débrancher de la prise. • Débranchez la fi che secteur de la prise lorsque l’appareil n’est plus en marche, ainsi qu’avant l’assemblage ou le démontage et avant le nettoyage et l’entretien. Consignes de sécurité...
  • Página 42: Aperçu De L'appareil

    APERÇU DE L‘APPAREIL...
  • Página 43 Touche de marche/arrêt Indicateur de quantité de café Touche du broyeur Indicateur de force du café Sélecteur de quantité de café Affi chage de la minuterie Sélecteur de l‘intensité du café Témoin de détartrage Touche de la minuterie Touche des heures Touche des minutes Écran Sélecteur de fi nesse du broyeur...
  • Página 44: Panneau De Commande, Touches Et Affichages

    PANNEAU DE COMMANDE, TOUCHES ET AFFICHAGES...
  • Página 45: Mise En Marche Et Utilisation

    MISE EN MARCHE ET UTILISATION Avant la première utilisation • Nettoyez l‘appareil. Pour cela, consultez la section „Nettoyage et maintenance“. • Nettoyez les accessoires. Consultez pour cela la section „Nettoyage et maintenance“. Réglage de l‘heure (illustrations B & C) Lorsque vous branchez le câble d‘alimentation dans la prise, l‘écran (8) s‘allume pour indiquer que vous pouvez régler l‘horloge.
  • Página 47 Réglage de l‘intensité du café (illustrations B & C) • Le sélecteur de force du café (4) sert à choisir l‘intensité du café. Vous pouvez le régler sur café doux (MILD), café moyen (MEDIUM) et café fort (STRONG). • Appuyez plusieurs fois sur le sélecteur de force du café (4) pour régler la force désirée.
  • Página 49 Remplissage du réservoir d‘eau : Ouvrez le couvercle (24). Remplissez le réservoir avec de l‘eau (14) jusqu‘au marquage souhaité de l‘indicateur (15). Ne versez pas plus d‘eau dans le réservoir d‘eau que nécessaire pour faire le café. N‘utilisez que la quantité d‘eau nécessaire pour préparer le café. L‘appareil s‘arrête automatiquement lorsque le réservoir d‘eau est vide.
  • Página 51 Insérez un filtre à café adapté dans le porte-filtre à café (10). Fermez le porte-filtre (1 1) jusqu‘à ce que le bouton de déverrouillage (12) s‘enclenche. 10 Définissez la quantité de café souhaitée. Voir section „Réglage de la quantité de café“.
  • Página 53: Nettoyage Et Maintenance

    NETTOYAGE ET MAINTENANCE • Éteignez toujours l‘appareil avant de le nettoyer ou de l‘entretenir. Débranchez la fiche de la prise et attendez que l‘appareil soit refroidi. • Ne plongez pas l‘appareil dans de l‘eau ou d‘autres liquides. • N‘utilisez pas de produits agressifs ou abrasifs pour nettoyer l‘appareil. •...
  • Página 54 • Vérifiez que la fonction de broyeur n‘est pas activée lorsque vous détartrez l‘appareil. Démarrage du processus de détartrage : Ouvrez le couvercle (24). Si besoin, videz le réservoir d‘eau (14). Retirez le support de filtre à charbon (20) du réservoir d‘eau (14). Versez un détartrant adapté...
  • Página 55: De Identification Et Résolution Des Problèmes

    Remplacement du filtre à charbon Ouvrez le couvercle (24). Si besoin, videz le réservoir d‘eau (14). Retirez le support de filtre à charbon (20) du réservoir d‘eau (14). Ouvrez le couvercle (25). Retirez l‘ancien filtre à charbon (26). Installez le nouveau filtre à charbon (26). Fermez le couvercle (25).
  • Página 56: Informations Sur Le Recyclage

    INFORMATIONS SUR LE RECYCLAGE Vous trouverez sur le produit l’image ci-contre (une poubelle sur roues, barrée d‘une croix), ce qui indique que le produit se trouve soumis à la directive européenne 2012/19/ UE. Renseignez-vous sur les dispositions en vigueur dans votre région concernant la collecte séparée des appareils électriques et électroniques.
  • Página 57: Datos Técnicos

    Estimado cliente: Le felicitamos por la adquisición de este producto. Lea atentamente el siguiente manual y siga cuidadosamente las instrucciones de uso con el fin de evitar posibles daños. La empresa no se responsabiliza de los daños ocasionados por un uso indebido del producto o por haber desatendido las indicaciones de seguridad.
  • Página 58: Indicaciones De Seguridad

    INDICACIONES DE SEGURIDAD Advertencias generales de seguridad • Lea atentamente todas las indicaciones y conserve este manual para consultas posteriores. • Utilice el aparato y los accesorios solamente para el fin previsto y no para otros fines descritos en el manual de instrucciones. •...
  • Página 59 • Desconecte el enchufe de la toma de corriente cuando el aparato no esté en marcha, antes de montarlo o desmontarlo y antes de limpiarlo y realizar labores de mantenimiento. Indicaciones de seguridad para cafeteras • No utilice el aparato al aire libre. •...
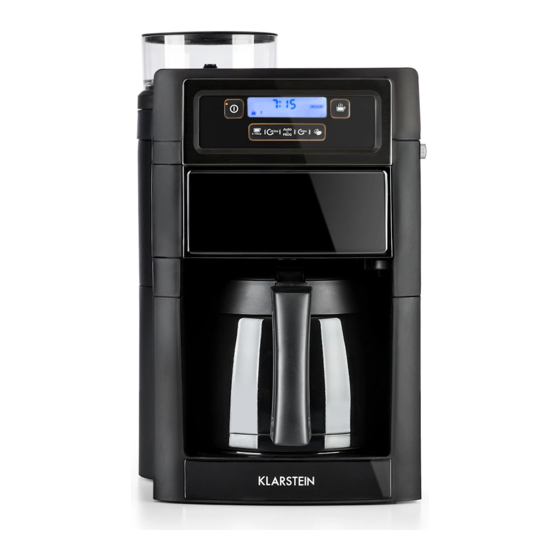
  • Página 60: Visión General Del Aparato

    VISIÓN GENERAL DEL APARATO...
  • Página 61 Botón on/off Indicador cantidad café Botón del molinillo Indicador intensidad café Selector cantidad café Indicador temporizador Selector intensidad café Indicador descalcifi cación Botón del temporizador Botón de horas Botón de los minutos Display Regulador del grado de molienda Filtro permanente Estructura del soporte del fi ltro Botón de desbloqueo (estructura del soporte del fi ltro)
  • Página 62: Panel De Control, Botones E Indicadores

    PANEL DE CONTROL, BOTONES E INDICADORES...
  • Página 63: Puesta En Marcha Y Uso

    PUESTA EN MARCHA Y USO Antes del primer uso • Limpie el aparato. Para ello, consulte la sección „Limpieza y mantenimiento“. • Limpie el accesorio. Para ello, consulte la sección: „Limpieza y mantenimiento“. Confi gurar la hora (ilustraciones B y C) Si conecta el enchufe a la toma de corriente, el display (8) se ilumina para indicar que se puede confi gurar la hora.
  • Página 65 Configurar la intensidad del café (ilustraciones B y C) • El selector de la intensidad del café (4) se emplea para regular la intensidad deseada del café. Puede seleccionarse un café suave (MILD), un café medio (MEDIUM) y un café fuerte (STRONG). •...
  • Página 67: Preparar Café Con Granos De Café (Ilustración A-H)

    Cómo llenar el depósito de agua: Abra la tapa (24). Rellene el depósito de agua (14) hasta la marca deseada en el indicador del nivel del agua (15). No llene más agua en el depósito de la necesaria para preparar el café. Utilice solamente la cantidad de agua necesaria para preparar el café.
  • Página 69: Preparar Café Con Café Molido (Ilustraciones A, B, C, D, F Y G)

    Presione el botón de desbloqueo (12) para abrir la estructura de soporte del filtro (1 1). Coloque un filtro de café adecuado en el soporte para el filtro (10). Cierre la estructura de soporte del filtro (1 1) hasta que encaje el botón de desbloqueo (12).
  • Página 71: Limpieza Y Mantenimiento

    LIMPIEZA Y MANTENIMIENTO • Apague el aparato y desconecte el enchufe de la toma de corriente antes de limpiarlo o de realizar labores de mantenimiento. Espere a que se haya enfriado completamente. • No sumerja el aparato en agua ni en ningún otro líquido. •...
  • Página 72 • Apague el aparato y desconecte el enchufe de la toma de corriente antes de descalcificarlo. Espere a que se haya enfriado completamente. • No sumerja el aparato en agua ni en ningún otro líquido. • Asegúrese de la función de molienda no esté activada cuando descalcifique el aparato.
  • Página 73: Detección Y Resolución De Problemas

    Sustituir filtro de carbón Abra la tapa (24). Si es necesario, vacíe el depósito de agua (14). Retire el filtro de carbón (20) del depósito de agua (14). Abra la tapa (25). Retire el filtro antiguo de carbón (26). Coloque el nuevo filtro de carbón (26). Cierre la tapa (25).
  • Página 74: Indicaciones Para La Retirada Del Aparato

    INDICACIONES PARA LA RETIRADA DEL APARATO Si el aparato lleva adherida la ilustración de la izquierda (el contenedor de basura tachado) entonces rige la normativa europea, directiva 2012/19/UE. Estos productos no pueden depositarse en los contenedores destinados a la basura común.
  • Página 75: Dati Tecnici

    Gentile Cliente, La ringraziamo per aver acquistato il dispositivo. La preghiamo di leggere attentamente le seguenti istruzioni per l’uso e di seguirle per evitare possibili danni tecnici. Non ci assumiamo alcuna responsabilità per danni scaturiti da una mancata osservazione delle avvertenze di sicurezza e da un uso improprio del dispositivo.
  • Página 76: Avvertenze Di Sicurezza

    AVVERTENZE DI SICUREZZA Avvertenze di sicurezza generiche • Leggere attentamente tutte le avvertenze prima dell’utilizzo e conservare il manuale per future consultazioni. • Utilizzare dispositivo e accessori solo per gli scopi previsti e secondo le modalità descritte nel manuale. • Non utilizzare il dispositivo se componenti o accessori sono danneggiati o guasti. Se componenti o accessori dovessero essere danneggiati o guasti, devono essere sostituiti dal produttore o da un’azienda tecnica autorizzata.
  • Página 77: Smaltimento Dell'imballaggio

    • Staccare la spina quando il dispositivo non è in utilizzo, prima di montaggio e smontaggio e prima di pulizia e manutenzione. Avvertenze di sicurezza per macchine del caffè • Non utilizzare il dispositivo all’aperto. • Non utilizzare il dispositivo in ambienti umidi. •...
  • Página 78: Descrizione Del Prodotto

    DESCRIZIONE DEL PRODOTTO...
  • Página 79 Tasto On/Off Spia quantità caffè Tasto macina Spia intensità caffè Selezionare quantità caffè Spia timer Selezionare intensità caffè Spia decalcifi cazione Timer Tasto delle ore Tasto dei minuti Display Selezionare grado fi nezza macina Filtro permanente Supporto del fi ltro Tasto di sblocco (supporto del fi ltro) Vano chicchi del caffè...
  • Página 80 PANNELLO DI CONTROLLO, TASTI E SPIE...
  • Página 81: Messa In Funzione E Utilizzo

    MESSA IN FUNZIONE E UTILIZZO Prima di procedere all’utilizzo • Pulire il dispositivo. Fare riferimento al paragrafo “Pulizia e manutenzione”. • Pulire gli accessori. Fare riferimento al paragrafo “Pulizia e manutenzione”. Impostare l’orologio (immagini B & C) Quando si collega la spina, il display (8) si accende per indicare che è possibile impostare l’orologio.
  • Página 83 Impostare l’intensità del caffè (immagini B & C) • Il tasto per selezionare l’intensità del caffè (4) viene utilizzato per impostare l’intensità desiderata. Può essere impostato su leggero (MILD), media intensità (MEDIUM) e caffè forte (STRONG). • Premere più volte il tasto (4) per impostare l’intensità desiderata. L’intensità selezionata (B) viene mostrata sul display (8).
  • Página 85 Come riempire il contenitore dell’acqua: Aprire il coperchio (24). Riempire il contenitore dell’acqua (14) fino al livello desiderato sulla scala di riempimento (15). Non aggiungere quantità d’acqua superiore a quella necessaria per la preparazione del caffè. Il dispositivo si arresta automaticamente quando il contenitore dell’acqua è...
  • Página 87 Chiudere il supporto del filtro (1 1) fino a quando il tasto di sblocco (12) si innesta. 10 Impostare la quantità di caffè desiderata. Fare riferimento al paragrafo “Impostare la quantità di caffè”. 1 1 Impostare l’intensità del caffè desiderata. Fare riferimento al paragrafo “Impostare l’intensità...
  • Página 89: Pulizia E Manutenzione

    PULIZIA E MANUTENZIONE • Prima di pulizia e manutenzione, spegnere il dispositivo, staccare la spina e attendere che si sia completamente raffreddato. • Non immergere il dispositivo in acqua o altri liquidi. • Non utilizzare detergenti aggressivi o corrosivi per pulire il dispositivo. •...
  • Página 90 • Prima di procedere alla decalcificazione, staccare la spina e attendere che il dispositivo si sia raffreddato. • Non immergere il dispositivo in acqua o altri liquidi. • Assicurarsi che la funzione di macinatura non sia attiva mentre si decalcifica il dispositivo.
  • Página 91: Ricerca E Correzione Degli Errori

    Sostituire il filtro ai carboni: Aprire il coperchio (24). Se necessario, svuotare il contenitore dell’acqua (14). Rimuovere il supporto del filtro ai carboni (20) dal contenitore dell’acqua (14). Aprire la copertura (25). Rimuovere il vecchio filtro ai carboni (26). Inserire il nuovo filtro ai carboni (26). Chiudere la copertura (25).
  • Página 92: Smaltimento

    SMALTIMENTO Se sul prodotto è presente la figura a sinistra (il bidone dei rifiuti con le ruote), si applica la direttiva europea 2012/19/ UE. Questi prodotti non possono essere smaltiti con i rifiuti normali. Informarsi sulle disposizioni vigenti per la raccolta di dispositivi elettrici ed elettronici.
  • Página 93: Technická Data

    Vážený zákazníku, Gratulujeme Vám k zakoupení produktu Prosím, důkladně si přečtete manuál a dbejte na následující pokyny, aby se zabránilo škodám na zařízení. Jakékoliv selhání způsobené ignorováním uvedených instrukcí a upozornění uvedených v návodu k použití se nevztahuje na naši záruku a jakoukoliv odpovědnost.
  • Página 94: Bezpečnostní Pokyny

    BEZPEČNOSTNÍ POKYNY Všeobecní bezpečnost • Před použitím si pečlivě přečtěte tuto příručku a uschovejte ji pro budoucí použití. • Spotřebič a příslušenství používejte pouze na určené účely a příslušenství nepoužívejte jinak, než je uvedeno v návodu. • Nepoužívejte spotřebič, pokud je poškozen nebo pokud je poškozena některá část nebo veškeré...
  • Página 95 Bezpečnostní pokyny pro kávovary • Spotřebič nepoužívejte venku. • Spotřebič nepoužívejte v prostředí, kde se nachází pára. • Pokud je v nádrži voda, okolní teplota nesmí klesnout pod bod mrazu. • Spotřebič umístěte na plochý a stabilní povrch. • Umístěte spotřebič na tepelně odolný povrch. •...
  • Página 96: Popis Produktu

    POPIS PRODUKTU...
  • Página 97 Tlačítko zapnutí / vypnutí Indikátor množství kávy Tlačítko mlýnku na kávu Indikátor síly kávy Tlačítko na volení množství kávy Indikátor časovače Tlačítko pro výběr síly kávy Indikátor na odstranění vodního kamene Tlačítko časovače Tlačítko hodin Tlačítko minut Displej Selektor jemnosti kávy Trvalý...
  • Página 98: Ovládací Panel, Tlačítka A Indikátory

    OVLÁDACÍ PANEL, TLAČÍTKA A INDIKÁTORY...
  • Página 99: Použití A Provoz

    POUŽITÍ A PROVOZ Před prvním použitím • Vyčistěte zařízení. Viz „Čištění a údržba“. • Vyčistěte příslušenství. Viz „Čištění a údržba“. Nastavení hodin (obr. B a C) Pokud je síťová zástrčka zasunuta do zásuvky, rozsvítí se displej indikátor (8), který indikuje, že hodiny mohou být nastaveny. Hodiny lze kdykoliv později upravit. Opakovaným stiskem tlačítka hodin (6) nastavte hodiny.
  • Página 101 Nastavení síly kávy (obr. B a C) • Tlačítko pro nastavení síly kávy (4) se používá k nastavení požadované síly kávy. Může být nastavena na mírně silnou kávu (MILD), středně silnou kávu (MEDIUM) a silnou kávu (STRONG). • Opakovaně stiskněte tlačítko na zvolení síly kávy (4) pro nastavení síly kávy. Síla kávy (B) se zobrazuje na displeji (8).
  • Página 103 Nastavení jemnosti kávy (obrázek E) • Tlačítko pro nastavení jemnosti kávy (9) se používá k nastavení požadované jemnosti mleté kávy při použití kávových zrn. Mohou být nastaveny na různé úrovně, od jemně pomleté kávy až po kávová zrna namleté na hrubo. •...
  • Página 105: Čištění A Údržba

    Příprava kávy s mletou kávou (obrázky A, B, C, D, F & G) Poznámka: Používejte pouze mleté kávové a košové filtrační sáčky velikosti 80/200 mm. Pokud není funkce mletí aktivována, stiskněte tlačítko na mletí kávy (2), čímž aktivujete funkci mletí. Množství kávy a síla kávy se zobrazují na displeji. Naplňte nádrž...
  • Página 107 Čištění prostoru mlýnku na kávu (obr. C & I) Poznámka: Při mletí kávových zrn může kávový prach ucpat mlecí mechanismus. Prostor mlýnku na kávu (19) je doporučeno čistit každé 2 týdny, aby se zabránilo ucpávání mlýnku. Před čištěním mlýnku na kávu je třeba provést následující kroky: Vypněte spotřebič.
  • Página 108 1 1 Zapněte spotřebič stisknutím tlačítka zapnutí / vypnutí (1). 12 Nechte spotřebič běžet, dokud se nádrž na vodu s prostředkem na odstranění vodního kamene nevyprázdní. Zařízení se automaticky zastaví, když je zásobník vody (14) prázdný. Vypláchněte zařízení dvakrát podle následujícího postupu: Naplňte vodní...
  • Página 109: Řešení Problémů

    ŘEŠENÍ PROBLÉMŮ Problém Možná příčina Navrhované řešení Kávovar není připojen do Zastrčte hlavní zástrčku. elektrické sítě. Na displeji není Žádné síťové napájení. Zkontrolujte pojistku / žádný symbol. zásuvku. Displej je porouchaný. Obraťte se na zákaznický servis. Příliš mnoho přístrojů je Zapojte zařízení...
  • Página 110: Pokyny K Likvidaci

    POKYNY K LIKVIDACI Podle Evropského nařízení odpadu 2012/19/EU tento symbol na výrobku nebo jeho obalu znamená, že výrobek nepatří do domácího odpadu. Na základě směrnice by se měl přístroj odevzdat na příslušném sběrném místě pro recyklaci elektrických a elektronických zařízení. Zajištěním správné...
  • Página 111: Technische Gegevens

    Geachte klant, hartelijk gefeliciteerd met de aanschaf van dit apparaat. Lees de hierna volgende handleiding aandachtig door en volg de instructies op om schade te voorkomen. Voor schade veroorzaakt door het niet in acht nemen van de instructies of door onjuist gebruik nemen wij geen verantwoordelijkheid.
  • Página 112: Veiligheidsinstructies

    VEILIGHEIDSINSTRUCTIES Algemene veiligheidsinstructies • Lees voor gebruik alle informatie zorgvuldig door en bewaar de handleiding als referentie. • Gebruik het apparaat en de bijbehorende accessoires uitsluitend voor het voorbestemde doeleinde en niet voor andere doeleinden dan die, die in de gebruikershandleiding worden beschreven.
  • Página 113 • Wanneer de stroomkabel of de stekker beschadigd is dient deze door de fabrikant, een geautoriseerd vakbedrijf of een gelijkwaardig gekwalifi ceerd persoon te worden vervangen. • Trek niet aan de stroomkabel om de stekker uit het stopcontact te halen. •...
  • Página 114: Overzicht Apparaat

    OVERZICHT APPARAAT...
  • Página 115 Aan / Uit toets Weergave koffi ekwantiteit Maalwerk Weergave koffi ekwaliteit Hoeveelheid koffi e Weergave timer Intensiteit koffi e Weergave ontkalking Timer Minuten Display Maalgradatie Permanentfi lter Filterhouder Ontregelingsknop (fi lterhouder) Koffi ebonenreservoir Watertank Waterstandindicator Koffi ekan Warmteplaat Maalkamer Koolfi lterhouder Borstel/schroevendraaier Waterdampsleuf Ontkalkingstoets (toets 3+4)
  • Página 116: Bedieningspaneel, Functietoetsen & Display

    BEDIENINGSPANEEL, FUNCTIETOETSEN & DISPLAY...
  • Página 117: Ingebruikname En Bediening

    INGEBRUIKNAME EN BEDIENING Voor het eerste gebruik • Reinig het apparaat. Zie hiervoor de sectie “Reiniging en onderhoud”. • Reinig de accessoires. Zie hiervoor de sectie “Reiniging en onderhoud”. De tijd instellen (afb. B en C) Wanneer u de stekker in het stopcontact steekt licht het display (8) op en geeft aan dat de tijd kan worden ingesteld.
  • Página 119 De koffie-intensiteit instellen (afb. B en C) • De koffie-intensiteit toets (4) dient voor het instellen van de gewenste koffie- intensiteit. U kunt kiezen uit milde koffie (MILD), middelmatig sterke koffie (MEDIUM) en sterke koffie (STRONG). • Druk meerdere malen op de koffie-intensiteit toets (4) om de gewenste intensiteit te selecteren.
  • Página 121 Zo vult u de watertank: Open het deksel (24). Vul de watertank (14) tot aan de gewenste markering van de waterstandsindicator (15) met water. Vul niet meer water dan voor de toebereiding van de koffie noodzakelijk is. Gebruik uitsluitend de voor de toebereiding benodigde hoeveelheid water. Het apparaat stopt automatisch wanneer de watertank leeg is.
  • Página 123: Reiniging En Onderhoud

    Sluit de filterhouder (1 1) totdat de ontregelingsknop (12) vergrendelt. 10 Stel de gewenste hoeveelheid koffie in. Zie hiervoor de sectie “De hoeveelheid koffie instellen”. 1 1 Stel de koffie-intensiteit in. Zie hiervoor de sectie “De koffie-intensiteit instellen”. 12 Plaats de koffiekan (16) op de plaat (18). 13 Zet het apparaat aan door op de Aan / Uit toets (1) te drukken.
  • Página 125 • Gebruik voor de reiniging van het apparaat geen agressieve of schurende middelen. • Reinig het apparaat niet met scherpe voorwerpen. • Controleer het apparaat regelmatig op eventueel opgelopen schade. • Reinig de accessoires: - Reinig de koffiekan met water en afwasmiddel. - Reinig de koffiefilterhouder met water en afwasmiddel.
  • Página 126 Zo start u het ontkalkingsproces: Open de deksel (24). Indien nodig leegt u de watertank (14). Verwijder de koolfilterhouder (20) uit de watertank (14). Vul de watertank (14) met een geschikte ontkalker. Plaats de koffiekan (16) op de plaat (18). Steek de stekker in het stopcontact.
  • Página 127: Foutmeldingen En Oplossingen

    Opmerking: De koolfilterhouder mag niet in de watertank worden ingezet voordat het apparaat is ontkalkt. Dit geldt niet wanneer het apparaat voor de eerste keer wordt gebruikt. FOUTMELDINGEN EN OPLOSSINGEN Probleem Mogelijke oorzaak Oplossing Apparaat niet aangesloten. Steek de stekker in het stopcontact.
  • Página 128: Instructies Voor Afvoer

    INSTRUCTIES VOOR AFVOER Wanneer het hier links afgebeelde symbool zich op het product bevindt (doorgestreepte vuilcontainer op wielen) dan geldt de Europese richtlijn 2012/19/EU. Deze producten mogen niet met het reguliere huisvuil worden afgevoerd. Informeer naar de correcte regeling aangaande de gescheiden inzameling van elektrische en elektronische apparaten in uw gemeente.

Este manual también es adecuado para:

1003287510032876Aromatica iiAromarica ii duo

Tabla de contenido