Tabla de contenido
Publicidad
Idiomas disponibles
Idiomas disponibles
Enlaces rápidos
Publicidad
Tabla de contenido

Resumen de contenidos para Brita WD 3020
- Página 1 BRITA Tap Instructions for use | Mode d‘emploi Manual de instrucciones | Instruções de utilização Gebrauchsanleitung | Istruzioni per l‘uso Instrukcja obsługi | Gebruiksaanwijzing 1014662-002_GA_BRITA_Tap_CE.indb 1 04.04.16 11:27...
-
Página 2: Tabla De Contenido
Seite I. Congratulazioni Pagina 73 ITALIANO II. Istruzioni d’uso Pagina 74 III. Note importanti Pagina 85 IV. BRITA al vostro servizio per una completa soddisfazione Pagina 86 I. Gratulujemy Strona 89 POLSKI II. Jakość od samego początku Strona 90 III. Ważne informacje Strona 101 IV. -
Página 3: English
I. Congratulations on your new BRITA Tap System ® You are assured of B RITA quality and our commitment to our c ustomers. Your BRITA Tap, is the key to cleaner, clearer great tasting filtered water Next to hot and cold unfiltered water, your BRITA system offers many advantages • Great tasting filtered water at your fingertips • F iltered water is ideal for bringing out the full potential of your... -
Página 4: Quality From The Very Start
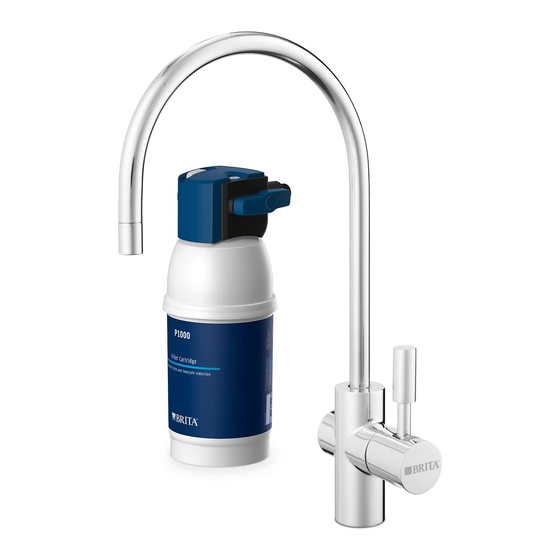
Terms of warranty The BRITA Tap system is subject to the statutory guarantee of 2 years. A guarantee claim may be asserted only if all instructions in this handbook are followed and observed. Contents of the BRITATap Water Filter Kit To ensure you get the best result from your BRITA Tap Water Filter Kit, please follow these instructions carefully. Your BRITA Tap Water Filter Kit includes the following (see fig. 1): 1. F ilter head with three settings including a convenient locking handle 2. Flexible wall mount 3. P 1000 water filter cartridge 4. BRITA Tap (design may differ from image shown) 5. BRITA Tap Cartridge Status Indicator 6. Battery (CR2032) - Página 5 Setting BRITA Tap – easy installation number of reaction zones that changed their colour Before starting, please check that you have all the components capacity P1000 up to 1200 L up to 600 L up to 400 L listed above (see fig. 1) as well as the recommended tools. P3000 up to 3400L up to 1700 L up to 1100 L There are 7 steps to the installation. German Carbonate up to 10 10 to 17 above 17 dH Hardness [°dH] Prior to installation, read the "Technical Data" (chapter 7) English Carbonate up to 13 13 to 21 above 21 and the "Important Notes" (chapter 9). The system cannot be installed with a low pressure boiler as this might lead to Hardness [°eH] water damages. After storage and transport below 0°C, French Carbonate up to 18 18 to 30 above 30 the product must be stored in the open original packaging Hardness [°fH]...
- Página 6 Status Indicator: 1 LED 2 LEDs 3 LEDs Depending on the setting you chose for the filter head (step 1), water hardness setting (HARDNESS) C you will programm the BRITA Tap Cartridge Status Indicator as cartridge setting (CARTRIDGE) A 1000 P 1000 P 3000 follows (see fig. 5): a Push the button on the right side (HARDNESS) to choose the C How the BRITA Tap Cartridge Status Indicator works water hardness. If you push the button once, two yellow LEDs...
-
Página 7: Technical Data
- Y ellow light: 90 % of the filter capacity has been used. R emember WD 3020 to buy a new replacement filter cartridge. - Red light: The filter cartridge needs to be changed. 1. B RITA Tap with 3 hoses E Reprogramming the BRITA Tap Cartridge Status 2. B RITA Tap Cartridge Status Indicator Indicator 3. O -Ring If the maximum volume is reached or the cartridge has been used 4. S hank for 12 months, the BRITA Tap Cartridge Status Indicator’s LED will 5. J oint (Is only necessary for installa- start flashing red (only if BRITA lever is in the filtering position). tion of the dispenser if you directly In this case the filter cartridge should be replaced (chapter 4). Once mount it onto your sink. If you... - Página 8 Please follow the diagram below (see fig. 9) and perform the steps in the right order. We recommend placing a suitable container under the water A C onnect supplied T-piece on your cold water supply supply as there will be water left in the hoses which will run a) I nsert one 3/8" gasket into the female nut of the supplied down when you unscrew them. T-piece. b) Connect this end of the T-piece to your cold water supply. d) Unscrew your kitchen tap – there is no standard mounting but in general a pipe wrench will help you to unmount it. If you do have an additional free 3/8" cold water supply for e) Pull out both your kitchen tap and the hoses. the BRITA Tap in your kitchen, you do not need to install the B You’re now ready to install the BRITA Tap. supplied T-piece! First of all, screw the shank (4) into the Brita Tap (1). If your cold water supply does not fit the 3/8" connector of Screw the hoses into the dispenser (see fig. 8). the T-piece, use the supplied adapter if required. Please insert the 1/2" gasket into the female nut of the adapter first. Screw the M8 connector of the hose with the blue stripe into the Your Water Filter Kit comes with two 1/2" adapters. Please hole C . go to your nearest supplier for adapters in other sizes. Screw the M8 connector of the hose with the red stripe into the hole H. Screw the M8 connector of the 800 mm hose into the hole B. B Connect the hose with the blue stripe to one side of the T-piece. C Take the hose with two 3/8" connectors. Insert the 3/8" gaskets WD 3020/ W D 3030/ W D 3040 and WD 3050 into the respective female threads of the two hose ends.
- Página 9 Step 5: Inserting the filter cartridge (see fig. 10) A Remove protective strap (1). B Insert the filter cartridge (4) vertically into the filter head (5). C Turn the locking handle (3) until you feel it engages. Cold water supply Hot water supply (fig. 9) The max. tightening torque for the G3/8" connections may not exceed 14 Nm! Only hose connections with gaskets (13) may be used – hoses with conical screw connections damage the connections of the filter head and invalidate any warranty claims! (fig. 10) The filter cartridge can only be inserted when the locking handle is open. Make sure that the filter cartridge is positioned correctly. ENGLISH 1014662-002_GA_BRITA_Tap_CE.indb 9 04.04.16 11:27...
- Página 10 Before use, make sure that you have followed all the steps (see fig. 11) correctly and all the parts are fitted. Place a suitable container under the cartridge to catch any leakages. A Turn on the cold and hot water supplies and check the system During assembly, note the installation dimensions, bending carefully for any leaks. radii of the hoses and dimensions of the accessories. The B Open the BRITA Tap and allow water to run until the filtered system can be operated vertically and horizontally. When water runs clear and without any bubbles (at least 2 litres). using the wall mount, install vertically only! A Attach the wall mount in place using the two matching screws and use two wall plugs, if necessary, depending on the type of Replacing the filter cartridge wall.
- Página 11 Filter Activating the BRITA Tap Cartridge Status P1000 119 mm/108 mm/265 mm system Indicator (filter head with filter P3000 117 mm/104 mm/417 mm A Push the Reset Button (see fig. 5) of the BRITA Tap Cartridge Sta- cartridge) tus Indicator for three seconds until the LED-light flashes green. P1000 108 mm/108 mm/259 mm B The timer starts automatically. Filter Dimensions cartridge P3000 104 mm /104 mm/410 mm (Width/Depth/ Height) Installed Maintenance dimensions P1000 137 mm/130 mm/265 mm (vertical Regularly check the filter system for leaks. Regularly check the installation hoses for kinks. Kinked hoses must be replaced. with wall...
- Página 12 Troubleshooting For models WD 3030 and WD 3040 only A No water flow These models have an aerator with two integrated outlets. The Inner one is for BRITA filtered water, the outer area for hot and cold Cause: Water intake closed. water. As with every tap aerator, there can be limescale build-up in Troubleshooting: O pen the water intake at the upstream shut-off the outer area. Therefore it is recommended to clean the aerator valve or by closing the locking handle (3) on the on a regular basis. For cleaning: Unscrew the cap on the end of the filter head (5). Check hoses for kinks. dispensers neck. The aerator is connected to a silicon hose. Detach B No or low water flow in spite of open water intake it carefully and clean the aerator (e.g. with vinegar). After cleaning Cause: Mains pressure too low.
- Página 13 WD 3020 Spare Part Name Article No. Spare Part Name 1004715 Gasket On Line 3/8" 2 mm CE + AU 1012554 1004713 Gasket On Line 1/2" 2 mm CE + AU 1004699 Hose On Line 3/8" IT - 3/8" IT CE 1015771 filterhead G3/8 3-way LED CE spare part 1004690 Adapter 1/2" IT - 3/8" ET 1005821 T-piece 3/8" 1015771 1016311 1012556 1016282 1004699 1015754 1005821 1004715 1013529 1012557 1004690 (fig. 13) (fig. 14) 1012562 1004713 Article No.
- Página 14 1014609 Aerator Set WD 3050 1012556 Spare Part Mixer Cartridge 1012550 1012552 Base Ring Set WD 3030/3040 brushed 1014609 1014608 Base Ring Set WD 3050 1012557 Hose Set WD 3020 CE 1013529 Assembly Set WD 3050 1012562 Spare part Hose DN6 800 mm HF M8x1 - G3-8HN ASM 1015754 BRITA Tap Cartridge Status Indicator spare part 1016311 Valve LED ASM spare part 1016282 Cover mixer tap WD3020-3040 spare part 1016311 1012556 1016282 1015754 1012552 brushed 1014608 1012557 1013529 1012562 (fig. 15) ENGLISH 1014662-002_GA_BRITA_Tap_CE.indb 14 04.04.16 11:27...
-
Página 15: Important Notes
III. Important notes Important notes Optimum use Protect the P 1000 water filter cartridge from direct sunlight and • B RITA recommends that the filter system is not left unused for mechanical damage. Do not assemble near sources of heat and a long period. If the BRITA Tap is not used for several days (2–3 open flames. A stop valve must be installed before the filter days), we recommend that the filter system be flushed with the system intake hose. The BRITA Tap System is only suitable for flushing volume X indicated in the table below. After stagnation domestic use. periods of over 4 weeks, the filter should be flushed with flushing volume Y. Please also note the maximum usage period of the fil- Only water of drinking water quality may be used as intake water ter cartridge is 12 months, irrespective of the actual volume used. for the BRITA water filter system. The BRITA water filter cartridge is only suitable for cold water use within the supply water tem- Similar to the conventional taps, before using you should let water perature stated in chapter 7 . No microbiologically impaired water rinse through for a short period so you can enjoy your BRITA or water of unknown quality may be used without appropriate filtered water. disinfection. Flushing volume X after 2–3 days stagnation Flushing volume The system cannot be installed with a low pressure boiler. P 1000 2 Litres Irrespective of the water used, you should use stainless steel utensils or kettles with stainless steel heating elements. This is of P 3000 3 Litres particular importance to people who are sensitive to nickel. Flushing volume Y after 4 weeks stagnation... -
Página 16: Brita, Quality And Satisfaction Guaranteed
IV. B RITA , quality and satisfaction guaranteed ® The BRITA service hotline cares Correct disposal of the BRITA Tap Cartridge Status Indicator Do you have any questions about your BRITA product? Every BRITA Tap Cartridge Status Indicator has Or on the subject of water fi ltration? Give us a call! a useful life of approx. 5 years. At the end of the You can fi nd the contact details for your BRITA customer service useful life of the Status Indicator, remember that team next to your country code on the back of this booklet. it must be disposed of according to the applicable regulations and statutory requirements. The best side of water: www.brita.net Are you looking for your nearest BRITA retailer? Do you want more detailed information about BRITA products? Or about the BRITA... -
Página 17: Français
I. Nous vous félicitons pour l'achat de votre nouveau Robinet BRITA ® Vous bénéficiez à présent de la qualité BRITA, de notre engagement envers nos clients et de notre garantie. Le Robinet BRITA fournit une eau filtrée plus claire au goût agréable. Outre la distribution d'eau froide et chaude non filtrée, le système BRITA offre de nombreux avantages • Une eau au goût agréable d'un simple gesten • L 'eau filtrée révèle la saveur de vos aliments et offre une eau Robinet BRITA au goût agréable pour votre consommation quotidienne... -
Página 18: La Qualité Dès L'installation
Contenu du kit d'installation du robinet BRITA Pour obtenir les meilleurs résultats possibles, lisez attentivement les instructions ci-après du kit d'installation du robinet BRITA. Votre kit d'installation du robinet BRITA comprend les éléments suivants (voir fig. 1) : 1. Tête de filtre à 3 réglages avec poignée de verrouillage pratique 2. F ixation murale pratique 3. C artouche filtrante P 1000 4. R obinet BRITA (votre Robinet BRITA peut ne pas correspondre tout à fait à celui de l'illustration) - Página 19 Réglage Robinet BRITA : installation facile Nombre de zones réactives dont la Avant d'installer le système, vérifiez que vous avez bien toutes couleur a changé les pièces mentionnées ci-dessus (voir fig. 1) et tous les outils recommandés. Capacité P1000 jusqu'à jusqu'à 600 L jusqu'à 1200 L 400 L L'installation comporte 7 étapes. P3000 jusqu'à jusqu'à jusqu'à 3400L 1700 L 1100 L Lisez attentivement les caractéristiques techniques (cha- pitre 7) ainsi que les instructions importantes (chapitre 9) Dureté carbonate jusqu'à 10 10 à 17 plus de avant l'installation. Le système ne peut pas allemande [°dH] 17 dH être installé avec un chauffe-eau à basse pression en raison Dureté carbonate jusqu'à 13 13 à 21 plus de 21 des risques de dégâts des eaux. Après un stockage et un...
- Página 20 BRITA : Selon le réglage que vous avez choisi (étape 1), vous allez pro- 1 LED 2 LEDs 3 LEDs grammer l'indicateur lumineux de changement de cartouche BRITA comme suit (voir fig. 5) : Réglage de dureté de l'eau (DURETÉ) C a Appuyez sur le bouton à droite (DURETÉ) pour choisir la dureté Cartouche (CARTOUCHE) A 1000 P 1000 P 3000 de l'eau. si vous appuyez sur le bouton une fois, deux LED...
-
Página 21: Caractéristiques Techniques
Ne pas immerger l’indicateur lumineux de changement de 2. I ndicateur lumineux de changement cartouche dans l’eau de cartouche BRITA 3. B ase 4. T ige 5. C ontre-plaque (nécessaire unique- ment si vous installez le distributeur Étape 3 : installation du robinet BRITA directement sur votre évier. Si vous l'installez sur la contre-plaque, vous Pour installer le robinet BRITA, assurez-vous tout d'abord de dispo- n'avez pas forcément besoin de ser de tous les éléments nécessaires. cette pièce, qui permet de stabiliser le robinet au niveau de l'évier) Assurez-vous de disposer de suffisamment de place sous 6. J oint d'étanchéité plat l'évier pour y installer la tête de filtre et la cartouche filtrante,... - Página 22 A R eliez la pièce de raccord en T fournie à l'arrivée d'eau froide. sous l'arrivée d'eau pour recueillir l'eau restant dans les a) M ontez un joint 3/8" sur l'écrou femelle de la pièce de raccord en tuyaux au moment de leur dévissage ! T fournie. b ) R eliez cette extrémité de la pièce de raccord en T à votre arrivée d) Dévissez votre robinet de cuisine ; il n'y a pas de montage d'eau froide. standard, mais une clé à mollette facilite généralement le démontage. Si vous disposez d'une deuxième arrivée d'eau froide 3/8" e) Tirez à la fois sur le robinet de l'évier de votre cuisine et sur pour le robinet BRITA dans votre cuisine, il n'est pas néces- les tuyaux. saire d'installer la pièce de raccord en T fournie ! Si le robinet B Vous êtes à présent prêt à installer le robinet BRITA. d'eau froide ne convient pas au raccord 3/8" du tuyau (1), Tout d'abord, vissez les tuyaux au robinet BRITA (1). utilisez l'adaptateur fourni. Montez d'abord le joint ½" sur l'écrou femelle de l'adaptateur. Votre kit d'installation com- Vissez les tuyaux au distributeur (voir fig. 8). prend deux adaptateurs ½". Adressez-vous au fournisseur le Vissez le connecteur M8 du tuyau identifié par la rayure bleue dans plus proche, si vous avez besoin d'autres adaptateurs. l'orifice C. Vissez le connecteur M8 du tuyau identifié par la rayure rouge dans B Raccordez le tuyau avec la rayure bleue à l'une des extrémités de l'orifice H. la pièce de raccord en T. Vissez le connecteur M8 du tuyau de 800 mm dans l'orifice B.
- Página 23 Étape 5 : mise en place de la cartouche filtrante (voir fig. 10). A Retirez la languette de protection (1). B Placez la cartouche filtrante (4) à la verticale dans la tête de filtre (5) C Tournez la poignée de verrouillage (3) jusqu'à ce qu'elle s'enclenche. Arrivée Arrivée d'eau d'eau chaude froide (fig. 9) Le couple de serrage pour les raccords G3/8" ne doit pas dépasser 14 Nm ! Utilisez seulement des raccords à joints plats (13) car les géométries de joints coniques endommagent les raccords de la tête de filtre. L'utilisation de tels joints entraîne en outre l'annulation de la garantie ! (fig. 10) L'insertion de la cartouche filtrante est possible uniquement lorsque la poignée de verrouillage est ouverte. Veillez à ce que la cartouche filtrante soit positionnée correctement. FRANÇAIS 1014662-002_GA_BRITA_Tap_CE.indb 23 04.04.16 11:28...
-
Página 24: Etape 7 : Mise En Service
A O uvrez la poignée de verrouillage (3). B P lacez un récipient adapté sous le tuyau de rinçage pour recueillir l'eau qui coule. Ouvrez le robinet de purge (2) et dépressurisez-le système. Fermez à nouveau le robinet de purge (2). C R etirez la cartouche filtrante saturée (4) de la tête de filtre (5) – Veuillez noter que la cartouche est fermement fixée, vous (fig. 11) pouvez donc tirer dessus sans risquer de la casser. D I nsérez la nouvelle cartouche filtrante (voir le chapitre 3.5). E F ermez la poignée de verrouillage (3). F R éinitialisez l'indicateur de changement de cartouche BRITA (chapitre 5). G O uvrez le levier BRITA de votre robinet BRITA et rincez le système jusqu'à ce que l'eau soit limpide et ne contienne plus d'air (laissez couler au moins 2 litres d'eau). FRANÇAIS 1014662-002_GA_BRITA_Tap_CE.indb 24 04.04.16 11:28... - Página 25 P 1000 et P 3000 modèle P 3000 reste actif jusqu'à 3 400 litres avec le réglage A, jusqu'à 1 700 litres avec le réglage B et jusqu'à 1 100 litres avec le réglage C. Tenez compte de ces données lorsque vous réinitialisez l'indicateur Pression de fonctionnement de 2 à 8,6 bars max. lumineux de changement de cartouche BRITA. Température de l'arrivée d'eau de 4 °C à 30 °C Fonctionnement de 4 °C à 40 °C Température Activation de l'indicateur lumineux de ambiante en Stockage/transport de -20 °C à 50 °C changement de cartouche BRITA P1000 1200 L Capacité jusqu'à 8,5 dH de A Appuyez sur le bouton reset (fig. 5) de l'indicateur lumineux de dureté de l'eau avec réglage changement de cartouche pendant trois secondes jusqu'à ce « A » P3000 3400 L qu'un voyant vert clignote. B Le compteur démarre automatiquement. Capacité de 8,5 à 17 dH de P1000 600 L dureté de l'eau avec réglage...
- Página 26 C Fuites Caractéristiques techniques du robinet BRITA Cause : raccords vissés mal fixés. Solution : vérifiez la pression de la tuyauterie. Contrôlez Pression de tous les raccords vissés et fixez-les selon les de 0,5 à 10 bars max. fonctionnement indications du chapitre 3.4.D Absence de signal lumineux d'une LED pendant utilisation Raccordement d'eau de 4° C à 30°C Cause : l a pile n'est pas insérée correctement ou est froide épuisée. Raccordement d'eau max. 70°C Solution : v érifiez que la pile est insérée correctement. chaude Si nécessaire, remplacer la pile. Débit ≥ 9 L/min...
- Página 27 WD 3020 Nom de la pièce de rechange Numéro d'article Nom de la pièce de rechange 1004715 Joint On Line 3/8" 2 mm CE + AU 1012554 1004713 Joint On Line 1/2" 2 mm CE + AU 1004699 Tuyau On Line 3/8" IT – 3/8" IT CE 1015771 Tête de filtre G3/8 pièce de rechange 3 en 1 LED CE 1004690 Adaptateur 1/2" IT – 3/8" ET 1005821 Pièce de raccord en T 3/8" 1016311 1012556 1015771 1016282 1015754 1004699 1005821 1004715 1013529 1012557 (fig. 14)
- Página 28 1012556 Valve intérieure fermeture / ouverture eau filtrée ASM 1012550 1012552 Anneau de base WD 3030/3040 brushed 1014609 1014608 Anneau de base WD 3050 1012557 Kit de tuyaux 1013529 Kit de montage sous évier WD 3050 1012562 Pièce de rechange Tuyau DN6 800 mm HF M8x1 – G3-8HN ASM 1015754 Pièce de rechange Indicateur LED de change- ment de cartouche BRITA Tap 1016311 Pièce détachée valve intérieure LED ASM 1016282 Levier de mélangeur robinet WD3020-3040 1016311 1012556 1016282 1015754 1012552 brushed 1014608 1012557 1013529 (fig. 15) 1012562 FRANÇAIS 1014662-002_GA_BRITA_Tap_CE.indb 28 04.04.16 11:28...
-
Página 29: Utilisation Optimale
III. Informations importantes Informations importantes Utilisation optimale Évitez d'exposer la cartouche filtrante P 1000 à un rayonnement • B RITA recommande d'utiliser le système de filtration régulièrement. solaire direct ou à des dommages mécaniques. Ne placez pas En cas de non-utilisation du robinet BRITA pendant 2 ou 3 jours, nous le système à proximité de sources de chaleur ou de flammes nues. vous recommandons de le rincer en faisant couler le volume X indiqué Montez un robinet d'arrêt en amont du tuyau d'alimentation dans le tableau ci-dessous. Après une période de non-utilisation de du système de filtration. Le robinet BRITA est réservé à un usage plus de 4 semaines, rincez le système de filtration en faisant couler ménager. le volume Y. N'oubliez pas que la durée d'utilisation de la cartouche filtrante est limitée à 12 mois indépendamment du volume réel utilisé. Utilisez seulement de l'eau potable avec le système de filtration BRITA. La cartouche filtrante du système de filtration BRITA peut Comme pour les robinets standards, avant utilisation nous vous recommandons de laisser l'eau couler un court moment afin de être utilisée uniquement avec de l'eau froide dans la plage de température indiquée au chapitre 7 . N'utilisez en aucun cas de l'eau savourer pleinement votre eau filtrée BRITA. chargée de contaminants microbiologiques ou de l'eau dont la Volume de rinçage X après 2 ou 3 jours de Volume de qualité est inconnue sans effectuer une stérilisation appropriée. non-utilisation rinçage Le système ne peut pas être installé avec un chauffe-eau à basse pression. P 1000 2 litres Indépendamment de l'eau utilisée, il est recommandé de se P 3000 3 litres servir d'ustensiles et d'appareils en acier inoxydable. Cette mesure... -
Página 30: Brita, Qualité Et Satisfaction Garanties
BRITA conformément Avez-vous des questions sur votre produit BRITA? Ou sur la fi ltration aux directives environnementales de l’eau? Alors contactez-nous! Les coordonnées fi gurent à côté de l’abréviation de votre pays. Chaque indicateur de changement de cartouche BRITA a une durée de vie d'environ 5 ans. Veillez à le mettre au rebut à l'issue de cette période conformément aux directives applicables et à la Le meilleur côté de l'eau : www.brita.net réglementation offi cielle relative aux appareils electroniques et électriques. N'oubliez pas de Vous cherchez un revendeur de produits BRITA près de chez vous ? retirer au préalable la pile que l'indicateur contient, Vous avez besoin d'informations complémentaires sur des produits et de la déposer dans les collecteurs spécifi ques BRITA ? Ou sur l'entreprise BRITA ? Vous souhaitez tirer profi t des prévus à cet effet, le cas échéant. -
Página 31: Español
I. Enhorabuena por la compra de su nuevo grifo BRITA ® Puede estar seguro de la calidad BRITA y nuestro compromiso con nuestros clientes. Su grifo BRITA es la clave para obtener agua filtrada de excelente calidad y sabor. A parte del agua sin filtrar, caliente o fría, su nuevo sistema BRITA le ofrece muchas ventajas. • A gua filtrada de excelente sabor a su alcance • E l agua filtrada es ideal para sacar todo el potencial de sus... -
Página 32: Calidad Desde El Principio
Contenido del kit inicial del grifo BRITA Para obtener unos resultados óptimos de este kit inicial del grifo BRITA, siga estas instrucciones detenidamente. Su nuevo kit inicial del grifo BRITA incluye lo siguiente (consulte la fig. 1): 1. C abezal de filtro con tres ajustes y una práctica llave de cierre 2. S oporte de pared flexible 3. C artucho filtrante de agua P 1000 4. G rifo BRITA (el diseño puede ser distinto al de la imagen) 5. I ndicador de estado del filtro BRITA... -
Página 33: Grifo Brita - Fácil Instalación
Ajuste Grifo BRITA – Fácil instalación número de zonas de reacción que han cambiado de color Antes de empezar, compruebe que tiene todos los componentes capacidad P1000 hasta 1200 l hasta 600 l hasta 400 l enumerados anteriormente (consulte la fig. 1), además de las herra- mientas recomendadas. P3000 hasta 3400l hasta 1700 l hasta 1100 l Grado alemán de hasta 10 10 a 17 más de El proceso de instalación se realiza en 7 pasos. dureza de 17 dH carbonatos [°dH] Antes de realizar la instalación, repase los datos técnicos (capítulo 7) y la información importante (capítulo 9). El sis- Grado inglés de hasta 13 13 a 21 más de 21 tema no se puede instalar con un calentador de baja presión, dureza de carbonatos [°eH] ya que la calidad del agua podría verse afectada. Tras el almacenamiento y transporte a menos de 0 °C, antes Grado francés de... -
Página 34: Paso 2: Puesta En Marcha Del Indicador De Estado Del Filtro Brita
BRITA: Según el ajuste que seleccione para el cabezal de filtro (paso 1), 1 LED 2 LED 3 LED deberá programar el indicador de estado del filtro BRITA de la siguiente forma (consulte la fig. 5): ajuste de dureza del agua (HARDNESS) C a Pulse el botón del lado derecho (HARDNESS) para seleccionar cartucho filtrante (CARTRIDGE) A 1000 P 1000 P 3000 el ajuste de dureza del agua. Si pulsa el botón una sola vez, dos... -
Página 35: Paso 3: Instalación Del Grifo Brita
• Duración de la pila: aprox. 2 años WD 3030/ WD 3040 y WD 3050 No sumergir el indicador de estado del filtro en agua. 1. G rifo BRITA (el diseño puede variar) con 3 mangueras 2. I ndicador de estado del filtro BRITA 3. B ase 4. M ango Paso 3: Instalación del grifo BRITA 5. J unta (solo necesaria si instala el dispensador directamente en el fre- Para instalar el grifo BRITA, compruebe primero que tiene todos los gadero. Si lo instala en la encimera, componentes necesarios. no necesita obligatoriamente esta pieza. Esta pieza ayuda a estabilizar Compruebe que haya espacio suficiente bajo el fregadero... -
Página 36: Paso 4: Conexión De Las Mangueras
Siga el diagrama (consulte la fig. 9) y estos pasos en el orden fría y caliente. correcto. A C onecte la pieza en T suministrada a la toma de agua fría. Recomendamos colocar un recipiente apropiado bajo la a) I nserte una junta de 3/8" en la tuerca hembra de la pieza en toma de agua, para verter el agua que salga de las man- T suministrada. gueras al desconectarlas. b) Conecte este extremo de la pieza en T a la toma de agua fría. d) Desenrosque el grifo; no hay un montaje estándar, pero Si la instalación de su cocina tiene otra toma más de agua generalmente podrá desmontarlo con una llave para tubos. fría de 3/8" para el grifo BRITA, no tiene que instalar la pieza e) Extraiga el grifo y las mangueras. en T suministrada. B Ya puede proceder con la instalación del grifo BRITA. Si la toma de agua fría no encaja en el conector de 3/8" de Primero, enrosque el mango (2) en el grifo BRITA (1). la pieza en T, utilice el adaptador suministrado en caso nec- Enrosque las mangueras en el dispensador (consulte la fig. 8). esario. Inserte en primer lugar la junta de 1/2" en la tuerca Enrosque el conector M8 de la manguera con la tira azul en el hembra del adaptador. orificio C. El kit inicial de filtración incluye dos adaptadores de 1/2". Enrosque el conector M8 de la manguera con la tira roja en el Puede adquirir adaptadores de otros tamaños en su distribui- orificio H. dor más cercano. Enrosque el conector M8 de la manguera de 800 mm en el orificio B Conecte la manguera con la tira azul en un extremo de la pieza en T. - Página 37 Paso 5: Inserción del cartucho filtrante (consulte la fig. 10) A Quite la cinta protectora (1). B Inserte el cartucho filtrante (4) verticalmente en el cabezal de filtro (5). C Gire la llave de cierre (3) hasta que se acople. Toma de Toma de agua caliente agua fría (fig. 9) El par de apriete máximo para las conexiones de G3/8" no debe ser superior a 14 Nm. Solo se podrán utilizar conex- iones de manguera con juntas (13), ya que las mangueras con conexiones roscadas cónicas dañan las conexiones del cabezal de filtro e invalidan cualquier reclamación de garantía. (fig. 10) El cartucho filtrante solo se puede insertar si la llave de cierre está abierta. Compruebe que el cartucho filtrante esté colocado c orrectamente. ESPAÑOL 1014662-002_GA_BRITA_Tap_CE.indb 37 04.04.16 11:28...
-
Página 38: Paso 7: Puesta En Marcha
Coloque un recipiente adecuado bajo el cartucho filtrante por si hubiera fugas de agua. Durante el montaje, anote las dimensiones de la instalación, A Abra las tomas de agua fría y caliente, y revise cuidadosamente el radio de curvatura de las mangueras y las dimensiones de si hay fugas. los accesorios. El sistema puede funcionar instalado vertical B Abra la palanca con la inscripción BRITA del grifo BRITA y deje y horizontalmente. Si va a usar el soporte de pared, instálelo correr el agua filtrada hasta que salga limpia y sin burbujas (al solo verticalmente. menos 2 litros). A Fije el soporte de pared con los dos tornillos adecuados y, si es necesario, utilice dos tacos según el tipo de pared. Sustitución del cartucho filtrante B Instale el cabezal de filtro (2) en el soporte de pared (1). Utilice... -
Página 39: Activación Del Indicador De Estado Del Filtro
La sustitución del cartucho filtrante P 3000 se realiza de igual forma Datos técnicos de los cartuchos filtrantes que la del cartucho P 1000. El cartucho filtrante P 3000 dura hasta P 1000 y P 3000 3400 litros con el ajuste A, hasta 1700 litros con el ajuste B y hasta 1100 litros con el ajuste C. Tenga esto en cuenta cuando ponga a cero el indicador de estado del filtro BRITA. de 2 bares a un máximo Presión de servicio de 8,6 bares Activación del indicador de estado del filtro Temperatura de entrada de agua de 4°C a 30°C BRITA funcionamiento de 4°C a 40°C Temperatura A P ulse el botón RESET (consulte la fig. 5) del indicador de estado almacenamiento/ ambiente para de -20°C a 50°C del filtro BRITA durante tres segundos hasta que el LED parpa- transporte dee en verde. -
Página 40: Datos Técnicos Del Grifo Brita
Solución del Datos técnicos del grifo BRITA problema: d esmonte el cabezal de filtro y las mangueras, e instálelos en el sentido del flujo de agua (capítulo 3.4). Presión de servicio de 0,5 bares a un máximo de 10 bares C Fugas Conexión de agua fría de 4°C a 30°C Causa: las conexiones roscadas no se han asegurado correctamente. Conexión de agua max. 70°C caliente Solución del problema: c ompruebe la presión de agua. Compruebe Velocidad de flujo ≥ 9 l/min todas las conexiones roscadas y móntelas según lo descrito en el capítulo 3.4. Nivel acústico Grupo II/- D El indicador LED no funciona Dimensiones Causa: la batería no está colocada correctamente o está... -
Página 41: Nombre De Las Piezas De Recambio
WD 3020 Nombre de las piezas de recambio N.º de artículo Nombre de la pieza de recambio 1004715 Junta On Line 3/8" 2 mm CE + AU 1012554 1004713 Junta On Line 1/2" 2 mm CE + AU 1004699 Manguera On Line 3/8" hembra - 3/8" hembra CE 1015771 Cabezal de filtro G3/8 de 3 vías, pieza de recambio del LED CE 1004690 Adaptador 1/2" hembra - 3/8" macho 1005821 Pieza en T de 3/8" 1016311 1015771 1012556 1016282 1004699 1015754 1005821 1004715 1013529 (fig. 13) - Página 42 1014609 Set de aireador WD 3050 1012550 1012556 Pieza de recambio del cartucho mezclador brushed 1014609 1012552 Set de anillo base WD 3030/3040 1014608 Set de anillo base WD 3050 1012557 Set de manguera WD 3020 CE 1013529 Set de montaje WD 3050 1012562 Pieza de recambio de la manguera DN6 800 mm HF M8x1 - G3-8HN ASM 1015754 Indicador de estado del filtro BRITA, pieza de recambio 1016311 Pieza de recambio de la válvula LED ASM 1016282 Pieza de recambio maneta agua corriente 1016311 WD3020-3040 1012556 1016282 1015754 1012552 brushed 1014608 1012557 1013529 1012562 (fig. 15) ESPAÑOL 1014662-002_GA_BRITA_Tap_CE.indb 42...
-
Página 43: Notas Importantes
III. Notas importantes durante varios días (2–3 días), recomendamos enjuagar el sistema Notas importantes de filtro con el volumen de enjuague X indicado en la siguiente tabla. Tras períodos de inactividad de más de 4 semanas, el filtro Proteja el cartucho filtrante de agua P 1000 de la luz directa del sol se debe enjuagar con el volumen de enjuague Y. Tenga también en y de daños mecánicos. No realice el montaje cerca de fuentes de cuenta que el período de uso máximo del cartucho filtrante es de calor ni llamas abiertas. Se debe instalar una válvula de cierre antes 12 meses, independientemente del volumen real usado. de la manguera de entrada del sistema de filtro. El grifo BRITA solo De forma similar a los grifos convencionales, antes de utilizar su grifo está indicado para su uso doméstico. BRITA, le aconsejamos que deje fluir agua durante un breve periodo de El sistema de filtro de agua BRITA solo se debe usar con agua pota- tiempo y entonces, ya podrá empezar a disfrutar del agua filtrada BRITA. ble. El cartucho filtrante de agua BRITA solo está indicado para su uso con suministro de agua fría con la temperatura indicada en el Volumen de enjuague X tras 2–3 días sin Volumen de capítulo 7 . No se deberá utilizar agua de calidad desconocida ni con utilizar enjuague propiedades microbiológicas reducidas sin la debida desinfección. P 1000 2 litros El sistema no puede instalarse con un calentador de baja presión. P 3000 3 litros Con independencia del agua que utilice, debe emplear utensilios de acero inoxidable o hervidores con resistencias de este material. Esto Volumen de enjuague Y tras 4 semanas sin Volumen de es especialmente importante para las personas sensibles al níquel. utilizar enjuague P 1000 20 litros Llegado el caso, primero filtrar y después hervir. -
Página 44: Brita Calidad Y Satisfacción Garantizadas
IV. B RITA , calidad y satisfacción garantizadas ® La línea directa BRITA le atiende Eliminación correcta del indicador de estado del Lo mejor del agua: www.brita.net fi ltro BRITA ¿Tiene alguna pregunta sobre su producto BRITA? ¿O sobre el tema Los indicador de estado del fi ltro BRITA tienen de la fi ltración de agua? ¡Llámenos! Encontrará los datos de contacto una vida útil aproximada de 5 años. Pasado este del servicio de atención al cliente BRITA de su país en la contraportada tiempo, recuerde desecharlo según las normativas de este manual. y los requisitos legales aplicables. Lo mejor del agua: www.brita.es ¿Busca su distribuidor BRITA más cercano? ¿Desea información más... -
Página 45: Parabéns
I. Parabéns por ter adquirido o seu novo sistema de torneira BRITA ® Qualidade BRITA e dedicação para com os nossos clientes garantidas. A torneira BRITA é a solução ideal para água filtrada mais limpa, clara e com ótimo sabor Para além de água quente e fria não filtrada, o seu sistema BRITA proporciona diversas vantagens • Água filtrada com um sabor fantástico à sua disposição • A água filtrada é ideal para fazer sobressair o melhor dos seus Torneira BRITA cozinhados e possui um ótimo sabor cada dia... -
Página 46: Qualidade A Partir Do Primeiro Momento
2 anos. Só poderá apresentar um pedido de garantia caso todas as instruções existentes neste manual tenham sido seguidas e respeitadas. Conteúdo do kit básico da torneira BRITA Para garantir os melhores resultados com o seu kit básico da torneira BRITA, siga cuidadosamente estas instruções. O seu kit básico da toneira BRITA inclui (ver fig. 1): 1. C abeça do filtro com três definições, incluindo um prático manípulo de fecho 2. S uporte flexível de parede 3. C arga filtrante P 1000 4. T orneira BRITA (o modelo pode ser diferente da imagem apresentada) 5. I ndicador de status do cartucho BRITA... - Página 47 Definição Torneira BRITA – instalação fácil número de zonas de reação que apresenta- Antes de iniciar, verifique se possui todos os componentes acima ram alterações de cor indicados (ver fig. 1), bem como as ferramentas recomendadas. capacidade P1000 até 1200 l até 600 l até 400 l A instalação é efetuada em 7 passos. P3000 até 3400l até 1700 l até 1100 l Antes da instalação, leia os capítulos Dados técnicos (capí- Dureza de car- até 10 10 a 17 acima de 17 tulo 7) e Informações importantes (capítulo 9). Não é per- bonatos em território mitido instalar o sistema com uma caldeira de baixa pressão alemão [°dH] porque pode provocar danos relacionados com água. Depois Dureza de car- até 13 13 a 21 acima de 21 de exposto a condições de armazenamento e de trans- bonatos em território porte de 0 °C, o produto deve ser guardado na embalagem inglês [°eH] original aberta, em contacto com as temperaturas ambiente Dureza de car- até 18...
- Página 48 BRITA: 1 LED 2 LEDs 3 LEDs Dependendo da definição selecionada para a cabeça do filtro definição da dureza da água (passo 1), o indicador de status do cartucho BRITA deve ser (HARDNESS) programado da seguinte forma (ver fig. 5): carga filtrante (CARTRIDGE) A 1000 P 1000 P 3000 a Prima o botão do lado direito (DUREZA) para escolher a dureza da água. Se prima o botão uma vez, piscam dois LEDs amarelos...
- Página 49 WD 3020 - L uz amarela: Foi utilizada 90% da capacidade do filtro. Não se esqueça de comprar uma nova carga filtrante de substituição. 1. T orneira BRITA com 3 tubagens - Luz vermelha: Tem de substituir a carga filtrante 2. I ndicador LED de mudança de carga filtrante da BRITA E Reprogramar o indicador de status do cartucho BRITA 3. O -Ring Se o volume máximo for atingido ou a carga filtrante já tiver sido utilizada durante 12 meses, o indicador de status do cartucho BRITA 4. H aste começará a piscar a vermelho (apenas se a alavanca da BRITA 5. E ncaixe (só é necessário para a estiver na posição de filtragem).
- Página 50 Siga o diagrama em baixo (ver fig. 9) e realize os passos pela ordem Visto existir água nas tubagens que irá escorrer quando as correta. desapertar, recomendamos colocar um recipiente adequado A Ligue o conector em T fornecido ao seu abastecimento de água fria por baixo do abastecimento de água para a recolher! a) I ntroduza uma junta de 3/8“ na porca fêmea do conector em T fornecido. d) Desaperte a torneira da cozinha – apesar de não existir uma b) L igue esta extremidade do conector em T ao seu abastecimento guarnição padrão, normalmente uma chave de tubos irá de água fria. ajudá-lo a desmontá-la. e) Puxe para fora a torneira da cozinha e as tubagens. Se possuir um abastecimento de água fria de 3/8” disponível B Está agora pronto para instalar a torneira BRITA. adicional para a torneira BRITA na sua cozinha, não precisa de instalar o conector em T fornecido! É necessário utilizar o Primeiro, aparafuse a haste (2) na torneira BRITA (1). adaptador fornecido caso o abastecimento de água fria não Aperte as tubagens no dispensador (ver fig. 8) se ajuste ao conector de 3/8" do conector em T. Introduza Aperte o conector M8 da tubagem com a tira azul no orifício C. primeiro a junta de 1/2" na porca fêmea do adaptador. Aperte o conector M8 da tubagem com a tira vermelha no orifício H. O seu kit básico da torneira inclui dois adaptadores de 1/2". Desloque-se ao fornecedor mais próximo para obter adapta- Aperte o conector M8 da tubagem de 800 mm no orifício B. dores de outras dimensões. WD 3020/WD 3030/WD 3040 e WD 3050 B Ligue a tubagem com a tira azul a uma extremidade do conector em T . C Pegue na tubagem com dois conectores de 3/8". Coloque as jun- tas de 3/8" nas respetivas roscas fêmea das duas extremidades...
- Página 51 Passo 5: Inserir a carga filtrante (ver fig. 10) A Retire a fita de proteção (1). B Introduza a carga filtrante (4) verticalmente na cabeça do filtro (5). C Rode o manípulo de fecho (3) até que o sinta engatar. Abastecimento Abastecimento de de água quente água fria (fig. 9) O binário máx. de aperto das ligações G3/8" não pode exceder 14 Nm! Só podem ser utilizadas ligações com juntas (13), uma vez que as tubagens com ligações roscadas cónicas danificam as ligações da cabeça do filtro, invalidando assim quaisquer reclamações de garantia! (fig. 10) A carga filtrante só pode ser introduzida quando o manípulo de fecho estiver aberto. Certifique-se de que a carga filtrante é corretamente colocada. PORTUGUESE 1014662-002_GA_BRITA_Tap_CE.indb 51 04.04.16 11:28...
- Página 52 Substituição da carga filtrante P 1000 (ver fig. 10): A Abra o manípulo de fecho (3). B Coloque um recipiente adequado por baixo da tubagem de descarga para recolher a água de enxaguamento. Abra a válvula de descarga (2) e retire pressão ao sistema. Feche a válvula de descarga (2). C Retire a carga filtrante gasta (4) da cabeça do filtro (5). Certifique- se de que a carga está encaixada corretamente de forma a poder dar-lhe um puxão forte sem se preocupar em parti-la. (fig. 11) D Insira uma nova carga filtrante (consulte o capítulo 3.5). E Feche o manípulo de fecho (3). F Reponha o indicador de status do cartucho BRITA (capítulo 5) G Abra a alavanca da BRITA da sua torneira BRITA e deixe correr água até que a água filtrada saia limpa e sem bolhas (pelo menos 2 litros). A substituição da carga filtrante P 3000 é idêntica à substituição da carga filtrante P 1000. A carga filtrante P 3000 dura até 3400 litros com a definição A, até 1700 litros com a definição B e até 1100 litros com a definição C. Considere isto quando fizer a reposição a zero do indicador LED de mudança de carga filtrante da BRITA. PORTUGUESE 1014662-002_GA_BRITA_Tap_CE.indb 52 04.04.16 11:28...
-
Página 53: Ativar O Indicador De Status Do Cartucho Brita
Sistema de Ativar o indicador de status do cartucho BRITA P1000 119 mm/108 mm/265 mm filtração (cabeça do A Prima o botão "Reset" (ver fig. 5) do indicador de status do cartucho filtro com BRITA durante três segundos até o LED começar a piscar a verde. P3000 117 mm/104 mm/417 mm carga B A contagem começa automaticamente. filtrante) P1000 108 mm/108 mm/259 mm Carga Dimensões Manutenção filtrante (largura/profun- P3000 104 mm /104 mm/410 mm didade/altura) Dimen- Verifique regularmente se existem fugas no sistema de filtração. sões de Verifique regularmente se existem dobras nas tubagens. As tuba- P1000 137 mm/130 mm/265 mm instalação gens dobradas têm de ser substituídas. -
Página 54: Resolução De Problemas
Resolução de problemas Apenas para os modelos WD 3030 e WD 3040 A Sem fluxo de água Estes modelos dispõem de um arejador com duas saídas integra- das. A interior é para água filtrada da BRITA, a exterior para água Causa: Entrada da água fechada. quente e água fria. Tal como acontece com todos os arejadores de Solução: A bra a entrada da água na válvula de corte a torneira, poder-se-á verificar acumulação de calcário na zona exterior. montante ou feche o manípulo de fecho (3) na Por isso, é recomendável limpar regularmente o arejador. Para lim- cabeça do filtro. Verifique se existem dobras par: desaperte a tampa na extremidade do gargalo do dispensador. nas tubagens. O arejador encontra-se ligado a uma tubagem de silicone. Retire-o B Pouco ou nenhum fluxo de água ainda que a entrada da com cuidado e limpe-o (p. ex., com vinagre). Após a limpeza, ligue... - Página 55 WD 3020 Nome da peça sobresselente Artigo n.º Nome da peça sobresselente 1004715 Junta On Line 3/8" 2 mm CE + AU 1012554 1004713 Junta On Line 1/2" 2 mm CE + AU 1004699 Tubagem On Line 3/8" IT - 3/8" IT CE 1015771 Cabeça do filtro G3/8 3 definições, LED, CE, peça sobresselente 1004690 Adaptador 1/2" IT – 3/8" ET 1005821 Conector em T 3/8" 1016311 1015771 1012556 1016282 1004699 1015754 1005821 1004715 1013529 1012557 (fig. 14) 1004690 (fig. 13) 1012562 1004713 Artigo n.º...
- Página 56 1014609 Conjunto do arejador WD 3050 1012550 1012556 Peça sobresselente, carga Mixer brushed 1014609 1012552 Conjunto do anel da base WD 3030/3040 1014608 Conjunto do anel da base WD 3050 1012557 Conjunto de tubagens WD 3020 CE 1013529 Conjunto de montagem WD 3050 1012562 Peça sobresselente, tubagem DN6 800 mm HF M8x1 - G3-8HN ASM 1015754 indicador de status do cartucho BRITA, peça sobresselente 1016311 Peça sobresselente válvula LED ASM 1016282 Peça sobresselente alavanca água não 1016311 filtrada WD3020-3040 1012556 1016282 1015754 1012552 brushed 1014608 1012557 1013529 1012562 (fig. 15) PORTUGUESE 1014662-002_GA_BRITA_Tap_CE.indb 56...
-
Página 57: Notas Importantes
III. Notas importantes Notas importantes Utilização otimizada Proteja a carga filtrante P 1000 da luz direta do sol e de danos • A BRITA recomenda a utilização frequente do sistema de filtração. mecânicos. Não efetue a montagem junto a fontes de calor e a Caso a torneira BRITA não seja utilizada por vários dias (2 a 3 chamas abertas. É necessário instalar uma válvula de retenção dias), recomendamos a lavagem do sistema de filtração com o antes da tubagem de entrada do sistema de filtração. O sistema de volume de lavagem X indicado na tabela seguinte. Após períodos torneira BRITA só é adequado para uma utilização doméstica. de estagnação superiores a 4 semanas, o filtro deve ser lavado com o volume de lavagem Y. Lembre-se também que o período Só deve ser utilizada água potável com o sistema de filtração de máximo de utilização da carga filtrante é de 12 meses, independ- água BRITA. A carga filtrante da BRITA é adequada apenas para entemente do volume efetivamente utilizado. utilização com água fria dentro dos intervalos de temperaturas de abastecimento especificados no capítulo 7 . Não deverá ser utilizada Igual que nas torneiras convencionais, antes de a utilizar deve água imprópria do ponto de vista microbiológico ou água de quali- deixar que a água saia clara durante um curto período de tempo dade desconhecida sem uma desinfeção adequada. para poder desfrutar da água filtrada BRITA. Não é permitido instalar o sistema com uma caldeira de baixa Volume de lavagem X após 2 a 3 dias de Volume de pressão. estagnação lavagem Independentemente do tipo de água utilizado, deverá usar utensíl- P 1000 2 litros ios de aço inoxidável ou chaleiras com elementos de aquecimento em aço inoxidável. Isto é especialmente importante para pessoas... -
Página 58: Brita, Qualidade E Satisfação Garantidas
O melhor da água: www.brita.net Procura o revendedor BRITA mais próximo? Pretende informações mais pormenorizadas acerca dos produtos BRITA? Ou acerca da Exclusão de responsabilidade empresa BRITA? Pretende desfrutar de uma das ofertas de serviços da BRITA? A BRITA não deverá ser responsabilizada por quaisquer danos, Informações atualizadas, sugestões para o consumidor, concursos incluindo aqueles considerados subsequentes, resultantes da utiliza- sazonais, receitas para café e chá deliciosas, tudo e isto e muito mais ção incorreta do produto. no endereço www.brita.net 100 % de satisfação: a garantia da BRITA Registar o seu produto online Temos a certeza de que este produto BRITA satisfaz as suas exigências no que diz respeito à Registe o seu produto e receba benefícios na página qualidade e ao desempenho. Se este produto não www.register.brita.net corresponder às suas expetativas, aceitaremos a sua devolução num prazo de 30 dias a partir da data de aquisição e reembolsaremos o valor de compra. Basta enviar o produto com a prova de compra (recibo) e os motivos da sua insatisfação, bem como o seu número de telefone e dados... -
Página 59: Deutsch
I. Herzlichen Glückwunsch zu Ihrer neuen BRITA Armatur ® Wir freuen uns, dass Sie sich für ein Qualitätsprodukt von BRITA entschieden haben. Ihre BRITA Armatur ist der Schlüssel für weiches, wohlschmeckendes BRITA gefiltertes Wasser. Neben kaltem und warmem ungefiltertem Wasser, überzeugt Ihre BRITA Armatur durch viele Vorteile: • w ohlschmeckendes BRITA gefiltertes Wasser jeder Zeit zur BRITA Armatur Verfügung • W asser ist der grundlegende Bestandteil für die Zubereitung von Speisen und kann somit das Ergebnis des Kochens beein- flussen. -
Página 60: Für Qualität Von Anfang An
II. Für Qualität von Anfang an Gewährleistungsbestimmungen Die BRITA Armatur unterliegt der gesetzlichen Gewährleistung von 2 Jahren. Ein Gewährleistungsanspruch kann nur innerhalb dieser Zeit geltend gemacht werden, wenn alle Hinweise dieser Anleitung genau befolgt und beachtet werden. Inhalt des BRITA Wasserfilter Sets mit Armatur Um sicherzugehen, dass Sie das beste Ergebnis mit Ihrer BRITA Armatur erzielen, folgen Sie bitte dieser Gebrauchsanweisung. Folgende Komponenten sind in Ihrem Wasserfilter Set enthalten (vgl. Abb. 1): 1. F ilterkopf mit drei Einstellmöglichkeiten inklusive komfortablem Verriegelungsgriff 2. P raktische Wandhalterung 3. P 1000 Filterkartusche 4. B RITA Armatur (Design kann von Darstellung abweichen) 5. B RITA Kartuschen-Statusanzeige... - Página 61 Einstellung Einfache Installation der BRITA Armatur Anzahl der Reak- tionsfelder, die ihre Bitte überprüfen Sie vor dem Start der Installation, dass alle Kompo- Farbe verändert nenten vorliegen (vgl. Abb. 1) und beachten Sie die empfohlenen haben Werkzeuge. Kapazität P1000 bis 1200 L bis 600 L bis 400 L Die Installation erfolgt in 7 Schritten. P3000 bis 3400L bis 1700 L bis 1100 L Vor der Installation beachten Sie bitte die technischen Daten Deutsche Wasser- bis 10 10 bis 17 über 17 dH (Kapitel 7) und die wichtigen Hinweise (Kapitel 9). Die BRITA härte [°dH] Armatur kann nicht an einem Niederdruckboiler installiert Englische Wasser- bis 13 13 bis 21 über 21 werden. Nach Lagerung und Transport unter 0 °C ist das härte [°e] gesamte Produkt bei geöffneter Originalverpackung mindes- Französische bis 18 18 bis 30 über 30...
- Página 62 2 LEDs 3 LEDs Statusanzeige: Wasserhärteeinstellung (HARDNESS) C Je nachdem welche Einstellung Sie in Schritt 1 am Filterkopf Einstellung der Filterkartusche A 1000 P 1000 P 3000 vorgenommen haben, programmieren Sie die BRITA Kartu- (CARTRIDGE) schen-Statusanzeige wie folgt (Abb. 5): a Drücken Sie den Knopf auf der rechten Seite (HARDNESS), um C So funktioniert die BRITA Kartuschen-Statusanzeige den Wasserhärtegrad auszuwählen. Wenn Sie den Knopf einmal Um eine optimale Leistung zu garantieren, sollte die Filterkartusche drücken, leuchten zwei gelbe LEDs auf (Standardeinstellung:...
- Página 63 (Abb. 6) Die Kartuschen Statusanzeige darf nicht ins Wasser getaucht werden. WD 3030/ WD 3040 und WD 3050 1. B RITA Armatur (Design kann von Darstellung abweichen) mit 3 Schläuchen (M8-Anschlüsse) Schritt 3: Installation der BRITA Armatur 2. B RITA Kartuschen-Statusanzeige 3. F ussplatte Um die BRITA Armatur zu installieren legen Sie sich zunächst alle 4. S chaft benötigten Teile zurecht. 5. K onterplatte (benötigen Sie ledig- lich, wenn Sie Ihre Armatur direkt Bitte beachten Sie, dass unterhalb der Spüle, ausreichend...
- Página 64 S etzen Sie die 3/8"-Dichtung in die Überwurfmutter des mitgelie- Sie die Schläuche lösen. Das Wasser können Sie in dem ferten T-Stücks ein. Eimer auffangen! b) S chließen Sie dieses Ende des T-Stücks an die Kaltwasser- versorgung an. d) Lösen Sie die Verschraubung Ihres Wasserhahns. Es gibt keine Standardverschraubung. Eine Rohrzange kann in der Wenn Sie bereits über eine zusätzliche freie 3/8"-Kaltwas- Regel helfen, den Wasserhahn zu lösen. serversorgung für die BRITA Armatur verfügen, brauchen e) Ziehen Sie den Wasserhahn mit den Schläuchen aus dem Sie das T-Stück nicht zu installieren. Sollten Sie einen 1/2" Loch, in dem er in die Spüle eingelassen ist. Wasseranschluss haben, nutzen Sie zur Installation des B Nun können Sie die BRITA Armatur installieren. T-Stücks den beiliegenden 1/2" Adapter. Legen Sie vor des- sen Installation die 1/2" Flachdichtung in die Überwurfmutter Zunächst ist es erforderlich, den Schaft (4) in die BRITA Armatur (1) ein! zu schrauben. Anschließend können Sie die Schläuche verschrau- ben. (Abb. 8) B S chließen Sie den Schlauch mit der blauen Markierung an einer Nehmen Sie den 450 mm Schlauch mit der blauen Markierung und Seite des T-Stücks an. schrauben Sie ihn in die Öffnung C. C L egen Sie den 800 mm Schlauch mit zwei 3/8" Überwurfmuttern Nehmen Sie den 450 mm Schlauch mit der roten Markierung und bereit. Legen Sie je eine 3/8" Flachdichtung in jede Überwurf- schrauben Sie in die Öffnung H.
- Página 65 Schritt 5: Einsetzen der Filterkartusche (vgl. Abb. 10) A Schutzkappe (1) abziehen. B Filterkartusche (4) senkrecht in den Filterkopf (5) einsetzen. C Verriegelungsgriff (3) bis zum spürbaren Einrasten drehen. Warmwasser- Kaltwasser- anschluss anschluss (Abb. 9) Das maximale Anzugsdrehmoment an 3/8 Zoll-Anschlüssen darf 14 Nm nicht überschreiten! Es dürfen nur Schlauch- anschlüsse mit Flachdichtungen (13) eingesetzt werden, da Schläuche mit konischen Verschraubungen die Anschlüsse des Filterkopfs beschädigen und zum Erlöschen des Gewährleistungsanspruchs führen! (Abb. 10) Filterkartusche kann nur bei geöffnetem Verriegelungsgriff eingesetzt werden. Bitte achten Sie auf die richtige Positionierung der Filter- kartusche. DEUTSCH 1014662-002_GA_BRITA_Tap_CE.indb 65 04.04.16 11:28...
- Página 66 Sie alle Komponenten montiert haben. Stellen Sie unter die Kartusche einen geeigne- ten Auffangbehälter für eventuelle Undichtigkeiten. Bei der Montage Einbaumaße, beachten Sie Biegeradien der A Öffnen Sie die Kalt- und Heißwasserzufuhr und überprüfen Sie Schläuche und Abmessungen des Zubehörs. Die P 1000 Fil- sorgfältig eventuelle Undichtigkeiten. terkartusche kann vertikal und horizontal betrieben werden. B Öffnen Sie den Hebel der BRITA Armatur und spülen Sie bis zum Mit der Wandhalterung ist nur ein vertikaler Betrieb möglich! blasenfreien und klaren Ablauf des gefilterten Wassers (mind. 2 Liter). A Montieren Sie die Wandhalterung an vorgesehener Position mit Hilfe von zwei passenden Schrauben und falls nötig je nach Wechsel der Filterkartusche Wandbeschaffenheit mit 2 Dübeln. B Filterkopf (2) in die Wandhalterung (1) einrasten. Hierbei vorge- Sobald das maximale Volumen erreicht ist oder 12 Monate vergan- gebene Einrastmulde (4) beachten.
- Página 67 P3000 137 mm/128 mm/417 mm Vor Auswechslung die technischen Daten (Kapitel 7) und die halterung) Wichtigen Hinweise (Kapitel 9) beachten. Positionierung der Filterkartusche Horizontal oder vertikal Reinigen Sie das Filtersystem außen regelmäßig mit einem Anschluss Wassereingang G3/8" weichen, feuchten Tuch. Anschluss Wasserausgang G3/8" Verwenden Sie keine ätzenden Chemikalien, Reinigungs- lösungen oder scharfe Reinigungsmittel. Technische Daten der BRITA Armatur Betriebsdruck 0,5 bar bis max. 10 bar Technische Daten der P 1000 und P 3000 Kaltwasseranschluss 4°C bis 30°C Kartusche Warmwasseranschluss max. 70°C Durchfluss ≥ 9 L/min Betriebsdruck 2 bar bis max. 8,6 bar Temperatur Eingangswasser 4°C bis 30°C...
- Página 68 Fehlerbehebung Nur für Modelle WD 3030 und WD 3040 A Kein Wasserfluss Diese Modelle verfügen über einen Strahlregler mit zwei integrier- ten Auslässen. Der innere ist für BRITA-gefiltertes Wasser, der Ursache: Wasserzufuhr geschlossen. äußere Bereich für warmes und kaltes ungefiltertes Wasser. Wie Fehlerbehebung: W asserzufuhr am vorgeschalteten Absperr- bei jedem Wasserhahn, kann sich Kalk im äußeren Bereich des ventil oder durch Schließen des Verriegelungs- Perlators ablagern. Deshalb ist es empfehlenswert, diesen in regel- griffs (3) am Filterkopf (5) öffnen. mäßigen Abständen zu reinigen. Zur Reinigung: Schrauben Sie die B Kein oder geringer Wasserfluss trotz geöffneter Wasserzufuhr Kappe am Ende des Halses der Küchenarmatur ab. Der Strahlregler Ursache: Leitungsdruck zu gering. ist mit einem Silikonschlauch verbunden. Nehmen Sie ihn vorischtig ab und reinigen Sie ihn (z.B. mit Essig). Nach der Reinigung das Fehlerbehebung: L eitungsdruck überprüfen. Falls der Fehler wei- dünne, lange Innenteil vorsichtig zurück in den Silikonschlauch...
- Página 69 WD 3020 Name Ersatzteil Artikel Nr. Name Ersatzteil 1004715 Dichtung On Line 3/8" 2 mm CE + AU 1012554 1004713 Dichtung On Line 1/2" 2 mm CE + AU 1004699 Schlauch On Line 3/8" IT - 3/8" IT CE 1015771 Filterkopf G3/8 3-way LED CE Ersatzteil 1004690 Reduzierstückset 1/2" IG - 3/8" AG Ersatzteil 1005821 T-Stück 3/8" 1015771 1016311 1012556 1016282 1004699 1015754 1005821 1004715 1013529 1012557 1004690 (Abb. 13) (Abb. 14) 1012562 1004713 Artikel Nr. Name Ersatzteil...
- Página 70 1014609 Strahlregler Set WD 3050 1012556 Ersatzteil Mischbatterie 1012550 1012552 Basisring Set WD 3030/3040 brushed 1014609 1014608 Basisring Set WD 3050 1012557 Schlauch Set WD 3020 CE 1013529 Montage Set WD 3050 1012562 Ersatzteil Schlauch DN6 800 mm HF M8x1 - G3-8 ÜM BGr 1015754 BRITA Kartuschen-Statusanzeige Ersatzteil 1016311 Ventil LED BGr Ersatzteil 1016282 Blende Mischbatterie WD3020-3040 Ersatzteil 1016311 1012556 1016282 1015754 1012552 brushed 1014608 1012557 1013529 1012562 (Abb. 15) DEUTSCH 1014662-002_GA_BRITA_Tap_CE.indb 70 04.04.16 11:28...
-
Página 71: Wichtige Hinweise
III. Wichtige Hinweise Wichtige Hinweise Der optimale Gebrauch Die P 1000 Wasserfilterkartusche vor Sonneneinstrahlung und • B RITA empfiehlt, das Filtersystem nicht über einen längeren mechanischen Beschädigungen schützen. Nicht in der Nähe von Zeitraum außer Betrieb zu nehmen. Sollte das BRITA Filtersystem Hitzequellen und offenem Feuer montieren. Vor dem Eingangs- einige Tage oder über einen längeren Zeitraum nicht in Gebrauch schlauch des Filtersystems muss ein Absperrventil installiert sein. sein, empfehlen wir das Filtersystem mit dem in der unten Ist der Wasserdruck größer als 8,6 bar, muss ein Druckminderer stehenden Tabelle angegebenen Spülvolumen zu spülen. Bitte vor dem Filtersystem eingebaut werden. Die BRITA Armatur ist nur beachten Sie bei längeren Stagnationszeiten auch die maximale für den häuslichen Gebrauch geeignet. Einsatzdauer der Filterkartusche von 12 Monaten und tauschen Sie die Filterkartusche gegebenenfalls aus. Als Speisewasser für das BRITA Wasserfilter-System darf ausschließ- lich Wasser in Trinkwasserqualität verwendet werden. Das BRITA Wie bei herkömmlichen Armaturen auch, sollten Sie vor Benutzung Wasserfiltersystem ist nur für die Kaltwasseranwendung innerhalb des das Wasser immer erst kurz ablaufen lassen, bevor Sie es genießen in Kapitel 7 angegebenen Wassereingangstemperaturbereichs geeig- Spülvolumen nach 2-3 Tagen Stagnation Spülvolumen net. Keinesfalls darf mikrobiologisch belastetes Wasser oder Wasser unbekannter Qualität ohne angemessene Desinfektion eingesetzt werden. P 1000 2 Liter Die BRITA Armatur kann nicht an einem Niederdruckboiler instal- P 3000 3 Liter liert werden. Unabhängig vom verwendeten Wasser sollten Sie zum Abkochen Spülvolumen nach 4 Wochen Stagnation... -
Página 72: Der Brita Service
Haben Sie Fragen zu Ihrem BRITA Produkt? Oder zum Thema Wasser- Jede BRITA Kartuschen-Statusanzeige hat eine fi ltration? Rufen Sie einfach an! Die Kontaktdaten Ihres BRITA Verbraucher- Nutzungsdauer von ca. 5 Jahren. Denken Sie service fi nden Sie neben Ihrem Ländercode auf der Rückseite dieser am Ende der Nutzungsdauer Ihrer Kartuschen Gebrauchsanweisung. Statusanzeige daran, dass sie entsprechend der hierfür geltenden Vorschriften und gesetzlichen Bestimmungen entsorgt werden muss. Die beste Seite des Wassers: www.brita.net Suchen Sie den nächstgelegenen BRITA Händler? Wünschen Sie detaillierte Informationen zu BRITA Produkten? Oder zum Unternehmen BRITA? Möchten Sie von BRITAs Serviceangeboten Haftungsausschluss profi tieren? Aktuelle Infos, Verbrauchertipps, saisonale Gewinnspiele, leckere Bitte haben Sie Verständnis, dass BRITA keinerlei Haftung bei Missach- K affee- und Teerezepte gibt’s rund um die Uhr auf www.brita.net tung der Gebrauchsanweisung übernehmen kann. Ihre Online Produktregistrierung 100 % Zufriedenheit: die BRITA Zufriedenheitsgarantie Registrieren Sie Ihr Produkt und sichern Sie sich Ihre Vorteile. -
Página 73: Congratulazioni
I. Ci congratuliamo per l'acquisto del vostro nuovo sistema per Rubinetto con filtro BRITA ® Avete la garanzia della qualità BRITA e del nostro impegno nei con- fronti dei nostri clienti. Il vostro Rubinetto con filtro BRITA è la chiave per ottenere acqua filtrata dal gusto eccellente Oltre all'acqua calda e fredda non filtrata, il vostro sistema BRITA offre numerosi vantaggi • Acqua filtrata dal sapore eccellente a portata di mano • L 'acqua filtrata è ideale per esaltare il pieno potenziale dei vostri... -
Página 74: Istruzioni D'uso
Contenuto del kit Rubinetto con filtro BRITA Leggere e seguire attentamente le seguenti istruzioni al fine di garan- tire un funzionamento ottimale del kit rubinetto con filtro BRITA. Il kit Rubinetto con filtro BRITA comprende i seguenti componenti (vedere fig. 1): 1. T esta del filtro con tre impostazioni, compresa una pratica impugnatura di fissaggio 2. Pratico fissaggio a parete 3. C artuccia filtrante per acqua P 1000 4. R ubinetto BRITA (il design può variare rispetto a quello mostrato nell'immagine) 5. I ndicatore dello stato di durata del filtro per rubinetto BRITA... -
Página 75: Italiano
Impostazione Rubinetto BRITA montaggio semplice numero di zone di reazione che hanno Prima di iniziare, appurare di avere con sé tutti i componenti soprae- cambiato colore lencati (vedere fig. 1) e gli strumenti consigliati. capacità P1000 fino a 1200 L fino a 600 L fino a 400 L L'installazione si suddivide in 7 fasi. P3000 fino a 3400L fino a 1700 L fino a 1100 L Prima del montaggio, leggere i dati tecnici (capitolo 7) e Durezza da carbonati, fino a 10 da 10 a 17 oltre 17 dH le informazioni importanti (capitolo 9). Non è possibile mon- parametri tedeschi tare il sistema in presenza di un bollitore a bassa pressione, [°dH] poiché potrebbe danneggiarsi a contatto con l'acqua. Durezza da carbonati, fino a 13 da 13 a 21 oltre 21 Dopo l'immagazzinaggio e il trasporto a una temperatura parametri inglesi inferiore a 0 °C, il prodotto deve essere conservato nella [°eH] confezione originale aperta per almeno 24 ore alla tempe- Durezza da carbonati,... - Página 76 BRITA: In base al tipo d'impostazione configurata per la testa del filtro (fase 1), sarà possibile programmare l'indicatore dello stato di durata del filtro per rubinetto BRITA come indicato di seguito (fig. 5): 1 LED 2 LED...
-
Página 77: Dati Tecnici
2. I ndicatore dello stato di durata del - S pia gialla: è stato utilizzato il 90% della capacità del filtro. filtro per rubinetto BRITA R icordarsi di acquistare un filtro di ricambio 3. O -ring - Spia rossa: il filtro deve essere sostituito 4. G ambo E Riprogrammazione dell'indicatore dello stato di 5. R accordo (è soltanto necessario per il montaggio del dispenser se durata del filtro per rubinetto BRITA si desidera installarlo sul proprio Se è stato raggiunto il volume massimo oppure il filtro è stato utiliz- lavello. Se lo si monta su una con- zato per 12 mesi, il LED dell'indicatore dello stato di durata del filtro tropiastra, questo componente non per rubinetto BRITA inizierà a lampeggiare in rosso (soltanto se la è necessario. Aiuta a stabilizzare leva BRITA è in posizione di filtraggio). il rubinetto in corrispondenza del In questo caso il filtro deve essere sostituito (capitolo 4). Una volta... - Página 78 Attenersi allo schema sottostante (vedere fig. 11) e rispettare le fasi nell'ordine corretto. Si raccomanda di posizionare un contenitore idoneo sotto l'e- A Collegare il raccordo a T all'erogatore dell'acqua fredda rogatore, poiché l'acqua presente nei tubi flessibili potrebbe fuoriuscire quando questi ultimi vengono allentati! a) I nserire la guarnizione da 3/8" nel dado femmina del raccordo a T in dotazione. d) Svitare il rubinetto della cucina. Non esistono istruzioni di b) C ollegare questa estremità del raccordo a T all'attacco per l'ero- montaggio standard ma, in generale, per effettuare quest’ope- gazione di acqua fredda razione potrebbe essere utile una pinza a pappagallo. e) Estrarre sia il rubinetto che i flessibili. Se in cucina si dispone di un ulteriore erogatore dell'acqua B Ora tutto è pronto per montare il rubinetto BRITA. fredda da 3/8" per il rubinetto BRITA, non è necessario instal- lare il raccordo a T in dotazione! Prima di tutto, avviare il gambo (2) nel rubinetto BRITA (1). Se l'erogatore dell'acqua fredda non è compatibile con il Avvitare i tubi flessibili nel dispenser (vedere fig. 10). connettore da 3/8" del raccordo a T, applicare l'adattatore Avvitare il connettore M8 del tubo flessibile contrassegnato da una fornito. Innanzitutto, inserire la guarnizione da 1/2" nel dado striscia blu nel foro C. femmina dell'adattatore. Il kit di filtrazione viene fornito con due adattatori da 1/2". Avvitare il connettore M8 del tubo flessibile contrassegnato da una Recarsi presso il primo rivenditore per adattatori di altre striscia rossa nel foro H. dimensioni. Avvitare il connettore M8 del tubo flessibile da 800 mm nel foro B.
- Página 79 Fase 5: Inserimento del filtro (vedere fig. 12) A Rimuovere la cinghia protettiva (1). B Inserire il filtro (4) in verticale nella testa del filtro (2). C Ruotare l'impugnatura di fissaggio (3) fino a quando non s’innesta. Erogatore Erogatore dell'acqua dell'acqua calda fredda (fig. 9) La coppia di serraggio massima per i collegamenti G3/8" non deve superare 14 Nm! Utilizzare solamente collegamenti per tubi flessibili con guarnizioni (13): i tubi flessibili con collega- menti a vite conica danneggiano i collegamenti della testa del filtro e rendono nulle le richieste di rimborso in garanzia! (fig. 10) Il filtro può essere inserito solo se l'impugnatura di fissaggio è aperta. Assicurarsi che il filtro sia posizionato in maniera corretta. ITALIANO 1014662-002_GA_BRITA_Tap_CE.indb 79 04.04.16 11:28...
-
Página 80: Sostituzione Del Filtro
Posizionare un contenitore idoneo sotto il filtro per raccogliere eventuali perdite. Durante il montaggio, prestare attenzione alle dimensioni di A Aprire gli erogatori dell'acqua fredda e calda e controllare con installazione, ai raggi di inclinazione dei tubi flessibili e alle cura il sistema per la presenza di eventuali perdite. dimensioni degli accessori. Il sistema può essere azionato in B Aprire la leva BRITA sul rubinetto BRITA e lasciare scorrere posizione verticale e orizzontale. Se si utilizza un fissaggio a l'acqua filtrata finché non risulta completamente pulita e senza parete, installare solamente in posizione verticale! bolle (almeno 2 litri). A Collegare il fissaggio a parete utilizzando le due viti compatibili e due prese a muro, se necessario, in base al tipo di parete. Sostituzione del filtro B Inserire la testa del filtro (2) nel fissaggio a parete (1). Servirsi dei... - Página 81 Praticità Da 4°C a 40°C durata del filtro per rubinetto BRITA Temperatura immagazzinaggio/ ambiente per Da -20°C a 50°C trasporto Sostituzione del filtro P1000 1200 L Attivazione dell'indicatore per la sostituzione Capacità fino a durezza da carbonati 10 °dH con del filtro a LED BRITA l'impostazione “A” P3000 3400 L A Premere il pulsante Reset (vedere fig. 5) dell' indicatore dello Capacità da durezza da P1000 600 L stato di durata del filtro per tre secondi sino al lampeggiamento carbonati da 10 a 17 °dH con in verde della spia a LED. P3000 1700 L l'impostazione “B” B Il timer si avvia automaticamente.
-
Página 82: Risoluzione Dei Problemi
Soluzione del problema: s montare la testa del filtro e i tubi flessibili Dati tecnici del rubinetto BRITA e installare in direzione del flusso dell'ac- qua (capitolo 3.4). C Perdite Pressione di esercizio da 0,5 bar a 10 bar max. Causa: c ollegamenti a vite non montati corretta- collegamento acqua mente. Da 4°C a 30 °C fredda Soluzione del problema: c ontrollare la pressione principale. Control- collegamento acqua lare tutti i collegamenti a vite e montarli 70°C max. calda come indicato nel capitolo 3.4. D Nessuna indicazione LED durante l'utilizzo portata ≥ 9 L/min Causa: L a batteria non è inserita correttamente classe di rumorosità... - Página 83 WD 3020 Nome ricambio Codice e nome del ricambio 1004715 Guarnizione On Line 3/8" 2 mm CE + AU 1012554 1004713 Guarnizione On Line 1/2" 2 mm CE + AU 1004699 Tubo flessibile On Line 3/8" IT - 3/8" IT CE 1015771 Ricambio LED G3/8 a 3 vie CE 1004690 Adattatore 1/2" IT - 3/8" ET 1005821 Raccordo a T 3/8" 1015771 1016311 1012556 1016282 1004699 1015754 1005821 1004715 1013529 1012557 1004690 (fig. 13) (fig. 14) 1012562 1004713 Codice e nome del ricambio...
- Página 84 1014609 Set aeratore WD 3050 1012556 Filtro miscelatore di ricambio 1012552 Set anelli di base WD 3030/3040 1012550 1014608 Set anelli di base WD 3050 brushed 1014609 1012557 Set di tubi flessibili WD 3020 CE 1013529 Set di assemblaggio WD 3050 1012562 Tubo flessibile di ricambio DN6 800 mm HF M8x1 - G3-8HN ASM 1015754 Ricambio del rubinetto BRITA con indicatore dello stato di durata del filtro 1016311 Valvola LED ASM 1016282 Copertura miscelatore rubinetto WD3020-3040 1016311 1012556 1016282 1015754 1012552 brushed 1014608 1012557 1013529 (fig. 15) 1012562 ITALIANO 1014662-002_GA_BRITA_Tap_CE.indb 84 04.04.16 11:28...
-
Página 85: Note Importanti
III. Note importanti Note importanti Utilizzo ottimale Proteggere il filtro per acqua P 1000 dai raggi diretti del sole e da • B RITA consiglia di non lasciare inutilizzato il sistema filtrante per eventuali danni meccanici. Non assemblare vicino a fonti di calore e un periodo di tempo troppo lungo. Se il rubinetto BRITA non viene fiamme libere. Installare una valvola di arresto a monte del flessibile utilizzato per diversi giorni (2-3 giorni), si consiglia di risciacquare il di ingresso del sistema filtrante. Il sistema per rubinetto BRITA è sistema filtrante con il volume di acqua X indicato nella seguente idoneo esclusivamente all'uso domestico. tabella. Dopo periodi di ristagno superiori a 4 settimane, il filtro dovrebbe essere risciacquato con il volume di acqua Y. Si prega di Utilizzare solamente acqua potabile con il sistema filtrante per notare che il filtro può essere utilizzato per un periodo massimo di acqua BRITA. Il filtro per acqua BRITA può essere impiegato 12 mesi, indipendentemente dal volume effettivo impiegato. solamente con acqua fredda alla temperatura dell'acqua indicata nel capitolo 7 . Non è consentito utilizzare acqua compromessa da Come per i rubinetti convenzionali, prima dell'utilizzo si consiglia di un punto di vista microbiologico o acqua di qualità non nota senza lasciare scorrere l'acqua per un breve periodo. disinfettarla adeguatamente. Non è possibile installare il sistema in Volume di risciacquo X dopo un ristagno di Volume di presenza di un bollitore a bassa pressione. 2-3 giorni risciacquo Indipendentemente dall'acqua usata, adoperare utensili in acciaio inossidabile o bollitori con elementi riscaldanti in acciaio inossi- P 1000 2 litri dabile. Ciò è di particolare importanza per le persone che sono P 3000 3 litri sensibili al nichel. -
Página 86: Brita Al Vostro Servizio Per Una Completa Soddisfazione
IV. BRITA , al vostro servizio per una completa soddisfazione ® Il BRITA Service Hotline Smaltimento corretto dell'indicatore dello stato di durata del fi ltro per rubinetto BRITA Avete domande sul vostro prodotto BRITA? oppure sull'argomento Ogni indicatore dello stato di durata del fi ltro per relativo alla fi ltrazione di acqua? Contattateci! Accanto al codice paese rubinetto BRITA ha una durata utile di circa 5 anni. presente sul retro del presente libretto è possibile trovare i dettagli di Al termine della durata utile dell'indicatore per la contatto del team del servizio di assistenza alla clientela BRITA. sostituzione del fi ltro, ricordarsi di smaltirlo nel rispetto delle regolamentazioni applicabili e dei requisiti previsti per legge. Il lato migliore dell'acqua: www.brita.net State cercando il rivenditore BRITA più vicino a voi? Desiderate infor-... - Página 87 NSF/ANSI 42 - 2010: regolamentazioni locali. pH: 7 .5 ± 0.5 Temperatura: 20 ± 3 °C (68 ± 5 °F) I fi ltri originali BRITA contengono un mix di scambiatori ionici e Residuo fi sso (TDS): 200 – 500 mg/L carboni attivi, tutti materiali testati per la compatibilità alimentare. Carbonio organico totale (TOC): ≥ 1.0 mg/L Gli scambiatori ionici riducono la durezza temporanea dell’acqua Cloro Libero Disponibile (FAC): 2 mg/L ±...
- Página 88 ITALIANO 1014662-002_GA_BRITA_Tap_CE.indb 88 04.04.16 11:28...
-
Página 89: Gratulujemy
® Gwarantujemy najwyższą jakość produktów BRITA. Naszym najwyższym celem jest zadowolenie klientów. Bateria BRITA z funkcją filtrowania to sposób na czystszą, smaczniejszą i bardziej przejrzystą wodę wodę Oprócz zwykłej zimnej i gorącej wody system BRITA oferuje również: • Filtrowaną wodę o doskonałym smaku płynącą prosto z kranu Bateria BRITA • F iltrowaną wodę stanowiącą idealną bazę do przygotowywania zimnych i gorących napojów • L epszy smak potraw. Woda, będąc podstawowym składnikiem wykorzystywanym do przygotowywania potraw, ma znaczący... -
Página 90: Jakość Od Samego Początku
Zawartość zestawu startowego baterii BRITA z systemem filtrujacym W celu uzyskania najlepszych efektów filtracji prosimy o dokładne zapoznanie się z niniejszą instrukcją obsługi zestawu startowego baterii BRITA. Zestaw startowy baterii BRITA z systemem filtrującym zawiera następujące elementy (patrz rys. 1): 1. G łowica filtra z trzema ustawieniami i wygodnym uchwytem blokującym 2. U chwyt do montażu ściennego 3. W kład filtracyjny P 1000 4. K ran BRITA (może różnić się wyglądem od przedstawionego na rysunku) 5. W skaźnik wymiany wkładów do baterii BRITA... - Página 91 Ustawienie Bateria BRITA – łatwa instalacja liczba stref reakcji, które zmieniły kolor Przed rozpoczęciem instalacji sprawdź, czy dostępne są wszystkie wymienione wyżej elementy (patrz rys. 1) i zalecane narzędzia. wydajność P1000 do 1200 l do 600 l do 400 l Instalacja przebiega w 7 krokach. P3000 do 3400 l do 1700 l do 1100 l Przed przystąpieniem do instalacji zapoznaj się z rozdziałem Twardość do 10 od 10 do 17 powyżej 17 węglanowa w stopni- 7 „Dane techniczne” i rozdziałem 9 „Ważne informacje” . Systemu nie można instalować wraz z podgrzewaczem ach niemieckich [°dH] niskociśnieniowym, ponieważ może to prowadzić do Twardość do 13 od 13 do 21 powyżej 21 obniżenia jakości wody. Jeśli produkt był przechowywany węglanowa w stopni- i transportowany w temperaturze poniżej 0°C, przed ach angielskich [°eH] rozpoczęciem jego użytkowania należy pozostawić go w Twardość...
- Página 92 (rys. 5) B Wstępne programowanie wskaźnika wymiany wkładów filtracyjnych BRITA: 1 dioda 2 diody 3 diody Zależnie od wybranych ustawień głowicy filtra (krok 1) należy zaprogramować wskaźnik wymiany wkładów BRITA w następu- ustawienie twardości wody (HARDNESS) C jący sposób (patrz rys. 5): wkład (CARTRIDGE) A 1000 P 1000 P 3000 a Naciśnij znajdujący się po prawej stronie przycisk HARDNESS (TWARDOŚĆ), aby wybrać ustawienie twardości wody. Jeśli...
-
Página 93: Dane Techniczne
WD 3020 D Sygnały Trzy diody w dźwigni BRITA są aktywne tylko w położeniu filtrowa- 1. B ateria BRITA z 3 wężami nia. Wskazania diod: 2. W skaźnik wymiany wkładów filtra- - Zielona dioda: filtr baterii BRITA działa prawidłowo. cyjnych BRITA - Ż ółta dioda: zużycie filtra przekracza 90%. Należy kupić 3. P ierścień O-ring nowy wkład filtracyjny. 4. T rzpień - Czerwona dioda: należy wymienić wkład filtracyjny. 5. Z łącze (niezbędne tylko w przy- E Ponowne programowanie wskaźnika wymiany padku instalacji baterii bezpośrednio wkładów filtracyjnych BRITA Wskaźnik wymiany... - Página 94 O dkręć istniejące węże od dopływu zimnej i ciepłej wody. nie do rodzaju ściany. Skorzystaj z poniższego schematu (patrz rys. 9) i wykonaj czynności w prawidłowej kolejności. Zaleca się umieszczenie pod dopływem wody odpowied- A P odłącz dostarczony w komplecie trójnik do dopływu zimnej niego naczynia, ponieważ po odkręceniu węży może z nich wody. wypłynąć woda! a) W łóż jedną uszczelkę 3/8" do wewnętrznego gwintu dostarczo- nego w komplecie trójnika. d) Odkręć baterię kuchenną – nie ma jednego standardowego b) Tę końcówkę trójnika podłącz do dopływu zimnej wody. mocowania, jednak zwykle można go odkręcić za pomocą klucza nastawnego. W przypadku dostępności w kuchni dodatkowego dopływu e) Wyciągnij baterię kuchenną i węże. (3/8") zimnej wody do baterii BRITA nie ma potrzeby B Po wykonaniu tych czynności można przystąpić do instalacji instalowania dostarczonego w komplecie trójnika! Jeżeli baterii BRITA. dopływ zimnej wody nie pasuje do złącza 3/8" trójnika, w razie potrzeby należy użyć dostarczonej w komplecie W pierwszej kolejności przykręć trzon (2) do baterii BRITA (1). Przy- przejściówki. Włóż uszczelkę 1/2" do gwintu wewnętrznego kręć węże do dozownika (patrz rys. 8). przejściówki. W zestawie startowym znajdują się dwie Przykręć złącze M8 węża z niebieskim paskiem do otworu C. przejściówki 1/2". Przejściówki w innych rozmiarach są Przykręć złącze M8 węża z czerwonym paskiem do otworu H. dostępne w sklepach. Przykręć złącze M8 węża o długości 800 mm do otworu B. B Do jednej końcówki trójnika podłącz wąż z niebieskim paskiem.
- Página 95 Krok 5: Instalacja wkładu filtracyjnego (patrz rys. 10) A Usuń pasek ochronny. B Wsuń wkład filtracyjny (4) pionowo w głowicę filtra (2). C Obróć uchwyt blokujący (3), aż do jego zatrzaśnięcia. Dopływ ciepłej Dopływ zimnej wody wody (rys. 9) Maksymalny moment dokręcania złączy G3/8" nie może przekraczać 14 Nm! Podczas montażu można używać wyłącznie węży z uszczelkami (13), ponieważ węże z gwintem stożkowym mogą uszkodzić złącza głowicy filtra i spowodować unieważnienie gwarancji! (rys. 10) Wkład filtracyjny można zainstalować wyłącznie przy odblokowanym uchwycie. Upewnij się, że wkład filtracyjny jest prawidłowo włożony. POLISH 1014662-002_GA_BRITA_Tap_CE.indb 95 04.04.16 11:28...
-
Página 96: Wymiana Wkładu Filtracyjnego
Wymiana wkładu P 1000 (patrz rys. 10): A Otwórz uchwyt blokujący (3). B Umieść pod przewodem płukania odpowiedni pojemnik na wypły- wającą wodę. Otwórz zawór płukania (2) w celu odpowietrzenia systemu. Zamknij zawór płukania (2) ponownie. C W yjmij zużyty wkład filtracyjny (4) z głowicy filtra (5) – pamiętaj, że wkład jest stabilnie osadzony, więc można go mocno pociągnąć bez obaw o uszkodzenie. D Włóż nowy wkład filtracyjny (patrz rozdział 3.5). (rys. 11) E Zamknij uchwyt blokujący (3). F Zresetuj wskaźnik wymiany wkładów filtracyjnych BRITA (rozdział 5). G Otwórz dźwignię baterii oznaczoną nazwą BRITA i przepuszczaj przez układ wodę do chwili, aż będzie przezroczysta i bez pęche- rzyków powietrza (co najmniej 2 litry). Wymiana wkładu filtra- cyjnego P 3000 przebiega dokładnie tak samo jak wymiana wkładu P 1000. Wydajność wkładu P 3000 przy ustawieniu „A” wynosi do 3400 litrów, przy ustawieniu „B” – do 1700 litrów, a przy ustawieniu „C” – do 1100 litrów. Należy pamiętać o tym podczas resetowania wskaźnika wymiany wkładów filtracyjnych BRITA. POLISH 1014662-002_GA_BRITA_Tap_CE.indb 96 04.04.16 11:28... - Página 97 P3000 137 mm/128 mm/417 mm szmatką. montażu ściennego) Nie używaj substancji ściernych, roztworów czyszczących ani Pozycja montażowa Pozioma i pionowa agresywnych środków czyszczących. Połączenie dopływu wody G3/8" Dane techniczne wkładów filtracyjnych P 1000 i P 3000 Połączenie odpływu wody G3/8" Dane techniczne baterii BRITA Od 2 barów do maks. Ciśnienie robocze 8,6 bara Temperatura pobieranej wody Od 4°C do 30°C Ciśnienie robocze Od 0,5 bara do maks. 10 barów użytkowania Od 4°C do 40°C Połączenie zimnej wody Od 4°C do 30°C Temperatura otoczenia przechowywania/ Połączenie ciepłej wody...
-
Página 98: Rozwiązywanie Problemów
B Słaby przepływ wody lub jego brak mimo otwartego perlator (np. używając octu). Po zakończeniu czyszczenia ostrożnie dopływu wody połącz długą, cienką część znajdującą się z tyłu perlatora z silikono- wym wężem. Umieść nakładkę na perlatorze i dokręć ją mocno. Przyczyna: Zbyt niskie ciśnienie w sieci. Upewnij się, że uszczelka w nakładce jest prawidłowo osadzona. Rozwiązanie: S prawdź ciśnienie w sieci. Jeżeli problem Jeśli jest osadzona prawidłowo, nie powinno być żadnych wycieków będzie nadal występował, sprawdź system podczas wypływu ciepłej, zimnej lub przefiltrowanej wody BRITA. filtracyjny oraz wkład filtracyjny i w razie Aby wymienić perlator na nowy, należy zamówić go w firmie BRITA. potrzeby wymień go. Sprawdź, czy węże nie Informacje kontaktowe biura obsługi klienta firmy BRITA znajdują się są pozaginane. na odwrocie tej broszury. Przyczyna: G łowica filtra nie została zamontowana w kierunku zgodnym z kierunkiem przepływu wody / węże zostały nieprawidłowo podłączone Rozwiązanie: W ymontuj głowicę filtra i węże i zainstaluj je w kierunku zgodnym z kierunkiem przepływu wody (rozdział 3.4). - Página 99 WD 3020 Nazwy części zapasowych Nr produktu Nazwa części zapasowej 1004715 Uszczelka On Line 3/8" 2 mm CE + AU 1012554 1004713 Uszczelka On Line 1/2" 2 mm CE + AU 1004699 Wąż On Line 3/8" IT – 3/8" IT CE 1015771 Głowica filtra G3/8 trójkierunkowa, część zapasowa LED CE 1004690 Przejściówka 1/2" IT – 3/8" ET 1005821 Trójnik 3/8" 1016311 1015771 1012556 1016282 1004699 1015754 1005821 1004715 1013529 1012557 (rys. 14) 1004690 (rys. 13) 1012562 1004713 Nr produktu Nazwa części zapasowej...
- Página 100 Zestaw perlatora WD 3050 1012550 1012556 Wkład mieszający brushed 1014609 1012552 Zestaw pierścieni podstawy WD 3030/3040 1014608 Zestaw pierścieni podstawy WD 3050 1012557 Zestaw węży WD 3020 CE 1013529 Zestaw montażowy WD 3050 1012562 Wąż DN6 800 mm HF M8x1 – G3-8HN ASM 1015754 Diodowy wskaźnik wymiany wkładów filtra- cyjnych BRITA 1016311 Zawór LED ASM 1016282 Dźwignia regulacji wody WD3020-3040 1016311 1012556 1016282 1015754 1012552 brushed 1014608 1012557 1013529 1012562 (rys. 15) POLISH 1014662-002_GA_BRITA_Tap_CE.indb 100 04.04.16 11:28...
-
Página 101: Ważne Informacje
III. Ważne informacje Ważne informacje Optymalne wykorzystanie Wkład filtracyjnego P 1000 należy chronić przed bezpośrednim • F irma BRITA zaleca, aby filtr nie był pozostawiany bez użytku przez światłem słonecznym i uszkodzeniami mechanicznymi. Nie montować dłuższy czas. Jeśli bateria BRITA nie jest używana przez 2-3 dni, zaleca systemu w pobliżu źródeł ciepła ani otwartego ognia. Przed wężem się przepłukanie systemu wodą w objętości X zgodnie z poniższą wejściowym systemu filtracyjnego musi być zai stalowany zawór odci- tabelą. Jeśli filtr nie był używany przez czas dłuższy niż 4 tygodnie, nający. System filtrujący z baterią BRITA jest przeznaczony wyłącznie należy przepłukać go wodą w objętości Y. Należy również pamiętać, że do użytku domowego. System filtracyjny wody BRITA może pobierać maksymalny okres użytkowania wkładu filtracyjnego wynosi 12 wyłącznie wodę pitną. Wkład filtrujący wodę BRITA służy wyłącznie miesięcy, bez względu na aktualne wykorzystanie wydajności filtra. do filtrowania zimnej wody, której temperatura mieści się w zakresie Podobnie jak w przypadku zwykłych baterii, przed użyciem baterii podanym w rozdziale 7 . Nie stosować w przypadku wody, w której BRITA należy spuścić wodę przed jej spożyciem przez pewien czas, mogą występować zanieczyszczenia mikrobiologiczne, oraz wody o w celu uzyskania najlepszej filtrowanej wody BRITA. nieprzebadanej jakości bez zastosowania odpowiedniej dezynfekcji. Ilość wody do przepłukania X po 2-3 dniach Ilość wody do Systemu nie można instalować razem z podgrzewaczem niskociśnie- przestoju przepłukania niowym. Bez względu na rodzaj używanej wody zaleca się korzystanie z przy- P 1000 2 litry borów kuchennych ze stali nierdzewnej oraz czajnika z elementami... -
Página 102: Pełna Satysfakcja Dzięki Produktom Brita
IV. Pełna satysfakcja dzięki produktom BRITA ® Prawidłowa utylizacja wskaźnika wymiany Infolinia serwisu BRITA jest do Twojej dyspozycji wkładów fi ltracyjnych BRITA Wskaźnik wymiany Czy masz jakieś pytania dotyczące produktu BRITA? Chcesz dowie- wkładów dzieć się więcej na temat fi ltrowania wody? Zadzwoń do nas! Informa- cje kontaktowe biura obsługi klienta BRITA znajdują się obok numeru Czas eksploatacji każdego wskaźnika wymiany kierunkowego kraju na odwrocie tej broszury. wkładów fi ltracyjnych BRITA wynosi ok. 5 lat. Pod koniec okresu użyteczności wskaźnika wymiany wkładów fi ltracyjnych należy pamiętać o tym, aby zutylizować go zgodnie z obowiązującymi przepisami Najlepsza strona wody: www.brita.net i wymogami ustawowymi. -
Página 103: Gefeliciteerd
Kraan ® U bent verzekerd van de beste BRITA kwaliteit en van onze betrokken- heid bij onze klanten. Uw BRITA Kraan is essentieel voor fris en heerlijk zacht BRITA gefilterd water Naast warm en koud gefilterd water biedt uw BRITA systeem veel voordelen • F ris en heerlijk, zacht BRITA gefilterd water direct binnen hand- bereik BRITA Kraan • G efilterd water is de ideale basis voor uw gerechten en dage- lijkse dranken • W ater is een belangrijk element voor de bereiding van uw eten... -
Página 104: Kwaliteit Vanaf Het Allereerste Begin
Voor het BRITA Kraan systeem geldt de wettelijke garantietermijn van 2 jaar. Een garantieclaim wordt uitsluitend gehonoreerd als alle instructies in deze gebruiksaanwijzing in acht zijn genomen. Inhoud van de BRITA Kraan starterkit Volg de aanwijzingen nauwkeurig op, zodat u zich ervan verzekert dat geniet van de beste resultaten met uw BRITA Kraan starterkit. Uw BRITA Kraan starterkit bestaat uit de volgende onderdelen (zie fig. 1): 1. p rofessionele filterkop met 3 instellingen en een handige vergrendeling 2. F lexibele muursteun 3. P 1000 waterfilterpatroon 4. B RITA Kraan (ontwerp kan afwijken van getoonde afbeelding) 5. B RITA Kraan statusindicator... -
Página 105: Stap 1: Carbonaathardheid (A/B/C) Selecteren Op De Filterkop
Instelling BRITA Kraan – eenvoudige installatie aantal reactiezones dat van kleur is Controleer voordat u begint of alle bovengenoemde componenten veranderd (zie fig. 1) en het aanbevolen gereedschap compleet zijn. inhoud P1000 tot 1200 l tot 600 l tot 400 l De installatie bestaat uit 7 stappen. P3000 tot 3400 l tot 1700 l tot 1100 l Voordat u met de installatie begint, dient u eerst de Technis- Duitse carbonaat- tot 10 10 tot 17 hoger dan che Gegevens (hoofdstuk 7) en de Belangrijke Opmerkingen hardheid [°dH] 17 dH (hoofdstuk 9) te lezen. Het systeem kan niet worden geïn- Engelse carbonaat- tot 13 13 tot 21 hoger dan 21 stalleerd met een lagedrukboiler, omdat dit tot waterschade hardheid [°eH] kan leiden. Franse carbonaat- tot 18 18 tot 30 hoger dan 30 Na opslag en transport bij temperaturen onder 0°C moet... -
Página 106: Stap 2: De Brita Kraan Statusindicator Starten
B Eerste programmering van de BRITA Kraan statusindicator: Om een optimale werking te garanderen, dient u de filterpatroon regelmatig te vervangen. De LED indicator voor de filterpatroonver- Afhankelijk van de gekozen instelling voor de filterkop (stap 1), vanging in de BRITA hendel geeft aan wanneer u de filterpatroon kunt u de BRITA Kraan statusindicator als volgt programmeren dient te vervangen. (zie fig. 5): a D ruk op de knop rechts (HARDNESS) om instelling C voor de D Signalen waterhardheid te kiezen. Druk op de knop, totdat één oranje LED De drie lampjes in de BRITA hendel worden alleen geactiveerd in knippert. -
Página 107: Stap 3: De Brita Kraan Installeren
E De BRITA Kraan statusindicator opnieuw WD 3020 programmeren Wanneer het maximale volume wordt bereikt of als de filterpatroon 1. B RITA Kraan met 3 slangen reeds 12 maanden in gebruik is, begint de LED van de BRITA Kraan 2. B RITA Kraan statusindicator statusindicator voor het filterpatroon in de kleur rood te knipperen 3. O -ring (alleen wanneer de BRITA hendel in de filterstand staat). 4. K raanbuis - h et filterpatroon moet worden vervangen (hoofdstuk 4). 5. V erbindingsstuk (is alleen nodig - d e BRITA Kraan statusindicator moet worden gereset nadat de voor de installatie van de kraan filterpatroon is vervangen. - Página 108 Voer de werkzaamheden uit volgens onderstaande tekening (zie fig. Wij raden aan een geschikte opvangbak onder de watertoe- 9) en volg de stappen in de juiste volgorde. voer te plaatsen, omdat achtergebleven water uit de slangen A Sluit het meegeleverde T-stuk aan op uw koudwatertoevoer zal lekken als u deze losschroeft! a) B reng één 3/8-inch pakking aan in de moer met binnendraad van het meegeleverde T-stuk. d) Schroef uw keukenkraan los - er is geen standaardbevestiging, b) S luit dit uiteinde van het T-stuk aan op de koudwatertoevoer. maar meestal kunt u het best een waterpomptang gebruiken. e) Trek uw keukenkraan en slangen naar buiten. Als u in uw keuken over een extra vrije 3/8-inch koudwater- B U kunt nu de BRITA Kraan installeren. toevoer beschikt voor de BRITA Kraan hoeft u het meegele- Eerst schroeft u de kraanbuis (2) in de BRITA Kraan (1). verde T-stuk niet aan te sluiten! Als de 3/8-inch koppeling op het T-stuk niet op uw koud- Daarna schroeft u de slangen in de dispenser (zie fig. 8). waterkraan past, dient u de meegeleverde adapter te Schroef de M8-koppeling van de slang met de blauwe streep in gat C. gebruiken. Plaats eerst de 1/2-inch pakking in de moer met Schroef de M8-koppeling van de slang met de rode streep in gat H. binnendraad van de adapter. Met uw starterkit zijn twee 1/2- Schroef de M8-koppeling van de 800-mm slang in gat B. inch adapters meegeleverd. Indien nodig kunt u bij uw lokale bouwmarkt ook adapters met andere maten kopen. WD 3020/ W D 3030/ W D 3040 en WD 3050 B Sluit de slang met de blauwe streep op een zijde van het T-stuk aan.
- Página 109 Stap 5: Filterpatroon aanbrengen (zie fig. 10) A Verwijder beschermband (1). B Koppel het filterpatroon (4) aan de filterkop (5). C Draai de vergrendeling (3) tot u voelt dat hij in de goede stand staat. Warmwater- toevoer Koudwater- toevoer (fig. 9) Het maximum aanhaalkoppel voor de G3/8-inch aansluitin- gen mag niet hoger zijn dan 14 Nm! Alleen slangkoppelingen met pakkingen (13) mogen worden gebruikt − slangen met conische schroefaansluitingen beschadigen de filterkopaan- sluitingen. Garantieclaims vervallen indien andere koppelin- gen worden gebruikt. (fig. 10) Het filterpatroon kan alleen worden aangebracht als de vergrendeling open is. Zorg ervoor dat het filterpatroon correct geplaatst is. NEDERLANDS 1014662-002_GA_BRITA_Tap_CE.indb 109 04.04.16 11:28...
- Página 110 (zie fig. 11) onderdelen zijn gemonteerd voordat u het product in gebruik neemt. Plaats een geschikte opvangbak voor het spoelwater onder het filterpatroon. Houd bij de montage rekening met de bouwmaten van het A Draai de koud- en warmwaterkraan open en controleer het systeem, de buigradius van de slangen en de afmetingen van systeem nauwkeurig op lekkage. de accessoires. Het systeem kan zowel verticaal als horizon- B Draai de BRITA gemerkte hendel op uw BRITA Kraan open en taal worden gebruikt. Als u gebruikmaakt van de muursteun, spoel het systeem totdat het gefilterde water helder en zonder monteer het systeem dan uitsluitend in de verticale stand! luchtbellen stroomt (minstens 2 liter). A Bevestig de muursteun op zijn plaats met de twee bijbehorende schroeven en gebruik afhankelijk van het muurtype zo nodig ook twee muurpluggen. Het filterpatroon vervangen B Steek de filterkop (2) in de muursteun (1). Gebruik de bevesti-...
-
Página 111: De Brita Kraan Statusindicator Activeren
U vervangt het P3000 filterpatroon op dezelfde manier als het Technische gegevens van de P1000 en P 3000 P1000 filter. Het P3000 filterpatroon kan tot 3400 liter meegaan filterpatroon bij instelling A, tot 1700 liter bij instelling B en tot 1100 liter bij instelling C. Houd hier rekening mee wanneer u uw BRITA Kraan statusindicator reset. Werkdruk 2 bar tot max. 8,6 bar Waterinlaattemperatuur 4°C tot 30°C De BRITA Kraan statusindicator activeren Omgevings- gebruik 4°C tot 40°C temperatuur A D ruk de resetknop (zie fig. 5) van de Kraan statusindicator drie opslag/transport -20°C tot 50°C voor seconden lang in totdat het groene lampje begint te knipperen. B De timer start automatisch. P1000 1200 liter Capaciteit tot carbonaathard- heid 10 °dH bij instelling "A"... - Página 112 C Lekkage Technische gegevens van de BRITA Kraan Probleem: Schroefverbindingen niet correct gemonteerd. Oplossing: C ontroleer waterdruk. Controleer alle schroef- Werkdruk 0,5 bar tot max. 10 bar verbindingen en monteer ze zoals beschreven in hoofdstuk 3.4. koudwatertoevoer 4°C tot 30°C D Geen LED indicatie bij gebruik warmwatertoevoer max. 70°C Probleem: Batterij is niet juist geplaatst of is uitgeput. Oplossing: C ontroleer of batterij juist geplaatst is. Indien doorstroomsnelheid ≥ 9 liter/min noodzakelijk, vervang batterij. geluidsklasse Group II/- Afmetingen (breedte/ Beluch- Gewicht...
- Página 113 WD 3020 Naam van reserveonderdeel Artikelnummer Naam van reserveonderdeel 1004715 pakking On Line 3/8 inch 2 mm CE + AU 1012554 1004713 pakking On Line 1/2 inch 2 mm CE + AU 1004699 slang On Line 3/8 inch IT - 3/8 inch IT CE 1015771 filterkop G3/8 3-in-1 LED CE, reserveonder- deel 1004690 adapter 1/2 inch IT - 3/8 inch ET 1005821 T-stuk 3/8 inch 1016311 1015771 1012556 1016282 1004699 1015754 1005821 1004715 1013529 1012557 (fig. 14) 1004690 (fig. 13) 1012562 1004713 Artikelnummer Naam van reserveonderdeel...
- Página 114 1014609 beluchterset WD 3050 1012550 1012556 reservedeel mixer filterpatroon brushed 1014609 1012552 set afdichtringen WD 3030/3040 1014608 set afdichtringen WD 3050 1012557 slangenset WD 3020 CE 1013529 montageset WD 3050 1012562 reservedeel slang DN6 800 mm HF M8x1 - G3-8HN ASM 1015754 BRITA Kraan statusindicator voor vervanging filterpatroon BRITA Kranen, reserveonderdeel 1016311 LED ventiel ASM onderdeel 1016282 Hoes mengkraan WD3020-3040 onderdeel 1016311 1012556 1016282 1015754 1012552 brushed 1014608 1012557 1013529 1012562 (fig. 15) NEDERLANDS 1014662-002_GA_BRITA_Tap_CE.indb 114 04.04.16 11:28...
-
Página 115: Belangrijke Opmerkingen
III. Belangrijke opmerkingen Belangrijke opmerkingen Optimaal gebruik Bescherm het P1000 waterfilterpatroon tegen direct zonlicht en • B RITA raadt aan het filtersysteem niet voor langere tijd ongebruikt mechanische beschadigingen. Monteer de waterfilterset niet in de te laten. Als de BRITA Kraan enkele dagen (2 tot 3 dagen) buiten nabijheid van warmtebronnen en open vuur. Er moet een afsluitklep gebruik is geweest, raden wij u aan het filtersysteem te spoelen worden gemonteerd vóór de ingangslang van het filtersysteem. Het met het volume X dat in de tabel hieronder staat aangegeven. Bij BRITA waterfiltersysteem is uitsluitend bedoeld voor huishoudelijk stilstandperioden langer dan 4 weken, moet het filter worden ges- gebruik. poeld met volume Y. Denk er ook aan dat de maximale gebruiks- periode van de filterpatroon 12 maanden bedraagt, ongeacht het Alleen water van drinkwaterkwaliteit mag worden gebruikt voor werkelijk gebruikte volume. consumptie via het BRITA waterfiltersysteem. Het BRITA water- filterpatroon is uitsluitend geschikt voor gebruik van koud water Zoals gebruikelijk bij iedere kraan is het verstandig om voor gebruik waarvan de temperatuur overeenkomt met de vermelde waarde in het water even kort te laten doorstromen zodat u kunt genieten van hoofdstuk 7 . Water dat microbiologisch onveilig of van onbekende BRITA gefilterd water. kwaliteit is, mag niet zonder voldoende ontsmetting worden Spoelvolume X na 2-3 dagen stilstand Spoelvolume gebruikt. Het systeem kan niet worden geïnstalleerd met een lagedrukboiler. P 1000 2 liter Ongeacht het gebruikte water, dient u roestvrijstalen keukengerei P 3000 3 liter te gebruiken. Dit is vooral van belang voor mensen die gevoelig zijn... -
Página 116: Brita ® , Gegarandeerde Kwaliteit En Tevredenheid
IV. BRITA , gegarandeerde kwaliteit en tevredenheid ® De BRITA servicehotline staat voor u klaar Correcte afvoer van de BRITA Kraan statusindicator Hebt u nog vragen over uw BRITA product? Of wilt u meer weten Elke BRITA Kraan statusindicator heeft een over waterfi ltratie? Bel ons dan! De contactgegevens van de BRITA gebruiksduur van ongeveer 5 jaar. Aan het einde klantenservicedienst voor uw regio staan naast de code voor uw land van de gebruiksperiode moet de indicator worden op de achterzijde van dit boekje. afgevoerd conform de geldende voorschriften en wettelijke regels. Uw beste waterwebsite: www.brita.net Bent u op zoek naar de dichtstbijzijnde BRITA leverancier? Wilt u uitgebreidere informatie over BRITA producten? Of misschien over het bedrijf BRITA? Uitsluiting van aansprakelijkheid Wilt u maximaal profi teren van een van de serviceaanbiedingen van... - Página 117 1014662-002_GA_BRITA_Tap_CE.indb 117 04.04.16 11:28...
- Página 118 1014662-002_GA_BRITA_Tap_CE.indb 118 04.04.16 11:28...
- Página 119 1014662-002_GA_BRITA_Tap_CE.indb 119 04.04.16 11:28...
- Página 120 Tel.: 0031 40 2818082 E-Mail: sc@brita-france.fr www.brita.pt Tel.: 00800 14789632 N° AZUR: 0810 73 15 45 www.brita.be www.brita.fr BRITA Wasser-Filter-Systeme AG BRITA Water Filter Systems Ltd. BRITA GmbH Gassmatt 6 BRITA House Heinrich-Hertz-Str. 4 CH-6025 Neudorf/LU 9 Granville Way D-65232 Taunusstein Verbraucherservice/Téléphone client/...