Publicidad
Idiomas disponibles
Idiomas disponibles
Enlaces rápidos
INSTALLATION INSTRUCTIONS
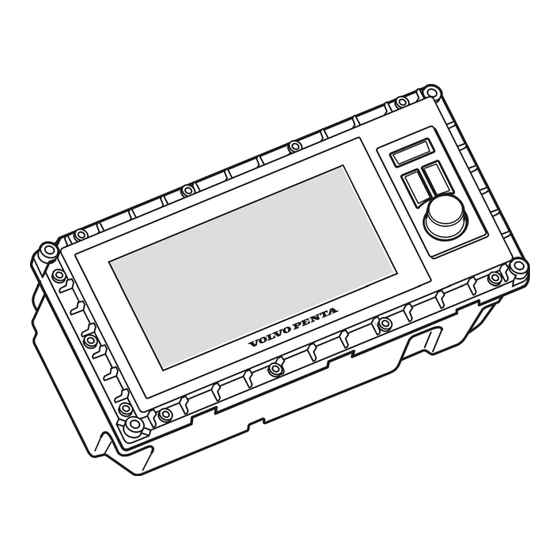
Installation Instructions
Volvo Penta 7" Display
Kit no. 21334200, 21330289, 21330288,
21853866
Einbauanleitung
Volvo Penta 7"-Display
Kit no. 21334200, 21330289, 21330288,
21853866
Instructions de montage
Écran 7" Volvo Penta
Kit no. 21334200, 21330289, 21330288,
21853866
Instrucciones de montaje
Display Volvo Penta de 7"
Kit no. 21334200, 21330289, 21330288,
21853866
Istruzioni di montaggio
Display Volvo Penta da 7"
Kit no. 21334200, 21330289, 21330288,
21853866
Plus d'informations sur : www.dbmoteurs.fr
47700859 05-2012 (Tab 6)
Monteringsanvisning
Volvo Penta 7" Display
Kit no. 21334200, 21330289, 21330288,
21853866
Instruções de instalação
Display Volvo Penta de 7 pol.
Kits nº 21334200, 21330289, 21330288,
21853866
Инструкция по установке
7-дюймовый дисплей Volvo Penta
Комплект № 21334200, 21330289,
21330288, 21853866
安装须知
沃尔沃遍达7"显示器
套件编号21334200、21330289、
21330288、21853866
Publicidad

Resumen de contenidos para Volvo Penta 21330289
- Página 1 47700859 05-2012 (Tab 6) INSTALLATION INSTRUCTIONS Installation Instructions Monteringsanvisning Volvo Penta 7” Display Volvo Penta 7” Display Kit no. 21334200, 21330289, 21330288, Kit no. 21334200, 21330289, 21330288, 21853866 21853866 Einbauanleitung Instruções de instalação Volvo Penta 7”-Display Display Volvo Penta de 7 pol.
- Página 2 IMPORTANTE! Questo kit e le relative istruzioni di montaggio sono stati realiz- zati per le officine di servizio Volvo Penta, i cantieri, i fabbricanti di macchine e tutte le altre officine autorizzate il cui personale ha ricevuto un addestramento qualificato e specializzato.
- Página 3 DEUTSCH IMC24- 2212X DEUTSCH DT15-6P VIDEO (IN) Plus d'informations sur : www.dbmoteurs.fr...
- Página 4 Plus d'informations sur : www.dbmoteurs.fr...
- Página 5 Plus d'informations sur : www.dbmoteurs.fr...
- Página 6 3 mm drill. Refer to figure A. IMPORTANT! Read through the complete instruc tions carefully and install the Volvo Penta 7” Dis- 3. Connect the harness to the back of the display. Refer play (color screen) in accordance with them. The to figure 2 and the EVC installation manual.
- Página 7 - Das Display an einem Ort montieren, der vor lang dau- ernder und direkter Einwirkung von Regen und Spritz- wasser geschützt ist. - Das Volvo Penta 7“-Display unterstützt 1 bis 4 Antriebs- strang-Steuergeräte. - Das Display ist möglichst gut vor schädlicher Sonnen- bestrahlung zu schützen, indem der Schutzdeckel ge-...
- Página 8 à la pluie ou aux éclaboussures un déclic. d’eau. - L’écran 7” Volvo Penta peut être utilisé avec 1 à 4 uni- tés de ligne de propulsion. - Dans la mesure du possible, protéger l’écran de la lumière directe du soleil en prenant l’habitude de mettre...
- Página 9 - El display Volvo Penta de 7” soporta 1-4 unidades de mando de líneas motrices. - Proteger el display todo lo que se pueda del efecto ne- gativo de la luz solar, acostumbrándose a poner siempre...
- Página 10 - Il display Volvo Penta da 7” può supportare da 1 a 4 centraline elettroniche nel gruppo di propulsione. - Proteggere il più possibile il display dagli effetti negativi dell’esposizione diretta alla luce solare applicando il co-...
- Página 11 - Montera displayen på en plats skyddad från långvarig och di- rekt exponering för regn och vattenstänk. - Volvo Penta 7” Display stödjer 1-4 drivlinstyrenheter. Skydda displayen så mycket som möjligt mot solljusets skadliga inverkan genom att ta för vana att alltid sätta på...
- Página 12 4. Remover o filme de proteção da unidade. prolongada e direta à chuva e a respingos de água. 5. Colocar o display sobre o recorte e pressioná-lo no - O display Volvo Penta de 7 pol. suporta 1-4 trens de lugar. força Quando a moldura estiver na posição correta, um leve...
- Página 13 ВАЖНОЕ ПРИМЕЧАНИЕ. Внимательно изучите 3 мм для крепежных винтов. См. рис. А. инструкцию и установите 7-дюймовый дисплей Volvo Penta с цветным экраном в соответствии 3. Подсоедините проводку с тыльной стороны с приведенными в ней указаниями. 7-дюймовый дисплея. См. рис. 2 и руководство по установке...
- Página 14 本套件包含: 方法A—顶部安装式(使用框架安装) 1. 将提供的孔模板固定在即将安装显示器的位置。全尺寸 名称 数量 图中的位置 模板位于本安装须知的背面。参见图A。 7”显示器 线束 注意! 塑料框(顶部安装) 切孔(图A)尺寸仅为标称尺寸,因此在切割之前应通过 保护盖 实际物理尺寸进行交叉检查。 衬垫 2. 使用线锯沿着模板上显示的线内侧钻孔并切割安装区 安装须知 域。用一个3 mm的钻子钻四个用于连接螺栓的孔。参见 图A。 3. 将线束连接到装置背面。参见图2和EVC安装手册。 安装,沃尔沃遍达7”显示器 4. 将显示器放在切孔中并用合适的固定器将其牢牢固定 到位。 重要事项! 注意! 仔细通读完整的安装须知并按照其说明安装沃尔沃 对于顶部安装式,建议使用以下头尺寸的螺钉:MRX M4 遍达7"显示器(彩色屏幕)。 沃尔沃遍达7”显示器 、MRT M4、RXS B7、RTS B9、 只能连接至EVC-C3及未来版本。 RXB B8、MFX-GF M4、MRT-GF M4、TP 4.0、...
- Página 15 This page has been left blank intentionally. Denna sida är avsiktligt lämnad blank. Esta página foi deixada em branco intencionalmente. Ce côté est prévu pour rester vierge. Эта страница оставлена пустой преднамеренно. Pagina lasciata intenzionalmente in bianco. Diese Seite ist absichtlich leer. 本页特意留为空白...
-
Página 16: Importante
SCALE 1:1 IMPORTANT! Please check the dimensions before using this template. Printers and copy- ing machines can distort images. WICHTIG! Abmessungen nachprüfen, da die Maße beim Ausdrucken oder Kopieren etwas verzerrt sein können. IMPORTANT ! Veuillez vérifier les dimensions avant d’utiliser ce gabarit. Les imprimantes et les photocopieurs sont susceptibles de défor- mer les images. - Página 17 SCALE 1:1 IMPORTANT! Please check the dimensions before using this template. Printers and copy- ing machines can distort images. WICHTIG! Abmessungen nachprüfen, da die Maße beim Ausdrucken oder Kopieren etwas verzerrt sein können. IMPORTANT ! Veuillez vérifier les dimensions avant d’utiliser ce gabarit. Les imprimantes et les photocopieurs sont susceptibles de défor- mer les images.
- Página 18 AB Volvo Penta SE-405 08 Göteborg, Sweden www.volvopenta.com Plus d'informations sur : www.dbmoteurs.fr...